How to Draw a Kiwi Step by Step
This tutorial shows how to draw a realistic kiwi fruit in six steps. It provides pencil line drawing and shading examples along with detailed explanations.
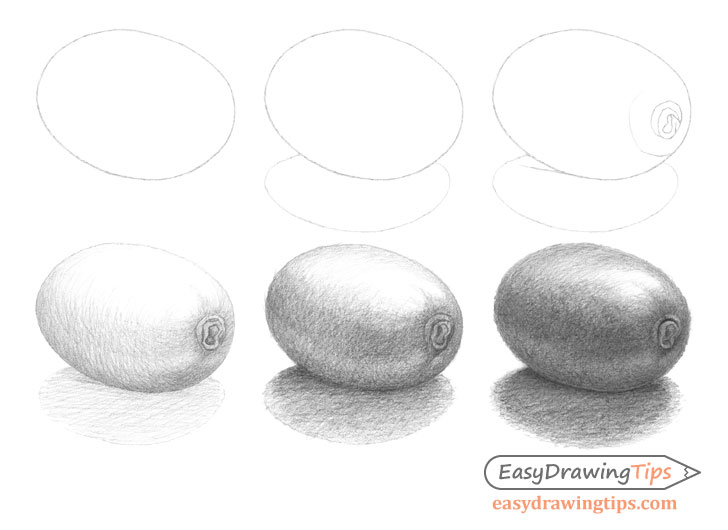
You can see a preview of all of the drawing steps above. In this case the kiwi will be drawn in 3/4 view. Just like the examples it’s recommended that you do the tutorial in pencil. Also be sure to make light strokes for it’s line drawing portion as you want them to eventually blend into the shading. The lines in some of the examples have been made darker just so that they are easier for you to see.
Also please note that if you want to make a similar drawing in a slightly different setup a lot of the tips and things mentioned in this tutorial will still apply.
Step 1 – Draw The Outline of the Kiwi

Begin with an outline of the kiwi’s shape. This will basically be it’s silhouette.
While this step is very simple it’s important to get it right. If the outlined of the kiwi is incorrect (too long, short, etc…) the rest of you drawing will be off and may end up looking odd.
Step 2 – Draw the Outline of the Shadow
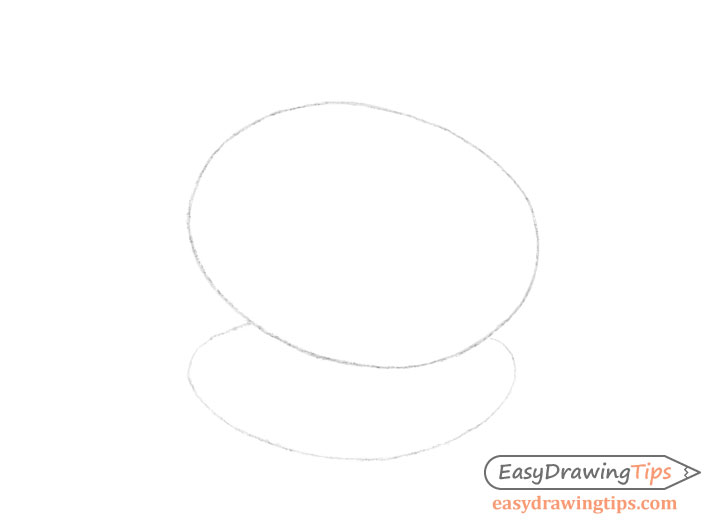
After outlining the kiwi itself you can also add an outline of it’s shadow. In this case the light will be coming from above it and somewhat behind it as well as slightly to the right side of the drawing.
This means that a large portion of the shadow will be facing towards the viewer and slightly to the left of the drawing.
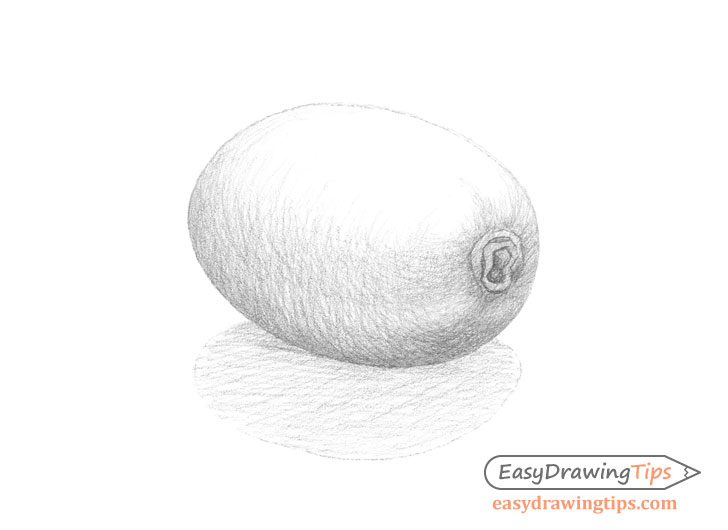
Step 3 – Draw the Smaller Details & Finish the Line Drawing

To finish the line drawing you can add some smaller details such as the little area where it was attached to the stem.
Step 4 – Begin Shading
With the line drawing finished you can begin shading. Start by applying strokes that overall are significantly lighter than what you want to to have in the finished drawing.
The goal of this stage is to establish the distribution of the light and dark areas of the object (in this case the kiwi).
As already mentioned the light source in this particular setup will be slightly to the right of the drawing area coming from above and behind the kiwi.
This means the top of the kiwi will be the lightest area (with the highlight on the top right) and the bottom the darkest. There will also be a lighter area between the bottom and the middle of the kiwi which will be created by the light reflecting from the surface it’s sitting on.
The shadow that it casts will also be darker at the base and will get lighter as it goes away from the kiwi/towards the viewer.
For the actual shading method you can apply short crosshatch strokes that somewhat wrap around the shape of the kiwi. The shading for this stage of the drawing can be fairly rough.
For an explanation of different stroke types and shading methods see:
Shading Techniques and Stroke Types Drawing Tutorial
Step 5 – Refine the Shading
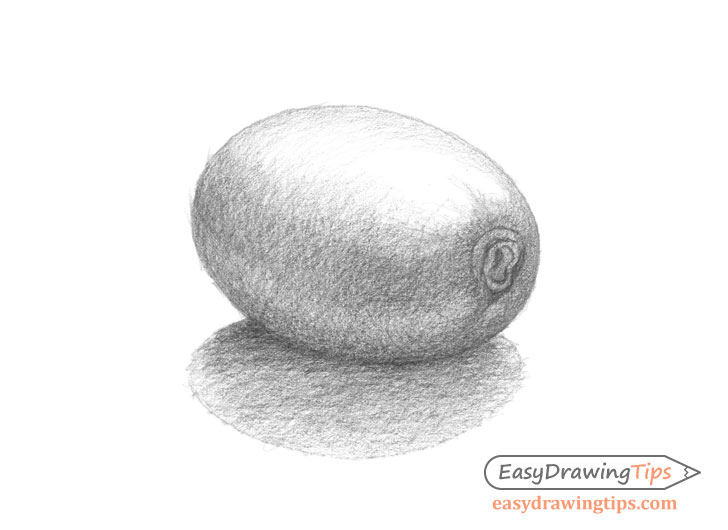
Continue adding more layers of strokes over top of the previous set to smooth out and darken the shading. Be careful not to press too hard on the pencil as you want this process to be gradual.
Step 6 – Finish the Kiwi Drawing
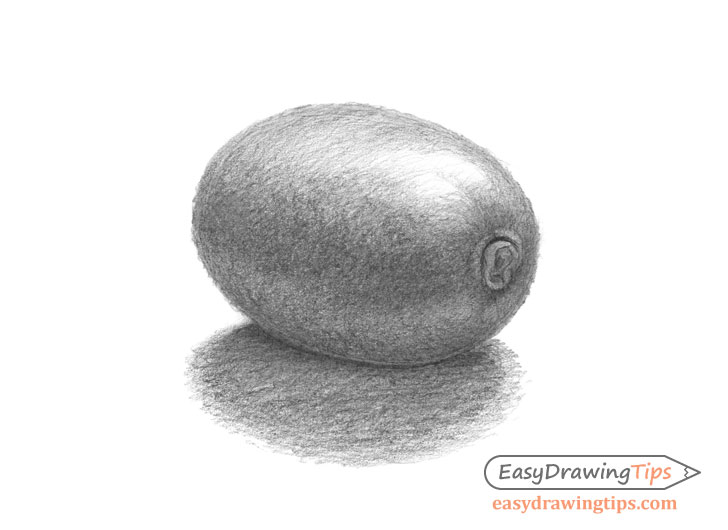
Darken the shading further to the level you wish to have in the final drawing but be careful not to fully blend the strokes as you want them to be somewhat visible to create the “fluffy” look of the little hairs that usually cover a kiwi’s surface.
At the same time you do want to even out your shading so that you generally have smooth gradients between most of the the light and dark areas. Though you can have sharper transitions where appropriate such as some spots around the highlight and the stem.
Once finished with the shading you can go around the edges of the kiwi with a series of short pencil strokes to again create the effect of the little hairs on it’s surface.
Conclusion
Kiwi’s generally have fairly simple shapes with little details. This makes them fairly easy to draw and shade. Just remember not to blend your strokes as much as you would want for some other objects.
If you found this tutorial helpful and would like to try a few more like it you can also see the following:
- How to Draw an Avocado Step by Step
- How to Draw Cherries Step by Step
- How to Draw a Plum Step by Step
- How to Draw a Croissant Step by Step


