How to Draw Nuts Step by Step
This tutorial shows how to draw different kinds of nuts. The examples include a peanut, hazelnut, almond and walnut (in their shells) with six drawing stages for each.
Creating small realistic looking drawings such as the nuts in these examples can be a good exercise for beginner and intermediate artists. It allows you to work on various pencil shading techniques and can help you practice showing different types of surfaces and textures.
Please note that some of the lines in the examples have been made darker so that they are easier for you to see. When you make the line drawings of the peanuts try and keep them light. This will make it easier to correct mistakes and clean up construction lines. You can always darken the lines later where needed.
To get a better understanding of some of the terms used in this tutorial you may also want to see the one on various shading techniques below (if you have not done so already):
Shading Techniques and Stroke Types Drawing Tutorial
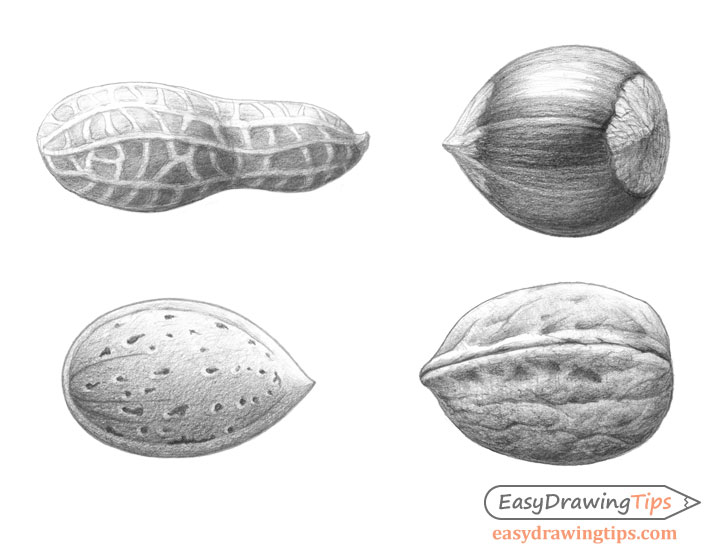
How to Draw a Peanut Step by Step
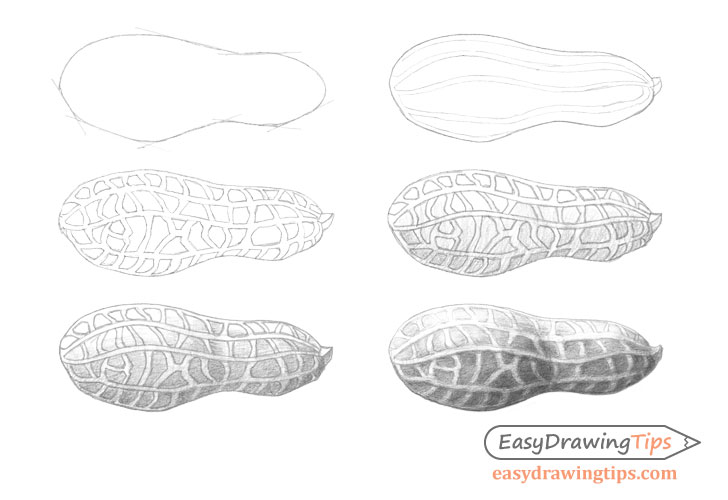
While technically not a nut a peanut it’s still similar to one in many ways and is a good fit for this tutorial. The main challenge in drawing one can be having to shade around all of the “veins” that run throughout it’s surface.
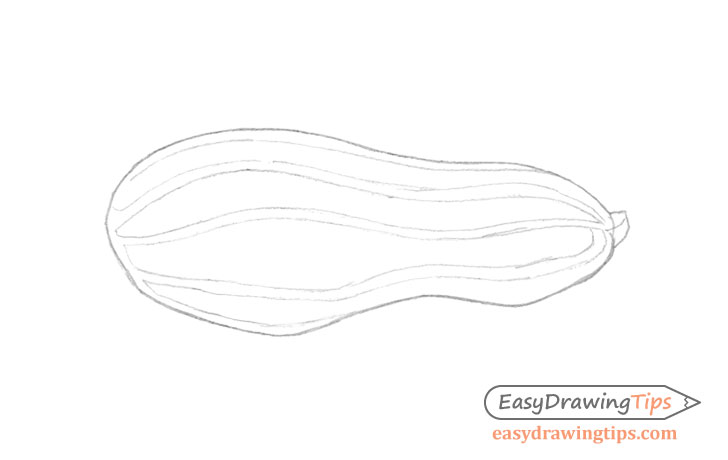
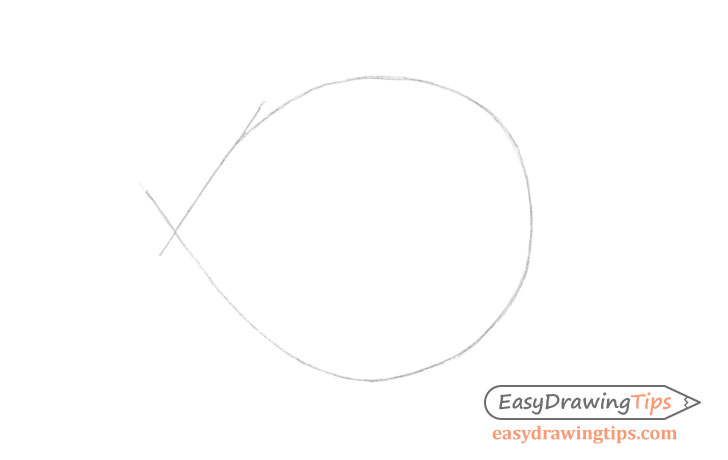
Step 1 – Make a Construction Drawing of the Peanut
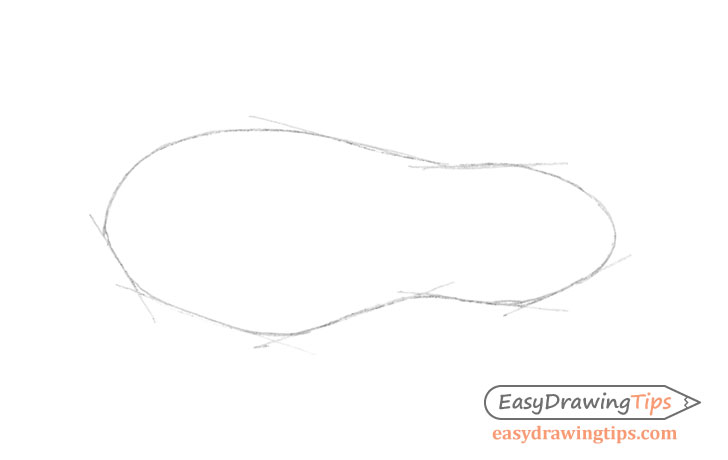
In the above example straight lines were used to first quickly frame the shape of the peanut with the more organic outline then added into it.
The goal of the straight lines was to quickly get the overall proportions and “flow” of the shape of the peanut.
Just as in the example you can begin by making a construction drawing to “frame” the peanut’s shape. Use this to estimate it’s overall proportions such as the width, height and size of one side in relation to the other. Once you feel that you have the correct proportions you can simply draw the more organic shape of the peanut into the construction frame.
For more on good drawing practices see:
Beginner Guide to Learning to Draw
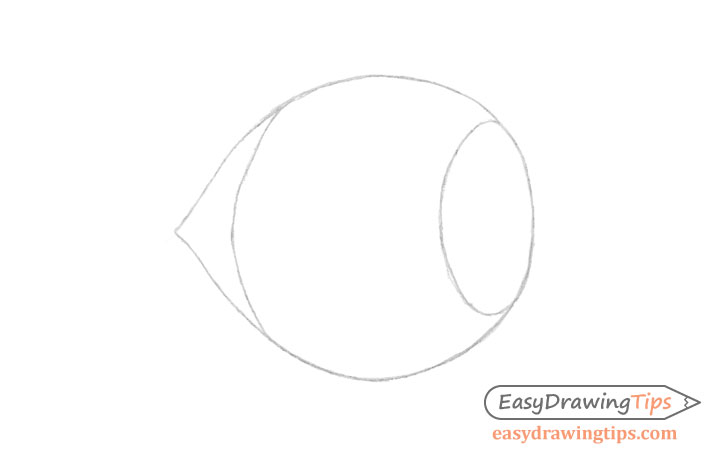
Step 2 – Begin Drawing the Inner Details
Begin adding the inner details of the peanut by first drawing the horizontal “veins” that run along it’s surface. Generally due to the curvature of the peanut the veins in the middle will appear to be farther apart while the veins on the top and bottom will appear to be closer together. Taking this into account when drawing will make the peanut appear more three dimensional.
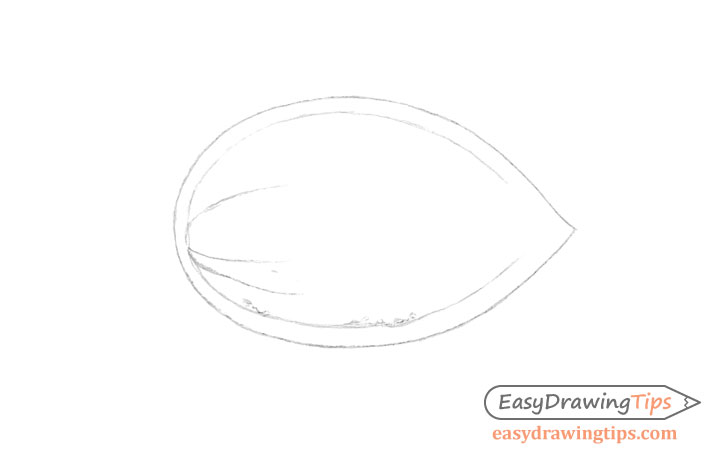
Step 3 – Finish the Line Drawing
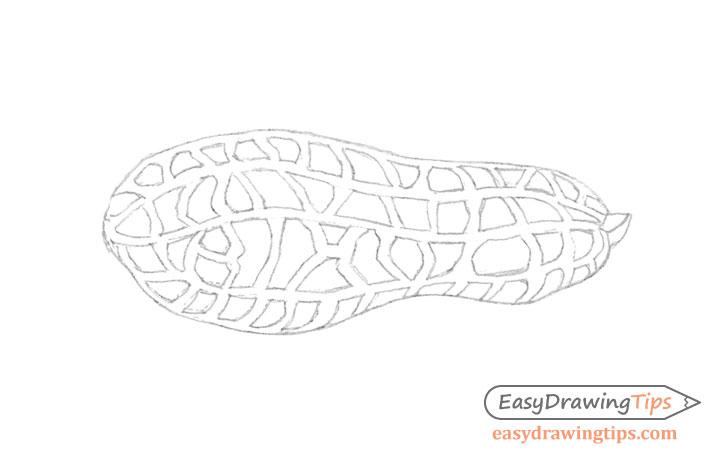
In between the lines from the previous step draw in the smaller sections that the surface of the peanut is broken up into. You can erase parts of the horizontal lines as need once done.
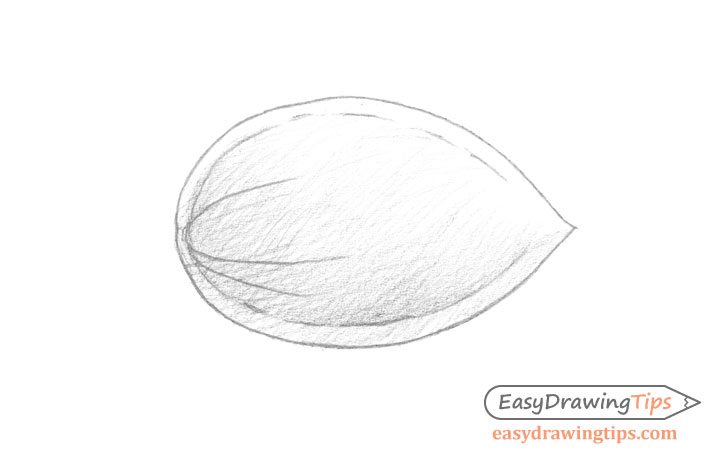
Step 4 – Add Basic Shading
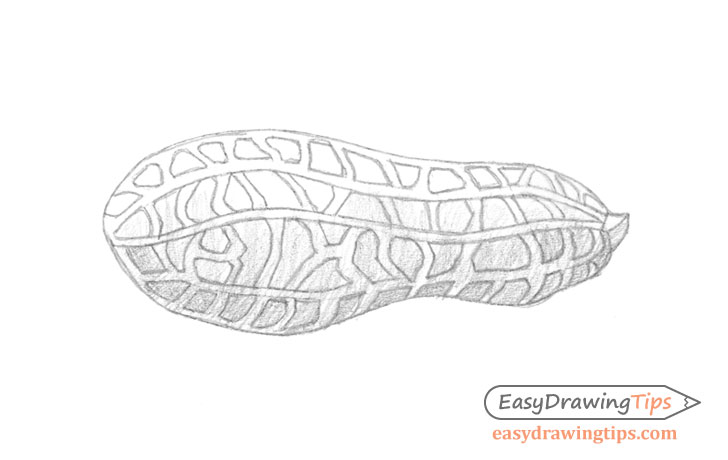
For this example the light will be coming from the top so the dark side will be on the bottom. Begin shading the peanut starting with it’s “in shadow” side.
To show the fairly smooth surface of the peanut you will want to pretty much blend the strokes to the point of invisible by the time you are finished shading. This means that the direction you make the strokes in for earlier stages is not that important. It’s still however generally good practice to try and make most of them in a way where they sort of slow along the shape of the object. Shading in this way can help you later on with surfaces where you do want visible strokes.
Be sure to keep this initial layer of shading significantly lighter than what you want to have in the finished drawing. The goal here is to create a “shading map” for yourself to establish the overall distribution of light and dark areas through the surface of the peanut. You can then slowly darken and smooth out the shading by adding more layers of stroke over top of it.
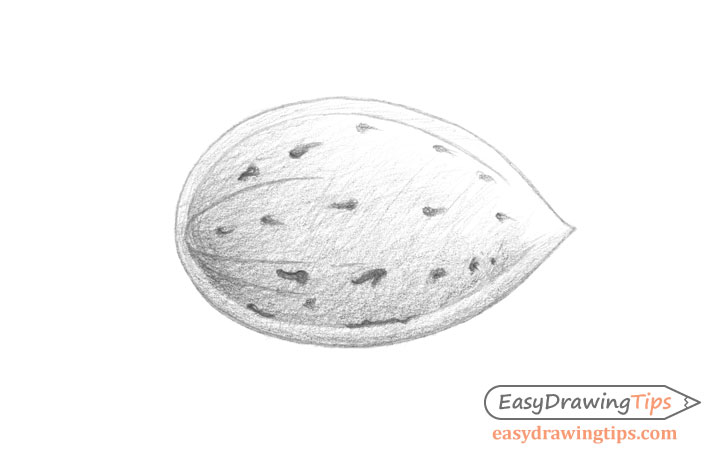
Step 5 – Refine the Shading
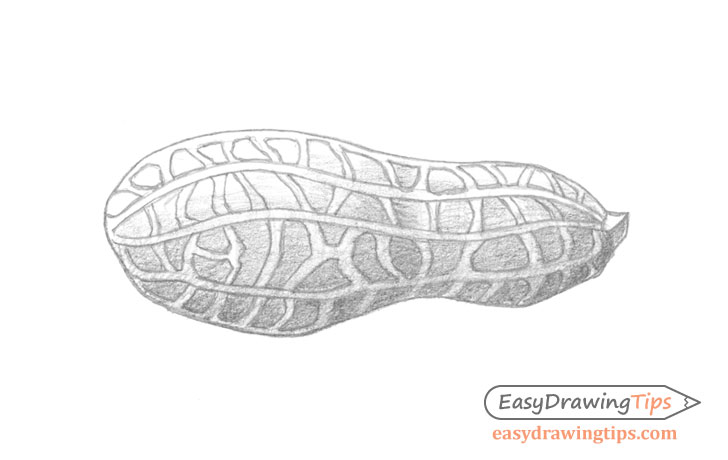
As you darken the shading you will want to keep the “veins” lighter than the areas in between them. This means pretty much having to individually shape each little “block” of the peanut.
When doing this be sure that you still get a fairly smooth overall transition between the light and dark areas. You don’t want to have one section really dark and the other on next to it much lighter in comparison.
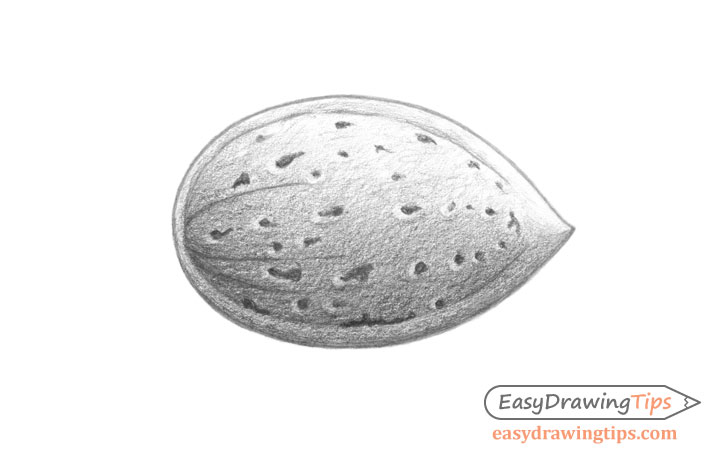
Step 6 – Finish the Drawing
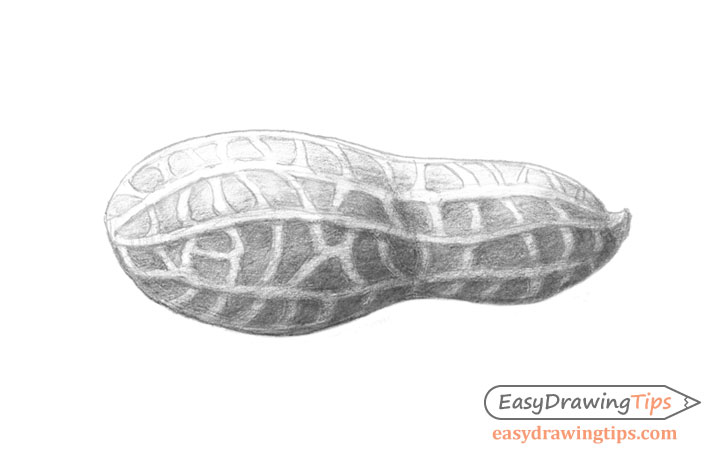
Finish the peanut drawing by further smoothing out and darkening the shading to the point where the strokes are pretty much invisible an there is a good contrast between the light and dark areas.
How to Draw a Hazelnut Step by Step
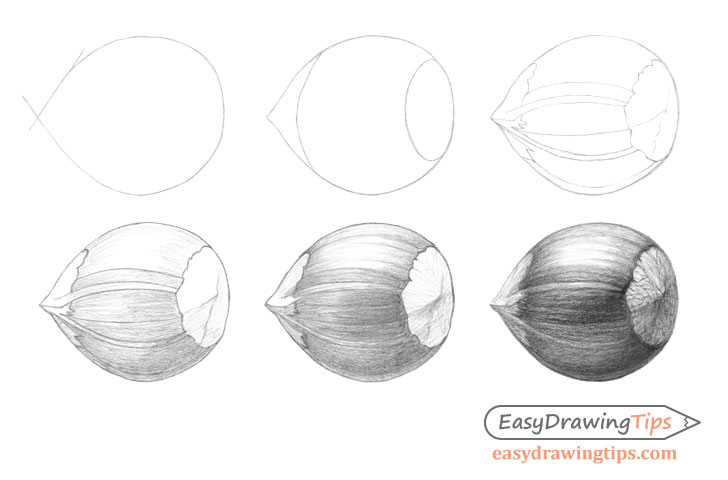
The hazelnut has a simple outer shape making the line drawing portion fairly easy. The shading can however be a little bit more complex than the previous example due to the different textures and patterns of it’s surface area.
Step 1 – Make a Construction Drawing of the Hazelnut
Due to the shape of the hazelnut the construction drawing will fairly simple. You can pretty much just outline it’s silhouette.
Step 2 – Define the Tip & Cap
You can quickly define the hazelnut’s tip and “cap” by outlining their general shapes. Keep these lines very light (lighter than the example).
Step 3 – Finish the Line Drawing

Based on the lines in the previous step make a more detailed drawing of the shape of the tip and “cap” and erase those lines afterwards.
Hazelnut’s generally tend to have some lines running along their shells between the tip and “cap”. You can add some of these to the line drawing as well.
To show the curvature of the hazelnut the lines near the middle should be more straight while the lines closer to the top and bottom should become progressively more curved the closer they are towards their respective sides.
Step 4 – Add Basic Shading

Similar to the peanut the light in this case will be coming form the top of the hazelnut so the bottom will be darker. However unlike the peanut the direction of the shading strokes for this example is actually very important.
Make all of the strokes similar to the lines between the tip and “cap” added in the previous step. They should basically flow along the shape of the hazelnut from the cap to the tip getting more curved as they move towards the top or bottom.
You will also again want to make the first layer of shading significantly lighter than what you want to have in the final drawing.
Step 5 – Refine the Shading

Apply more layers of strokes over to of the previous set and try to keep them all going in the same general direction.
Smooth out the shading and darken it but keep the strokes somewhat visible, especially on the lighter areas of the hazelnut. These strokes will help define it’s surface pattern.
The hazelnut also has a fairly smooth and reflective surface. You can show this by creating more of a contrast between the highlight and mid tone areas (the more neutral grey that is not too light or dark) than for the peanut.
Step 6 – Finish the Drawing
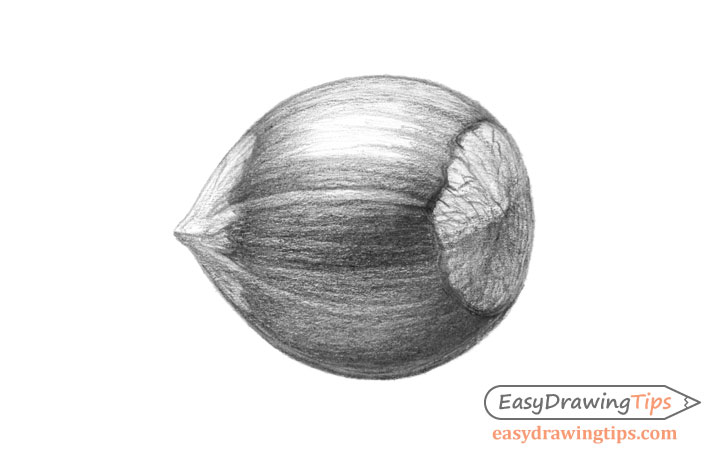
Smooth out and darken the shading even further but again try and keep the surface pattern visible by not fully blending all of the strokes.
Also be sure to make the middle part of the shell is overall significantly darker than the cap and the tip (excluding the highlight).
How to Drawn an Almond Step by Step
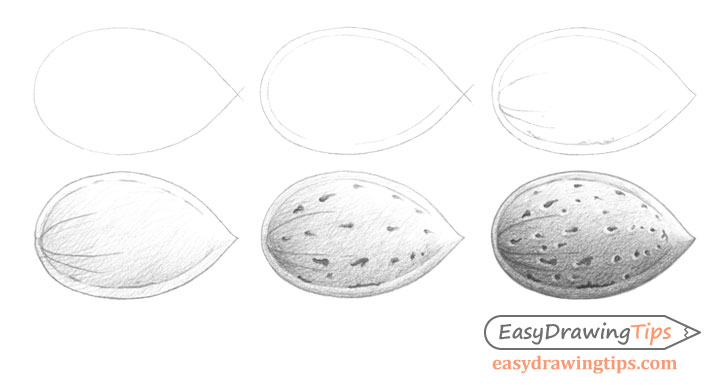
The almond has a fairly simple overall shape and is not particularly difficult to shade. The can be in drawing the smaller details of the little holes throughout it’s surface.
Step 1 – Make an Outline Drawing of the Almond
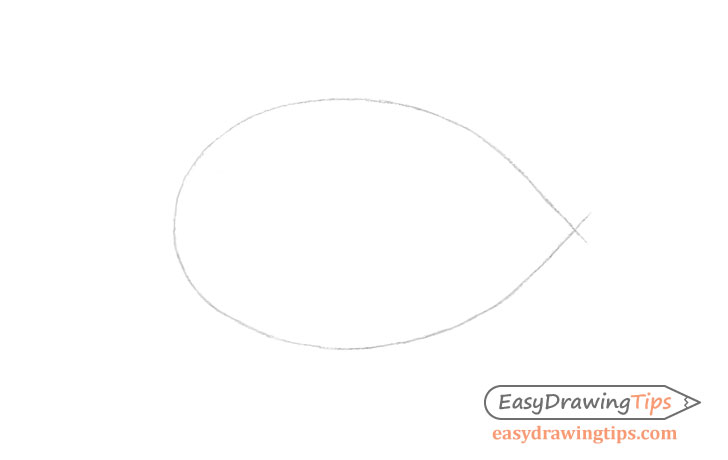
Similar to the hazelnut the outer shape of the almond is fairly simple. Outline it and move on to the next step.
Step 2 – Define the Edge of the Shell
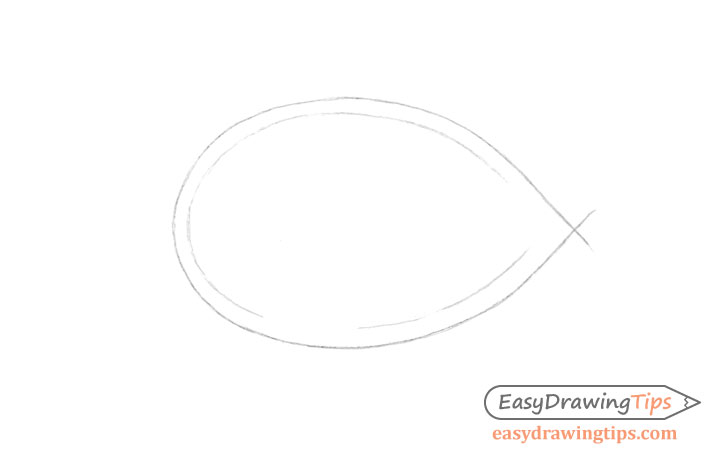
Almond shells tend to have a sort of “edge” around them. You can show this by drawing a second inner outline of it’s shape similar to the above example.
Step 3 – Finish the Line Drawing
Running along the shape of the almond add some lines to help define it’s texture.
Step 4 – Add Basic Shading
In this case the light will be coming from the top and slightly more towards the tip side of the almond.
For this particular example a crosshatch shading technique will be used where the layers of strokes are added on a slight angles in relation to one another.
Again start by shading the darker side of the almond and keep the shading lighter than what you want to have in the finished drawing.
Step 5 – Refine the Shading
Darken the shading by adding more layers of strokes over top of the previous set. Afterwards add some dark patches along the almond to create the various holes almonds tend to have in their shells. Try and keep these fairly random in size and shape.
Step 6 – Finish the Drawing
Darken and smooth out the shading by adding even more layers of strokes to the point where the individual strokes are almost invisible. You will however want to leave small light areas around the bottom/back (opposite the tip) areas of the little holes near the middle of the almond as the little edges created by these holes will catch more light than their surroundings.
You do not need to add these light patches near the very top and bottom holes as those will either be fully lit or fully in the dark.
How to Draw a Walnut Step by Step
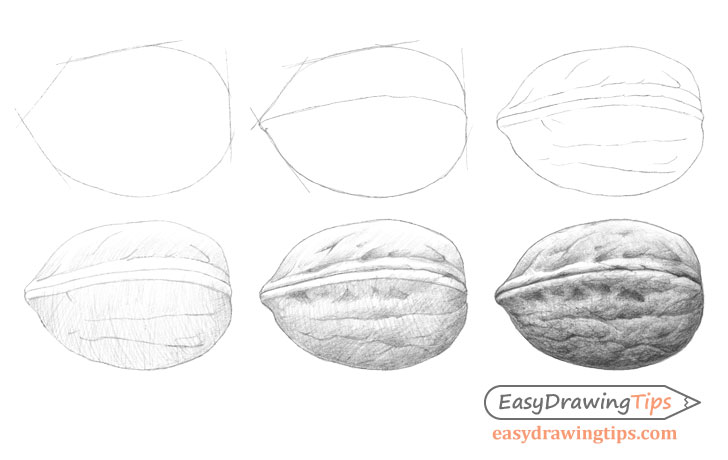
The walnut has a somewhat more complex outer shape the the other nuts in this tutorial and a far more complex texture. This makes it a more difficult nut to draw then the previous examples.
Step 1 – Make a Construction Drawing of the Walnut
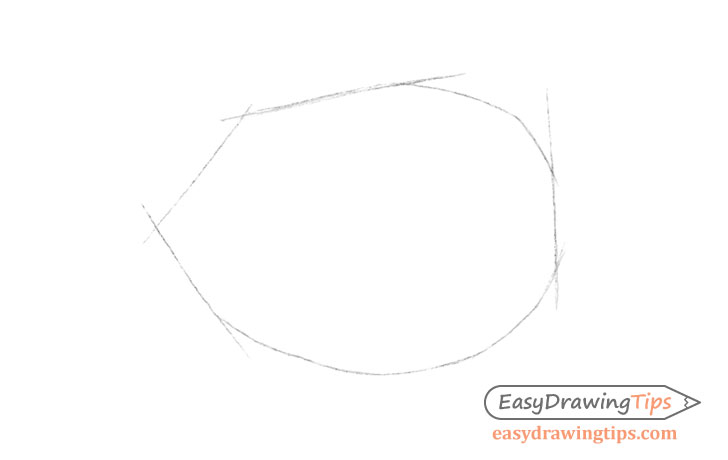
Similar to the peanut make a construction frame drawing of the outer shape of the walnut.
Step 2 – Make an Outline Drawing

Add in the more organic outline of the walnut inside the construction lines as well as the split between it’s two halves (top and bottom in this case).
Step 3 – Finish the Line Drawing
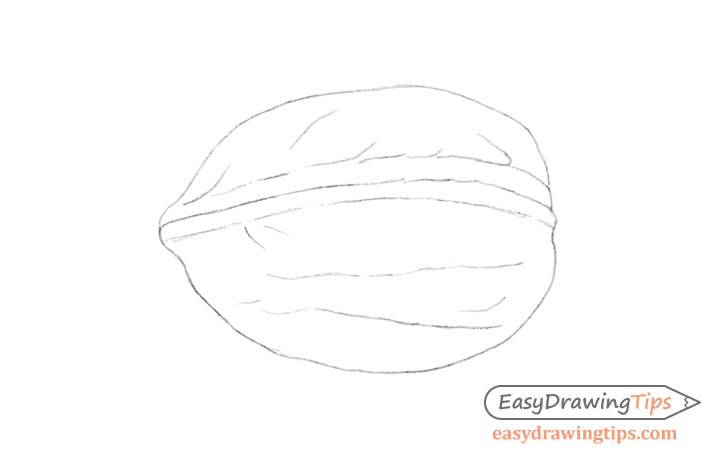
Finish the line drawing by adding some lines that defining the edge around the split in the walnut’s shell as well as some of the larger bumps and curves on it’s surface area.
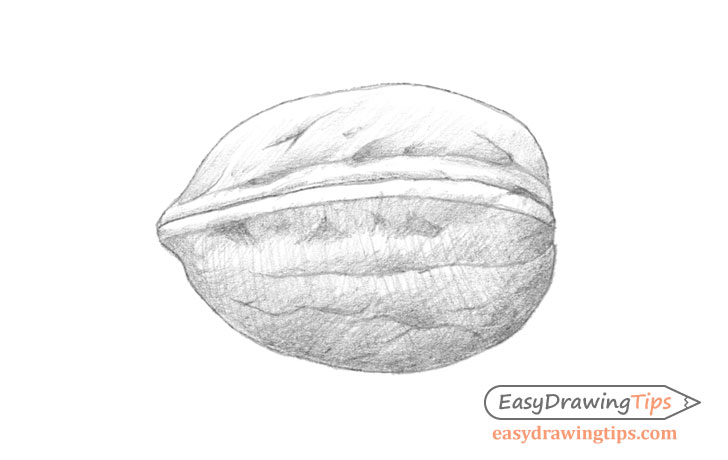
Step 4 – Add Basic Shading

In this example the light will be coming mainly from the top of the walnut.
Similar to the almond begin the shading with a set of overlapping strokes. The way the strokes are applied is particularly important in this examples as they will help define the texture of the walnut.
Similar to the other examples keep the shading for this stage lighter than what you want to have in the finished drawing.
Step 5 – Refine the Shading
Refine the shading by adding more overlapping layers of strokes but be careful not to fully blend them (especially in the lighter areas of the shell) As mentioned the crosshatch will help define the texture of the walnut.
You can also add some darker patches of shading around the small indented areas that this nut has throughout it’s surface.
Step 6 – Finish the Drawing
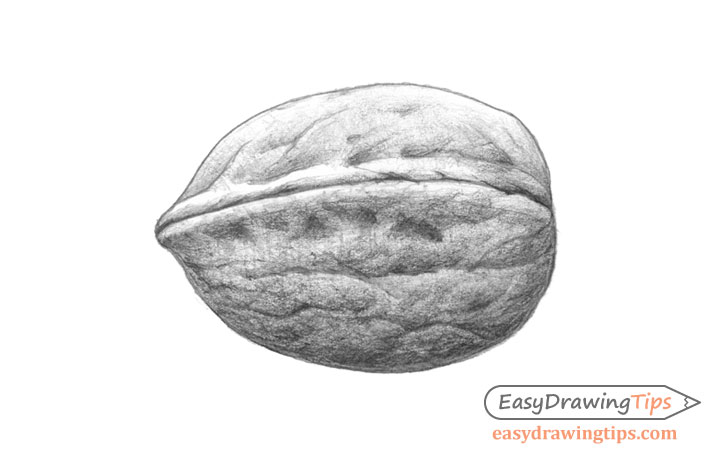
To finish the drawing darken the shading by applying more and more layers of overlapping strokes. Try and keep the overall transition from light to dark fairly smooth.
Also add in more smaller darker patches throughout the shell to create the various bumps and curves on the walnut’s surface.
Conclusion
This tutorial shows how you can use different types of shading techniques to help emphasize different types of surfaces. While the examples are those of various types of nuts you can also use the same approach and techniques for drawing and shading many other kinds of objects. Simply think of what types of strokes can best represent a certain texture and experiment for yourself.
If you like this tutorial and would like to try a few more like it also see:
- How to Draw an Eggplant Step by Step
- How to Shade Basic 3D Shapes Tutorial
- How to Draw a Realistic Orange Step by Step
- How to Draw an Avocado Step by Step
- Absolute Beginner Drawing Exercises Tutorial