How to Draw the Body Step by Step
This tutorial shows how to draw the female body with step by step illustrated examples and easy to follow instructions.
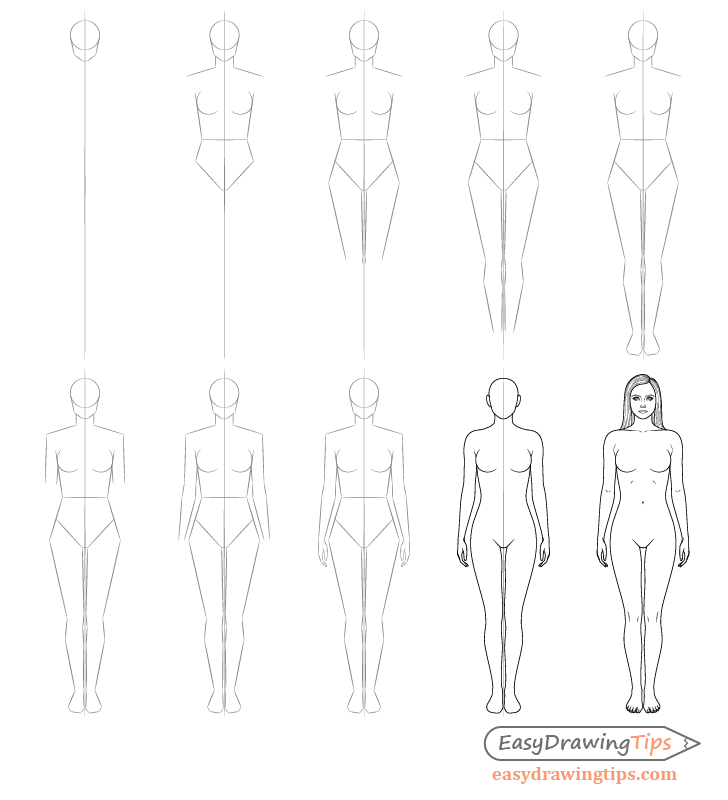
The tutorial goes from a simplified structure drawing to a detailed outline of the body.
The reasons for the structure drawing are several. One is that it allows you to quickly establish the the body’s major proportions. Another is that a less detailed drawing makes it easier to spot mistakes as there is less information for you to process. Finally, it also allows for quick corrections and adjustments.
It’s recommended that you do the tutorial in pencil and start with light easy to erase lines. You can darken them once you have all parts of the drawing outlined.
Step 1 – Draw the Head
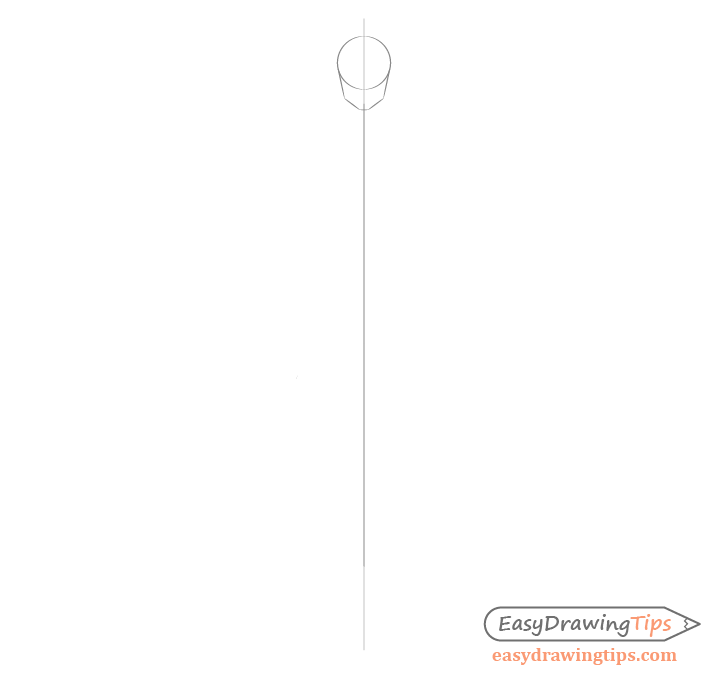
Begin by making a straight vertical line to act as a guide that can help you see if the drawing is symmetrical. The line should be as tall (or slightly taller) than the entire body.
Towards the upper end of the guide line add the simplified shape of the head. First draw a circle for it’s upper part. From this circle project a pair of lines that are slightly angled towards the middle of the head followed by a second pair of lines that are angled even more inwards. You can then join the two sides with a horizontal line to define the bottom of the head.
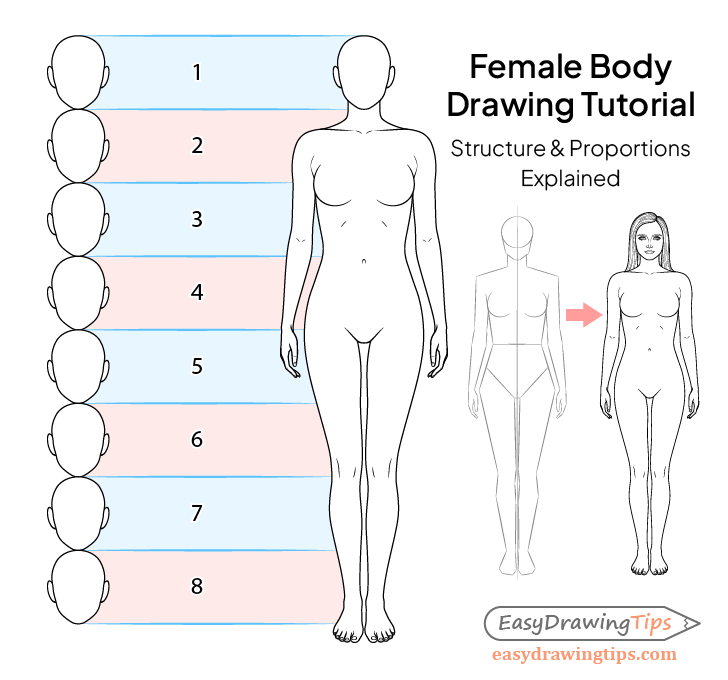
The head can be used to measure the height of the body as shown in the example above. While this relation can somewhat vary depending on the height of the person, the body is generally about eight heads tall.
You may also notice that in the example the feet go slightly past the measuring line. The reason for this is that you want to measure the height from around the heel to the top of the head and not from the toes.
Step 2 – Draw the Body
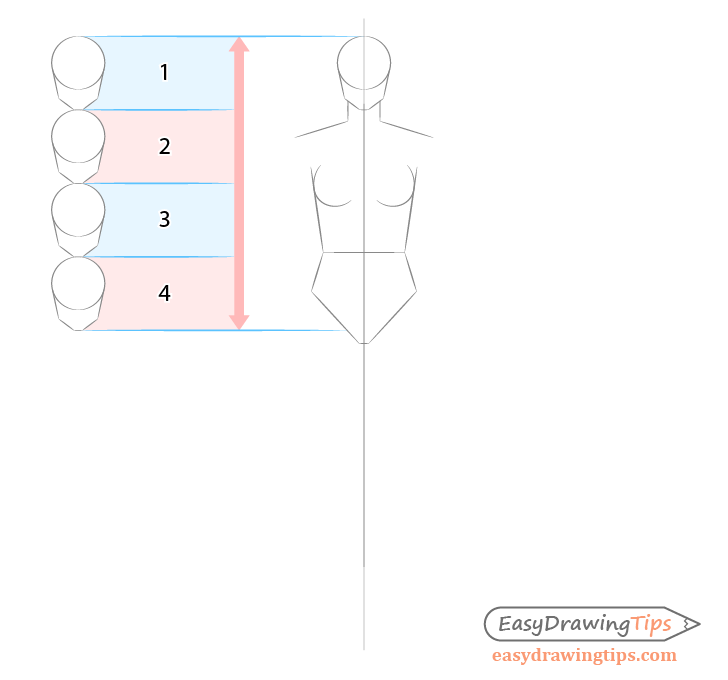
Going down from the head add the neck and shoulders followed by the sides and bottom of the body. Make the neck slightly thinner than the head.
Draw a female body with an hourglass-like shape where it’s thinner around the waist and gets wider as it goes up and down. As shown in the example the waist should generally be just a little bit higher than three head down from the top of the body.
The height of the head and the upper body combined should be just a little over four heads tall, slightly more than the height of the entire body (with the legs).
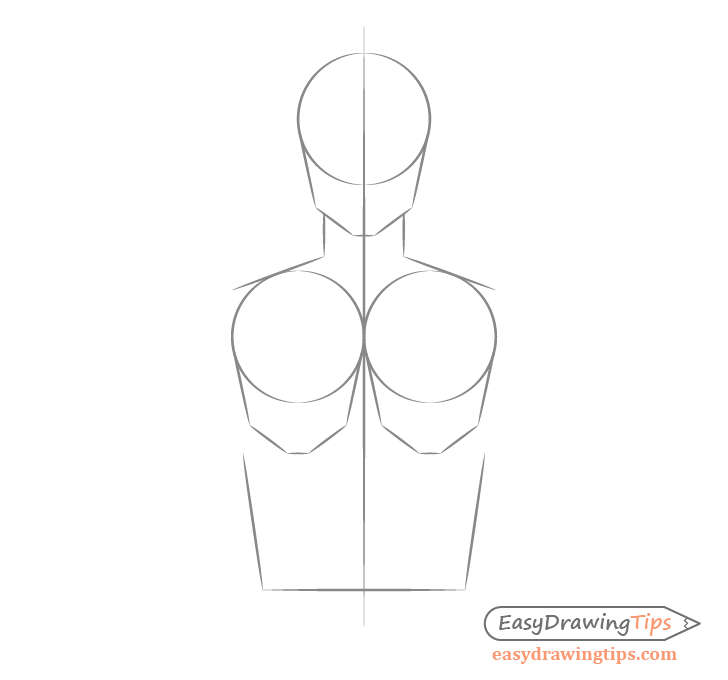
Make the upper part of the chest roughly two heads wide as shown in the example.
Step 3 – Draw the Upper Parts of the Legs
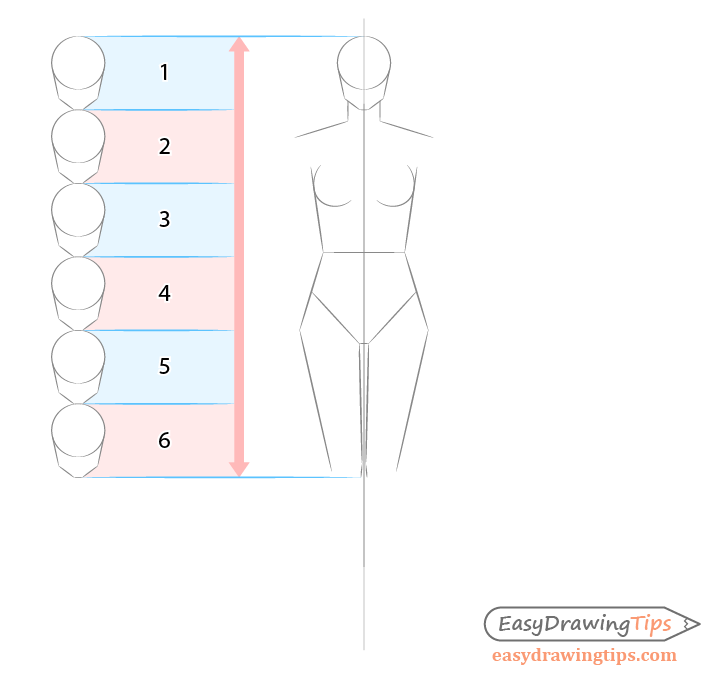
Going down from the body add the upper parts of the legs. The upper parts of the legs should be about two heads tall. Draw each leg thicker near the top and thinner as it goes down.
Step 4 – Draw the Lower Parts of the Legs
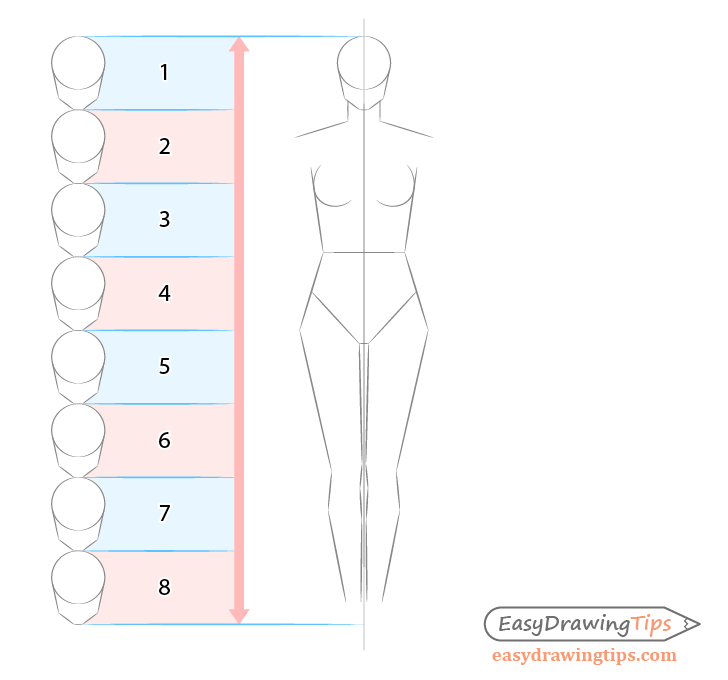
Draw the lower parts of the legs getting thicker as they go down and then thinner. The part of each leg where it gets thicker as it goes down should be shorter than the part where it gets thinner.
Step 5 – Draw the Feet
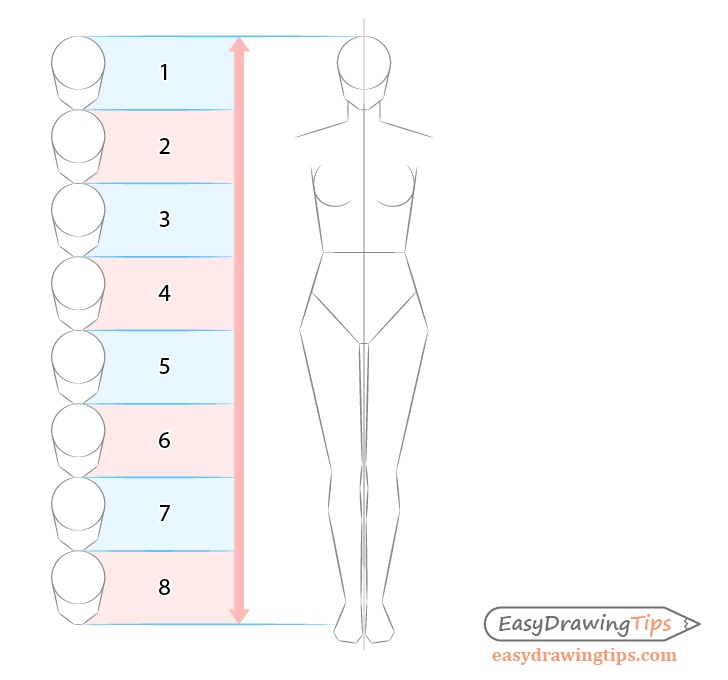
Similar to the upper part of the legs the feet combined with the lower parts of the legs should be two heads tall (up to the bottoms of the knees).
Step 6 – Draw the Upper Parts of the Arms

In this case the arms will be held just slightly out (a little bit away from the body). Begin by drawing their upper parts down to (roughly) the elbows. You can make these areas the same width throughout their entire length.
Step 7 – Draw the Lower Parts of the Arms
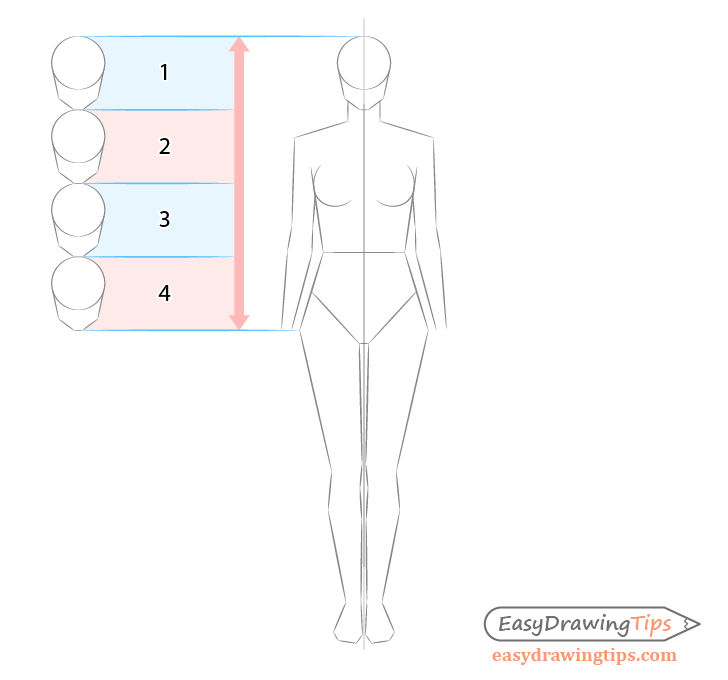
Draw the lower part of each arm down to the wrists. Similar to the lower parts of the legs where it first gets thicker as it goes down and then thinner again. The part where the arm gets thicker as it goes down should again be shorter than the part where it gets thinner.
The wrists should be roughly four heads down from the top of the head (half the length of the entire body).
Step 8 – Draw the Hands
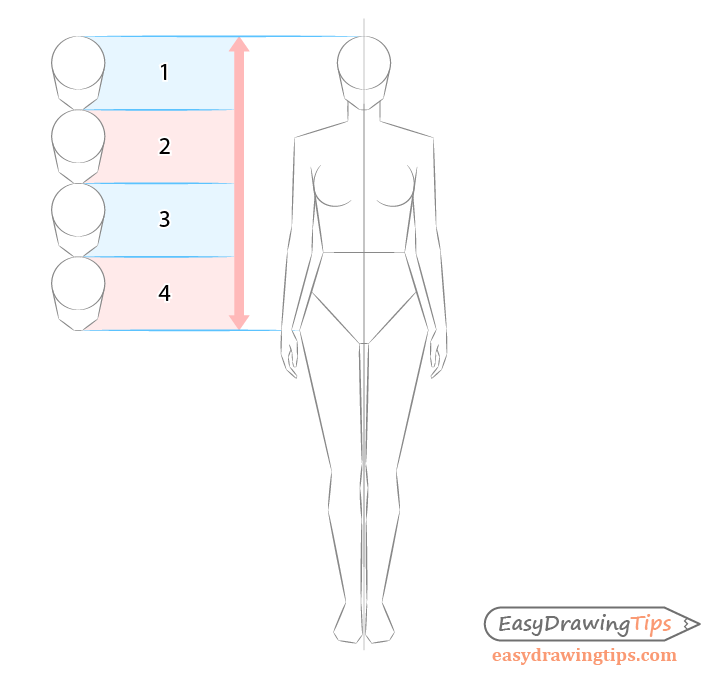
Going down form the writs add the hands.
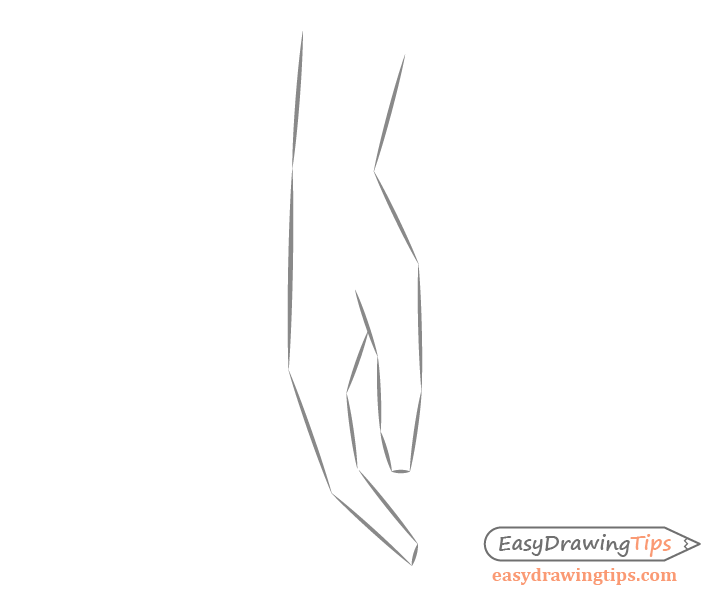
You can see how to make a simplified drawing of one in the example above.
Step 9 – Make a More Detailed Outline of the Body
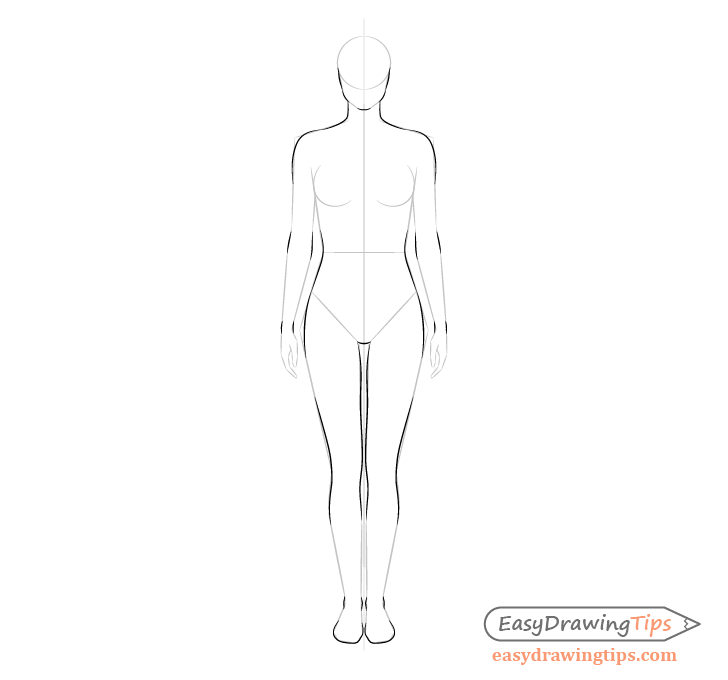
Once you have everything in place you can pretty much just round off the corners of the structure drawing where needed to create an organic outline of the body (as shown in the example).
You can also add some of the smaller details like the bump created by the bones around the wrists and above the heels.
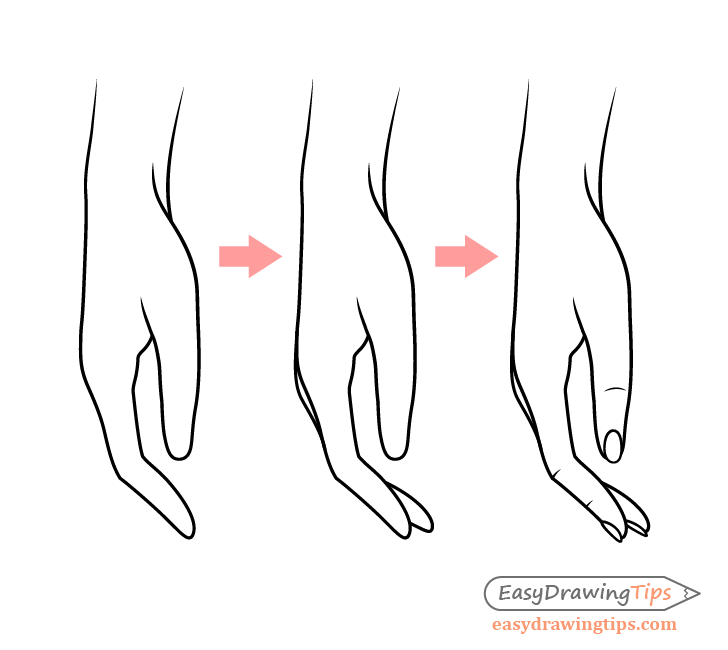
You can see how to draw the details of the hand in the step by step example above. Depending on the size of your drawing you can leave out the small details such as the wrinkles and fingernails.
For more on drawing hands see:
How to Draw a Hand Step by Step
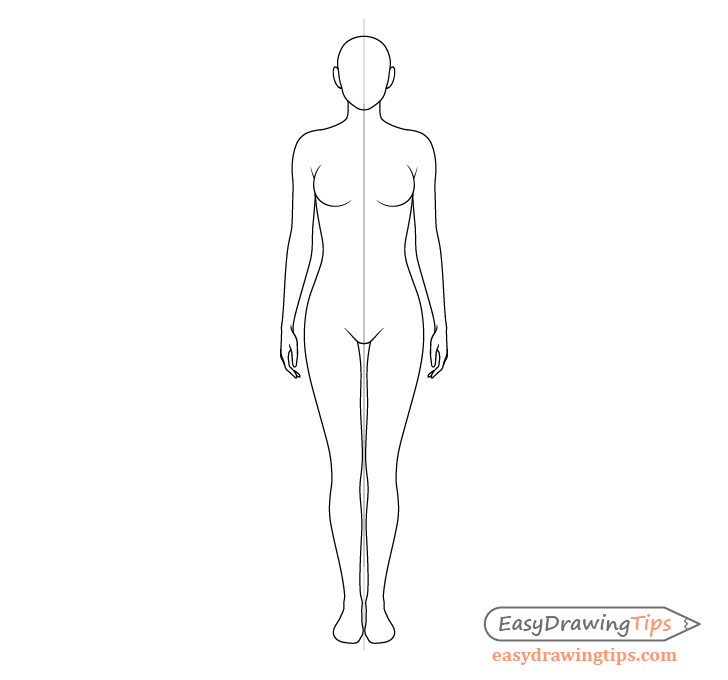
Once you are happy with how things look you can clean up most of the constructions lines but leave the center line in place.
Step 10 – Draw the Details of the Body & Head
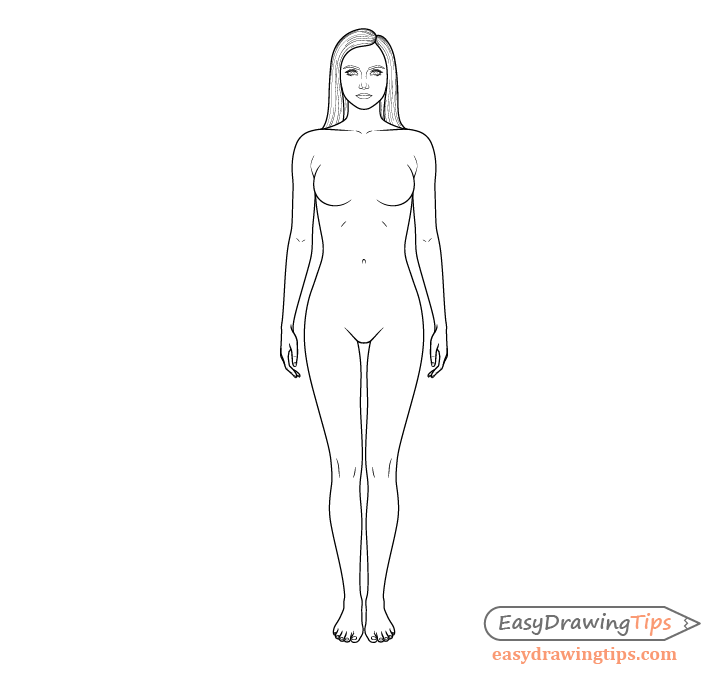
In addition to the detailed of the hands already covered above add the smaller parts and details of the body as follows:
Body Details Drawing
- Collar bones – going down from the shoulders towards bottom of the neck
- Breasts – curving along each side of the chest
- Ribs – hinted at on each side of the body between the chest and the stomach
- Belly button – about three heads down from the top of the head
- Arm creases – hinted at between the lower and upper parts of each arm
- Knees – hinted at between the lower and upper part of each leg
- Toes – inside the outlines done earlier (see example below)
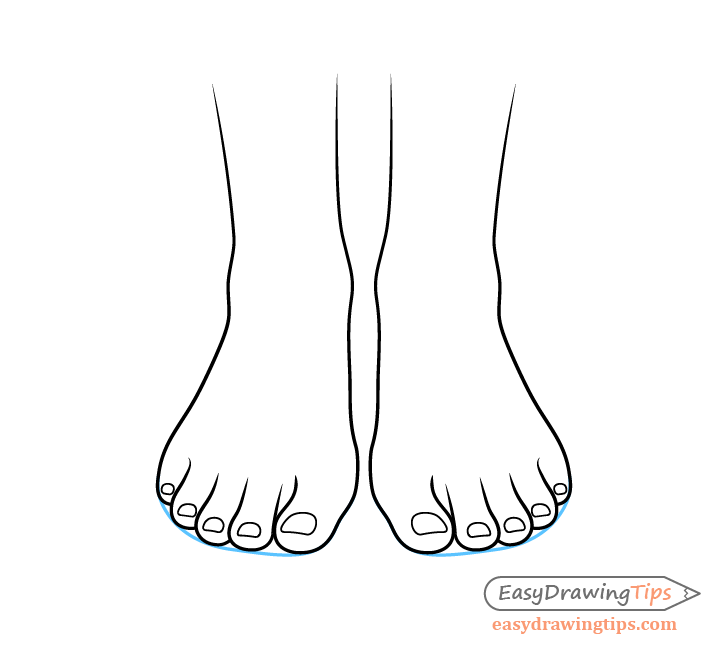
Inside the outline of the feet draw the individual toes and toenails as shown in the example.
Positioning the Facial Features & Hair on the Head
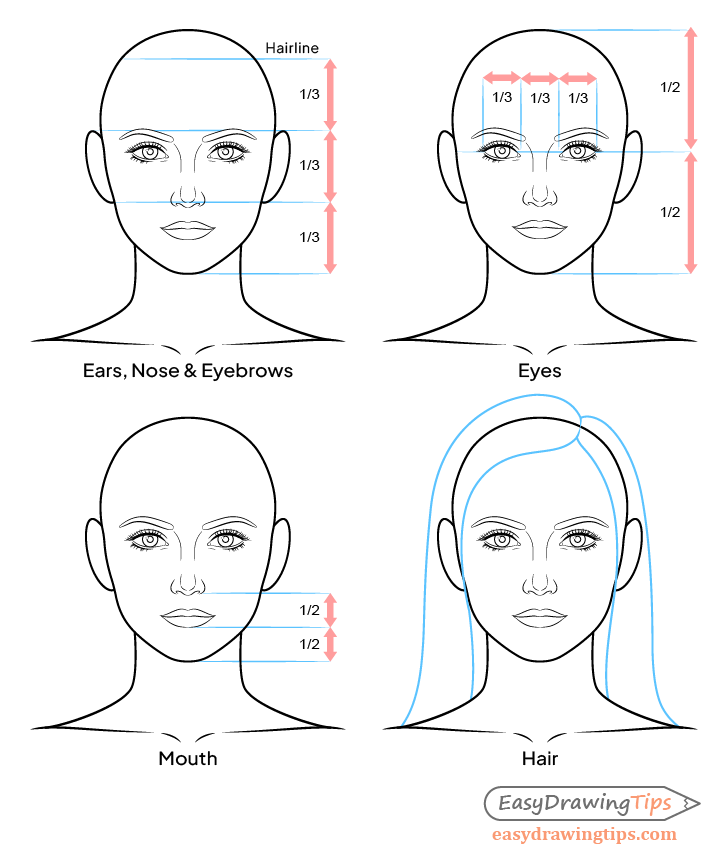
As the focus of the tutorial is on the body drawing the facial features and hair is optional. If you do wish to draw them you can do it as shown in the example above.
Drawing the Eyebrows, Ears and Mouth
To position the ears eyebrows and nose divide the face into tree even sections starting from the hairline and going down to the bottom of the head. You can then place them as follows:
- Eyebrows – at the top of the middle section
- Ears – between the top and bottom of the middle sections
- Nose – with it’s tip at the bottom of the middle section
Drawing the Eyes
Place the eyes at the halfway point between the top and bottom of the head. Space the eyes where there is roughly the width of one eye between them.
For more on drawing eyes see:
How to Draw an Eye Step by Step
Drawing the Mouth
Place the mouth with it’s bottom lip starting from the halfway point between the bottom of the nose and the bottom of the head.
Drawing the Hair
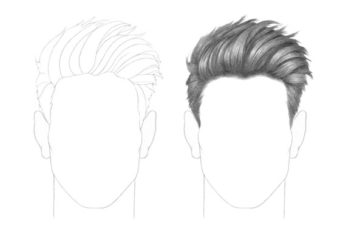
Outline the main shape of the hair over top of the outline of the head and erase the parts that it covers afterwards. You can then add it’s smaller details as shown below.
For more on drawing hair see:
How to Draw Hair Step by Step Tutorial
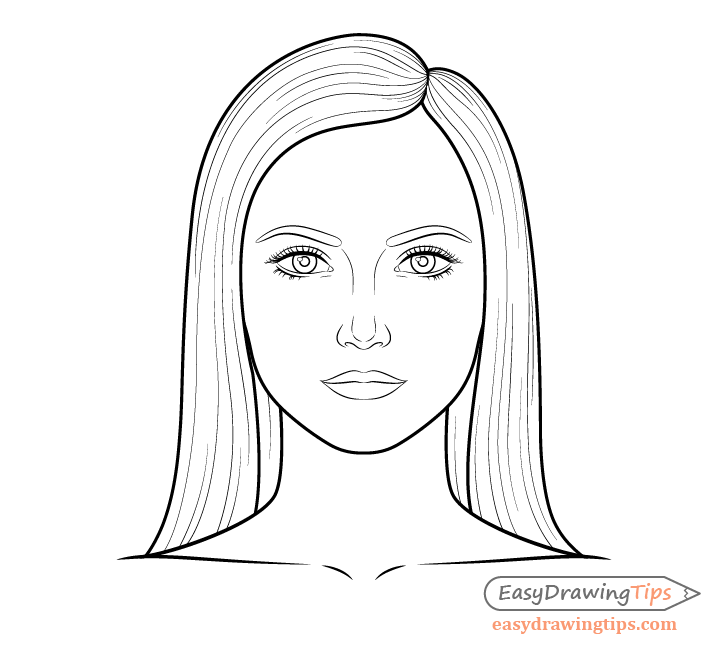
You can see the finished drawing of the face and hair (with some hair folds added) in the example above.
As already mentioned, the focus of this tutorial is on the proportions of the body so it only covers the basics of drawing the facial features and hair. You can however check the following tutorial for a much more in depth guide:
How to Draw a Female Face Step by Step Tutorial
Drawing the Clothes
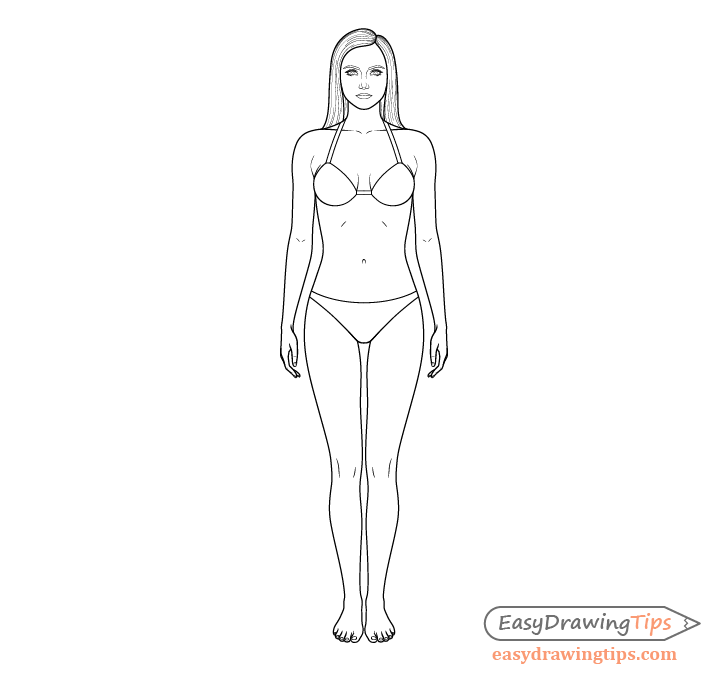
You can optionally add some clothes. In this examples it’s just a simple bikini/swimsuit.
Generally even if you are going to draw more complex/baggy clothes it’s a good idea to create a basic outline of the body and then add them over top of it (as was shown with the hair). This can help you avoid mistakes and make it easier to see where fold are likely to form.
Conclusion
This tutorial explains how to structure and proportion the the different parts of the female body. It also suggest what order you should draw them in. As was mentioned at the start of the tutorial, a good way to measure the body is using the head. You want to start your drawing with that and then add the larger and more important parts of the body followed by the smaller details. For example, it’s easier to place the facial features once you have an outline of the head than to first draw the face and then to try and outline the head around it.
Starting with the larger and more important elements is a good way to manage the drawing process and can help you avoid mistakes that lead to a lot of backtracking.
For more advice on good drawing practices you can also see the following:
Beginner Guide to Learning to Draw
For other similar tutorials try:
- How to Draw a Young Girl in 12 Steps (With Proportions)
- How to Draw Bird Step by Step – Side View
- How to Draw a Pizza Slice in 6 Steps

