How to Draw Cherries Step by Step
This tutorial shows how to draw realistic looking cherries. It provides examples that go from basic construction lines to a finished pencil shaded drawing.
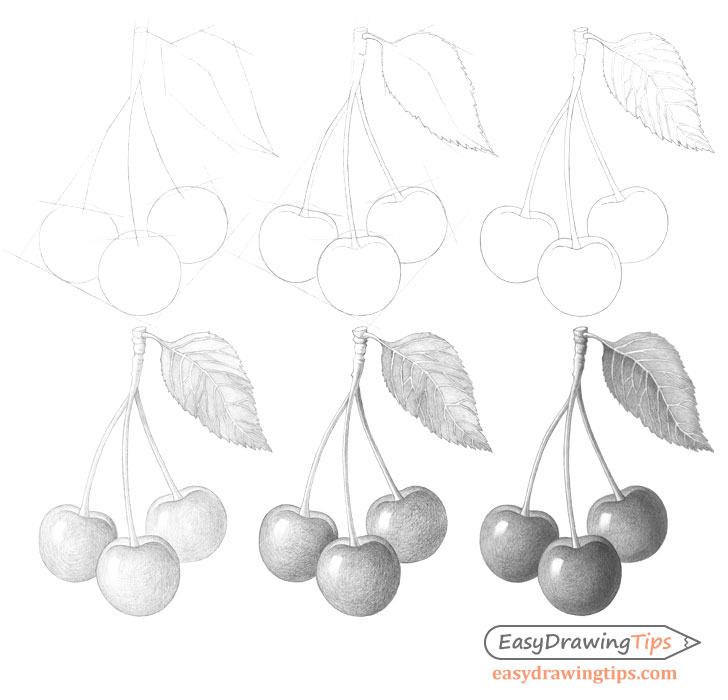
The tutorial consists of six major steps in total. You can see a preview of these above.
In addition to showing how to draw cherries it also talks a little bit about good drawing practices and explains why you want to draw things a certain way.
Overall the tutorial is not very complex and can be good for both beginners and intermediate artists.
Step 1 – Make a Basic Construction Drawing of the Cherries
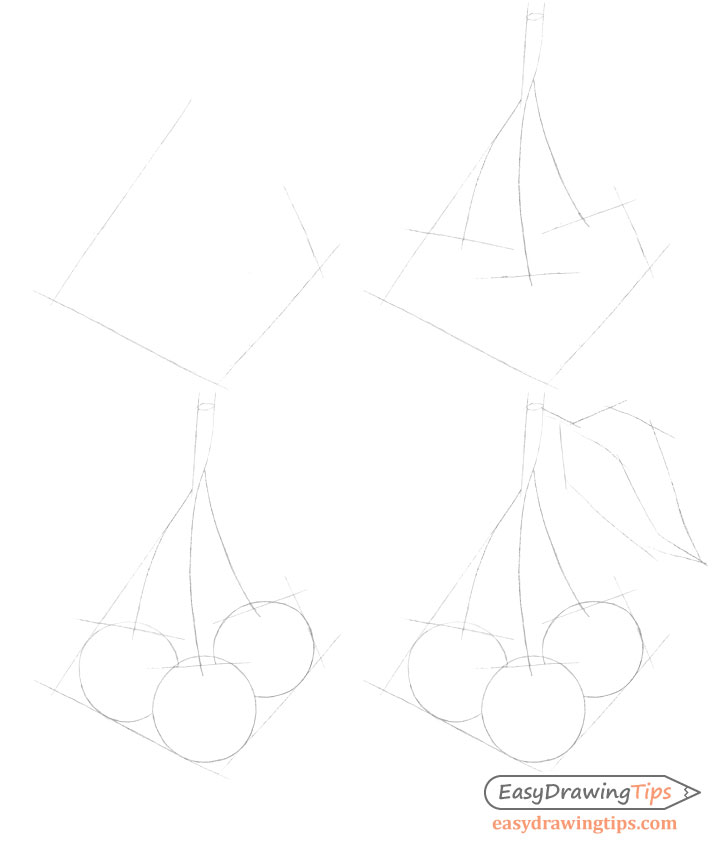
Start by making a quick construction drawing of the cherry bunch as shown above.
1. Frame the Shape of the Cherry Bunch
First frame the combined shape of the cherries. You can see how this is done with just a few lines in the example above.
This frame can help you quickly make sure that the cherries have good overall positioning in relation to the drawing area.
2. Add Guide Lines for the Stems
Next draw in the lines that will help you estimate the length and curve of the stem of each cherry. You can also add a bit of a “cut off” line on the end of each of these to roughly indicate where the actual cherries will start.
3. Outline the Cherries
Add a circle for each of the cherries to help estimate their overall size.
4. Construct the Leaf
Finally similar to the construction frame for the cherries create a similar one for the shape of the leaf (again see examples).
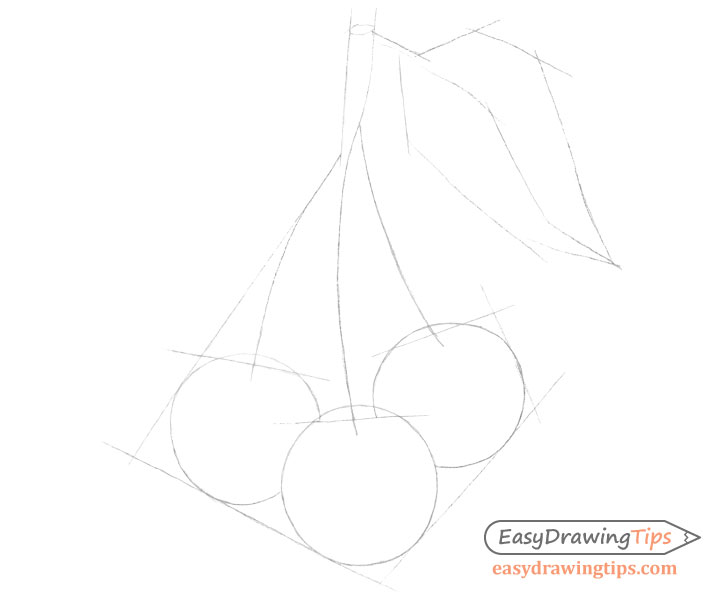
Above is a larger version of the finished construction drawing of the cherries. As explained in some other tutorials here on EasyDrawingTips there are several reason for creating these.
The main goal is to quickly estimate the overall positioning, size, shape and placement of the major parts of whatever it is that you are drawing.
If you go straight into the details without establishing the overall shape of your subject you may then have to do far more backtracking to correct mistakes.
For example if you were to start the drawing with the leaf and draw all of it’s details such as the veins before moving on to the cherries you could then find that the cherries now don’t fit well on the drawing area. This would mean having to erase all of that work and starting over. If on the other hand you find that things are off during the construction stages you generally only need to erase a few simple lines.
Step 2 – Make a Line Drawing
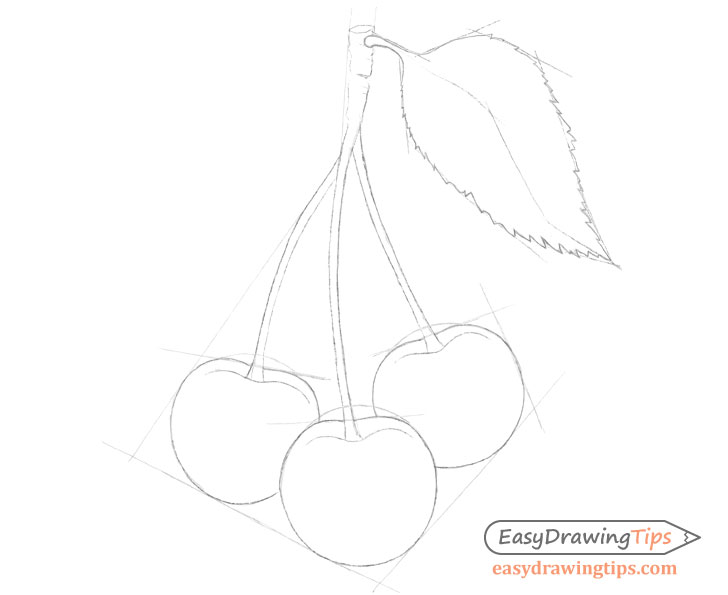
After you have the finished construction drawing you can then use it to create the more detailed line drawing of the cherries.
Inside the construction frame add the detailed shapes of the cherries and stems as well as the outline of the leaf.
Step 3 – Finish the Line Drawing

Add all of the inner details of the leaf such as the midrib and veins.
Step 4 – Begin Shading
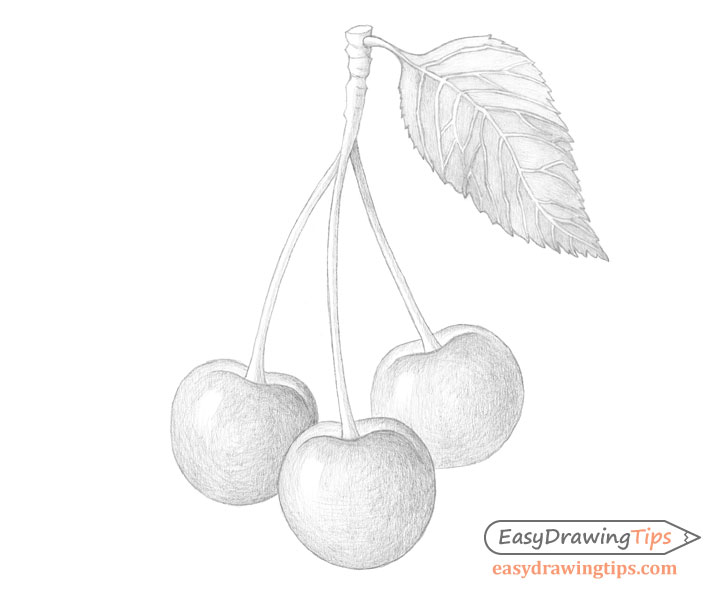
Shading the Cherries
In this example the light will be coming from the left of the cherries. This means that the shadows will be on the right.
It’s also important to note that cherries like those in the example are fairly dark in color. This means that their overall shading will have to be fairly dark as well. You should however start the shading by creating a layer that is much lighter than what you want to have in the final drawing and then gradually build up to the level you want.
As the surface of the cherries is fairly smooth and reflective you will also want to show fairly sharp highlights (light reflecting from the surface of the cherries).
To further emphasize this smooth surface you can also fully blend your strokes.
For more about different stroke types and shading see:
Shading Techniques and Stroke Types Drawing Tutorial
Shading the Stems
Just as the cherries the stems will have the light side on their left and the darker side on their right. The stem on the very right side of the drawing will generally overall be the darkest.
When shading the stems you can apply the stroke in roughly the same directions as their outlines (vertically). Once you get the upper part where they all merge you can make the strokes in a more horizontal direction going from right to left. You can make also make these in sort of small “batches” where some are longer or darker then the others. This will give the area bit of a bumpy look.
Shading the Leaf
In this case the leaf’s “in shadow” side will be the bottom half. The upper half will generally be lighter. The veins running both halves generally be lighter then the rest of the leaf simply due to their lighter color.
Step 5 – Add More Layers of Shading
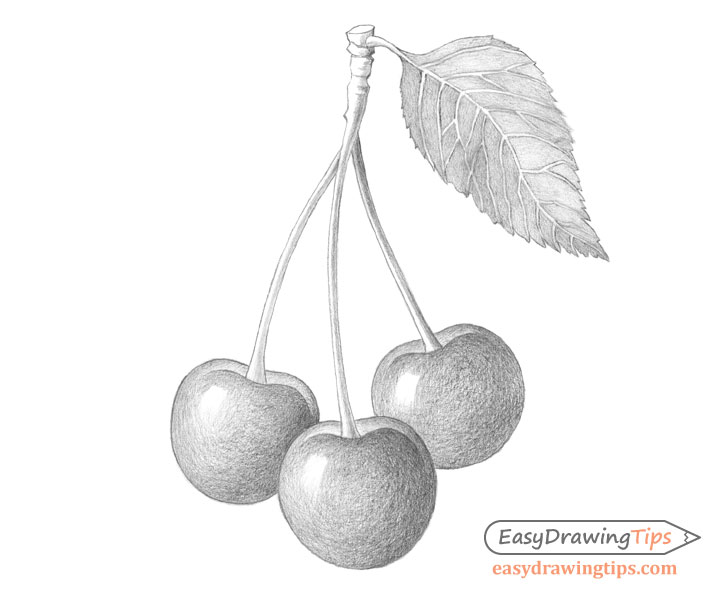
After you establish the light and dark areas with the initial layer of shading you can then apply more layers of strokes to darken it. Again be sure to go gradually so that you don’t over shade the lighter and/or mid tone areas to the point where the pencil can no longer go dark enough to create the shadows.
Step 6 – Finish the Drawing of the Cherries
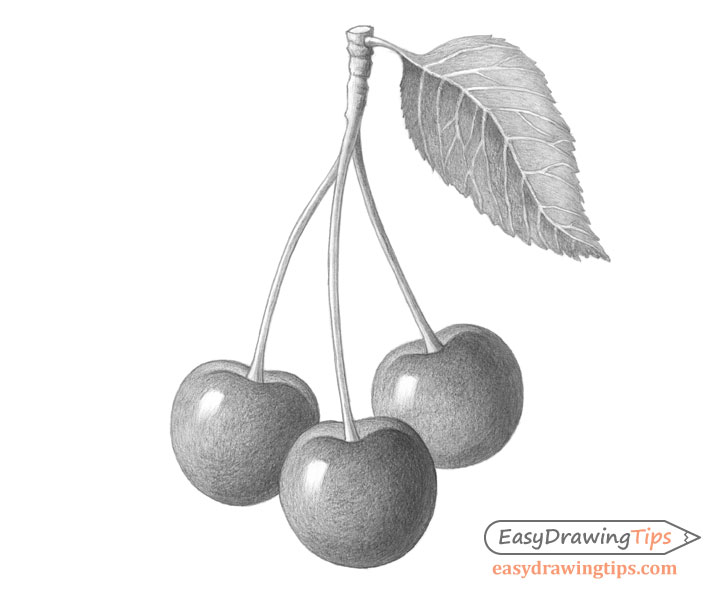
Darken the shading further by adding more and more layers. You will also want to use this process to further blend the pencil strokes and create smooth out the shading.
As already mentioned one area where you do want to have fairly sharp transition from light to dark are the highlights (due to their reflective surface).
In this case the highlight will only really have a bit of a gradient on their bottom. This generally simply means that whatever is illuminating them is partially obstructed in that area.
Conclusion
Drawing and shading realistic looking cherries is not overly difficult as long as you know what you’re doing. This tutorial explained a bit about properly structuring a line drawing and provided some tips on shading a dark reflective surface.
Using a construction drawing can save you a lot of time and hassle by minimizing the amount of backtracking in case you make a mistake. Applying shading in several layers can also help you avoid mistakes especially on darker surfaces which generally require effort to shade and are more difficult to erase.
If you’ve found this tutorial to interesting and would like to try some more like it see the following:
- Egg Step by Step Basic Shading Tutorial
- How to Draw a Realistic Orange Step by Step
- How to Draw an Avocado Step by Step
- How to Draw a Kiwi Step by Step


