How to Draw a Shoe in Nine Steps
This tutorial shows how to draw a dress shoe from the side view in nine steps with detailed illustrated examples for each of them.
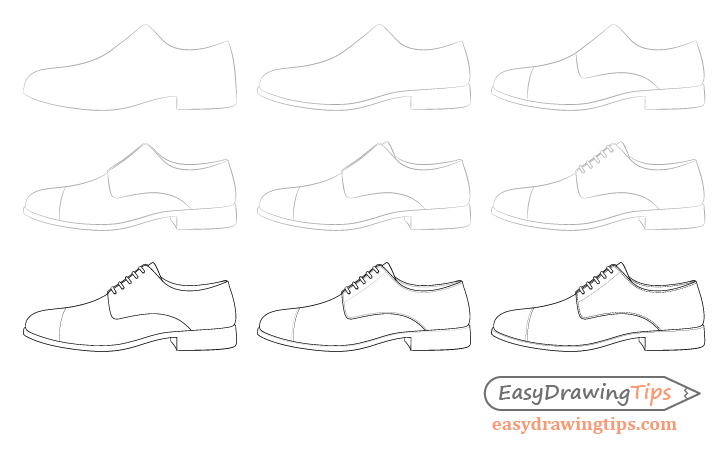
As mentioned, in this example the shoe will be drawn from the side and also a just a bit below the “eye level”. Generally you will not see this type of view when a shoe is being worn but instead if you are looking at it more directly such as one on display at a store or when holding one it in your hands.
For more on “eye level” see:
Perspective Drawing Tutorial for Beginners
Be sure to start the tutorial in pencil and make light lines as you will need to erase small parts of the drawing in some of the steps.
Step 1 – Make a Basic Outline Drawing of the Shoe
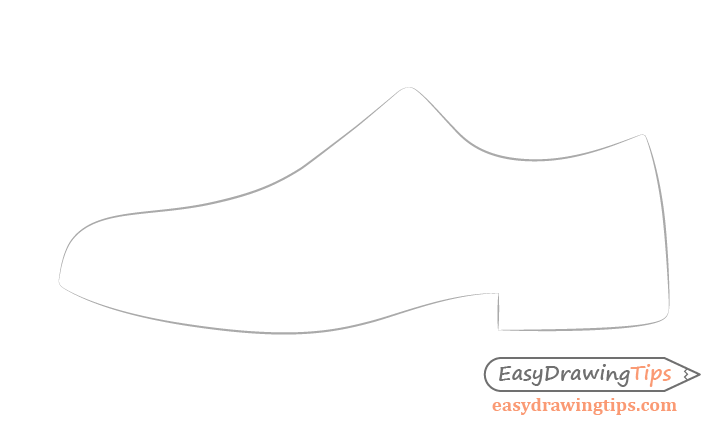
Begin with a simple outline of the the shoe. This should basically be it’s simplified silhouette (without any of the smaller details).
The goal here is to get the correct proportions as well as the general flow of it’s shape.
This means things like the overall width and height as well as the size of the different parts of the shoe compared to one another. For example the length of the heel compared to the rest of the shoe, etc…
You will also want to pay attention to the various angles and curves.
Step 2 – Draw the Sole
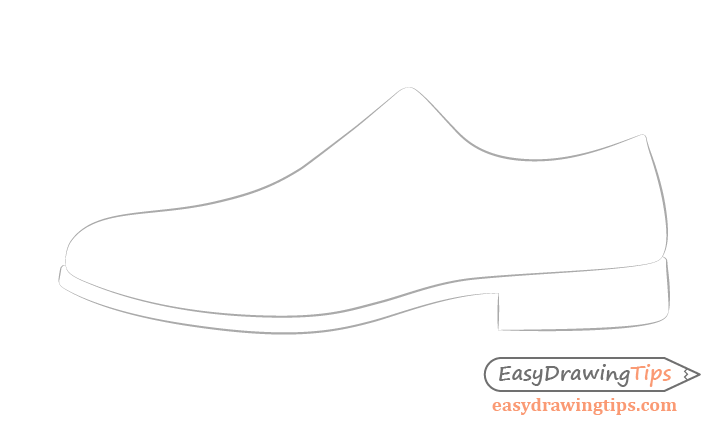
Onto the previous outline add the sole. You can erase little bits of the drawing as needed when adding it.
Step 3 – Draw the Toe Cap & Quarter
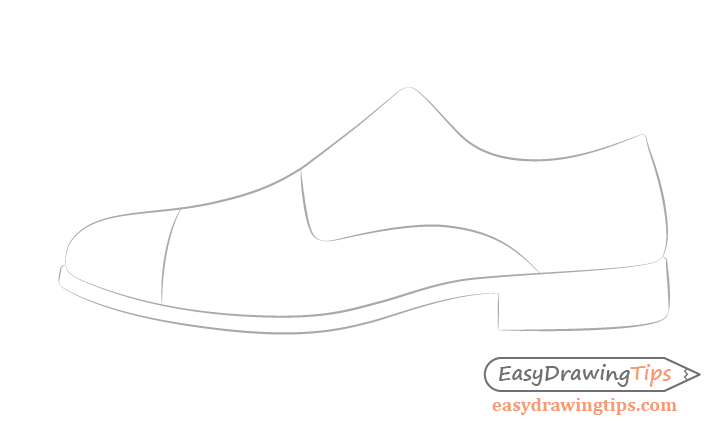
Outline the toe cap and the quarter (area around the shoe laces and opening) as shown in the example. With these you should have the basic design of the shoe.
Step 4 – Draw the Inner Side
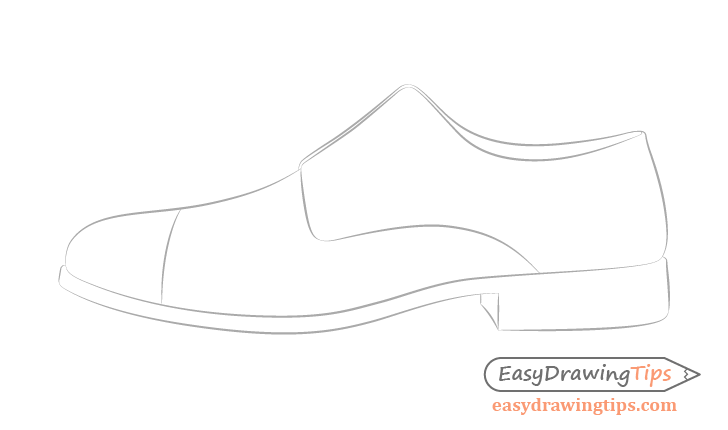
For this step first outline the upper part of the quarter in the front. Behind it add the far side of the shoe which will be facing towards the viewer with it’s inner end.
You can also draw the inwards facing side of the heel.
Step 5 – Draw the Tongue
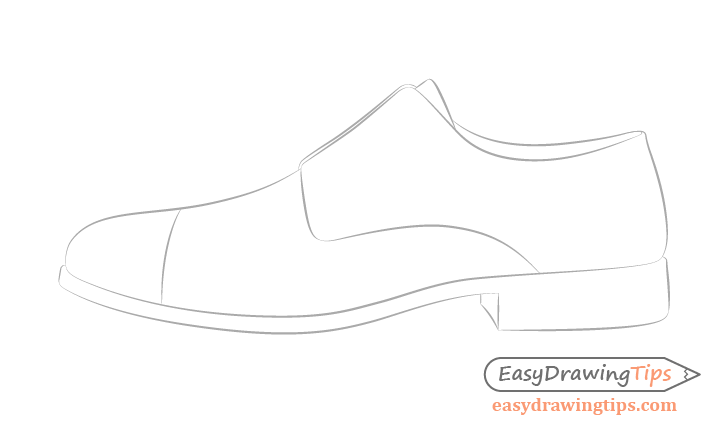
For this simple step add the tongue sticking out from between the two sides of the quarter.
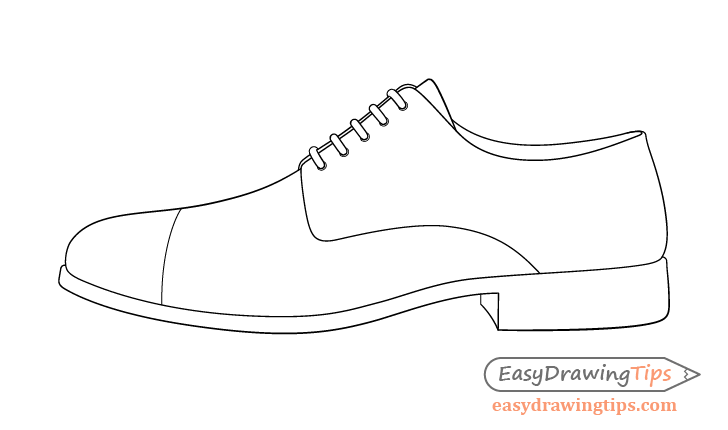
Step 6 – Draw the Laces

Finally add the shoe laces as shown above. Draw the laces on the sides with a bit of a curve to them and draw the ones between them petty much straight. As the middle laces will be facing pretty much directly towards the viewer the curve in their shapes will not be visible.
An easy way to help insure the shoe laces fit into the quarter and have even spacing is to first draw the ones on the sides, next the one in the middle and then the two in between these. If you try to draw the laces going from one end not only will it be more difficult to evenly space them out but you may also find that they don’t fit well by the time you get to the other end.
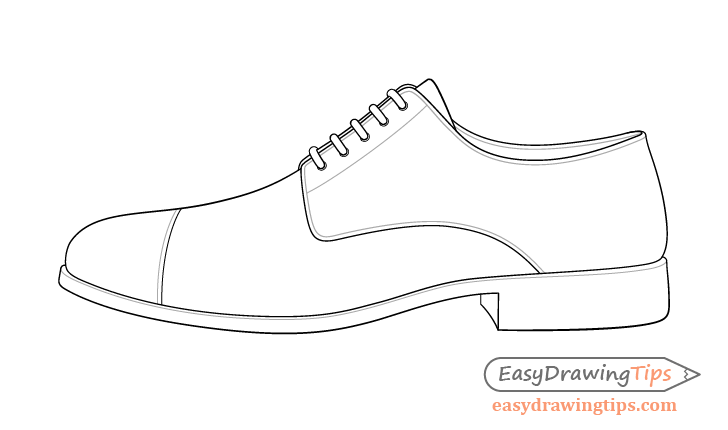
Step 7 – Clean Up the Drawing
At this stage clean up your drawing and/or make any necessary corrections. Once you feel content with the way you things look, trace over your lines with a darker stroke. You should have a finished basic line drawing of a dress shoe before moving on to the next step.
Step 8 – Draw the Stitching Lines & Edge Lines
While you could leave the drawing as it is in the previous step you may notice it looks a little plain. To make things more interesting you can give the shoe a few more details.
In this case these will be the edge along the sole as well as some stitching. Before drawing the individual stitches first very lightly draw some guide lines to set the paths you will draw them a long.
You can add the edge along the sole in a similar manner.
Step 9 – Draw the Individual Stitches & Finish the Shoe Drawing

To finish the shoe drawing add the little dashes of the titches and darken the edge line along the sole. Making the little dashes may be a bit time consuming but the extra attention to detail can definitely improve the look of the drawing.
Conclusion
The shoe used as the example for this particular tutorial has a fairly standard look for such foot ware. As is recommended in most tutorials here on EasyDrawingTips the drawing stages go from the larger and more important shapes to the smaller details.
For more on good drawing practices see:
Beginner Guide to Learning to Draw
For more tutorials similar to this one see:
- How to Draw a Dolphin Step by Step
- How to Draw a Peach Step by Step Tutorial
- How to Draw a Book Step by Step
- How to Draw a Microphone Step by Step


