How to Draw a Carrot Step by Step
This tutorial shows an easy way to draw, color and shade a carrot in six steps with simple illustrated examples and quick instructions.

As you can see in the preview image above, the carrot in the examples is drawn in a way where it’s not very complex but also not overly stylized. Drawing in this way can be great practise and can help you get nice looking artwork fairly quickly.
Please note that the lines in the examples are dark just to make it easier for you to see them. It’s recommended that you start the tutorial in pencil and make light lines that are easy to erase (in case you make a mistake). You can darken them later on (before coloring) with a black pen or marker.
Step 1 – Outline the Shape of the Carrot
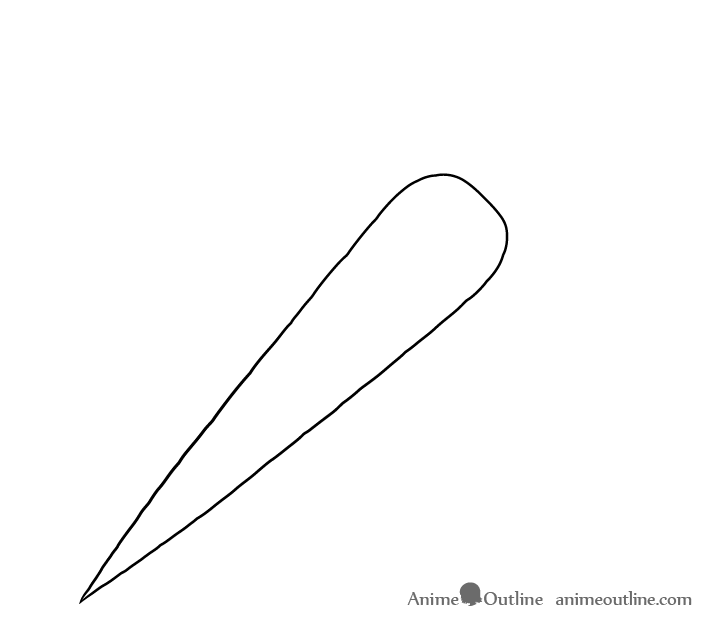
Begin the drawing by outlining the carrot’s overall shape. You can deliberately make the outline a little wavy as the surface of a carrot is generally not perfectly smooth. Also be sure to position it in a way where you have some room at the top of your drawing area for the stems.
Step 2 – Draw the Foreground Stems
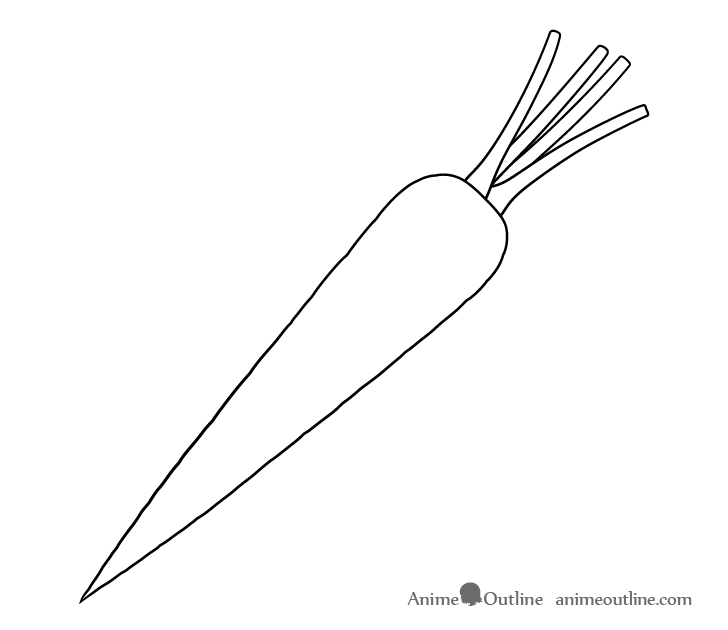
Coming out of the top of the carrot add a few stems. In this particular example the leaves will be cut off (as they often are when carrots are sold) so the stems will be fairly short.
Make the stems wider at the base (where visible) and them like a fan where they branch out in different directions as they go up.
Step 3 – Draw the Background Stems
Add a few more stems in between the initial set (these will be the ones that are farther in the background). Place them in a way where they fill the gaps or better balance out the shape of the bunch (just so that the drawing looks nicer).
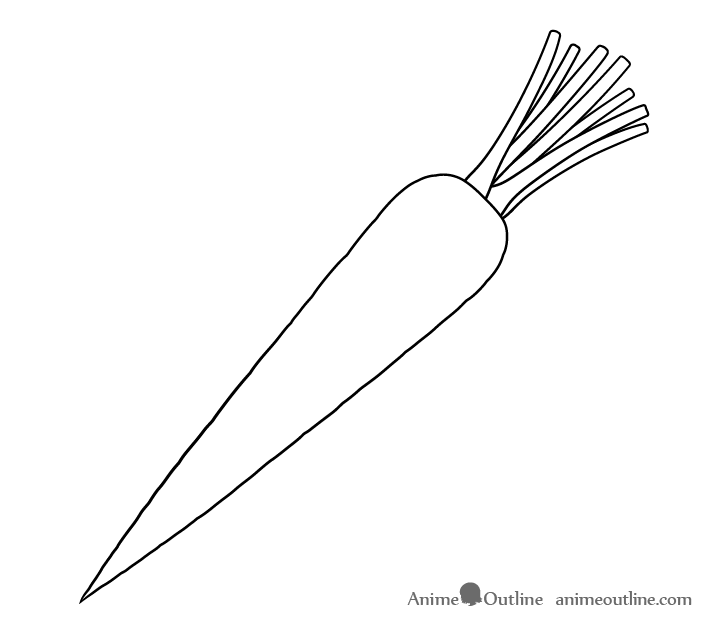
Step 4 – Draw the Root Scars
Once you’ve defined the shape of the carrot and added all of the stems you can move on to the smaller details of the drawing. These are the little root scars that are so characteristic of a carrot’s surface. Place these horizontally in relation to it’s shape and draw them randomly scattered through the surface. Make some scars longer and wider and other shorter and narrower so that the drawing looks natural.
Once you’ve added the scars and are happy with the way things looks, you can trace over your lines with a black pen or marker. Alternatively you can just darken them with the pencil.
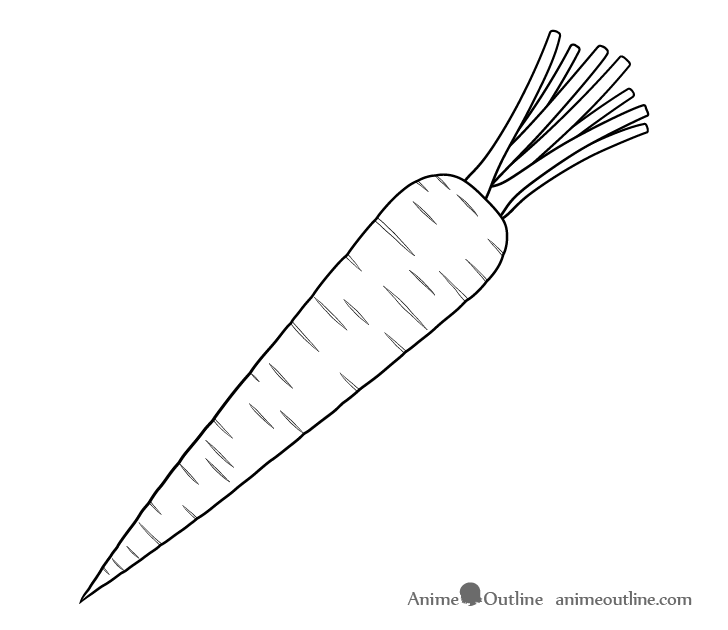
Step 5 – Add Color

To color the drawing make the carrot orange, the scars a lighter orange/yellow and the leaves a yellow green. However, be sure to leave a highlights along the carrot and along each of the foreground stems (the ones drawn in step two).
The highlights are the light reflecting form the smooth surface of the different parts of an object. Adding them to the drawing helps give the carrot a shiny and more three dimensional appearance.
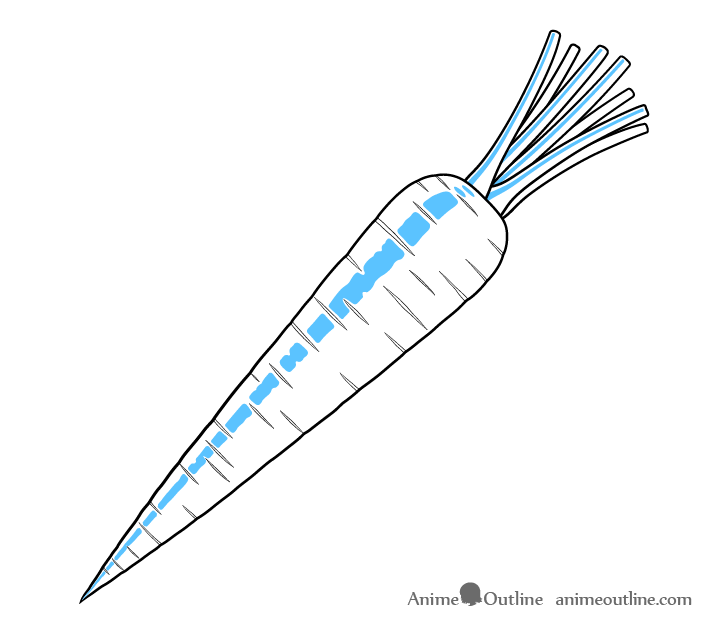
You can see the shapes and placement of the highlights shown in blue (so that it’s easier to see) in the example above. You can either create them as you color or lightly outline them beforehand so that you don’t accidentally go over them. For very smooth and shiny surfaces you could leave the highlights white. However in this case you will want to make them a slightly lighter version of the orange of the carrot and the green of the leaves (as carrots are generally not that shiny).
Draw the highlights along the carrot as a streak that is broken up by the scars (as there are slightly indented by the carrot less light will reach there). Also make their shapes “wobbly” to again help emphasize that the carrot has a uneven surface.
Step 6 – Add Shading
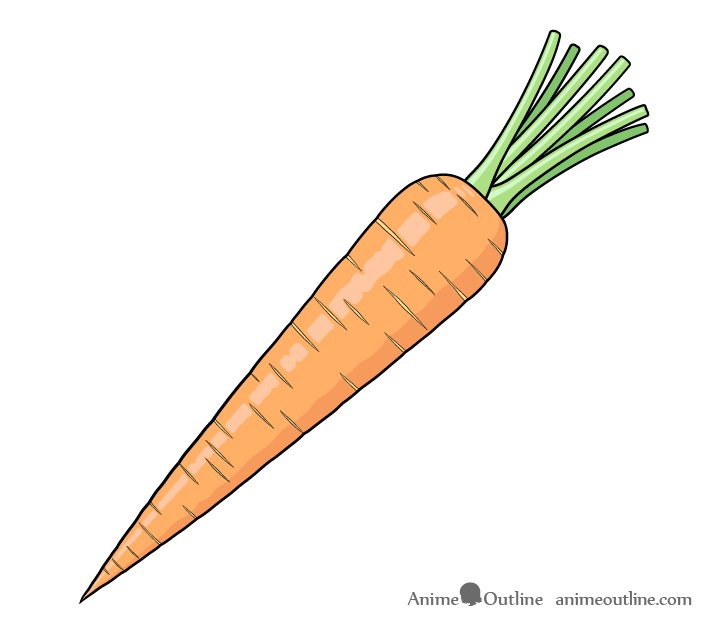
For the last step of the drawing add a shadow along the side of the carrot and to the background stems (added in step three). This will again make the carrot appear more three dimensional and will make the background stems appear to be farther back.
Generally the shadow is opposite the light source which in this case is coming from the upper/left side of the drawing. Such a lighting setup would generally mean that there should also be shadows along the right side of each stem. However, as the drawing is somewhat simplified and the stems so thin that the shadows would hardly be visible, you can just leave them out.
Similar to the highlights give the shadow along the carrot a slightly wavy/wobbly outline to help emphasize the bumps on the carrot and to keep the drawing looking organic.
Conclusion
This tutorial shows how you can create artwork (of in this case a carrot) that is slightly simplified but that at the same time still looks nice and fairly realistic.
If you like these kinds of easy to follow drawing guides that can help you create slightly stylized but serious looking art, also see the following tutorials:
- How to Draw a Monarch Butterfly Step by Step
- How to Draw a Pizza Slice in 6 Steps
- How to Draw a Milk Carton Step by Step
- Draw a Cactus in a Plant Pot Step by Step
- How to Draw a Young Girl in 12 Steps (With Proportions)


