How to Draw Eye Expressions Step by Step
This tutorial shows how to draw nine different eye expressions. It explains how the eyes tend to change with each expression and provides six drawing steps for each example.
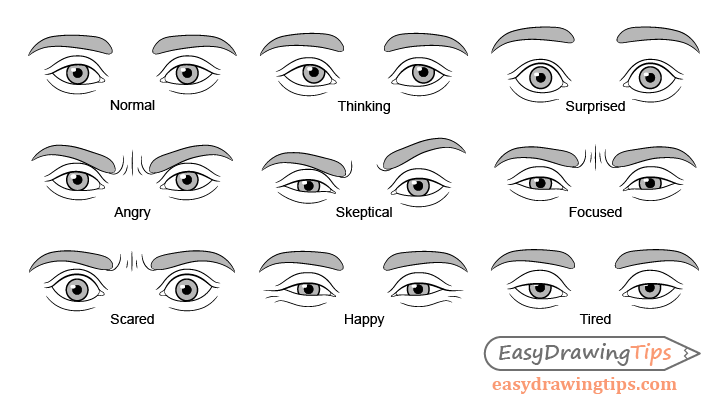
As shown above the expressions included in the tutorial are:
- Normal
- Thinking (can also be daydreaming)
- Surprised (can also be scared)
- Angry
- Skeptical (can also be plotting)
- Focused
- Scared
- Happy
- Tired (can also be sad)
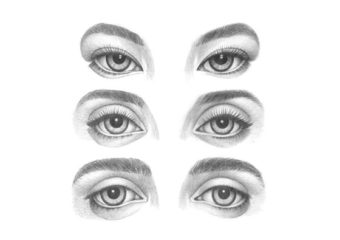
Please note that as this tutorial focuses on getting a certain expression the examples show a somewhat simplified drawing of the eyes. For drawing more detailed eyes see:
While the provided examples are fairly simple it’s still recommended that you do the tutorial in pencil and make light lines that you can easily erase in case you make a mistake. The lines in the examples are dark simply so that they are easier for you to see. You can darken your lines in the last step of the drawing before adding the shading.
It’s also highly recommended that you read over the drawing instructions for the normal expressions even if you don’t plan on drawing it. It provides some information that is not included in the other examples (to avoid repetition).
Eye Spacing When Drawing Eyes
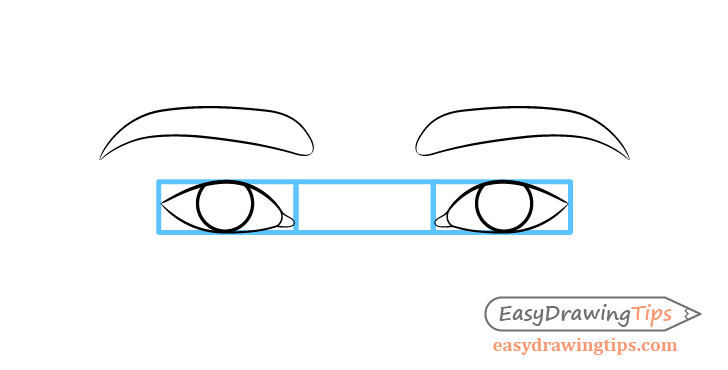
One important thing to be aware of before drawing any of the expressions below is the spacing between the eyes. Generally this should be enough to fit another eye in between them (as shown in the above example) Remember that this space also includes the width of the tear duct.
Finally also keep in mind that the distance between the eyes should remain the same regardless of the expression.
How to Draw Normal Eyes Step by Step
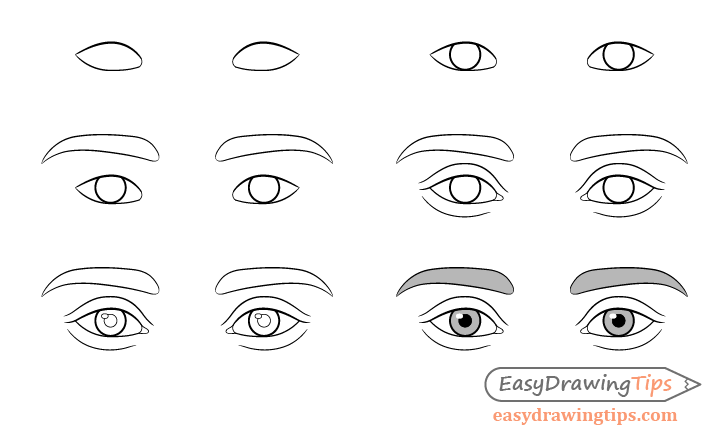
This first drawing is of the eyes in their natural relaxed state. This example is what the rest of the expressions in the tutorial will be based on.
Step 1 – Draw the Outlines of the Eyes
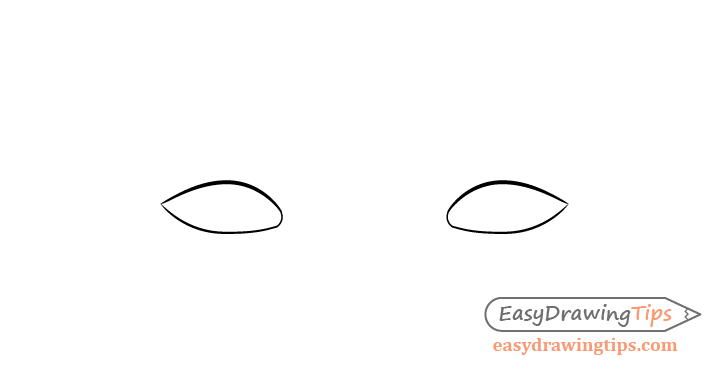
Begin with the outline of the white of each eye without any of the other details.
The shapes and angles of the eyes can vary between different people. In this case they will be angled slightly downwards towards the nose.
For drawing different types of eyes see:
How to Draw Different Eye Types Step by Step
Be careful that you position both eyes on the same level so that one is not too high or too low in relation to the other. You can optionally draw a straight horizontal line right above where you want to draw the eyes to help you do this.
Step 2 – Draw the Irises

Inside the outline of each eye draw the irises with their tops slightly covered by the upper eyelids and their bottoms just touching the bottom eyelids.
Again this can change depending on the person but generally drawing the irises in such a away will help show a normal/relaxed eyes.
Step 3 – Draw the Eyebrows
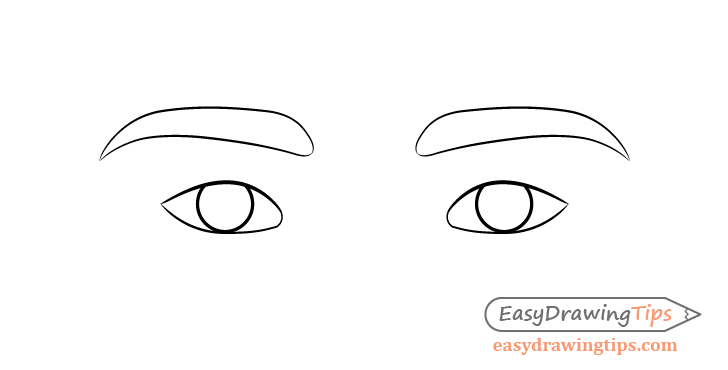
Just like the eyes the shape of the eyebrows can also change from person to person. Usually however eyebrows will tend to be thicker towards their inner ends and thinner towards their outer ends. Also towards the outer ends they will tend to have a bit of a bend in their shape.
Taking these things into account draw the eyebrows just a little bit above the eyes as shown in the example.
For more detailed examples of different types of eyebrows see:
How to Draw Eyebrows Step by Step
Step 4 – Draw the Eyelids
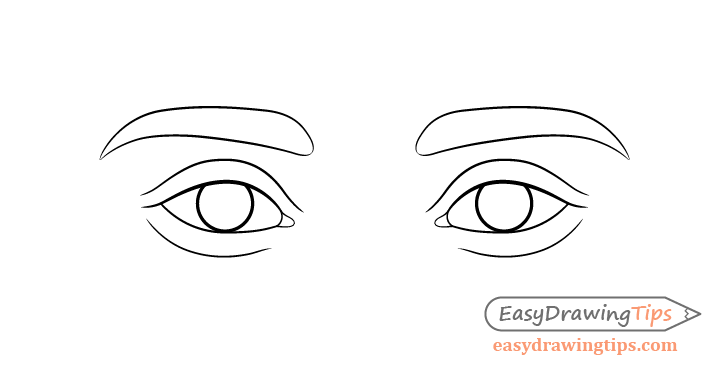
It’s important to note that the lines that outline the white of the eyes are technically the eyelids also. So when this tutorial refers to the “eyelids” it’s actually talking about the top of the upper eyelids and the bottom of the lower eyelids. The reason for this is to simply keep the steps a little more organized and to avoid some repetition.
For a fairly basic drawing of the eyelids first add a pair of curves to show the upper and lower eyelid of each eye as can be seen in the example above.
You will usually want the curves that define the lower eyelids to be lower down in relation to the eyes when compared to the upper eyelids.
Also please note that these are somewhat simplified drawings of the eyes there is no need to draw the individual eyelashes. You can however extend the upper outline of each eye to go slightly past it’s outer corner. You can also make this line slightly thicker than most of the other lines. Doing this will create the impression of eyelashes. You should however save thickening the line for when you are almost done with the drawing (right before adding shading).
Step 5 – Draw the Pupils & Highlights
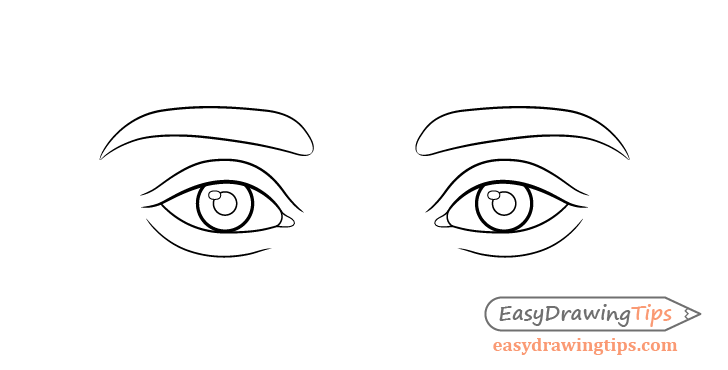
To finish the line drawing add the pupils as well as a pair of highlights (one for each eye).
the pupils should be positioned directly in the center of the irises while the position and shape of the highlights can vary depending on the light source and other factors. As the focus of the tutorial is on showing eye expressions it will not go into this in too much detail.
You can simply make the highlights oval in shape and draw them slightly overlapping the pupils (as is often the case).
Step 6 – Add Shading

Even a little bit of shading can help a drawing stand so to finish you can add some as shown in the example. Before doing this you can also tracer over your lines with a darker stroke. As mentioned earlier make the line that defines the upper part of the white of the eyes thicker to create an impression of eyelashes. You can also give a slightly thicker outline to the irises.
For the shading fill in the pupils with black (or very dark pencil shading) and make the irises and eyebrows a dark grey (keep the little highlights white).
Once done you should have a basic drawing of the eyes with some very simple shading.
How to Draw Thinking Eyes Step by Step
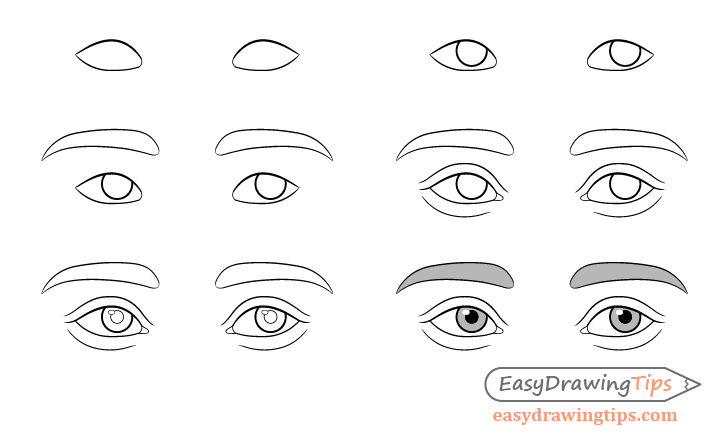
This expression shows “thinking” eyes. Kind of like when a person is trying to make a decision or to remember something.
Step 1 – Draw the Outlines of the Eyes
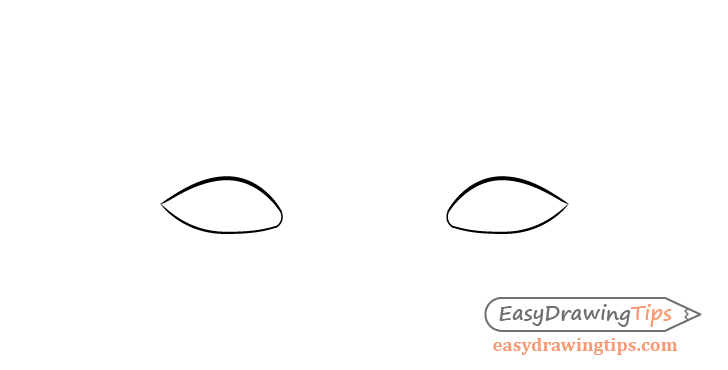
Begin with the outline of the whites of the eyes. You can draw these the same as you would for a normal expression.
Step 2 – Draw the Irises
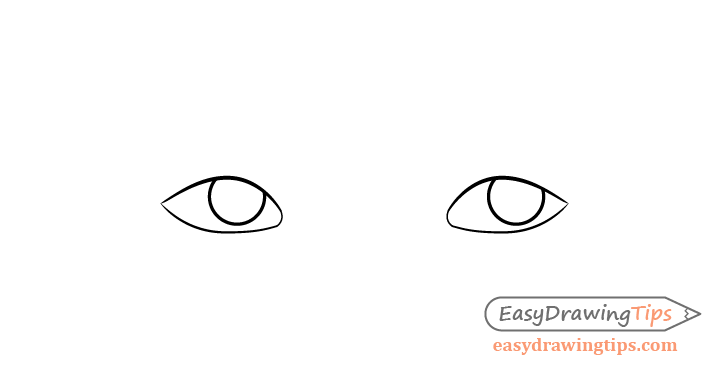
Draw the irises rolled upwards and to one side. A good part of them should be covered by the upper eyelids.
Step 3 – Draw the Eyebrows

Draw the eyebrows very slightly raised compared to the normal expression. Especially their inner ends.
Step 4 – Draw the Eyelids
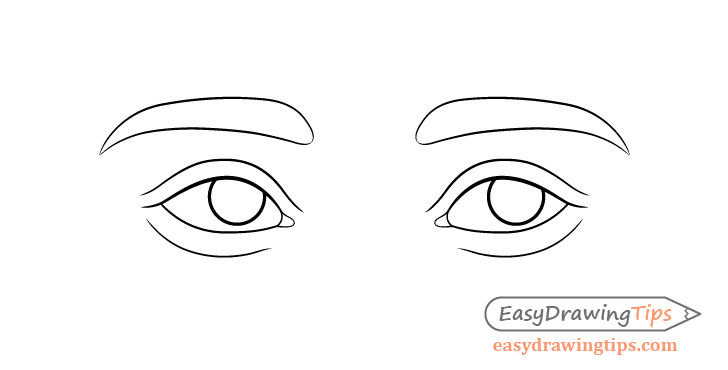
Draw the eyelids the same as you would for a normal expression.
Step 5 – Draw the Pupils & Highlights
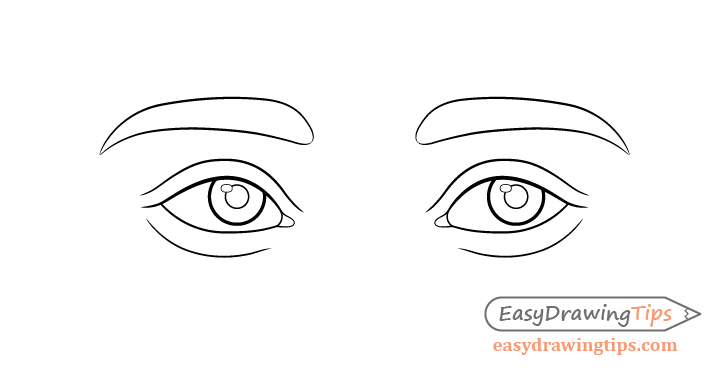
Add the pupils in the center of each of the irises and afterwards add the highlights.
Step 6 – Add Shading
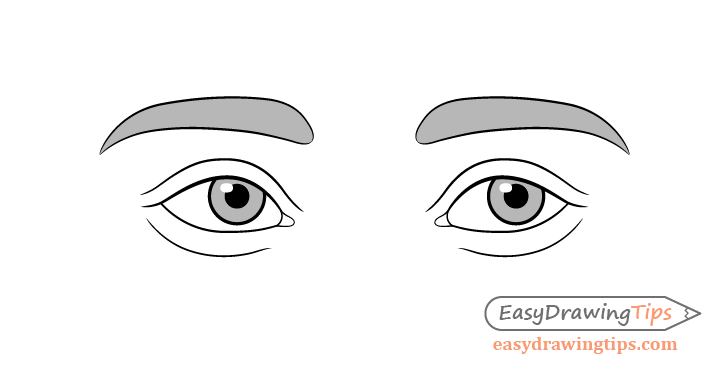
Finally again darken your lines and add some basic shading as explained in the first example.
How to Draw Surprised Eyes Step by Step
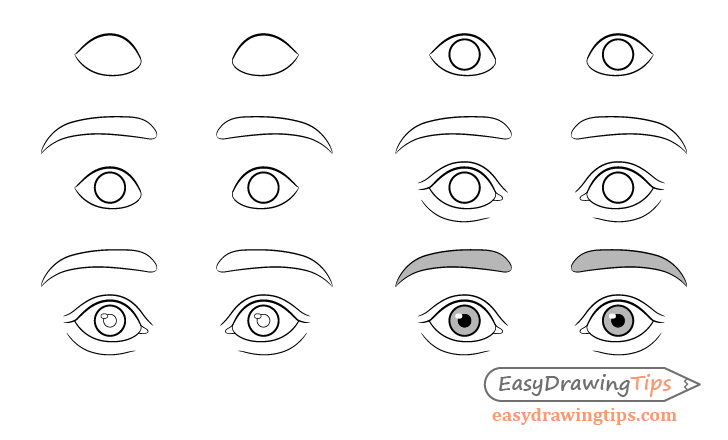
This drawing of the eyes shows a surprised expression. It can also be sued to show a scared expression although there is also a different variation of a scared expression shown later on in the tutorial.
Step 1 – Draw the Outlines of the Eyes
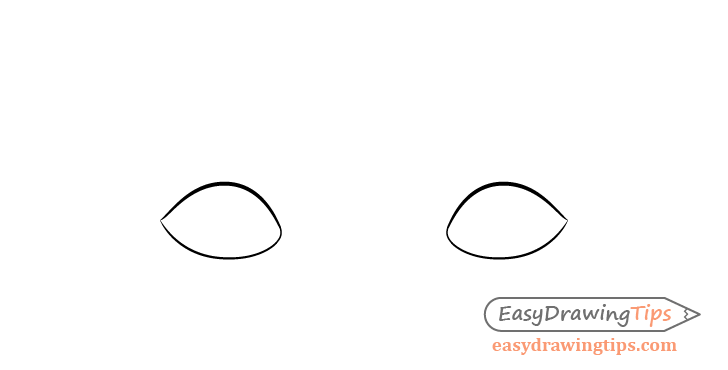
For this expression draw the eyes wide open. Make them vertically much wider than for a normal expression. However don’t overdo this as you can end up with eyes that look like they belong to a cartoon character.
Step 2 – Draw the Irises
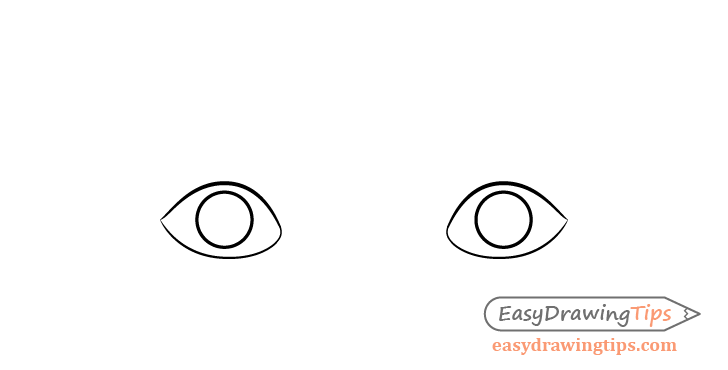
Draw the irises not touching the upper or lower eyelid. This is very important as it will help create the surprised look.
Step 3 – Draw the Eyebrows
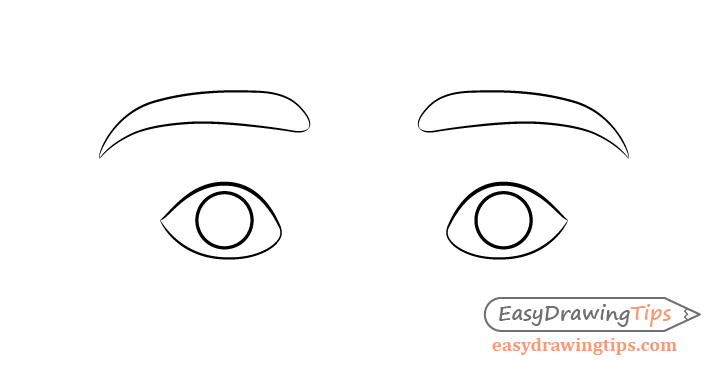
Draw the eyebrows raised. In addition to simply drawing the eyebrows higher up you should also draw their inner end significantly raised in comparison to a normal expression.
Step 4 – Draw the Eyelids
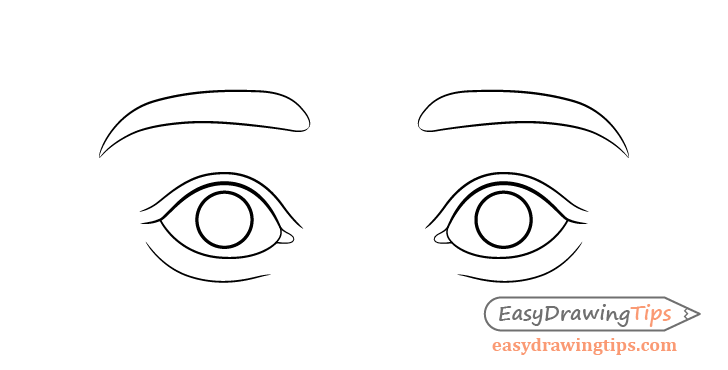
Draw the line that defines the upper eyelids higher up than you would for a normal expression. However the distance between them and the whites of the eyes should also be narrower than normal.
You can draw the line for the bottom eyelids just a tiny bit lower down.
Step 5 – Draw the Pupils & Highlights
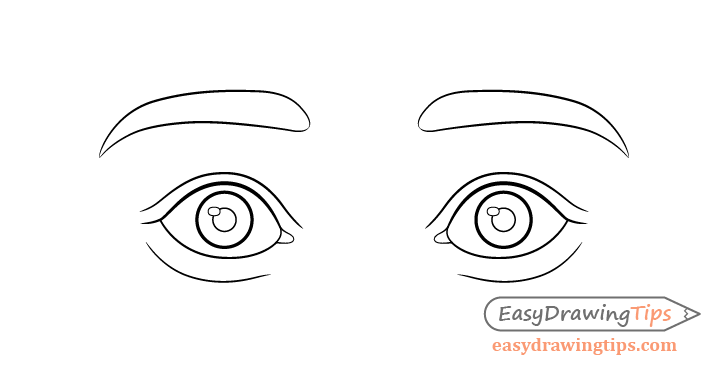
Draw the pupils in the middle of the irises same as you would for a normal expression and then add the highlights.
Step 6 – Add Shading
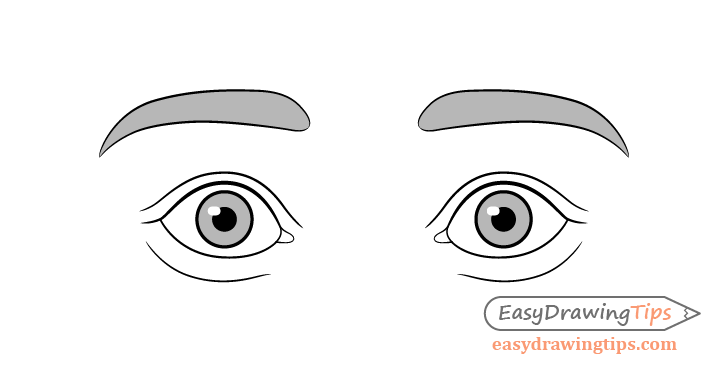
To finish darken your lines and add some basic shading as described in the first example.
How to Draw Angry Eyes Step by Step
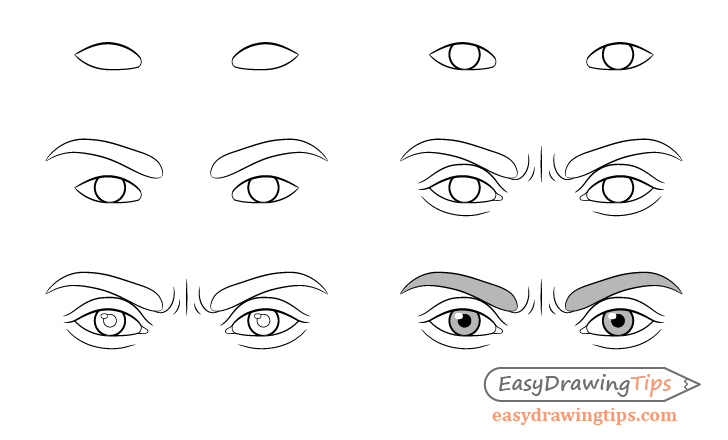
This drawing is of an angry/unhappy expression but a similar setup can also be used for a serious expression.
Step 1 – Draw the Outlines of the Eyes
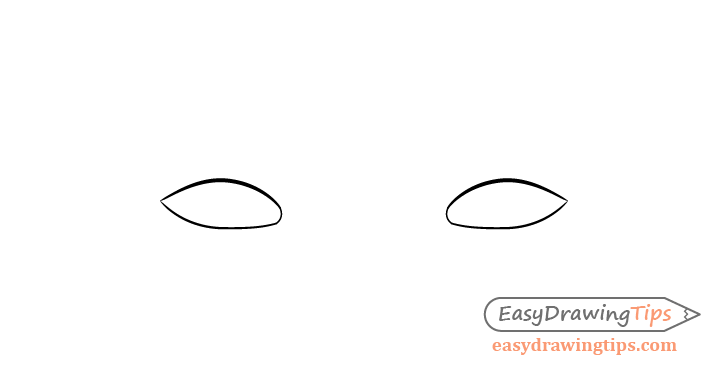
Draw the outlines of the eyes slightly vertically narrow than you would for a normal expression.
Step 2 – Draw the Irises
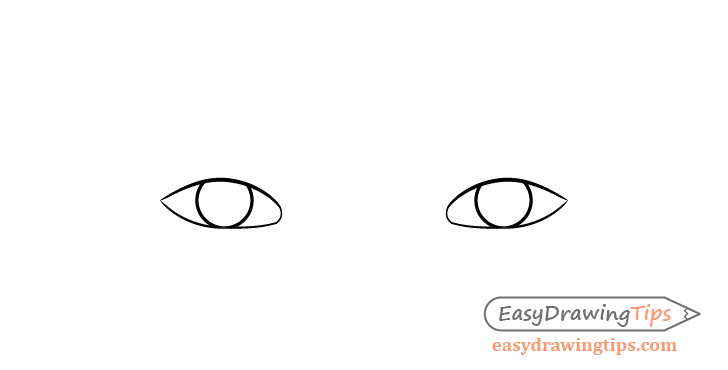
As the eyes are drawn slightly narrower the irises should also be a tiny bit more covered by the eyelids than in a normal expression.
Step 3 – Draw the Eyebrows
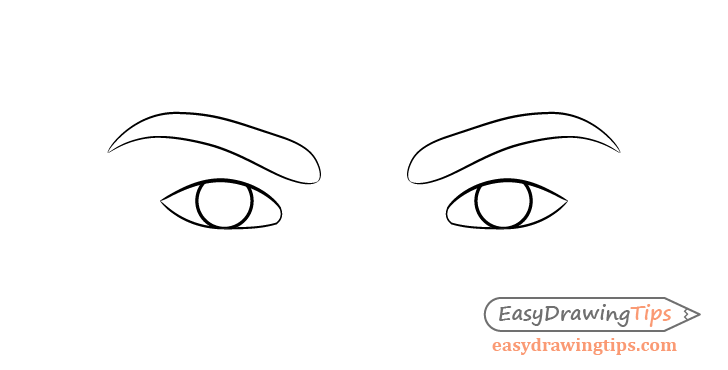
Draw the eyebrows lower down with their ends lowered even further forming a bit of a wave in their overall shapes.
Step 4 – Draw the Eyelids & Wrinkles

Draw the eyelids with their upper outlines slightly lowered and their lower outlines slightly higher up.
As the eyebrows are pushed both downwards the skin around their inner corners will wrinkle. The number and pattern of the wrinkles can change from person to person. In this case you can draw one big wrinkle down the middle and two more large wrinkles sort of wrapping around the inner shape of the eyebrows. You can then add a pair of smaller wrinkles in between them.
Step 5 – Draw the Pupils & Highlights

Draw the pupils in the middle of the irises being slightly overlapped by the highlights.
Step 6 – Add Shading
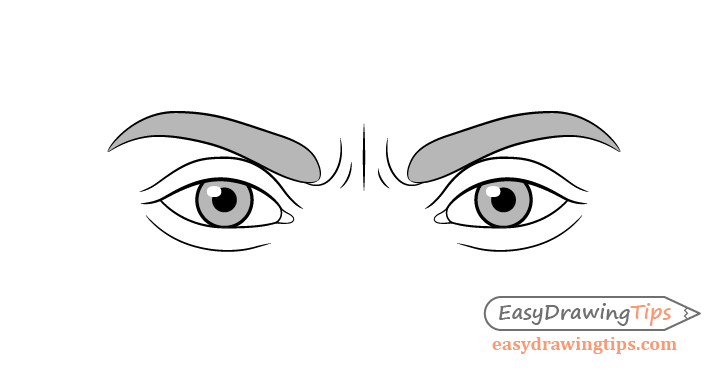
Finally darken your lines and add some basic shading as explained in the first example.
How to Draw Skeptical Eyes Step by Step
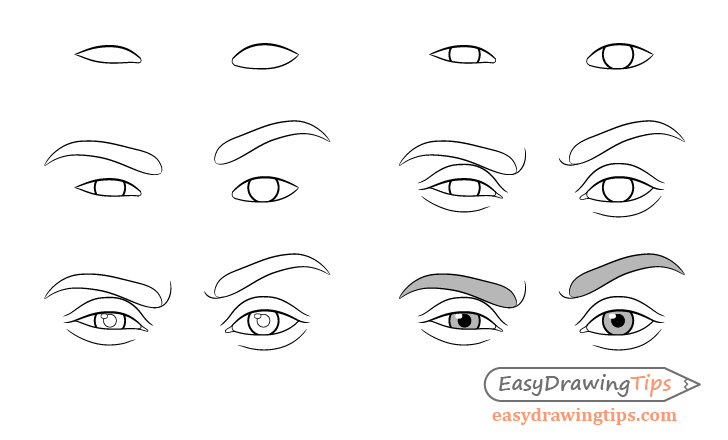
The “skeptical” expression is somewhat different form the other examples in this tutorial as it will have the two eyebrows in different positions.
Step 1 – Draw the Outlines of the Eyes
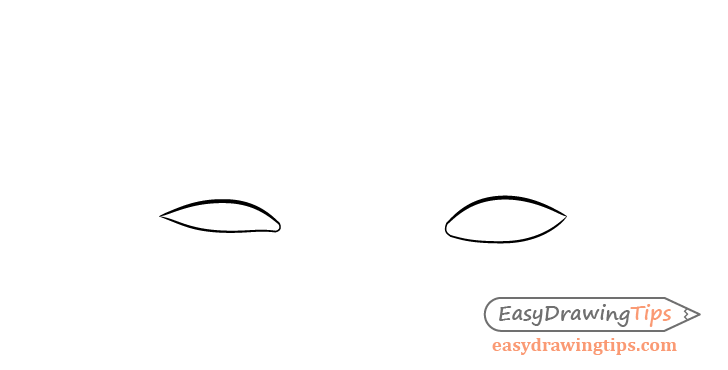
For this expression draw one eye much narrower and the other one just slightly so.
Step 2 – Draw the Irises
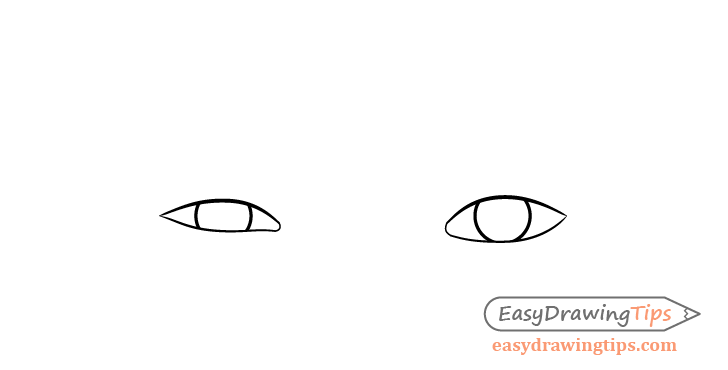
Draw the irises with a large part of the one in the squinted eye covered by the eyelids. The one in the other eye should also be slightly more covered by the eyelids than in a normal expression.
Step 3 – Draw the Eyebrows
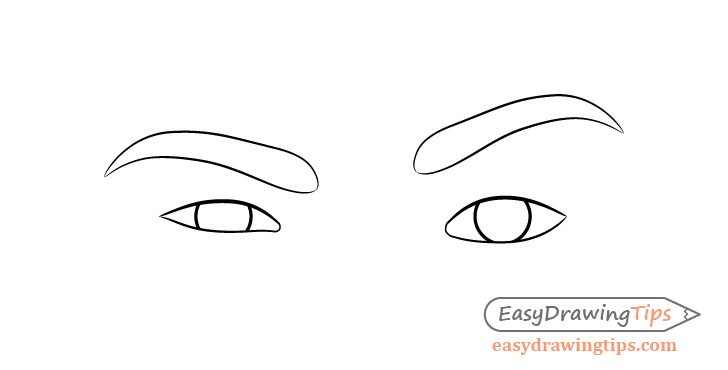
Draw the eyebrows with the one over the narrowed eye lowered, especially it’s inner end. Draw the outer end of the second eyebrow raised and it’s inner end lowered (compared to a normal).
Step 4 – Draw the Eyelids & Wrinkles
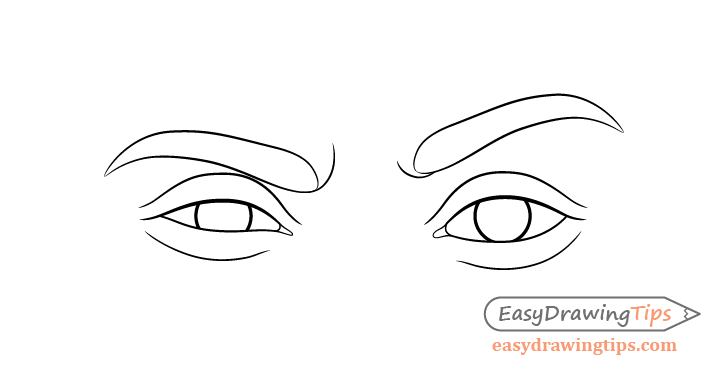
Draw the upper eyelids in pretty much the same place as for a normal expression for both eyes. Draw the lower eyelid over the squinted eye slightly raised (pulled up).
Next you can add just a hint of wrinkles around each of the eyebrows.
Step 5 – Draw the Pupils & Highlights
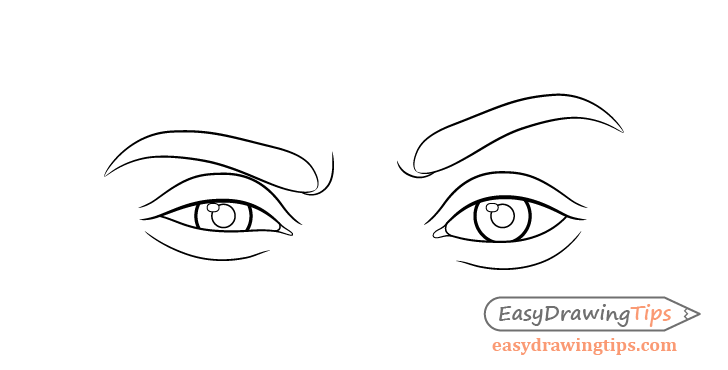
In the middle of each iris draw the pupil and afterwards add the highlights.
Step 6 – Add Shading
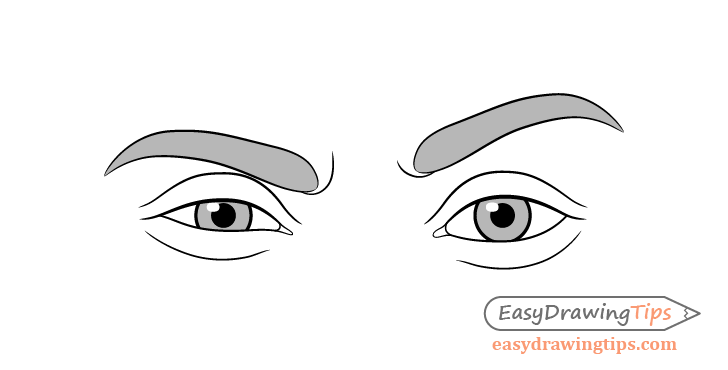
Finish by darkening your lines and adding some simple shading. You can again refer to the first example of the tutorial for details.
How to Draw Focused Eyes Step by Step
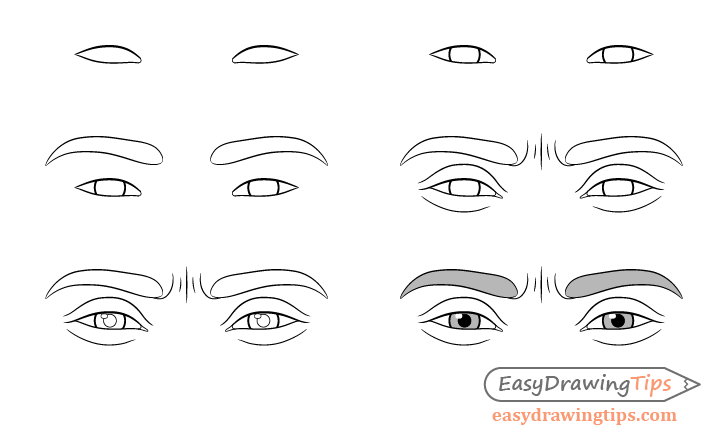
This eye expression can be used to show focused or once thinking eyes. However while the other expression can be more of a daydreaming look this one is more for showing someone who is trying to solve a problem.
Step 1 – Draw the Outlines of the Eyes
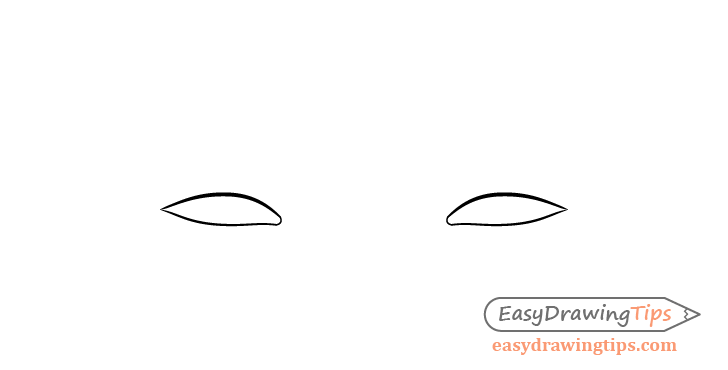
For for eyes with a “thinking” expression draw their outlines much narrower than normal.
Step 2 – Draw the Irises
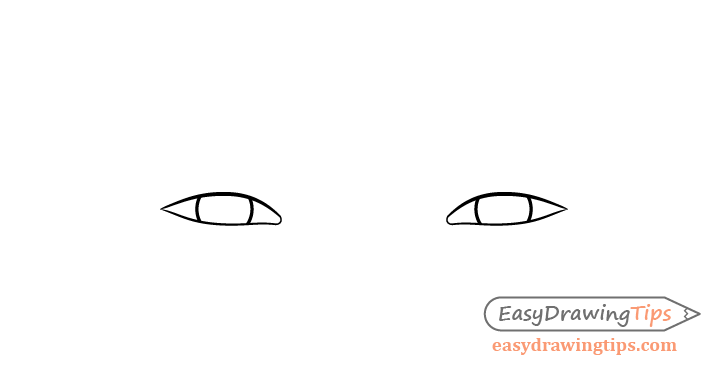
Draw the irises with a good portion of their tops and bottoms covered by the eyelids.
Step 3 – Draw the Eyebrows
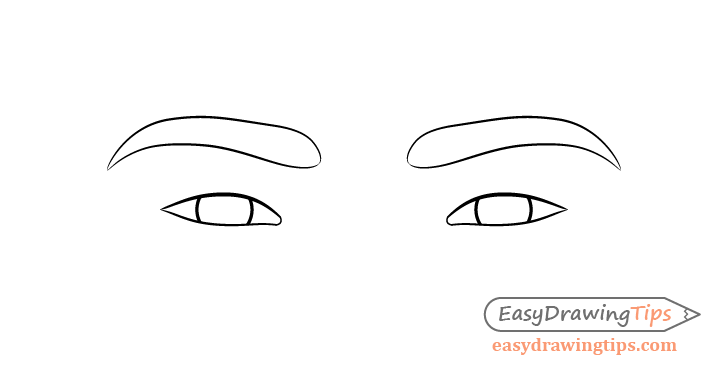
Draw the eyebrows lower down (particularly their inner ends) and slightly closer together than normal.
Step 4 – Draw the Eyelids & Wrinkles
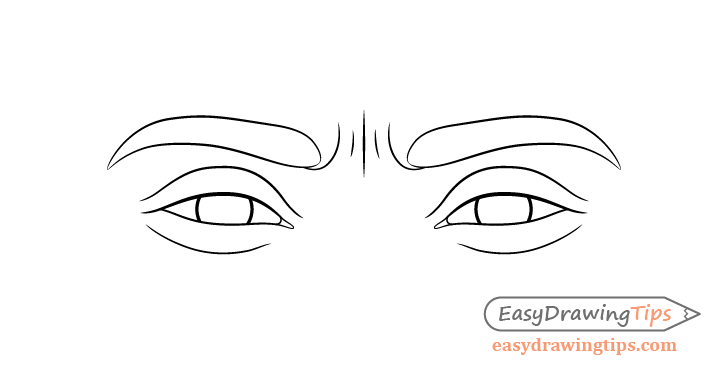
Draw the eyelids with their upper outlines a tiny bit lower and the lower outlines slightly raised (pulled up by the squinting of the eyes).
Similar to the previous example of “angry eyes” draw some wrinkles in between the eyebrows. However in this case make the wrinkles slightly more vertical in their direction as the eyebrows will be more squeezed together with this expression than pushed down.
Step 5 – Draw the Pupils & Highlights
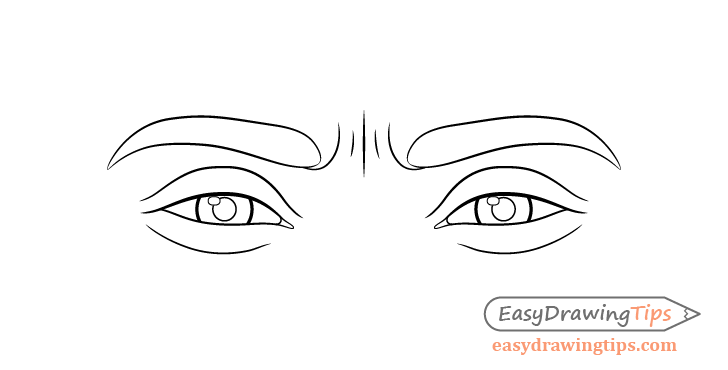
Draw the pupils in the middle of the irises slightly overlapped by the highlights.
Step 6 – Add Shading
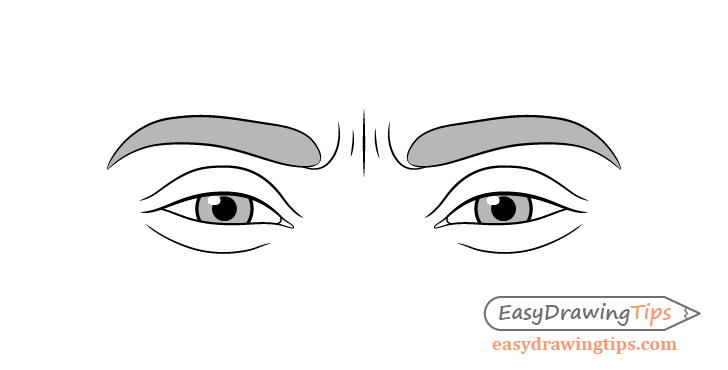
Finally darken your lines and add some basic shading to finish the “focused eyes” drawing.
How to Draw Scared Eyes Step by Step
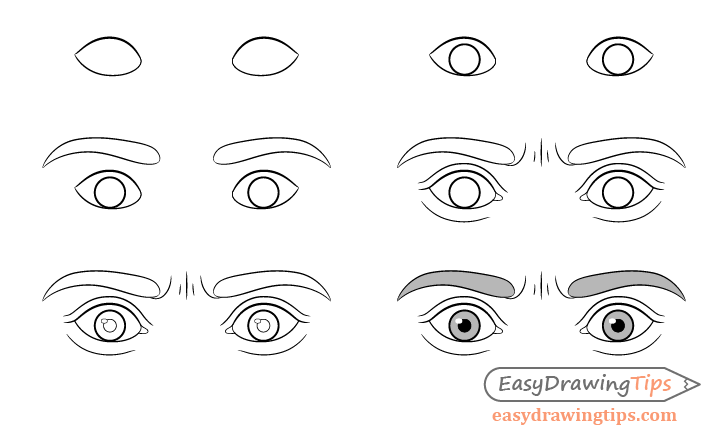
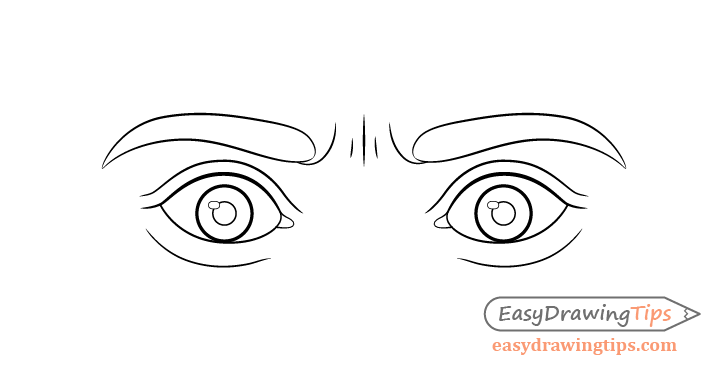
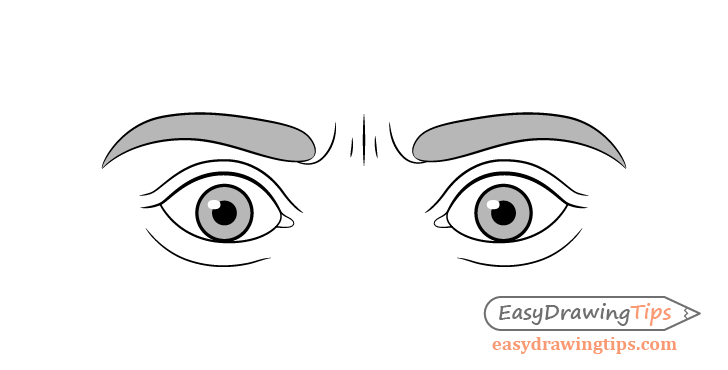
The scared eye expression is somewhat similar to the surprised one but with a few important differences.
Step 1 – Draw the Outlines of the Eyes
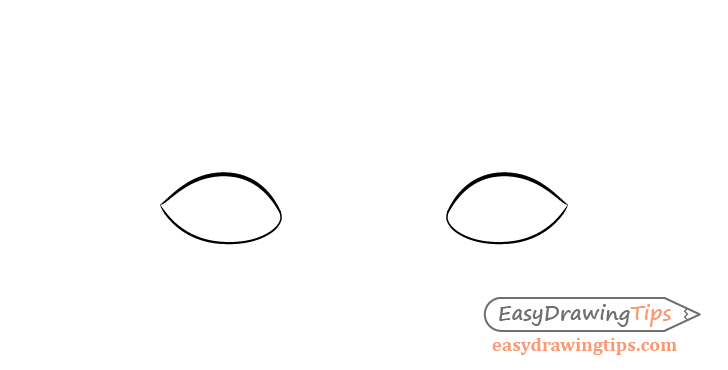
Draw the outlines of the white of the eyes wider than normal.
Step 2 – Draw the Irises
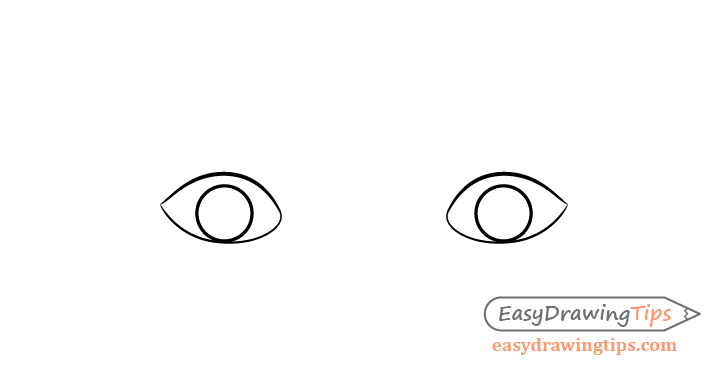
Draw the irises touching the bottom eyelids with some space between them and the top eyelids. The eyes should be looking slightly downwards.
Step 3 – Draw the Eyebrows
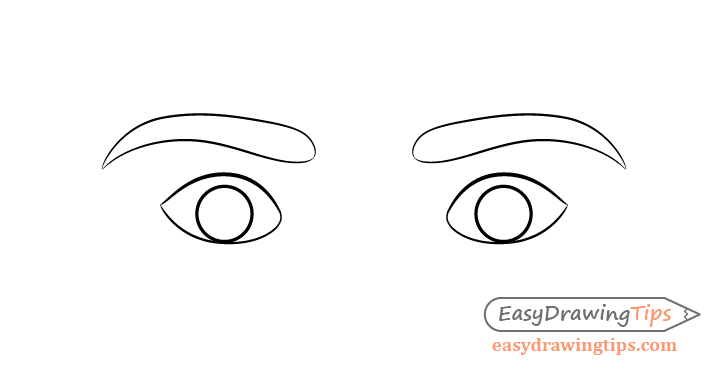
Draw the eyebrows slightly lowered, especially their inner ends. You can also draw them a tiny bit closer together than normal.
Step 4 – Draw the Eyelids & Wrinkles
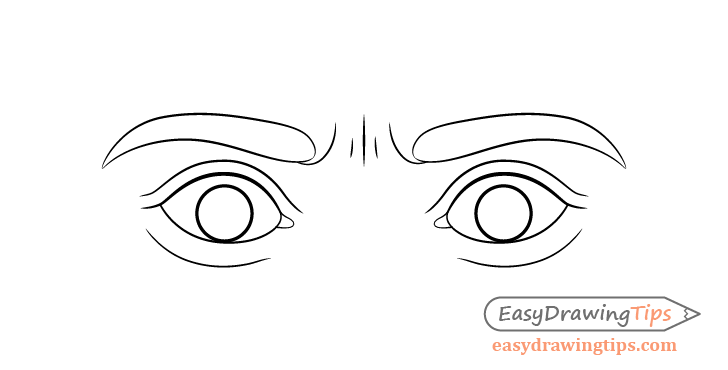
Draw the lower eyelids in pretty much the same place as for a normal expression
Draw some wrinkles in between the eyebrows similar to the angry/focused expression. But make them slightly smaller as the eyebrows are not as squeezed together as in those expressions.
Step 5 – Draw the Pupils & Highlights
Step 6 – Add Shading
How to Draw Happy Eyes Step by Step
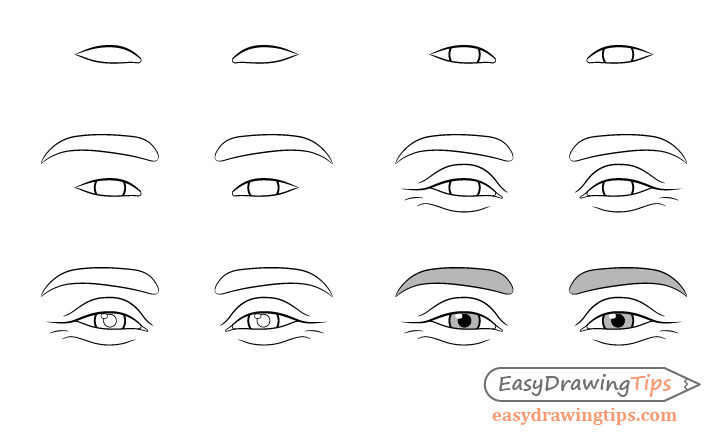
The “happy eyes” expression is created when a person is smiling. Although you don’t see the actual smile the expression of the mouth will actually effect how you draw the eyes.
Step 1 – Draw the Outlines of the Eyes
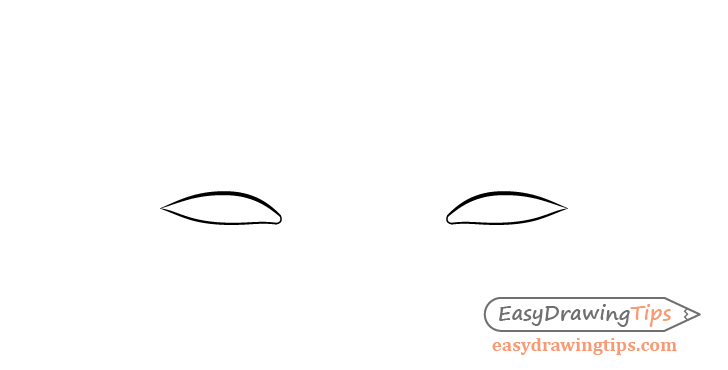
For this expression draw the eyes much narrower than normal.
Step 2 – Draw the Irises
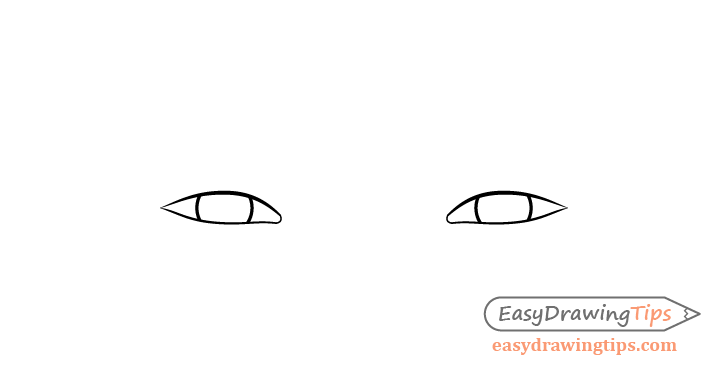
Draw both irises with a large portions of their tops and bottoms covered by the eyelids.
Step 3 – Draw the Eyebrows
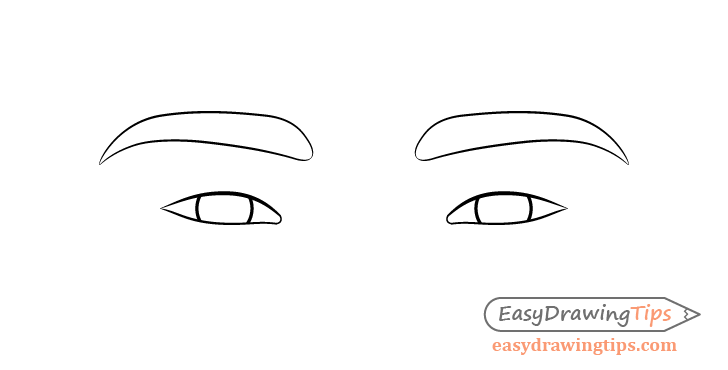
Draw the eyebrows in pretty much their natural state (same as for a normal expression).
Step 4 – Draw the Eyelids & Wrinkles

With this expression the eyes will tend to have more wrinkles around them. This is due to the cheeks being raised which causes the skin around the eyes to become more “squished” creating folds.
Draw the top line of the eyelids a tiny bit lower down than normal. Draw the bottom outline of the eyelids higher up and extend them with slight downwards curves at their outer ends to show wrinkles.
You can also extend the lines that define the white’s of the eyes/bottom of the upper eyelids to go further from the outer corner of each eye (again the show wrinkles).
To finish you can throw a few more wrinkles at the outer corner of each eye near the bottom eyelids.
Step 5 – Draw the Pupils & Highlights

Inside each of the irises draw the pupil and the highlight.
Step 6 – Add Shading

Finally darken your lines by tracing over them and add some basic shading. You can again see the first example of the tutorial (the normal eyes) for more explanation.
How to Draw Tired Eyes Step by Step
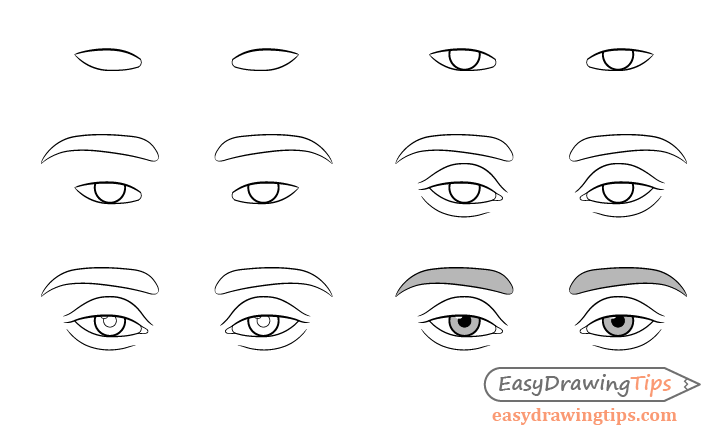
The final example is of eyes with what can be a tired or sad expression.
Step 1 – Draw the Outlines of the Eyes
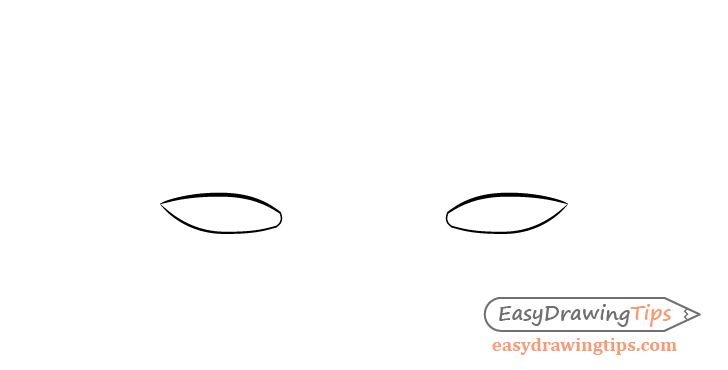
For this expression draw the whites of the eyes with the upper part sort of “squished down”.
Step 2 – Draw the Irises
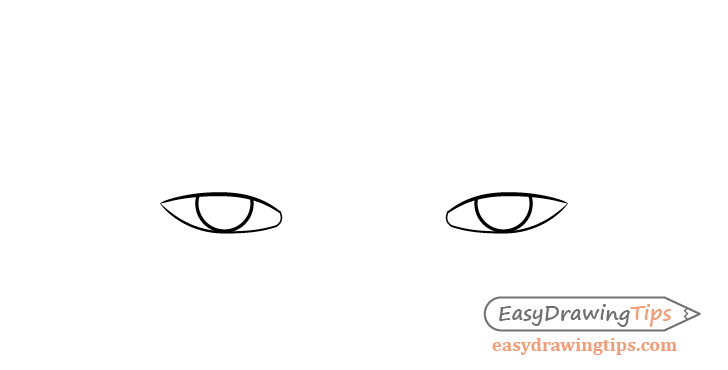
Draw the irises with their tops significantly more covered by the eyelids.
Step 3 – Draw the Eyebrows
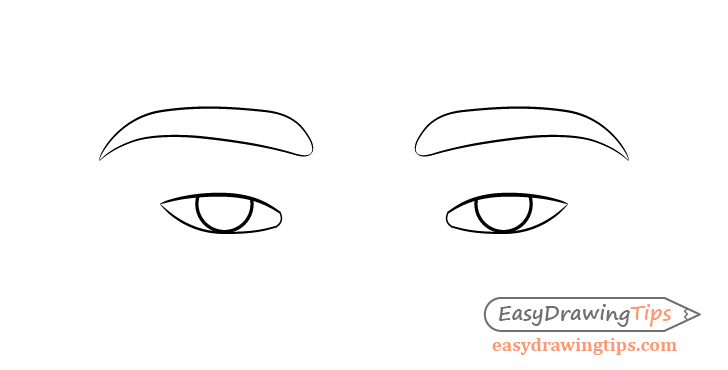
Draw the eyebrows in the same position as for a normal expression.
Step 4 – Draw the Eyelids

Draw the eyelids same as normal.
Step 5 – Draw the Pupils & Highlights

Inside each iris draw the pupil and part of the highlight. About half of each highlight will be covered by the eyelids.
Step 6 – Add Shading

To finish trace over your lines with a darker stroke and add some basic shading.
Conclusion
Some eye expressions can be shown in different ways, in addition to that the shapes of eyes can also vary depending between different people. However this tutorial still provides a good general guide for achieving some of the most common expressions of the eyes.
Whatever emotion you are trying to draw try and think of how the eyes, eyelids and eyebrows will move/shift when making it and where wrinkles might form. It can of course also be helpful to look at some photos or ask someone to pose for you.
If you enjoyed this tutorial and would like to try some more like it also see:
- How to Draw a Male Face Step by Step Tutorial
- How to Draw a Female Face Step by Step Tutorial
- How to Draw a Smile Step by Step
- How to Draw Different Types of Lips
- How to Draw Different Nose Types
