How to Draw a Pizza Slice in 6 Steps
This step by step tutorial shows an easy way to draw a pizza slice topped with pepperoni, mushrooms and bell peppers. It includes line drawing and coloring examples.
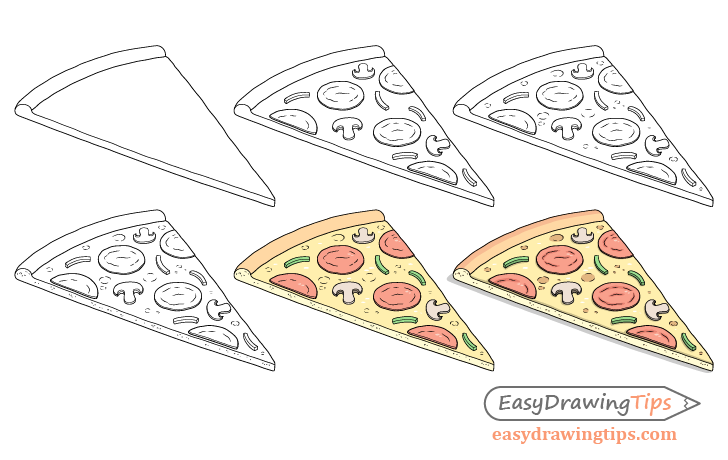
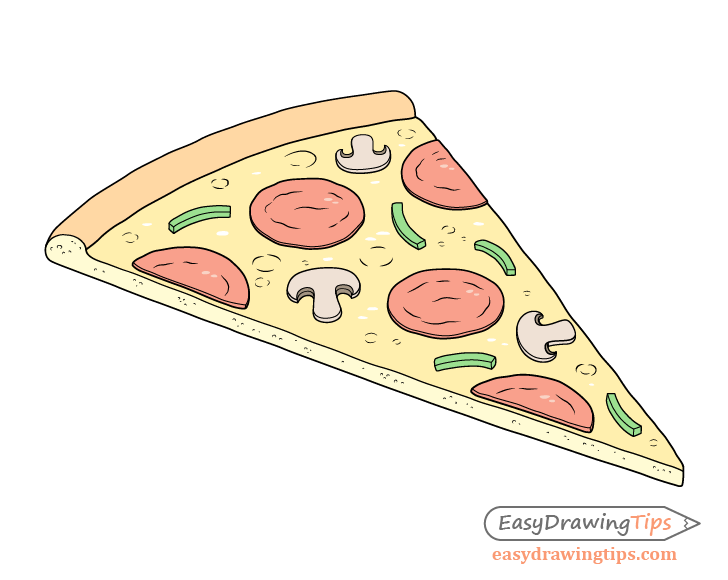
You can see a preview of the main drawing stages for the pizza slice in the image above. There are also additional examples included in some of the steps.
The tutorial is fairly simple and can be great for beginners and intermediate artists that want to practice their line drawing skills as well as applying some basic shading.
It’s recommended that you start the drawing in pencil and make light lines that are easy to erase in case you make a mistake. The lines in the examples are dark just so that they are easier to see. You can darken your lines before coloring.
Step 1 – Outline the Shape of the Pizza Slice
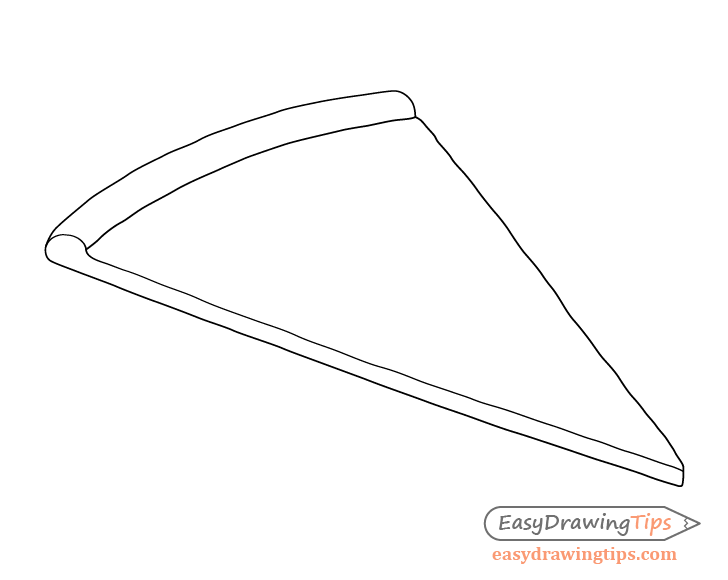
First outline the main shape of the slice. In this examples it’s drawn from a 3/4 view which is a good choice as it’s a fairly natural angle to view a pizza slice from. It will also allow you to show a good amount of detail in later steps.
Draw the slice similar to a triangle but with one side (the crust) slightly rounded. Define it with somewhat wavy lines to make things look more natural (pizza slices generally aren’t perfect). Due to perspective the far side of the slice in the background will appear smaller/shorter than the one in the foreground. Keep this in mind when drawing.
For more on perspective see:
Perspective Drawing Tutorial for Beginners
While this initial step is fairly simple it’s also very important because if you don’t get the correct shape at this stage the rest of your drawing will look off as well. Be sure that the slice looks right before you move on to the smaller parts of the pizza.
Step 2 – Draw the Toppings

Drawing a pizza is similar to making one. You can draw the toppings one set at a time. Start with the larger items, the pepperoni slices.
As the pizza is being viewed on an angle the slice will appear oval in shape with a few of them partially cut off at the sides.
Once you have all of the slices outlined add their edges to show their thickness. After that you can add some folds as pepperoni tends to warp when it’s baked. You can show the folds by adding several wavy lines inside each slice.
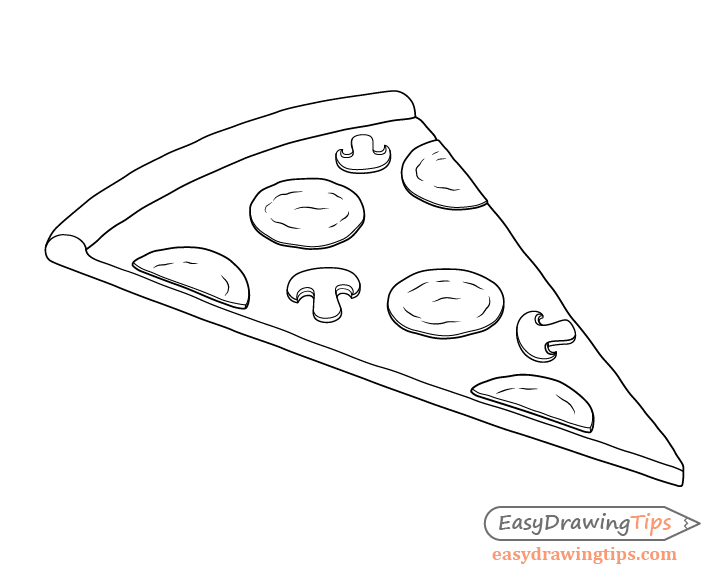
After the pepproni add the mushrooms. Similar to the pepperoni slices first outline their shapes and then add the edges to show their thickness. Again, keep in mind that these are drawn on an angle and in perspective.

Finally add the bell pepper slices. You can think of their shapes as little bent rectangles. Place them facing in different directions filling up the open spots on the surface of the slice.
Step 3 – Draw the Cheese Bubbles
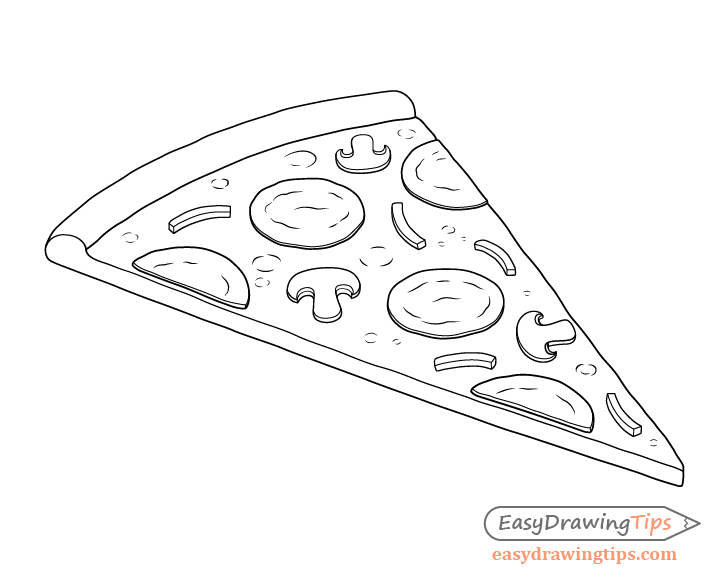
For the next set of detail add some cheese bubbles to the pizza slice which tend to pop up when it bakes. You can define these with broken up lines that create oval-like shapes.
Step 4 – Draw the Pores in the Dough

For the last set of details add the pores along the sides that are created as the pizza dough bakes. Draw these as little curves of different sizes. You can place a few on their own and others in small batches. Try and keep their positions somewhat random but at the same time try and space them out through the entire side.
Once done with this step you can darken your lines by tracing over them.
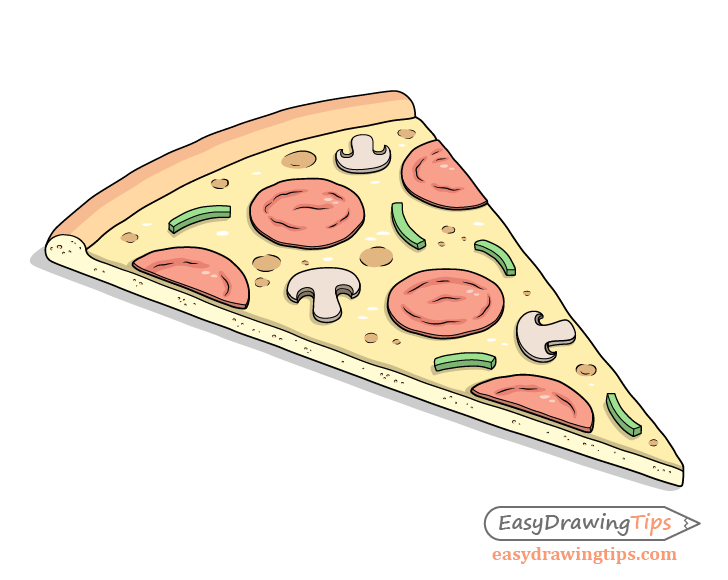
Step 5 – Add Color
When coloring leave a few light spots along the cheese and pepperoni. These will be little reflections from the shiny surfaces that area created when the pizza is baked the fat in the cheese/pepperoni comes up to the surface.
You can either outline these beforehand or simply create them as you color. Alternatively you can also use a white correction pen to add them in afterwards.
If you are drawing digitally you can simply add them on a new layer over top of the color.
Color the slice as follows:
- Cheese – yellow
- Crust – light orange/brown
- Side of Slice – light yellow
- Pepperoni – pink (with a bit of orange)
- Mushrooms – grey/brown with darker parts under the cap
- Peppers – green
Step 6 – Add Shading
Adding color the to the drawing definitely make’s it’s different parts stand out more. However, you may notice that the example in the previous step still looks a little plain. To fix this you can add some very basic shadows and darken a few parts of the pizza.
Before shading any object you should first consider the lighting setup that it’s in. For this particular drawing the light source will be position above and very slightly behind and to the right of the slice. This means that the lightest areas will generally be on top and the shadows will be cast slightly to the left and towards the viewer.
Add shadows in the following areas:
- Shade the non-upwards facing sides of all of the toppings (pepperoni, mushrooms and peppers) as well as the cheese.
- Add short shadows cast by all of the toppings towards their bottom/left sides.
- Add a shadow cast by the main slice towards the bottom/left.
- Darken the ares around the folds in the pepperoni.
- Add tiny shadows around the pores on the side of the slice.
Darken the following areas:
- Make the backwards facing side of the crust a darker orange/brown.
- Color the ares of the cheese where the bubbles were formed a light brown.
Once finished with the above you should be done with the drawing.
Conclusion
This tutorial shows how to create a simple but at the same time a nice looking and detailed drawing of a pizza slice. As already mentioned, drawing a pizza slice is somewhat similar to making a pizza. You will want to first establish the shape of the slice (kind of like making the pizza dough) and then place the different toppings on top of it one set at a time. You will then want to add the smaller details such as the cheese bubbles and the pores in the dough that are created as the pizza bakes.
If you like these types of simple step by step tutorials you can also try the following:
- How to Draw a Milk Carton Step by Step
- How to Draw a Carrot Step by Step
- How to Draw a Mushroom in 8 Steps
- How to Draw a Strawberry Step by Step