How to Draw a Milk Carton Step by Step
This tutorial shows how to draw a carton of milk in six steps. It provides easy to follow illustrated examples and quick drawing instructions.
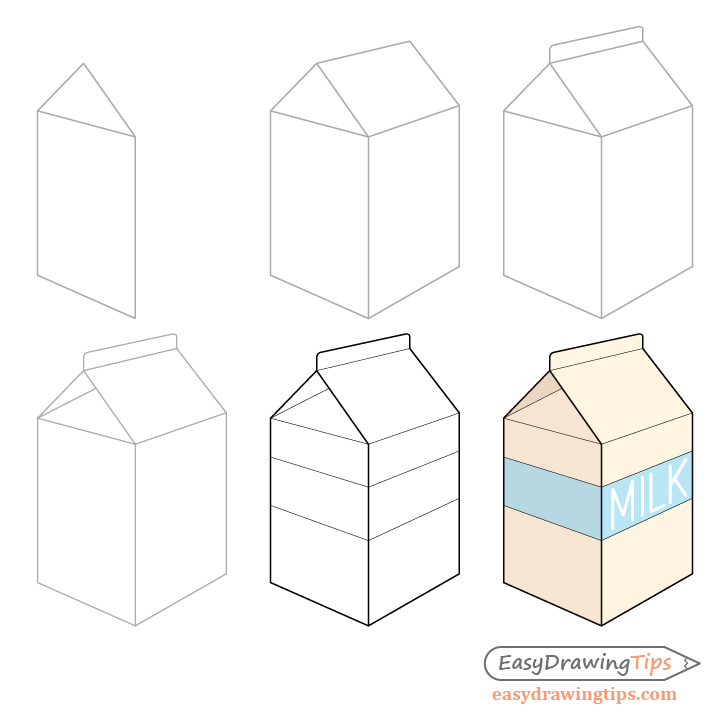
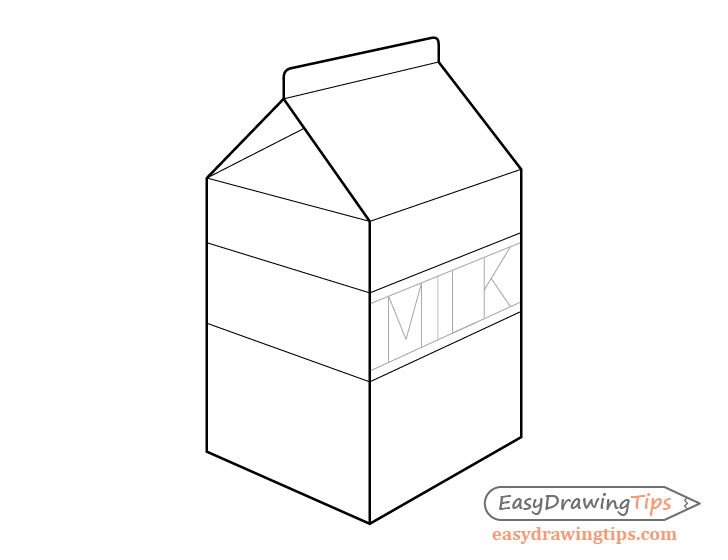
You can see a preview of the steps for drawing the milk carton in the picture above. In this case the it will be drawn in 3/4 view and in two point perspective.
This tutorial is fairly beginner friend and can be done simply by looking at the provided examples. However if you are not familiar with perspective drawing you may also want to look at:
Perspective Drawing Tutorial for Beginners
As you will need to draw a lot of straight lines you may wish to use a ruler to help you. However if you want to practice your drawing skills it’s better to try and make the lines without it.
Also be sure to start the drawing in pencil and to make light lines that you can easily erase if you make a mistake. You can darken them when you feel that everything looks right.
Step 1 – Draw the Front of the Milk Carton
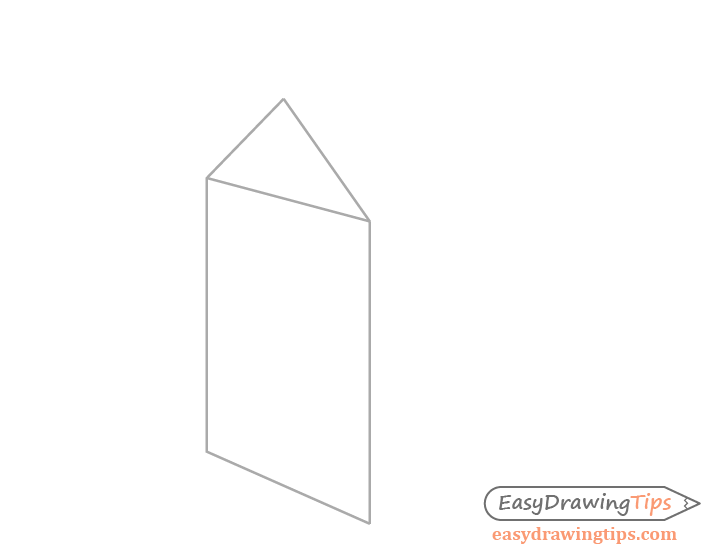
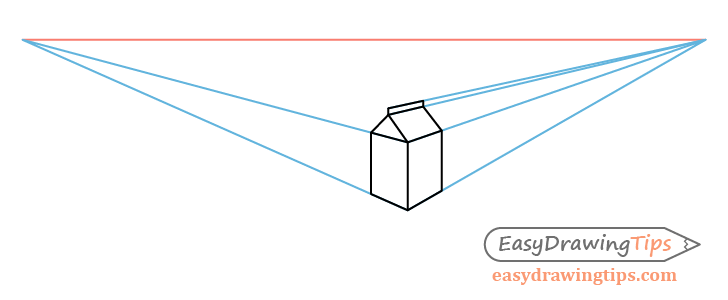
Begin by drawing the front of the carton. It’s bottom will be shaped like a rectangle and the top like a triangle. As the carton is being viewed on an angle draw the lines that define the top and bottom of the rectangle and the bottom of the triangle on an angle as well.
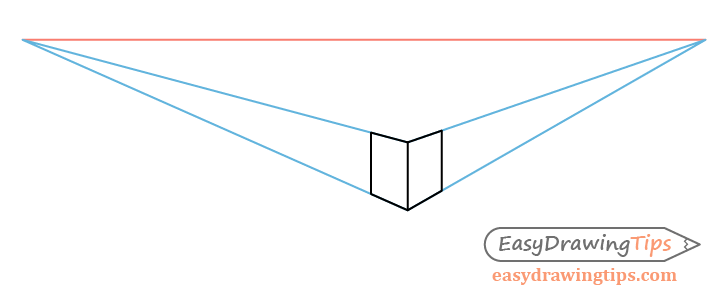
When drawing these lines make sure that they are NOT parallel but instead are angled slightly towards one another as they go into the background so that if you were to extend them they would eventually come together at the vanishing point.

You can see what this would like in the illustration above.
Please note that you do not need actually draw out these perspective lines (shown in blue). The example is simply meant to help you gain a better understanding of how perspective drawing is done.
Step 2 – Draw the Side

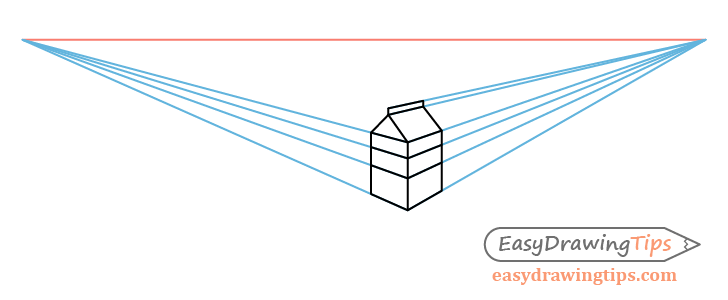
Draw the side of the carton again starting with a rectangle similar to the one drawing for the front.
The rectangle should again have angled lines for it’s top and bottom that will join if you extend them far back enough. The point (vanishing point) that they join at should be on the same level (the eye level/horizon line) as the one for the other rectangle.
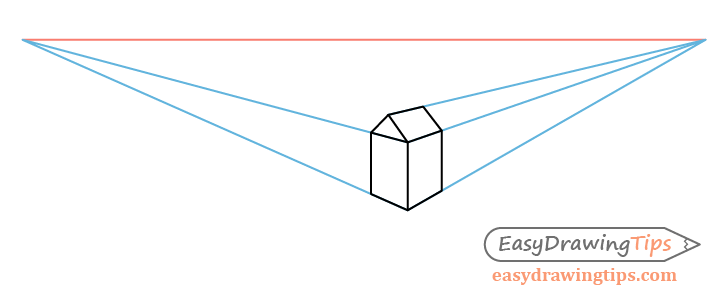
Next you will want to add the little “roof” like bit on top of the rectangle. The line that defines the top of this part should again be aimed towards the same vanishing point as the rectangle for that side of the carton.
Again you do not need to draw out the perspective lines the examples are just meant to show you what you should be aiming for.
Step 3 – Draw the Top
For this short step add the steal at the top of the carton.
Again this should be drawn in perspective so that it’s top line points towards the second vanishing point.
You can first draw the seal with just straight lines and then round off off it’s corners.
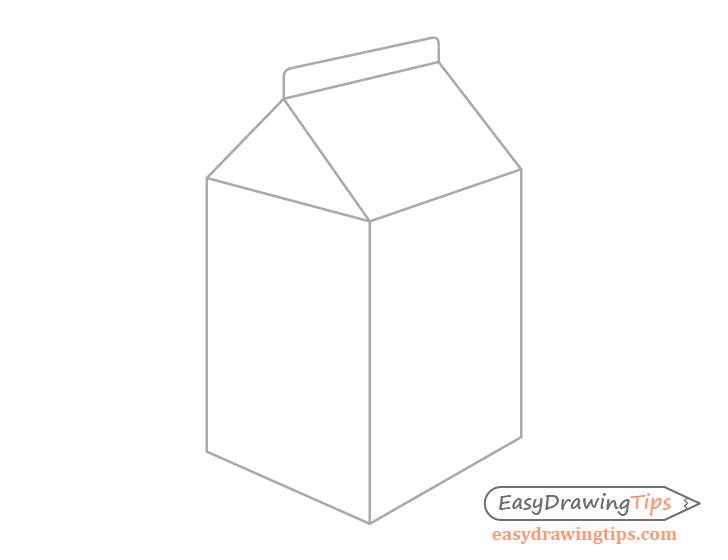
Step 4 – Draw the Fold

For this quick step simply add one line that will help show that the side of the carton is folded in at the top. And with that you should have a pretty much finished outline of the main shape of the milk carton.
Step 5 – Finish the Line Drawing

With the main shape of the carton defined you can add a little label area to it as shown in the above example.
You can estimate the angle of the lines that define the label by yet again aiming them towards their respective vanishing points.
Once done drawing the label you can trace over your drawing with darker lines as was mentioned at the start of the tutorial.
Step 6 – Color the Milk Carton
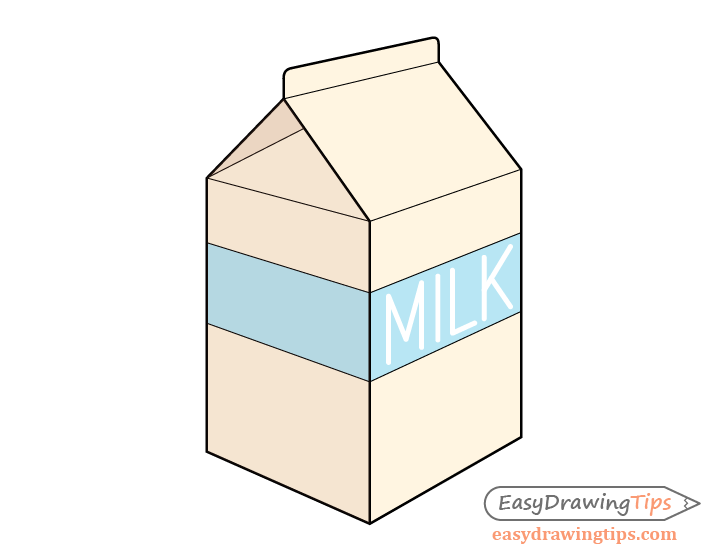
Finally you can shade an color the carton. You can also optionally add the word “milk” to it as shown in the example
To add the text first project a couple more lines to help you space the letters from the edges of the label. Draw these lines very lightly. The example lines are darker just so that it’s easier for you to see. Also try and draw the lines where they again obey the perspective rules and are aimed at the second vanishing point.
Once done you can write the text in between them (again in very light pencil lines). These will then act as guides that you can color around to create the white text of the word “milk”. Also be sure to try and keep the thickness of the letters fairly even throughout as you color around them.
Please note that the above only applies if you are drawing on paper. If drawing digitally you can simply add the letters over top of the label color.
For the actual colors you can make the carton a light yellow/brown and the label blue.
To make the carton look a little more three dimensional you can also add some basic shading. In the example the light will be coming from the upper right of the drawing so the side of the carton will be shaded slightly darker than the front. You can also shade the upper area of the part that is folded in slightly darker than the rest as in this type of a lighting setup less light will reach there.
Once done with the shading you should be pretty much finished with the drawing.
Conclusion
This fairly easy milk carton tutorial can be great practise for beginners. It can help you practise the basics of perspective drawing and shading as well as simply drawing long straight line.
Even a simple object when drawing correctly can look quite nice.
For more similar tutorial also see:
- How to Draw a Pizza Slice in 6 Steps
- How to Draw an Eagle Head Step by Step
- How to Draw a Mushroom Step by Step
- How to Draw a Shoe in Nine Steps
- How to Draw a Microphone Step by Step
- How to Draw Cylinders in Perspective Tutorial


