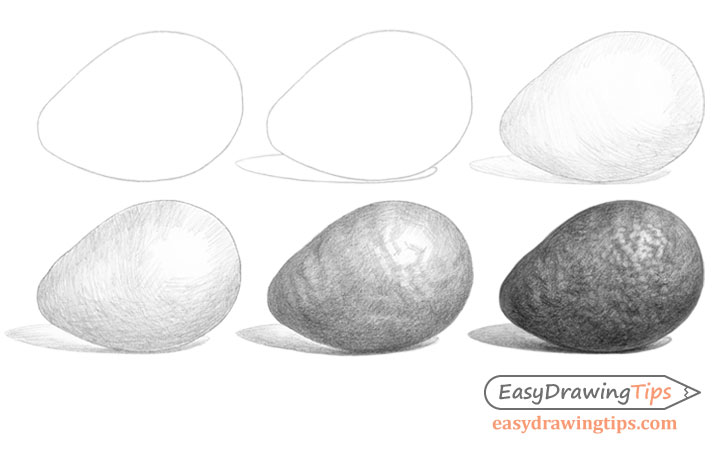
How to Draw an Avocado Step by Step
This tutorial shows how to draw an avocado in six steps. It includes detailed line drawing and pencil shading examples with quick explanations.
Please note that while not absolutely necessary it can be very helpful to have a kneaded eraser (one you can mold into different shapes) for this tutorial.
Step 1 – Draw an Outline of the Avocado

Start with a simple light outline drawing of the avocado. Generally they tend to be shaped somewhat similar to eggs with one end being pointier than the other.
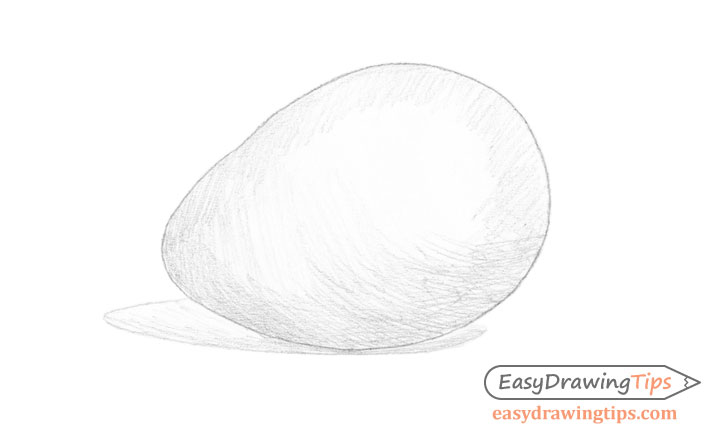
Step 2 – Draw an Outline of the Shadow

To help with the shading also make a light outline of the shadow the avocado casts on the surface it’s sitting on.
In this case the light will be coming from the upper right side of the drawing and therefore the shadow will be to the left and slightly behind the object.
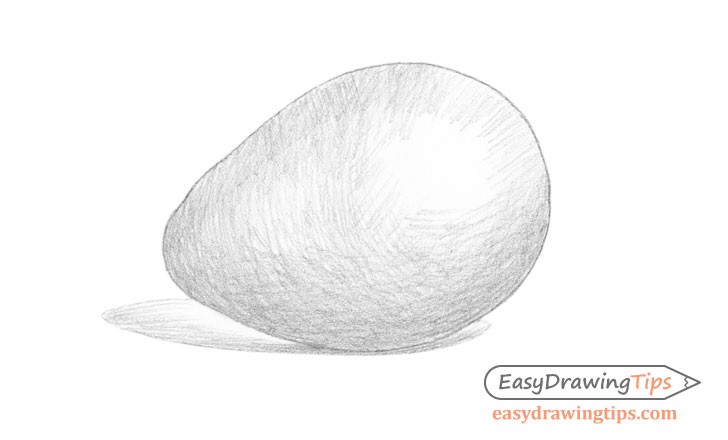
Step 3 – Begin Shading
Begin the shading by first making one directional strokes that wrap around the shape of the avocado (as shown in the example). These will act as a guide for applying additional layers of shading.
You can also apply a set of one directional strokes to the shadow.
Be sure to leave a good amount of distance between each stroke to keep them visible.
Step 4 – Refine the Shading
Over top of the initial set apply more strokes and try and make them on a slight angle to the previous set creating a crosshatch. Keep the highlight area white.
For more on different types of shading strokes see:
Shading Techniques and Stroke Types Drawing Tutorial
Try and make the strokes in the “in shadow” areas (facing away from the light) slightly darker. In this case the dark areas will be along the left and bottom side of the avocado.
Step 5 – Begin Darkening the Shading
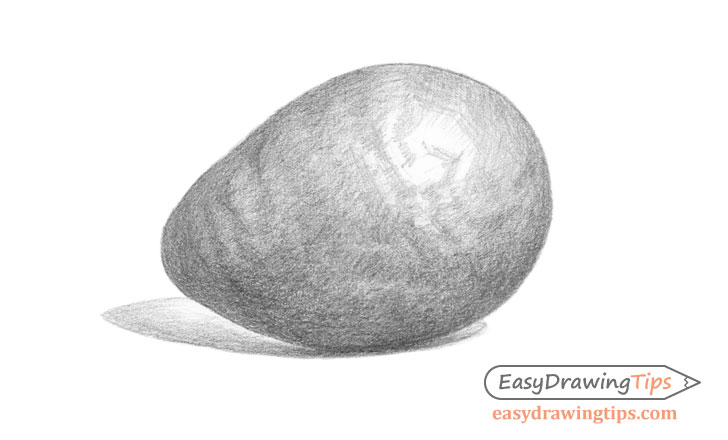
After you have a basic crosshatch over the entire avocado you can begin darkening the drawing and creating the avocado’s uneven texture.
Do this by applying patches of darker strokes while keeping some light areas in between them. These patches should be darker on the shaded side and lighter on the bright side.
Step 6 – Finish the Drawing
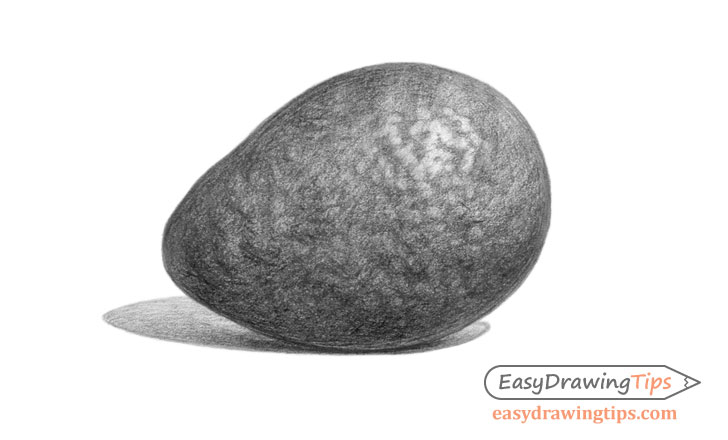
Finally darken the drawing even further by applying very small dark patches along the surface of the avocado. Again try and for the most part keep these darker in the shaded areas.
As suggested earlier at this pointy a kneaded eraser can be very handy as well. You can mold the eraser into having a pointy tip and then sort of “dip” it around you drawing to pick up some of the shading creating patches of lighter areas. These can help give the avocado it’s bumpy yet shiny looking texture.
Conclusion
While the shape of an avocado is fairly basic properly shading the texture of one can be somewhat tricky. Using a kneaded eraser as suggested in this tutorial can help but in general depending on your artistic skills it can take a bit of time to get something that looks good.
For more similar tutorial also see:
- How to Draw an Eggplant Step by Step
- How to Draw Garlic Step by Step Tutorial
- How to Draw a Realistic Orange Step by Step
- How to Draw Nuts Step by Step


