How to Draw a Shopping Bag Step by Step
This tutorial shows how to draw a paper shopping bag in 3/4 view in eight steps. It also shows how to apply some basic color/shading.
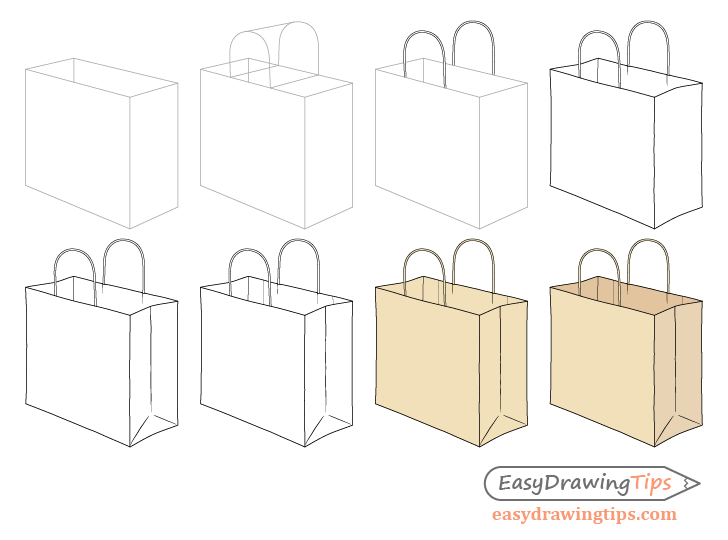
The tutorial lets you apply some basic knowledge of perspective drawing to a real object. It also shows how you can use some simple shading (no gradients) to make the drawing appear more three dimensional.
You can see a preview of the drawing stages in the image above. It’s recommended that you start the tutorial using a regular pencil. You can use colored pencils or paints for the coloring/shading.
For an explanations of perspective drawing see:
Perspective Drawing Tutorial for Beginners
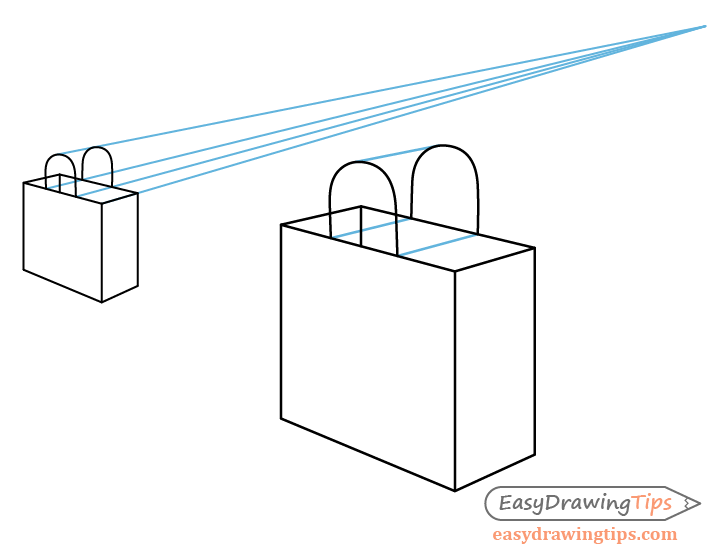
Step 1 – Make a Perspective Drawing of the Bag
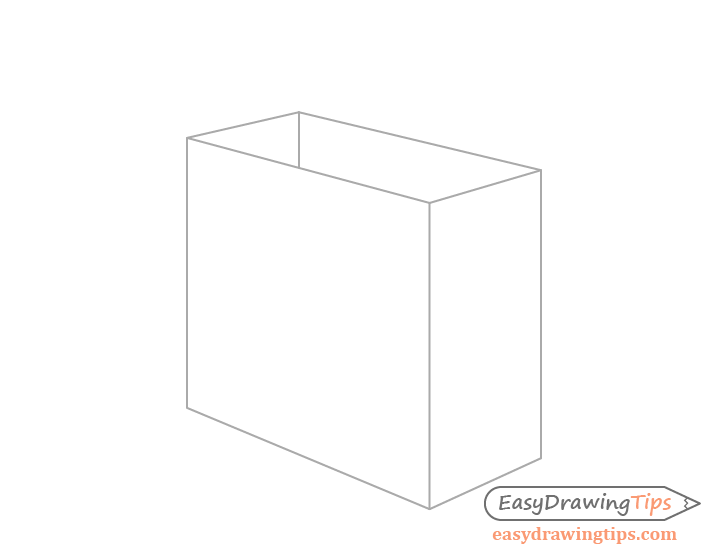
Begin by drawing a rectangular prism with an open top in two point perspective. This will then be built upon the create the main body of the bag.
You can see the drawing steps as well the position of the vanishing points and perspective lines for the prism above.
First draw the side, next the front and finally the top.
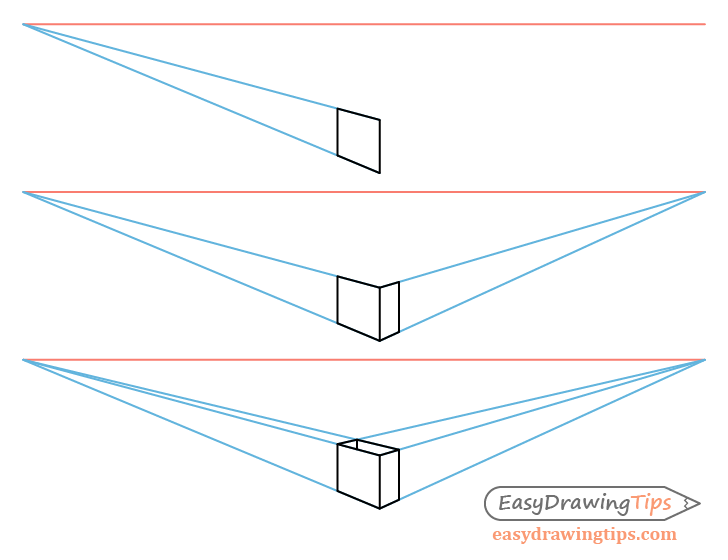
Generally vanishing points will not fit on the page and you can often simply estimate the perspective of an object by looking at it. If however you do want to draw the perspective lines you can make a small thumbnail drawing to then use as a reference for the larger one as in the example.
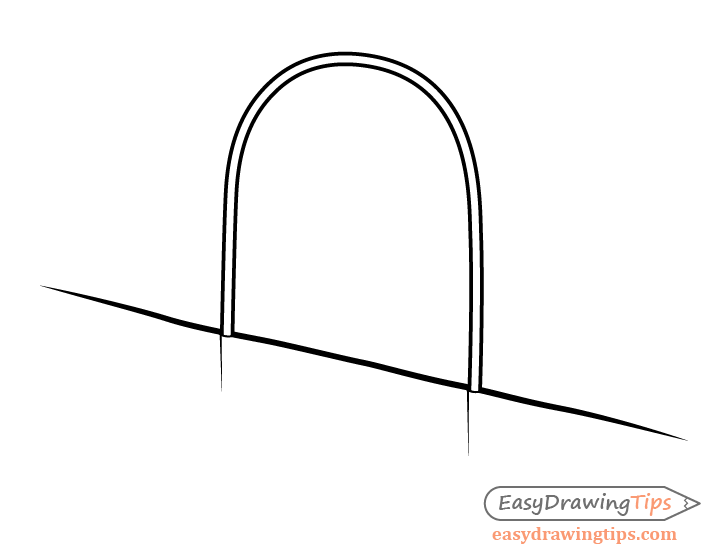
Step 2 – Draw the Handle Lines
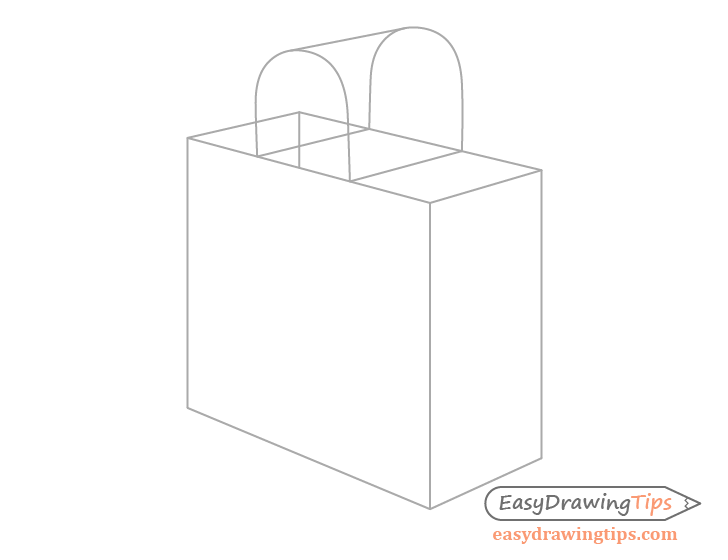
Going up from the prism make an outline drawing of the handles. For this step you can just define each with a single line. You also don’t need to be overly precise with the curves of their shapes as these types of handles tend to bend and warp.
In this next example yo u can see how perspective lines can be used to position the handles. Again, if you don’t want to make a thumbnail you can draw a little bit of them in between the two handles.
You can again erase these lines after finishing this step.
Step 3 – Outline the Handles
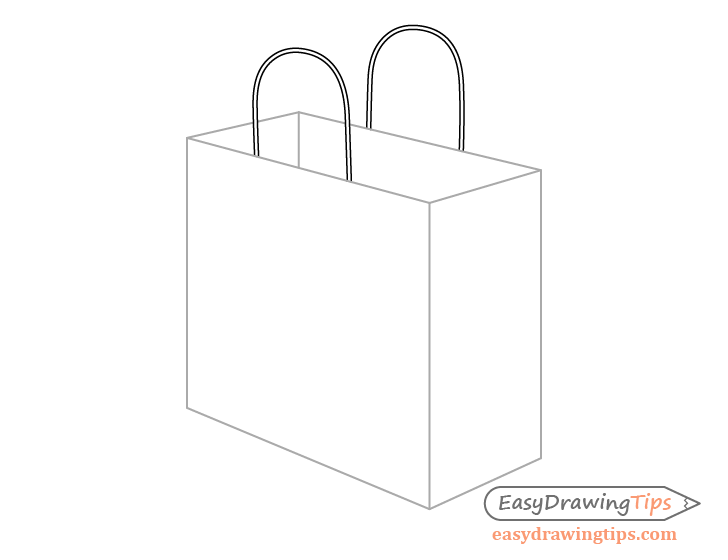
For this simple stage of the drawing add the inner outline of the handles to set their thickness. Try and do it in a way where they have a consistent width through their entire length.
Step 4 – Draw the Detailed Shape of the Bag
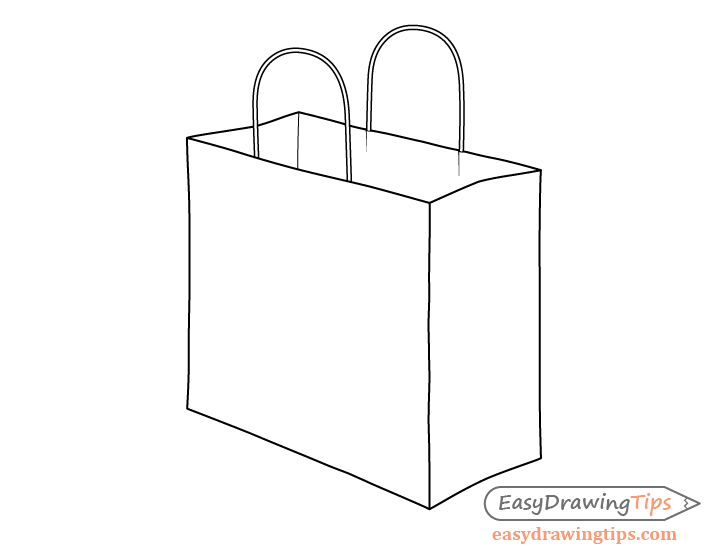
Outline the actual shape of the bag based on the prism. Make the lines that define it slightly wavy/and uneven to give a sense that the material of the bag is slightly bent/warped (as is common with paper bags of this type).
You can also draw a pair of little bumps going down the inner side of the bag from the farther handle. These will help show that there is another layer of paper glued over top of the handle.
Step 5 – Draw the Folds

Draw the folds on the front side of the bag as shown in the example. Try and make the lines that define them slightly wavy as well to again give a sense that the bag is made of paper.
Step 6 – Add the Minor Details & Finish the Line Drawing

Finally you can draw a pair of vertical lines on the inner side of the gag to show the piece of paper blued over top the handle that helps hold it in place.
Once done with this step you should have a basic line drawing of the bag.
Step 7 – Add Color
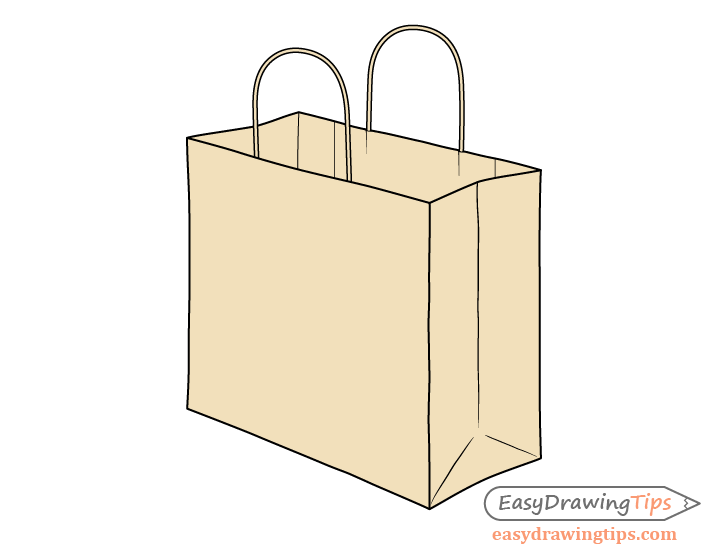
To color the shopping bag you can make it a fairly light yellow brown. Fill in the entire object with this color.
If you prefer you can also simply fill in the entire bag with a regular pencil if you prefer a black and white drawing instead.
Step 8 – Add Shading

As you have probably noticed the bag without any shading in the previous step looks a little plain and flat. You can fix this by giving it some very simple shading.
In this case the light will be coming from the left side of the drawing so shade the front of the bag (side with the folds) slightly darker and make the inner part even darker (less light will reach there).
Once done shading you should hopefully have a drawing similar to the example.
Conclusion
Some basic knowledge of perspective drawing can help you create better looking art that is properly structured. Combined with some basic color/shading you can have an end result that was not very difficult to create but still looks quite nice.
For more similar tutorials also see the following:
- How to Draw a Milk Carton Step by Step
- How to Draw a Strawberry Step by Step
- How to Draw a Phone Step by Step
- How to Draw a Peach Step by Step Tutorial
- How to Draw a Microphone Step by Step
- How to Draw a Pizza Slice in 6 Steps