How to Draw a Microphone Step by Step
This tutorial shows how to draw a microphone in eight steps. The main focus is on line drawing but there is also some basic shading applied in the last step.
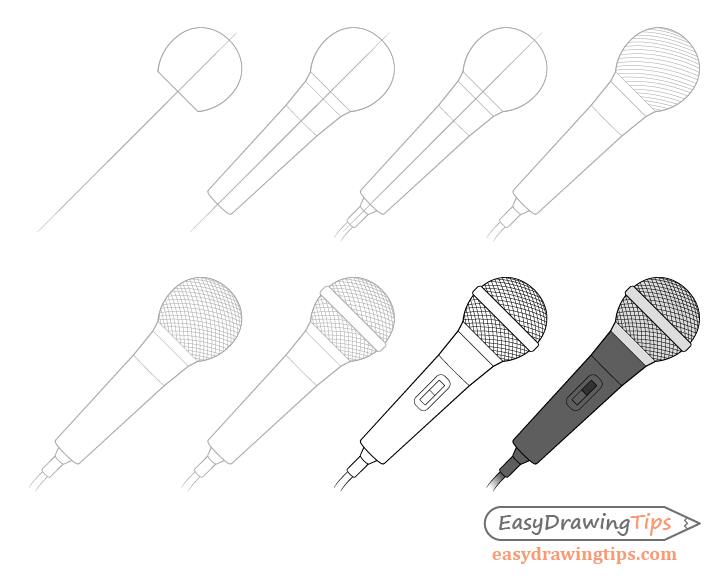
In this case the microphone will be somewhat simplified. You can see the drawing stages for it shown in the preview image above.
Start the tutorial in pencil and make light as you will need to erase small parts of the drawing in some of the steps. You can darken them before you shade (once you feel that things look good). You can use a regular pencil for the shading as well.
Step 1 – Outline the Head of the Microphone

Begin by making a straight at the angle that you wish to draw the microphone at. The purpose of this line is to ac as a guide that helps make sure that the microphone drawing does not get bent or skewed in one direction. It can also help you see if both halves of the drawing are symmetrical.
At the top of the central line add the head of the microphone. It will be somewhat similar to a circle but with a slightly flattened top and a cut-0ff bottom.
In this case it’s bottom area will be close to the level so it’s curve will just look like a straight line.
Step 2 – Draw the Handle
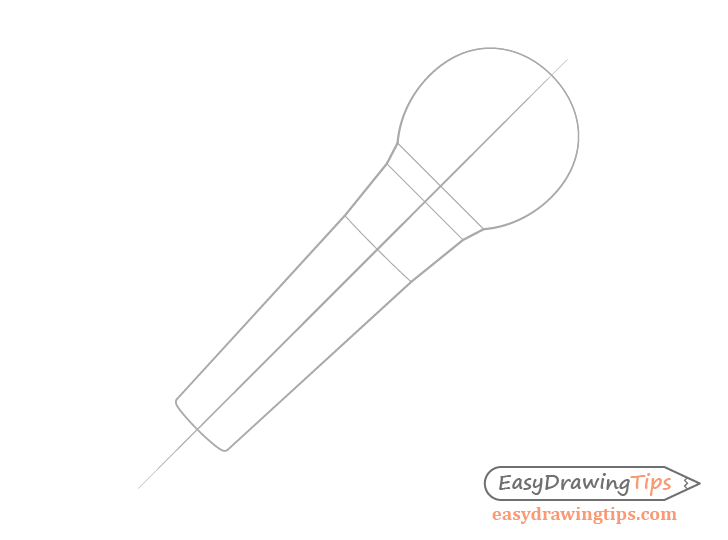
Draw the handle made up of the sections shown in the example. Just like the bottom of the head you can define the bottom of the first section with a straight line. Draw the bottom of the next section with a barely noticeable curve and the bottom of the handle with a fairly noticeable one.
For an explanation of why the drawing is structured in this way see the “Top vs Bottom Comparison” section of the following tutorial:
How to Draw Cylinders in Perspective Tutorial
Step 3 – Draw the Wire
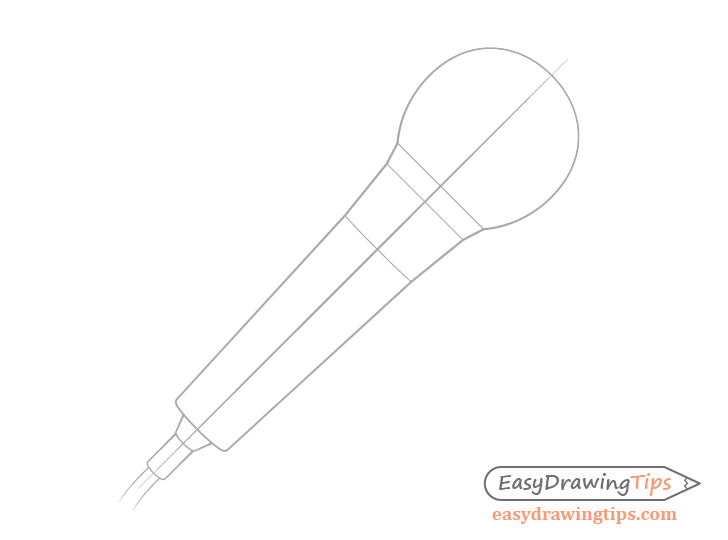
At the bottom of the microphone show a little bit of the cord as well as the part that attaches it to the handle.
Once done you should have a basic outline drawing of the object. If you feel that things look right you can erase the straight line added in step one and move on to the next step.
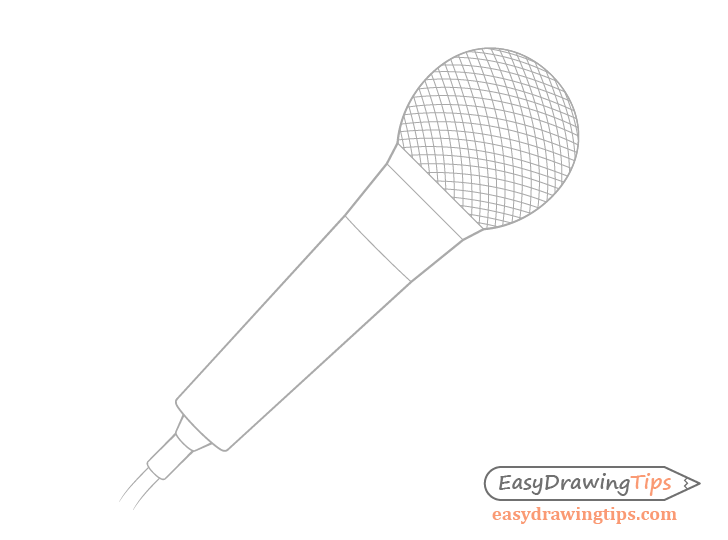
Step 4 – Draw the First Set of the Mesh Stripes
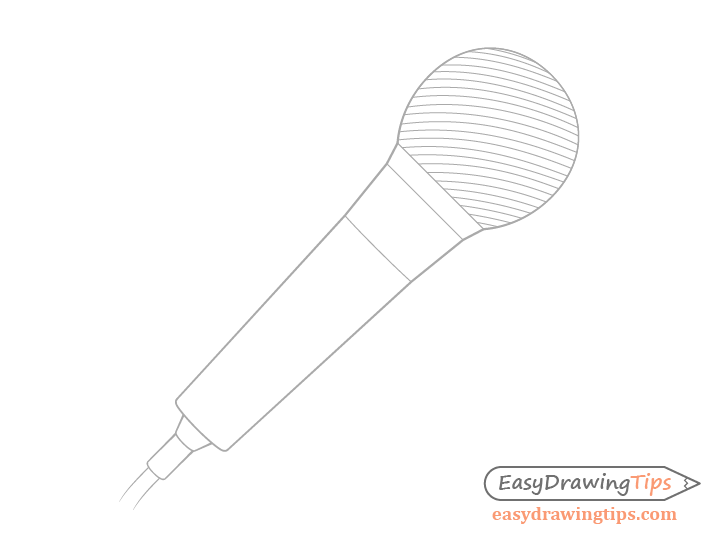
With the main shape of the microphone done you can give it some smaller details. Begin with the mesh.
First draw a set of curved lines running in one direction across the surface of the head.
Step 5 – Draw the Second Set of Mesh Stripes
Add a second set of stripes overlapping the first one as shown in the example. Try to keep the curves as well as the spacing between these similar to those in the previous step.
Step 6 – Draw the Head Ring
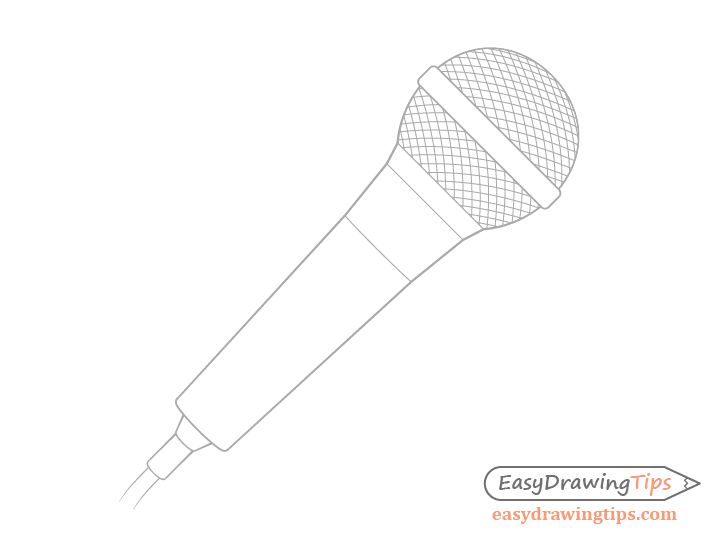
Running through the middle of the head add a ring that microphones usually have in that area. You can erase part of the mesh before doing so.
Again, as the ring is fairly close to the “eye level” you can pretty much draw this part with straight lines for it’s top and bottom.
Step 7 – Draw the Switch & Finish the Line Drawing
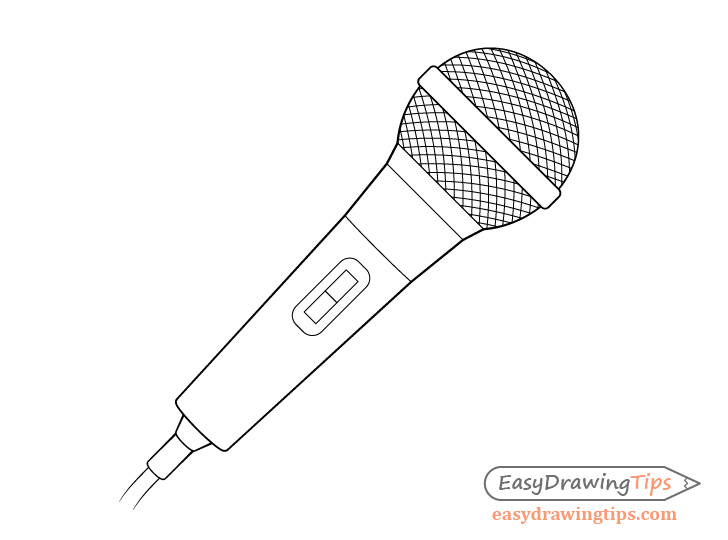
For the last little details you can draw an on/off switch in the middle of the handle. Simply refer to the example for it’s design.
Once the switch is done you can trace over your drawing with a darker pencil stroke. If you are feeling confident in your tracing ability you can also use a thin black marker.
Step 8 – Apply Some Shading

For some very basic shading make the head of the microphone a alight grey with the handle a much darker grey. Color the upper part of the switch a very dark grey to make it look like there is an indent there that the slider can go into.
As the wire “cuts off” at the bottom give it a bit of a gradient where the grey gets lighter as it goes down. This will help create a fade that helps show that the wire is not actually cut off but simply not drawn all the way down.
Conclusion
This tutorial shows how to create a fairly simple but effective drawing. In the example the microphone is drawn without too many small details and only very basic shading is applied. However, in the end the result still look quite nice and very much like the object it’s supposed to be.
For more similar tutorials also see:
- How to Draw a Milk Carton Step by Step
- How to Draw a Shopping Bag Step by Step
- How to Draw a Pizza Slice in 6 Steps
- How to Draw a Carrot Step by Step
- How to Draw a Hammer in 10 Steps


