How to Draw an Eye Step by Step
This tutorial shows an easy way to draw a realistic looking eye in nine steps. It includes detailed illustrated examples and provides simple explanations to go along with them.
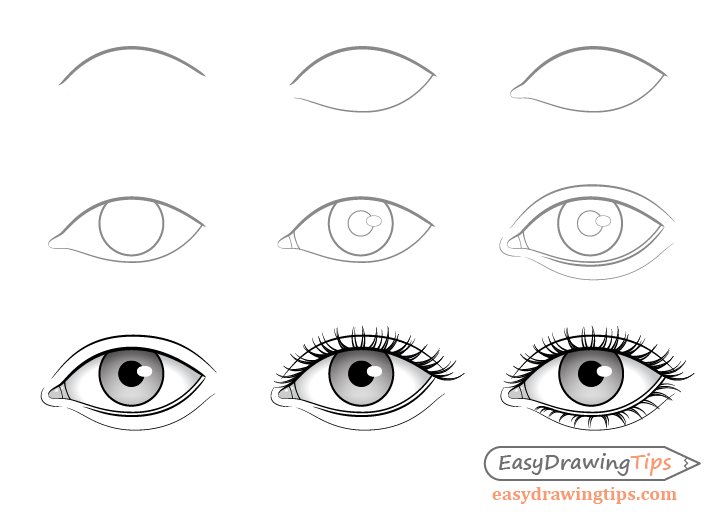
A preview of the different drawing stages for the eye is shown in the image above.
The tutorial can be particularly good for beginners as it presents an example with very basic line drawing and minimal shading.
It’s recommended that you follow along using a pencil and make light lines when positioning the various parts of the eye. You can darken them later on once you are happy with the way things are placed.
Step 1 – Draw the Upper Outline of the Eye
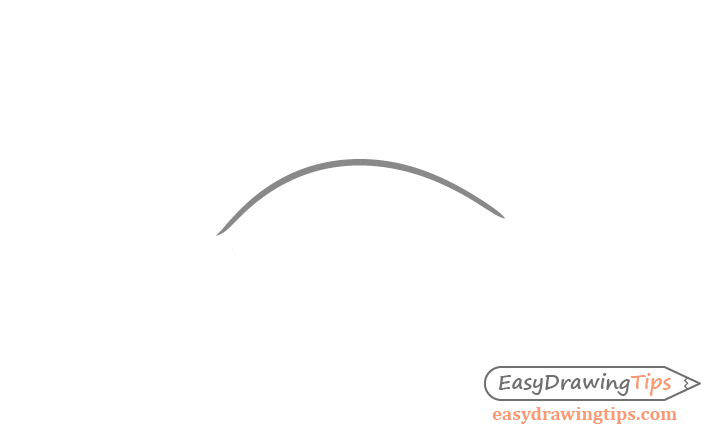
Begin with a simple curved line for the upper part of the eye as shown in the example.
Step 2 – Draw the Lower Outline

Define the bottom part of the eye with a second solid line but leave a little open area near it’s inner tip for the tear duct.
Step 3 – Draw the Tear Duct Area
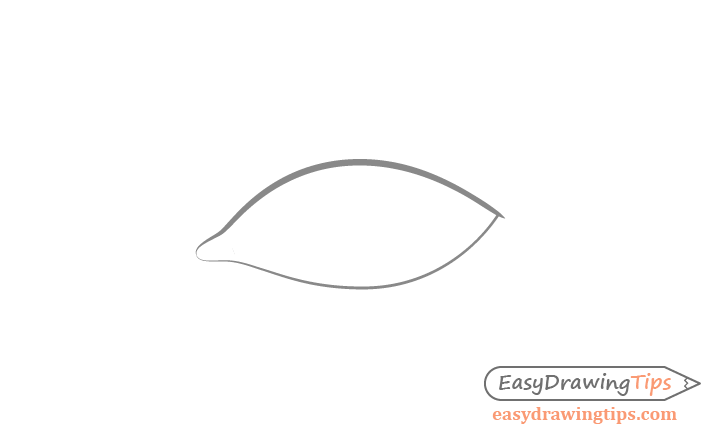
Draw the tear duct to close the the little gap between the two lines from the previous step so that you have one continuous outline.
Step 4 – Draw the Iris
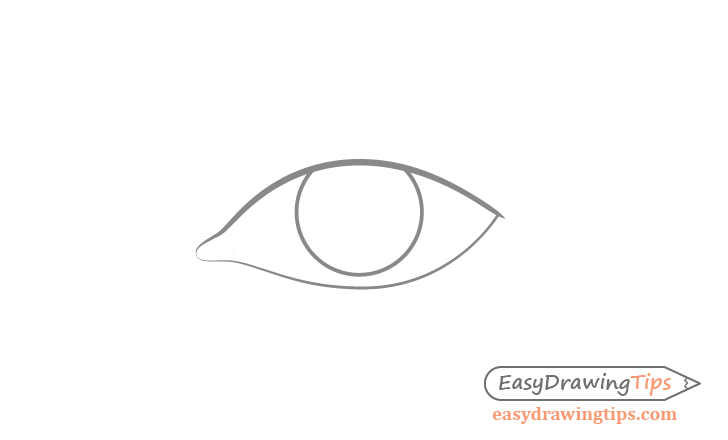
Inside the outline of the eye add the iris. Make it round in shape with it’s upper slightly covered by the eyelid.
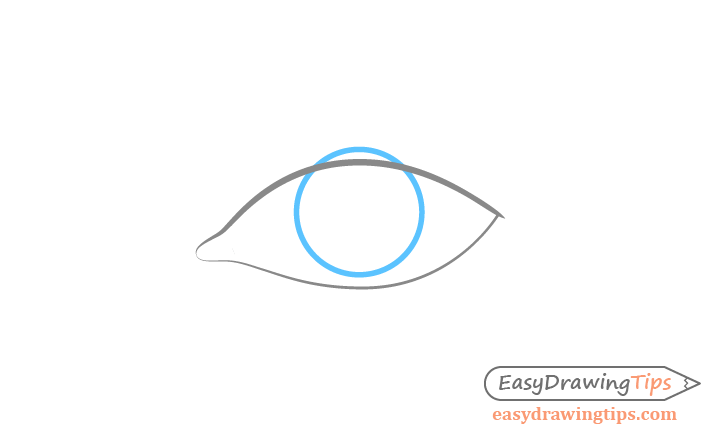
To make it easier to see if the iris is actually round you can first draw out it’s entire circle and then erase the part behind the eyelid.
Step 5 – Draw the Pupil & Other Smaller Details
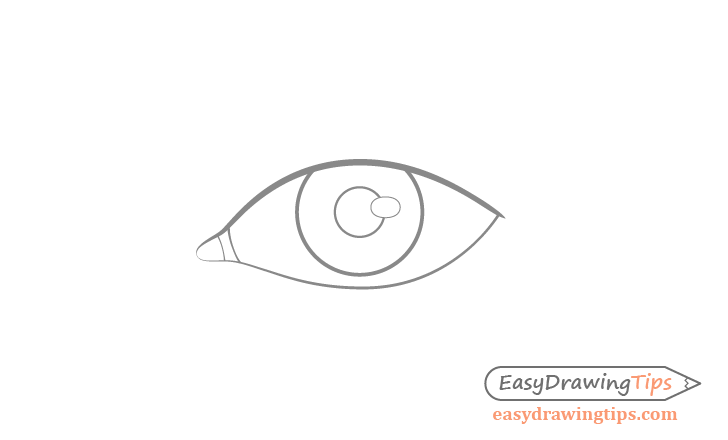
Inside the iris add the pupil overlapped by a small oval shaped highlight (light reflecting from the eye). Be sure to keep the outline of the highlight particularly light as you will want it to blend into the shading later on. Afterwards add the details of the tear duct.
Similar to the iris you can first draw the entire circle of the pupil and then erase the little bit overlapped by the highlights once you add that in.
Step 6 – Draw the Eyelids

Above the eye add the curve to define the upper part of the top eyelid. Right below the eye draw another curve to show the edge of the bottom eyelid with another curve below that to show it’s bottom.
Once done with the above you can darken your lines if you feel that everything looks right. However, do not darken the outline of the highlight.
Step 7 – Apply Shading
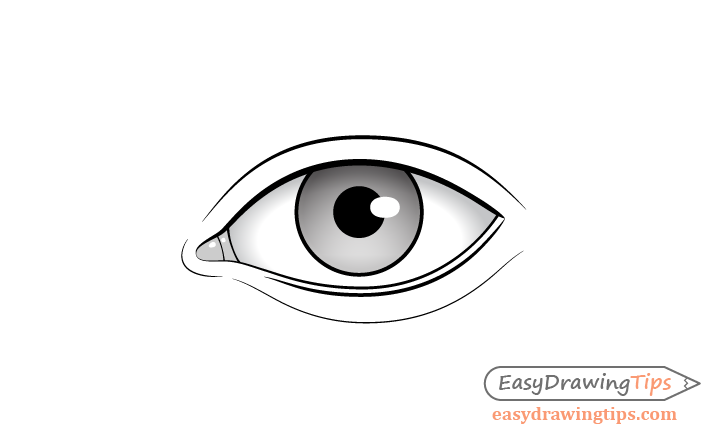
To keep things simple but at the same time to make the drawing much nicer you can add some bare minimum shading.
First fill in the pupils with dark solid shading (excluding the highlight). Next, shade the iris with a smooth gradient that is darker towards the edges and lighter towards the center. Over top of this add a second layer of shading with a gradient that gets lighter as it goes down.

You can see what you should be aiming for the in the illustration above.
Shade the tear duct area a solid grey but leave a couple of highlights as shown in the example. You can either outline them beforehand or simple create the as you go.
Finally add some light shading to the upper/outer part of the white of the eye that again is darker towards the edges and lighter towards the center.
Step 8 – Draw the Upper Eyelashes
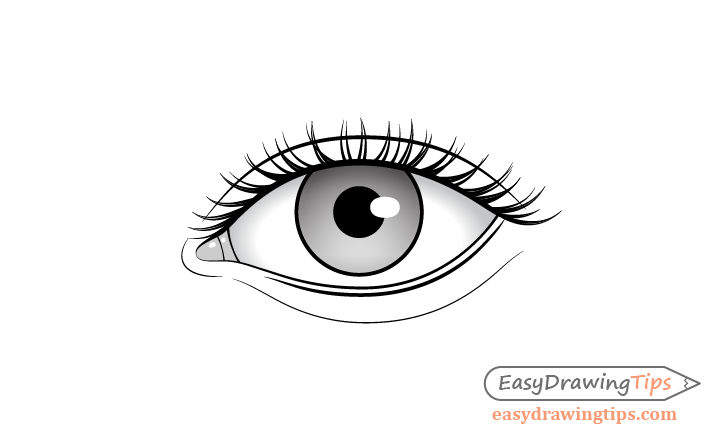
Adding the eyelashes can be a little bit tricky but should still not be too difficult. If drawing using a pencil (as is recommended) you will want to press harder on it towards the base of each lash and pull it away from the paper near the tip. This will help you get lashes that are thicker at the base and narrower as they go out.
Try and keep the directions/curves of each lash somewhat different from one another so that they look more natural (or else it may look like a doll’s eye).
Be sure to draw the lashes curved (not straight) and to have a fairly even distribution of them that fans out along the eyelid.
Step 9 – Draw the Lower Eyelashes & Finish the Eye Drawing
Draw the lashes for the bottom eyelid in pretty much the same way as for the top one but make them shorter (especially towards the inner tip of the ye).
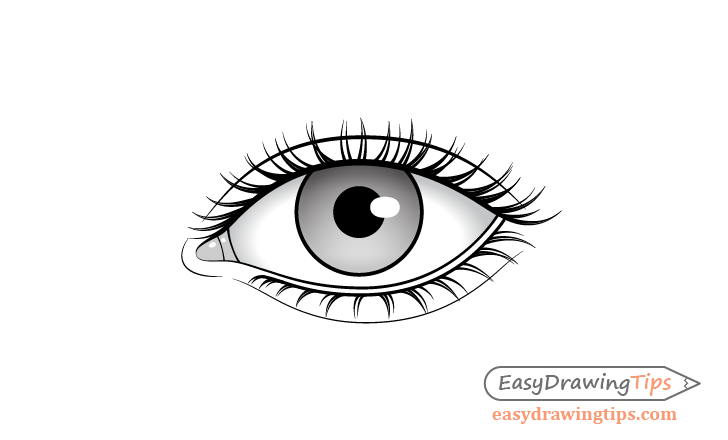
Once done with this step you should have a finished drawing of the eye.
Conclusion
Drawing a realistic eye can be very difficult, especially if you are a beginner. To help this tutorial provides a detailed breakdown of the drawing process with pretty much just the bare minimum lines and shading. Hopefully you’ve found it easy to understand and follow along.
If you enjoyed this tutorial and would like to try some similar once also see the following:
- How to Draw a Smile Step by Step
- How to Draw Eye Expressions Step by Step
- How to Draw a Shopping Bag Step by Step
- How to Draw a Young Girl in 12 Steps (With Proportions)
- How to Draw the Female Body Step by Step


