How to Draw a Hand Step by Step
This tutorial explains how to draw and shade a hand by providing detailed illustrations along with guidelines for estimating the various proportions of the hand such as the fingers and thumb.

The hand is one of the most difficult body parts to draw so approaching the drawing process in the right way is essential.
Step 1 – Hand Proportions Sketch
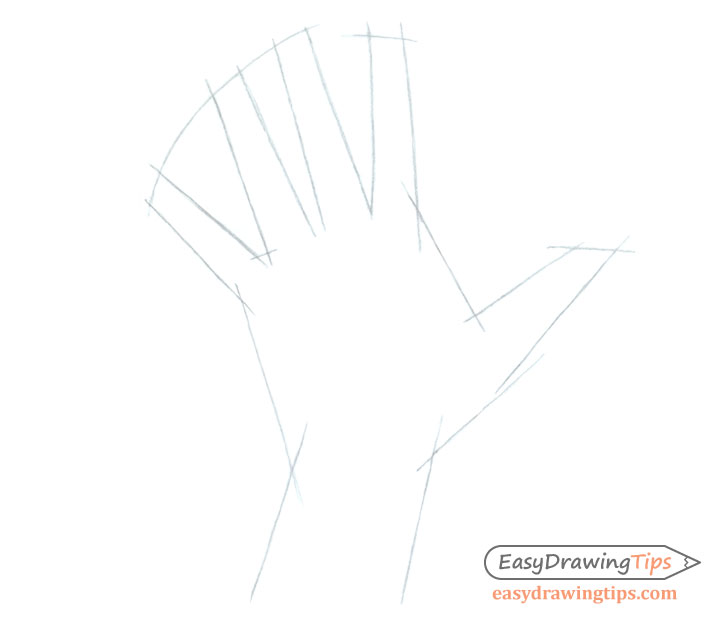
Start your drawing by first quickly sketching out the overall shape of the hand.
Be sure to compare each part of the hand such as the palm, thumb and fingers to one another and try to correctly size and proportions them in relation to one other.
Keep in mind that this step is still a rough estimate and you can refine your drawing in the following steps.
Step 2 – Hand Outline Drawing
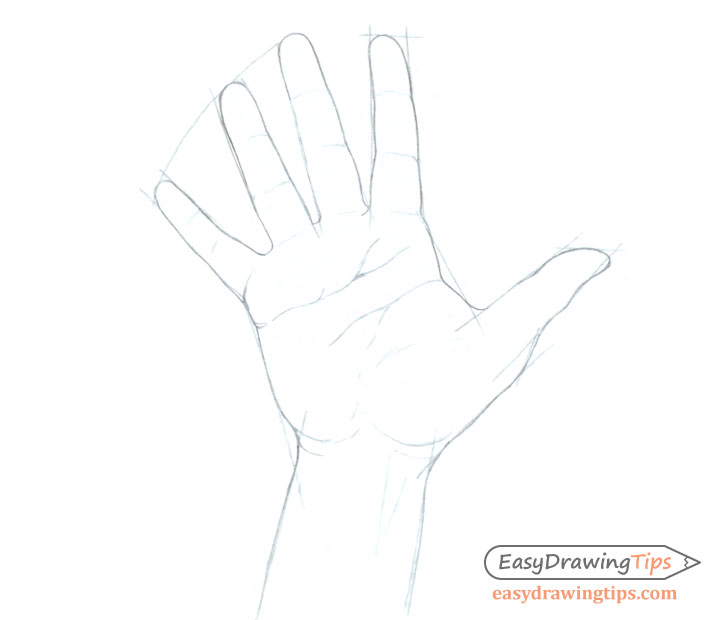
After you have your initial proportions sketch you can start refining it into an outline drawing of the hand. Be sure to tweak any proportions that seem out of place. You can estimate these based on the guidelines below.
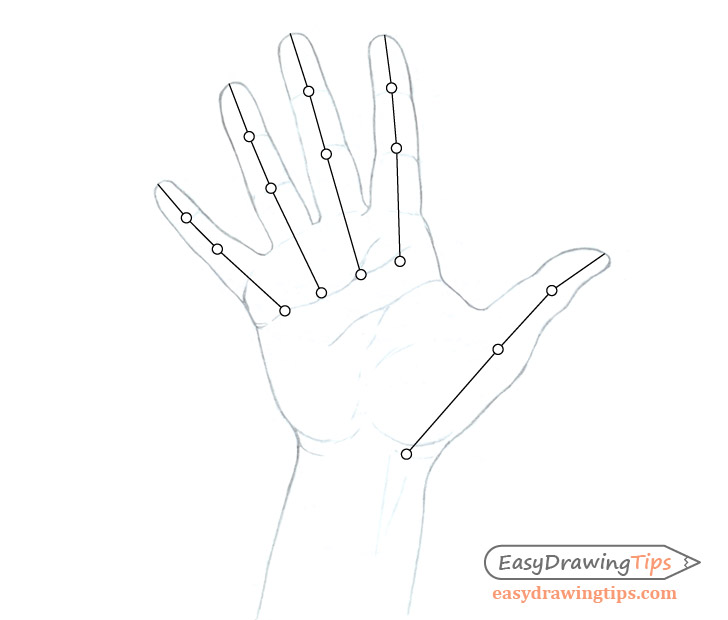
Above you can see a rough positioning of the joints of the fingers and thumb. Having an idea of where these are located can be very helpful when drawing. Note thing to note that may not be obvious to new artist sis that the fingers bend from the knuckles that are about a quarter way down into the actual palm and not from the edge of the palm of the hand.
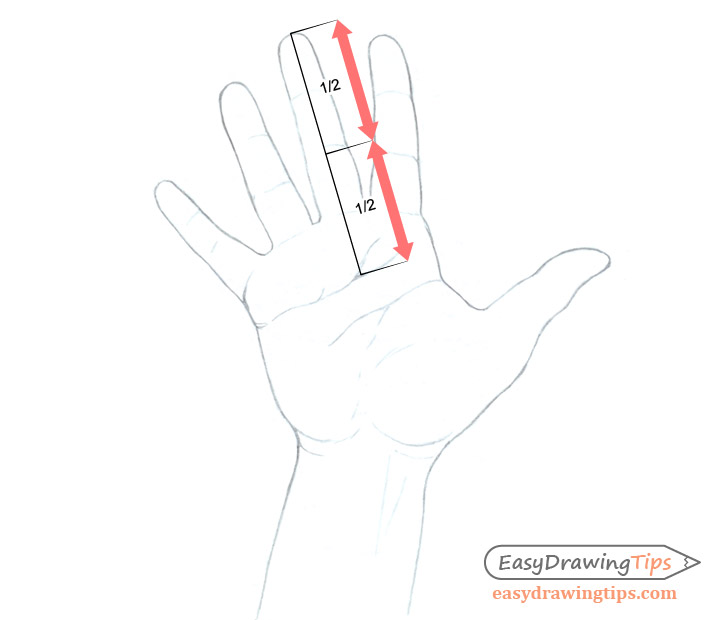
The distance from the knuckles to the first joint of the finger is about the same as the distance from that joint to the tip.
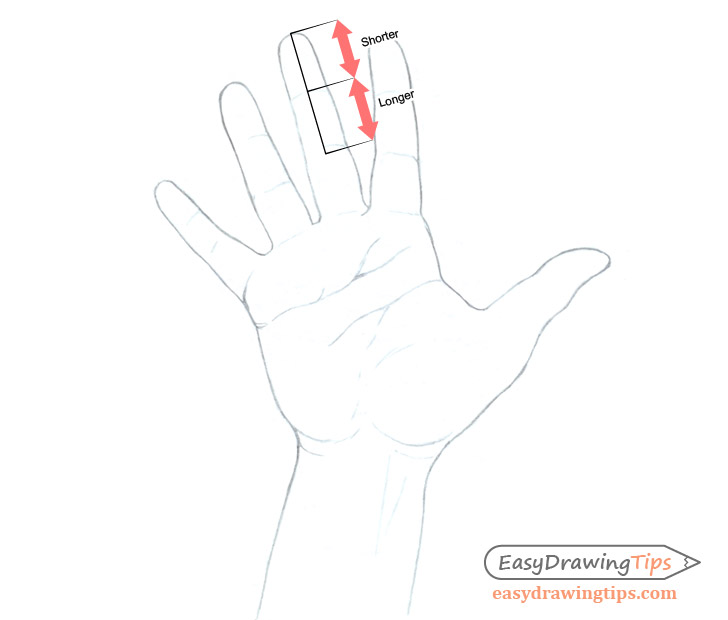
The distance from the tip of the fingers to the join is shorter then the distance from that join to the next.
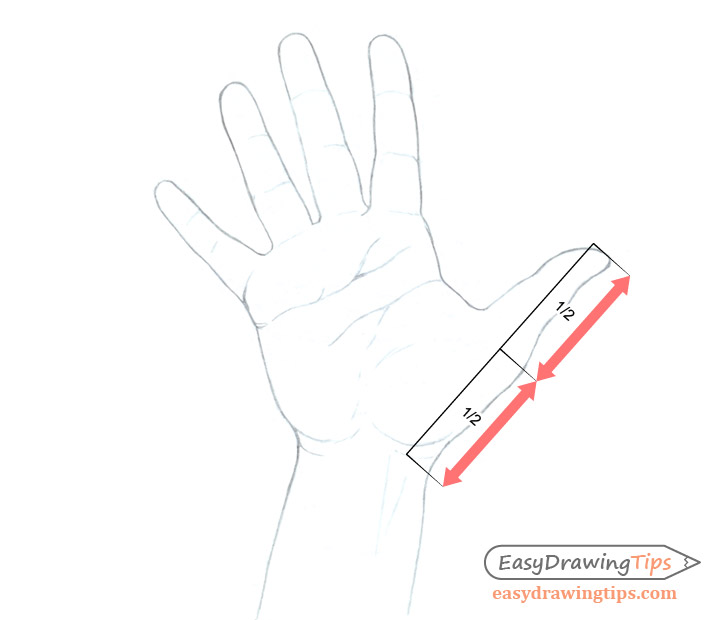
The base of the thumb actually starts around the base of the palm of the hand. The distance from the base is about equal to the distance from the first join to the tip of the thumb when thumb is slightly bent. It’s slightly smaller if the thumb is straightened out but that’s not a natural position for a thumb to be in therefore you can use the 1/2 measurement.
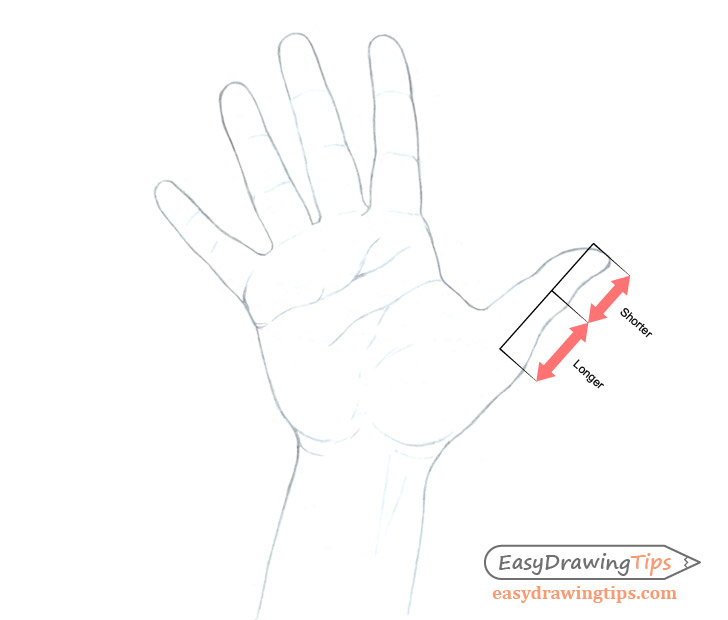
Just like the fingers the tip of the thumb to joint distance is shorter than from there to the next joint.
Step 3 – Basic Shading
The shadows will depend on the light source/sources. In this particular example the light is coming from the top left.
The hand is mostly comprised of curves so you will eventually want to draw smooth gradients for most of the shadows. But you can start the shading process by first doing fairly rigid shading of the darker areas of the hand. Try and make the stroke in the directions that will help reinforce the shape of the hand.
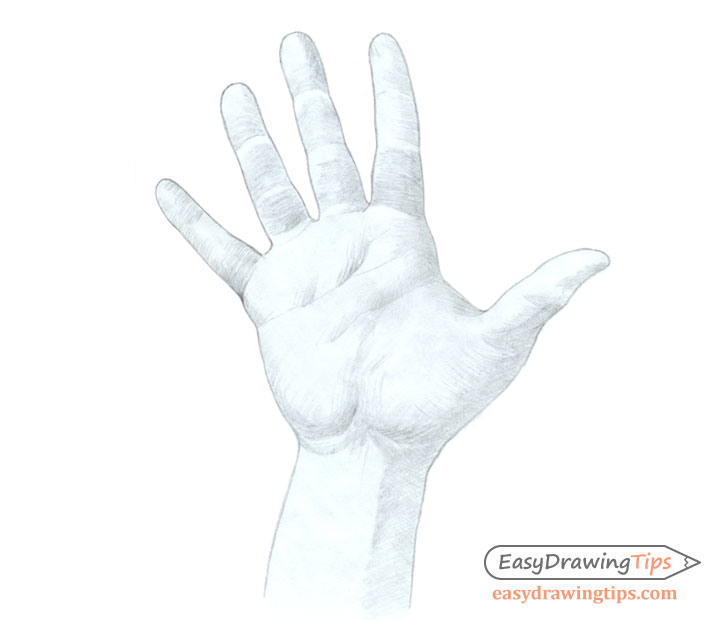
Step 4 – Finished Drawing
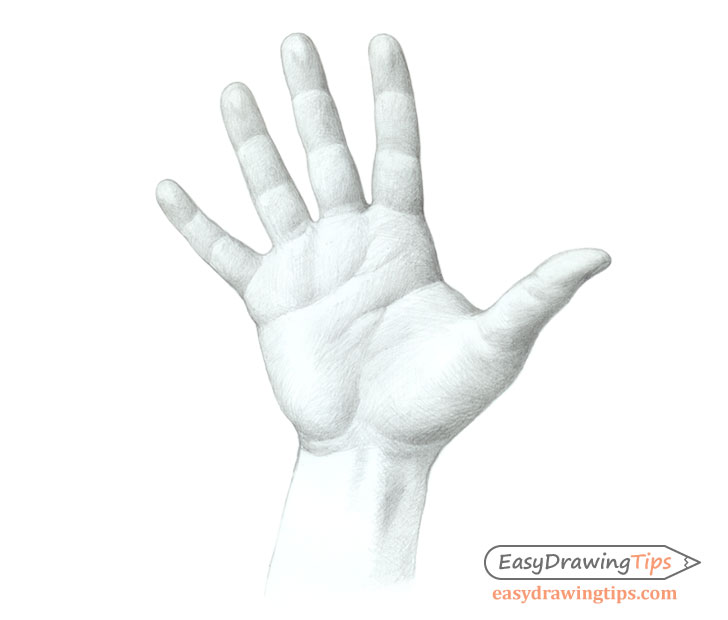
Continue applying shading to your drawing to reinforce the darker shadows and to create smooth gradients. Again remember to make your strokes in a way to that reinforces the shape of the hand. You do not need to make every stroke in the same direction for each part. Try and create a light cross hatch.
Conclusion
The hand is fairly difficult to draw and proportion correctly. It can be very convenient to look at your own hands to gain a better understanding of the proportions. At the same time be aware that hand proportions vary in different people.


