How to Draw Bird Step by Step – Side View
This tutorial explains how to draw a bird from the side view in six illustrated steps. The bird used as an example is a robin.
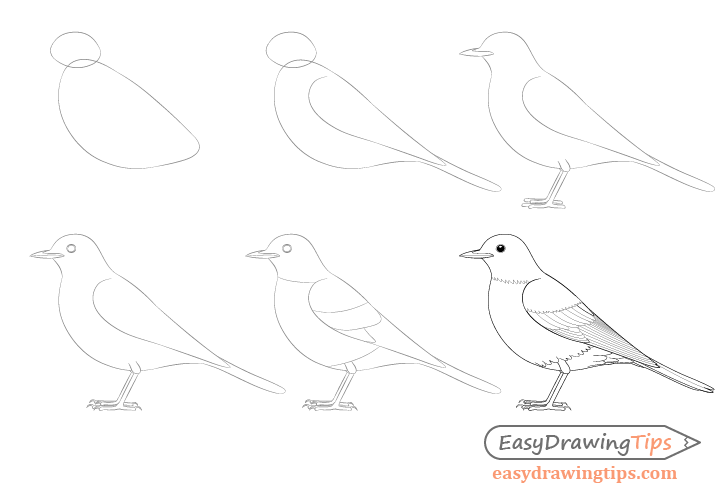
Above you can see a preview of the different stages of the tutorial. The focus is on line drawing. It may be particularly helpful to beginner artists that are looking to draw something more serious but also not overly complex.
Step 1 – Establish the Main Proportions of the Bird
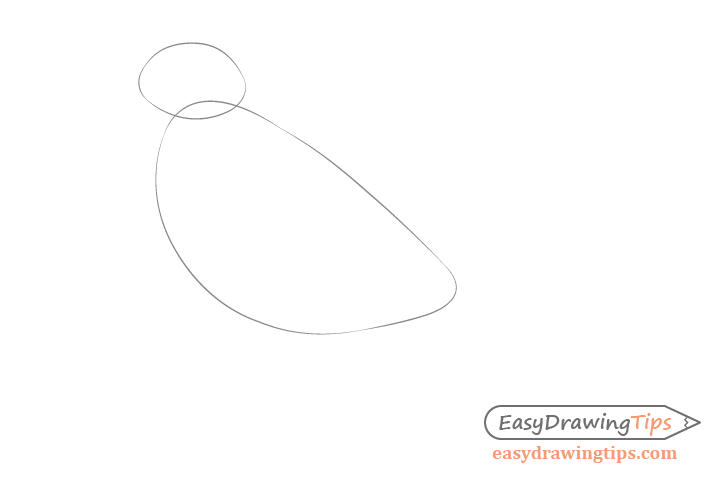
Start your drawing by estimating the overall proportions and shape of the bird’s head and body. You want to have the largest and most important shapes first.
The reason to do this is to avoid making mistakes like one part of the bird’s body being out of proportion compared to another. It can also save you having to backtrack more than you need to in case you do make a mistake.
In this case the body will be significantly larger than the head. The head will very loosely resemble something like an egg. The body will have a larger curve at the bottom with a flatter back.
Step 2 – Outline the Wing & Tail
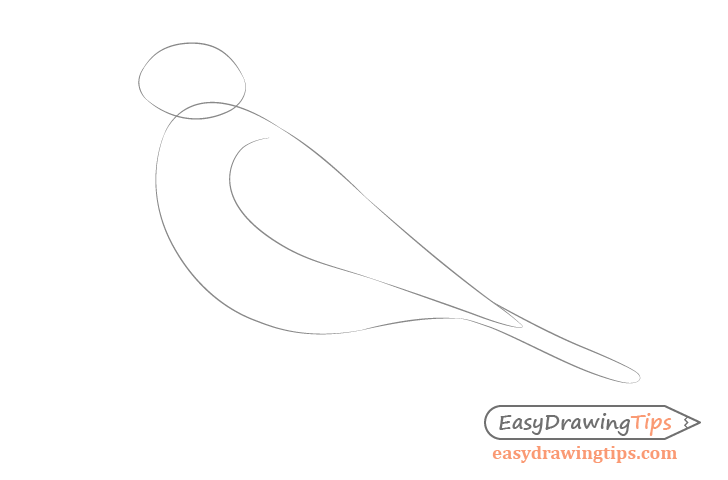
Add the rough shape of the wing and tail onto the sketch of the bird’s body. When folded the wing will have a rounded base (about half the body in width) followed by a cone like shape getting narrower towards the tip. Draw it accordingly.
Draw the tail a tiny bit wider as it gets away from the body followed by a rounded tip.
Step 3 – Draw the Beak & Feet
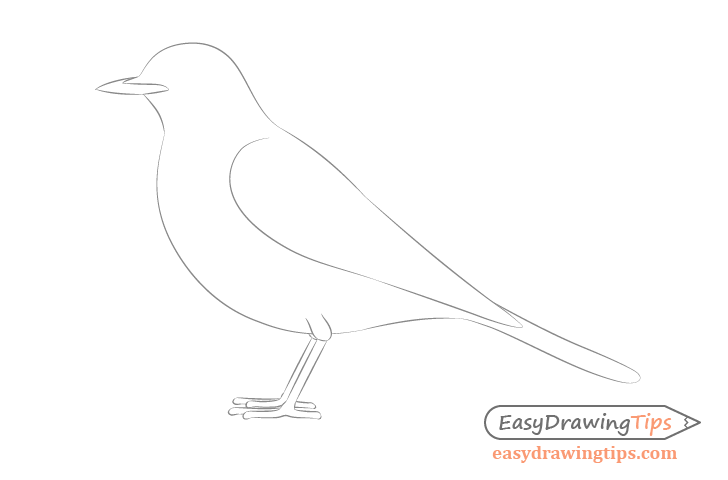
Once you have sketched out the major shapes of the body you can move down to the smaller parts such as the beak and legs.
Draw the beak with a pointy tip and it’s inner shape sort of “cutting” into the head for about 1/3 of its length.
When drawing the legs keep in mind that the back leg will be partially hidden behind the front leg. The back leg should also be drawn slightly smaller as it’s further away from the viewer (due to perspective).
For an explanation of perspective drawing see:
Perspective Drawing Tutorial for Beginners
The base of the legs will have some tiny feathers around them going down to the joints. Draw these areas thicker than the rest of the leg as sort of angled letter “U” like shapes.
From the joint down to the toes the legs are pretty much straight. Draw that part of the front leg with two parallel lines and show part of the back leg with just one line.
Generally birds have three toes on the front of the leg and one on the back. In this case the far forward facing toe on each leg will be hidden behind the other toes so you can only show two per leg.
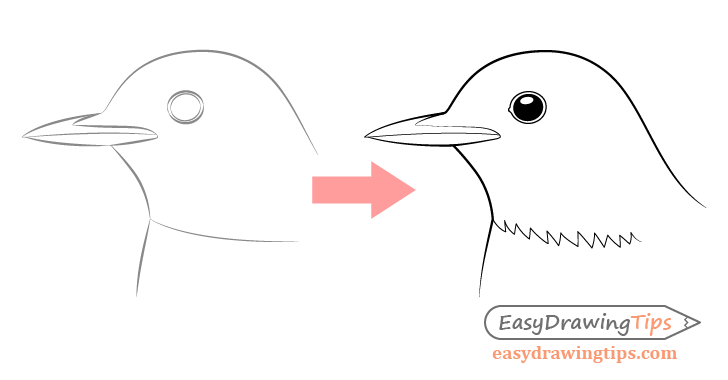
Step 4 – Draw the Eye & Other Smaller Details
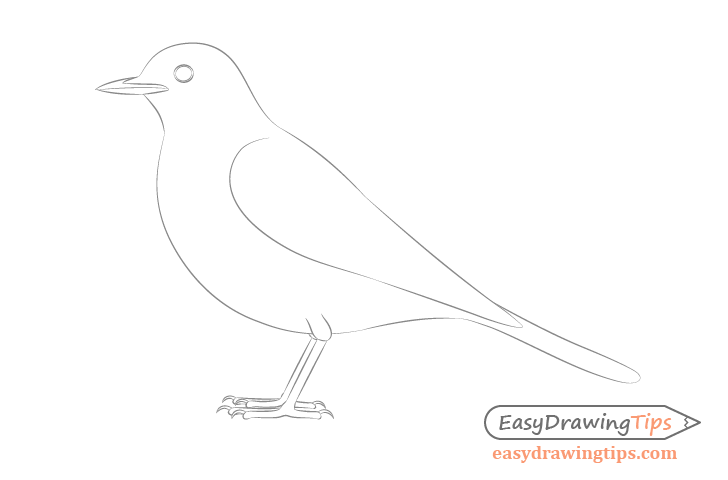
Add the eye and other smaller details of the claws on the feet.
Draw the claws growing from the upper/front part of the toes with two curved lines for each claw that join at the tips.
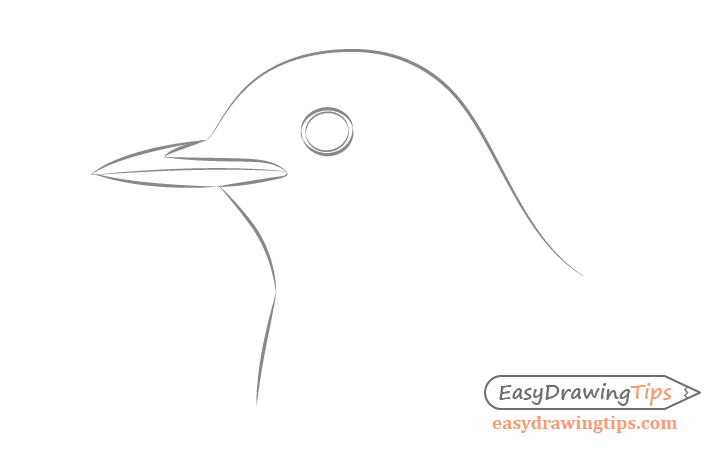
You can see a larger drawing of the birds’ head above to make the details easier to see.
Draw the eye slightly to the left of the head and add a second shape around it that basically traces the shape of the eye (kind of like an outline). This will indicate the bird’s eyelids.
Also add a split between the upper and lower part of the beak. You can draw this one with slightly curved line as shown in the example.
Step 5 – Establish the Feather Patterns
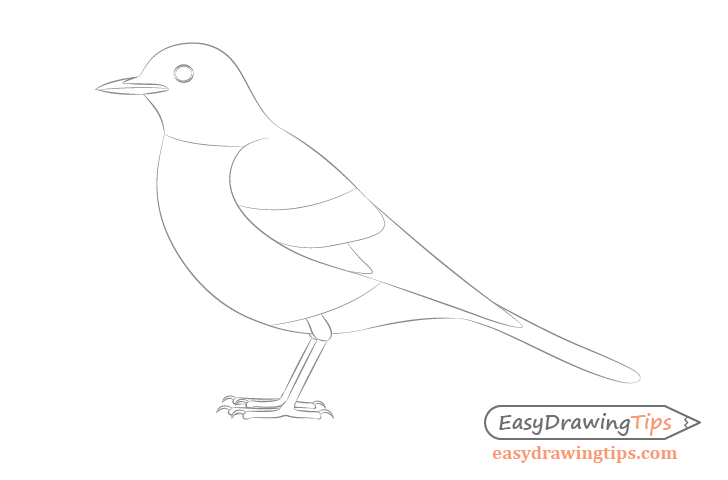
Once you have drawn out all of the the body parts create some construction lines to define the different sets of feathers. In this case you only need two lines on the body and three on the wing.
Step 6 – Add the Feathers & Finish the Bird Drawing
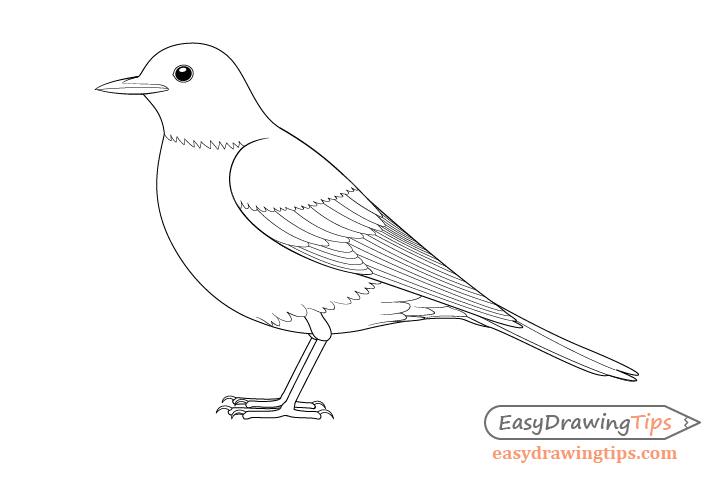
Now in the different sections of the body defined by the construction lines draw the various sets of feathers as shown in the above example. Draw these going from top to bottom and left to right. Basically you want to draw a set before drawing the one that comes out from underneath it.
You can also erase the construction lines for each group of feathers as you finish drawing it.
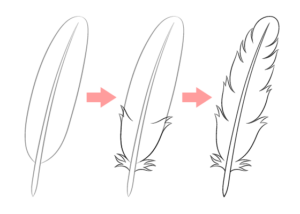
For making a detailed drawing of an individual feather see:
How to Draw a Feather Step by Step
After you are done adding the feathers you can finish the bird drawing by going over it with darker/more solid lines. If you feel confident in you tracing ability you can even do it with a thin black marker. However, if you are worried about making a mistake then simply darkening your lines with the pencil may be a better option.
You can once again see a larger drawing of the bird’s head in the example above which should again make some of the details easier to see.
Fill in the eye with a solid black color or shade it in with the pencil but leave a tiny oval shaped area white for the highlight (light reflecting from it). You can also give the eyelid area around the eye a tiny bump at the front.
Conclusion
This is a fairly simple tutorial that can help you create a nice and detailed drawing of a bird. If you are a beginner it can also help you learn to draw in the right way by working from the larger proportions down to the details.
For more similar tutorials check out:
- How to Draw an Eagle Head Step by Step
- How to Draw a Horse From the Side View Tutorial
- How to Draw a Sitting Cat Front View – Step by Step
- Dog’s Head Front View Drawing – Step by Step
- How to Draw a Dolphin Step by Step
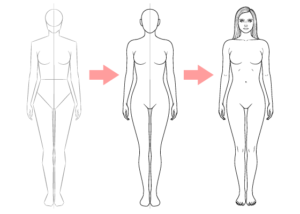
- How to Draw the Female Body Step by Step
For more advanced bird drawing tutorials see: