How to Draw Bread Step by Step
This tutorial shows how to draw a loaf of bread in six steps. It goes from a simple line drawing to fully shaded realistic looking artwork.
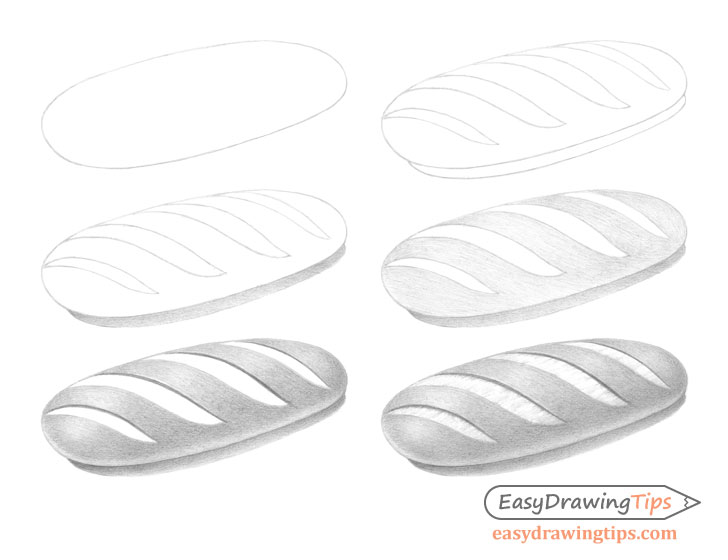
In this case the bread loaf will be a baguette also know as “French Bread”. You can see a preview of it’s six drawing stages above.
This guide is fairly simple and can be good for beginners or intermediate artists who want to practice their shading techniques. As with the example the tutorial is best done in pencil, though you could also use other mediums.
Step 1 – Draw The Outline of the Bread Loaf
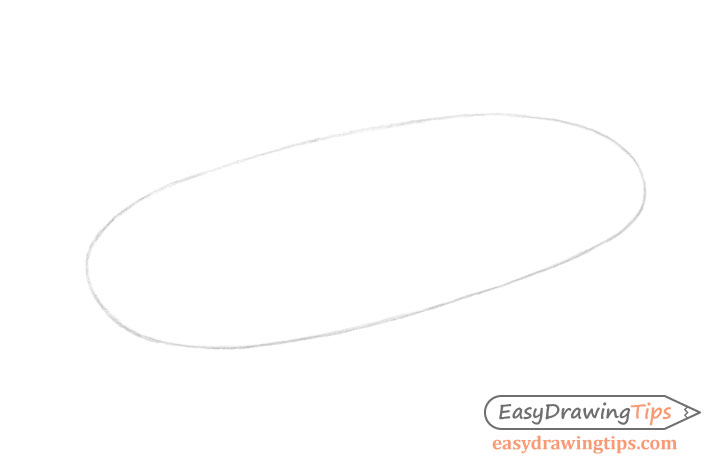
Begin with a simple outline of the bread’s shape. Make the loaf narrower towards it’s back end (facing away from the viewer) to show a bit of perspective. However, be careful not to overdo this as more extreme perspectives can makes things look really big or “in your face”.
For more on perspective drawing see:
Perspective Drawing Tutorial for Beginners
Step 2 – Draw the Slashes

Along the top of the loaf add the slashes that are so characteristic of this type of bread. Be sure to draw them in a way where they wrap around the baguette’s shape to emphasize that it’s not flat and has volume.
In this case the bread loaf will have a fairly hard shadow so you can outline the edges of that as well. In this case the light is coming from above and very slightly to the front of the baguette. This means the shadow will be pretty much underneath it stretching just a tiny bit backwards.
Step 3 – Shade the Shadow
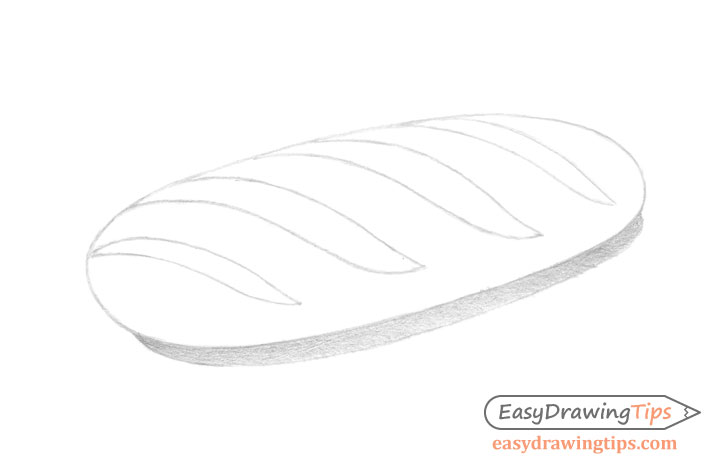
Once you have the basic outline the drawing is ready for shading. You can start with the loaf’s shadow. Darken it but don’t go full strength as you will want to add even darker areas later on.
Step 4 – Shade the Baguette
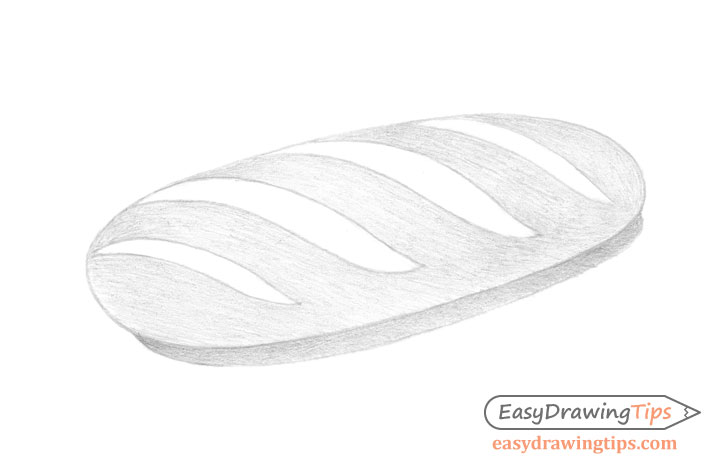
Similar to the shadow fill in the baguette (excluding the slashes) with a slightly lighter medium grey.
At this stage don’t worry i the drawing looks flat. It will begin looking more three dimensional in the next step.
Step 5 – Darken the Shading
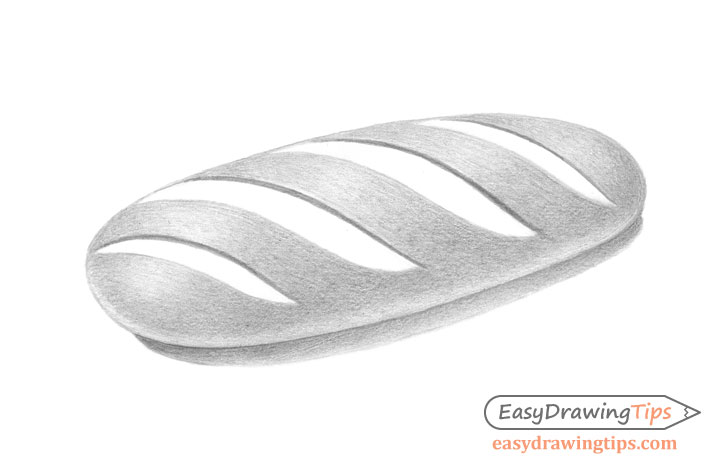
As already mentioned in this particular example the light is coming from above and very slightly to the front o the baguette. This means that it will have a lighter area running pretty much along it’s middle. There will also be some light reflecting from the surface it’s sitting on illuminating it’s bottom. There will be a darker area along it’s lower and middle section. There will also be some very dark ares along the sides of the slashes (long and narrow) where the crust hangs over them.
As the baguette has a fairly smooth surface the transition between most of the above areas will be very gradual. For this reason you want to try and create smooth gradients when shading. The shadow also has a bit of a gradient. Make it slightly darker near the base of the loaf and lighter (the grey from step three) as it moves away from it.
When doing smooth shading like in this example you can pretty much blend your strokes to the point of invisible.
For more on different stroke types and shading methods see:
Shading Techniques and Stroke Types Drawing Tutorial
Step 6 – Finish the Drawing
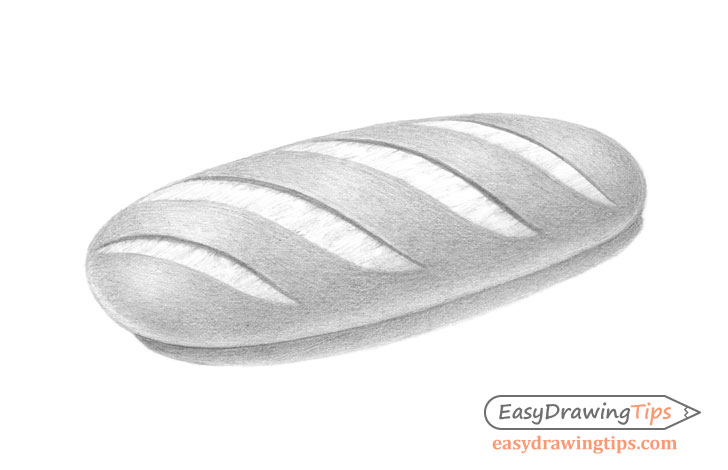
For the last part of the drawing shade the remaining parts of the slashes. Make these a very light grey with some darker streaks mixed into it to create the texture of the dough that is pulled apart as the bread bakes.
With the above done your drawing of the baguette should be finished. Although you can refine the shading if needed by lightening (with the eraser) or darkening certain areas.
Conclusion
As shown in this and many other tutorials here on EasyDrawingTips, proper shading can make art that would have otherwise been plain and/or flat stand out and have volume. The line drawing, and even early shading stages of the baguette are not particularly interesting. However, once properly refined the shading makes the bread appear three dimensional and even helps convey it’s different textures.
If you like these types of drawing guides also be sure to look at the following:
- How to Draw a Muffin Step by Step
- How to Draw a Pizza Slice in 6 Steps
- How to Shade Basic 3D Shapes Tutorial
- Egg Step by Step Basic Shading Tutorial
- How to Draw an Eye Step by Step


