How to Draw a Bottle Step by Step (Line & Shading)
This tutorial shows how to draw a bottle in eight steps going from simple construction lines to a realistic looking, pencil shaded drawing.
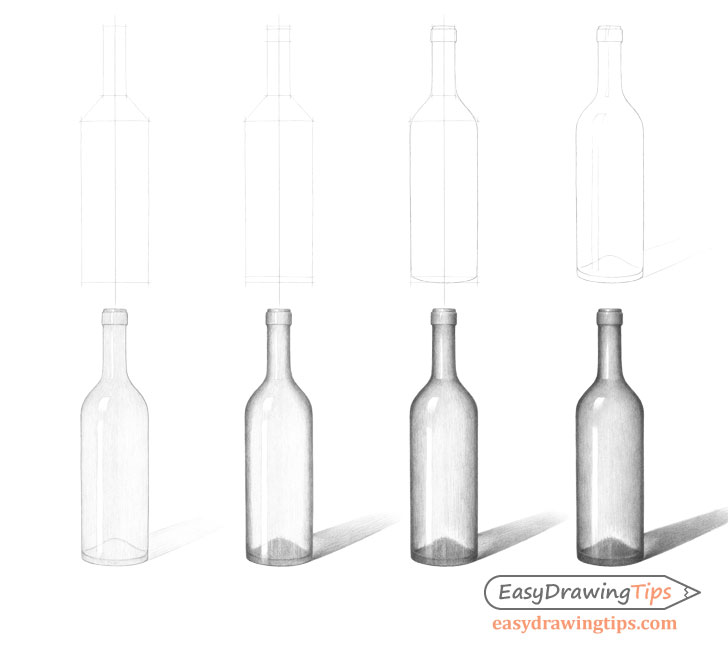
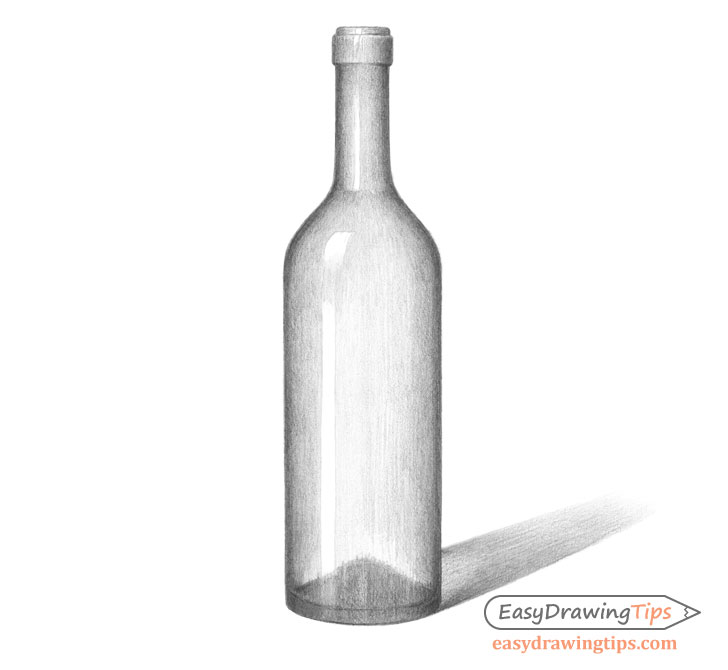
The included examples are shown in the preview image above. The tutorial can be split into two portions, the line drawing and the shading (4 steps each). As mentioned, the line drawing part starts out with a basic constructions drawing that then transitions into an outline of the bottle. The shading part is broken down into several stages where different layers of pencil strokes are gradually applied to create the wine bottle’s smooth looking surface.
Step 1 – Make a Construction Drawing of the Bottle
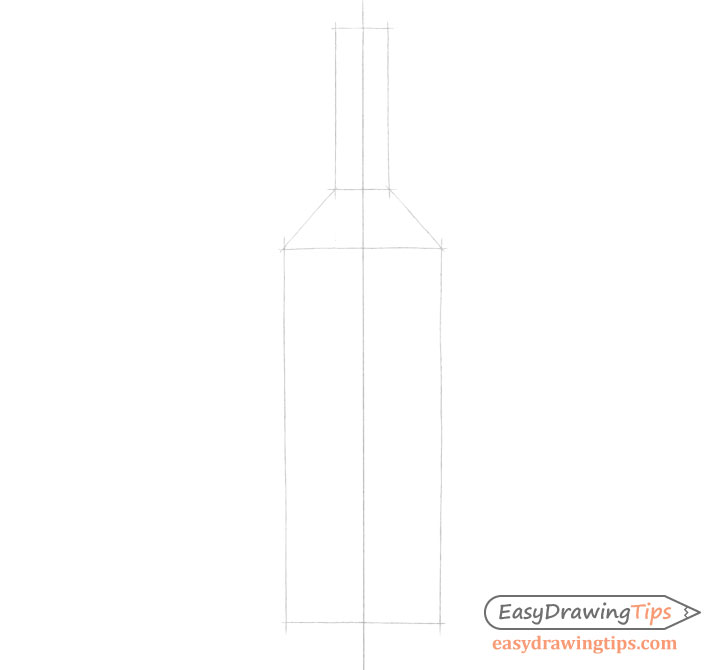
To quickly establish the bottle’s overall proportions make a simple constructions drawing as shown above. Begin with a straight vertical line through the middle of your page/drawing area. This line will be used as a guide that can help you see if both halves of the bottle are even in width and to help insure that it is not crooked or skewed to one side.
Once you have the center guide line construct the bottle. In this case it can be broken down into three simple shapes.
- Neck – shaped like a rectangle
- Shoulder shaped like a trapezium (similar to a house roof)
- Body – shaped like a rectangle (much larger than the first one)
As already mentioned the purpose of the construction drawing is to try and quickly get the bottle’s proportions and overall shape. This means checking the size, width, height, etc… of one part in relation to the others. So that for example the neck does not end up being too wide/short or too large/small in relation to the body. Not only is this easier to see in a simplified drawing it also requires far less time to make a correction if you spot a mistake.
Step 2 – Proportion the Smaller Parts
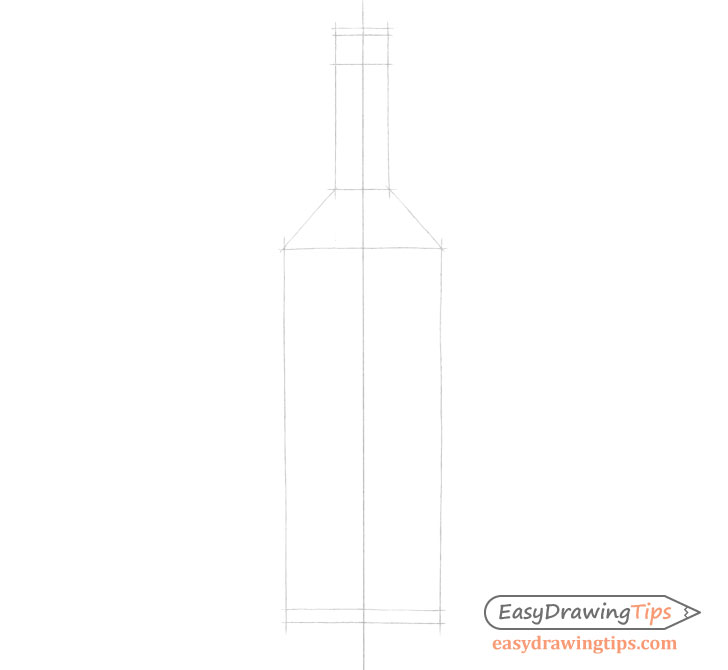
After you have a construction drawing of the bottle’s major parts proportion the smaller details. These are:
- Finish – the wider bit at the top of the bottle
- Base – the very bottom of the bottle (to estimate the height of the curve)
Step 3 – Outline the Shape of the Bottle
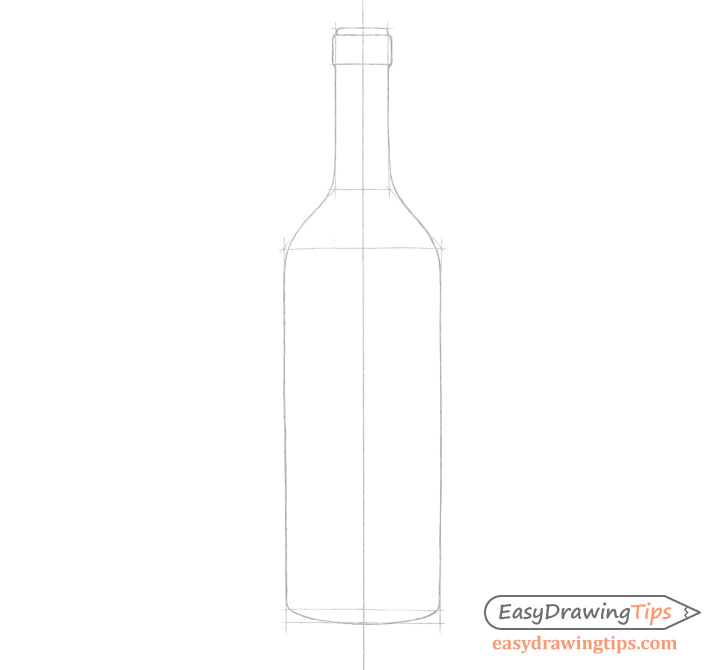
With all of the parts proportioned you can outlined the outer shape of the the bottle with all of it’s bend’s and curves (using the construction drawing as a frame).
Please note than when doing the above you should not be alarmed if the bottle does not perfectly fit into the frame. You can slightly break out of it where you feel doing so will help you create a more accurate shape.
You will notice that the bottle’s bottom is drawn rounded while the top is drawn flat. Here is a quick explanation of whats going on here:
Both the opening of the bottle and it’s base are of circular in shape. When viewed on an angle a circle look like an oval. The closer the circle is to the level of a viewers eyes the flatter it appears (until it basically becomes completely flat).
In this case the top of the bottle is higher up (closer to the eyes) so it appears flat while the bottom is lower down so it appears rounder.
For more on this see the following tutorials:
Step 4 – Clean up the Drawing & Add the Details
For the last part of the line drawing you can add the following:
- Highlights – the brightest spots where the light reflects from the bottle (helps when shading)
- Punt – the “bump” at the bottom of the bottle
- Shadow – the shadow cast by the bottle (to it’s upper/back as the light is coming from the left/front).
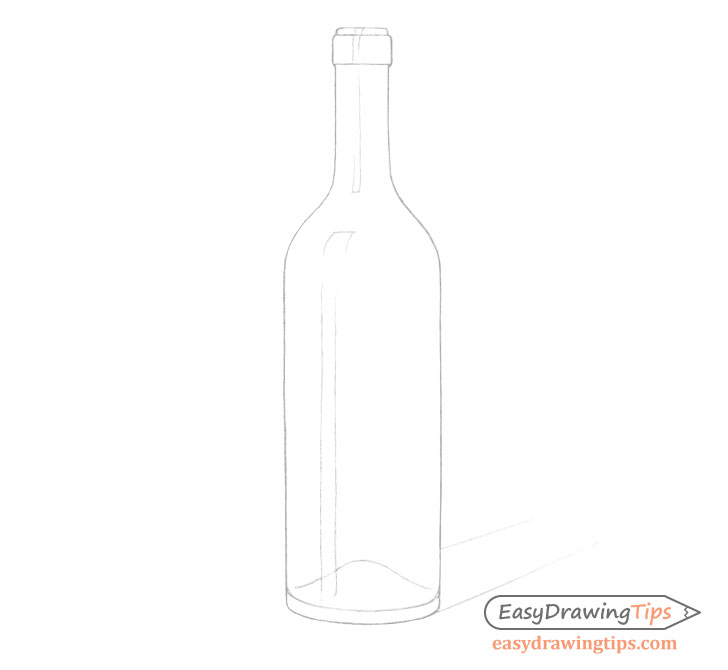
Step 5 – Begin Shading
At first fill in the entire bottle with nearly solid light grey pencil shading (leave the highlights white). You can darken the shadow to roughly the same level at it’s base but make it lighter as it goes away from the bottle.
As bottles have smooth surfaces you can blend the shading (pencil strokes) to the point where they are barely visible. However, you should still try and apply them in a way where they flow along the bottle’s/shadow’s shape. For example make vertical strokes along the neck/body, angled strokes along the shadow and strokes that gradually get more angled as they go from the center to the sides along the shoulder.
For this example one directional strokes will be used (without any crosshatch).
For an explanation of different shading strokes and techniques see the following:
Shading Techniques and Stroke Types Drawing Tutorial
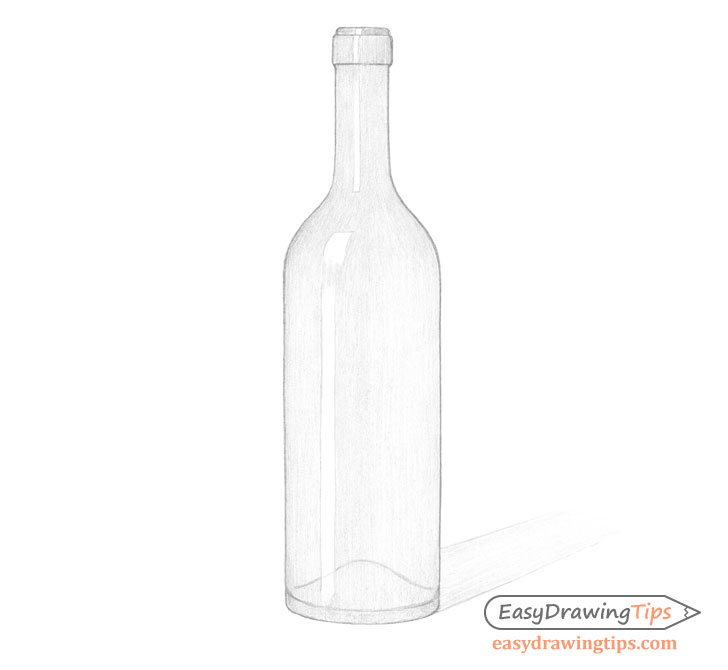
Step 6 – Continue Shading
Add another layer of shading over top of the first one that defines the darkest parts of the bottle.
Transparent objects shaped like this wine bottle tend to have a darker outline around their edges and parts where multiple layers overlap. This means that you can darken the sides as well as the punt (bump) at the bottom. You can also darken the shadow while leaving a little lighter bit at it’s base (created because the bottle is transparent).
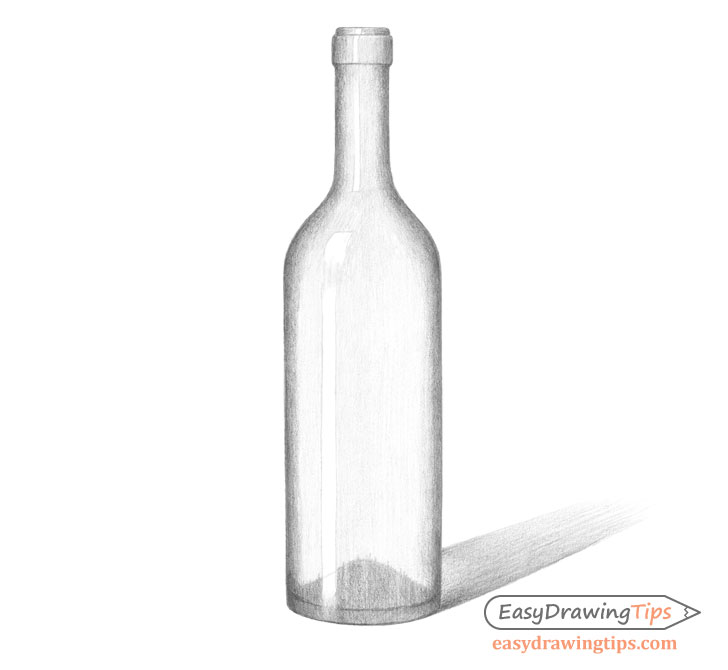
Step 7 – Smooth Out the Shading
Apply another later of shading to create longer and smoother gradients between the light and dark parts of the bottle as shown in the example above. Because the light is coming from the left side of the drawing and slightly to the front of the bottle it’s right side will be a little darker. Please note that this may be a bit hard to see in the example.
Step 8 – Finish the Bottle Drawing
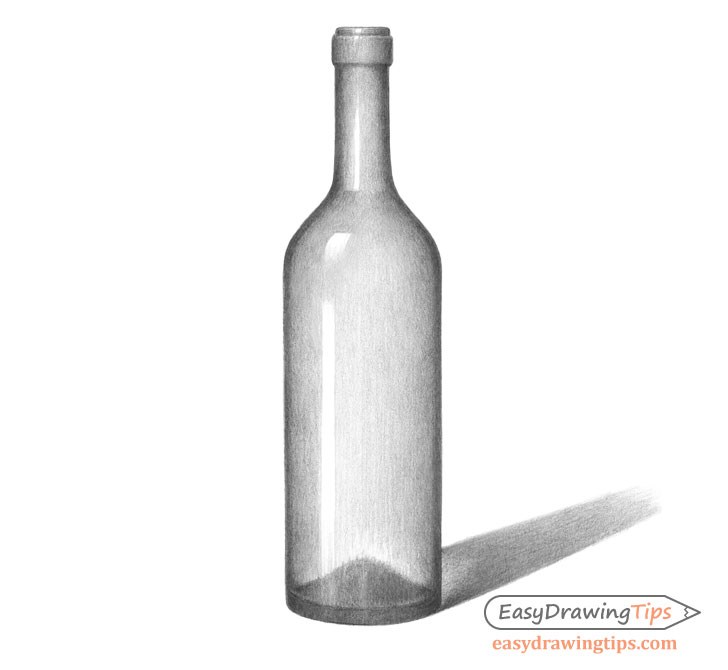
For this final step further smooth out and darken the shading (where needed) to create the proper contrast between the light and dark parts of the bottle. If you feel that you’ve made some areas too dark you can lighten them with an eraser.
Once done shading you should have a finished drawing of the wine bottle.
Conclusion
Whenever drawing any object the most important thing is to first establish it’s correct shape. No matter how much attention you put into the details or the shading afterwards your drawing will not look right if this part is wrong.
When shading it’s best to do it gradually in several layers. This makes it easier to avoid mistakes. For example if you darken your midtones (medium dark ares) full strength right away you may find that you won’t be able to make the shadows dark enough in comparison to create the proper contrast (even going full strength with the pencil).
If you’ve found this tutorial helps and would like to try some more like it see the following:
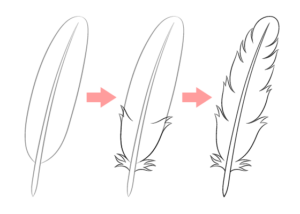
- How to Draw a Croissant Step by Step
- Egg Step by Step Basic Shading Tutorial
- How to Shade Basic 3D Shapes Tutorial
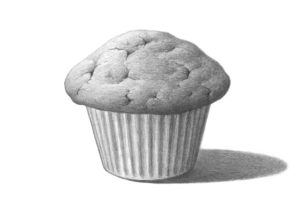
- How to Draw a Muffin Step by Step