How to Draw an Ear Step by Step – Side View
This tutorial shows how to draw an ear from the side view in six steps. It provides pencil drawing examples and quick explanations for each of them.

A preview of the drawing stages included in the tutorial is shown above. If you are going to follow along it’s recommended that you draw the ear in pencil just like in the examples.
For drawing an ear from the front view see:
How to Draw an Ear From the Front Step by Step
Step 1 – Get the Overall Proportions of the Ear
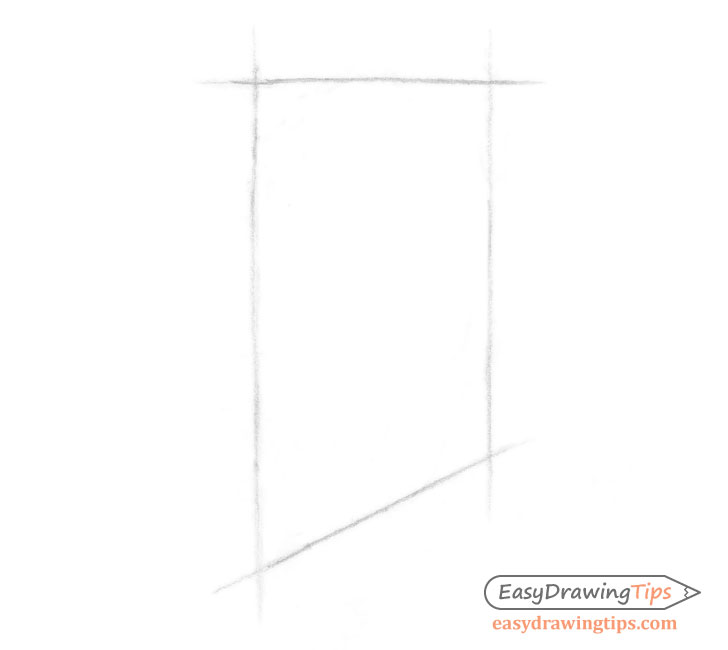
The first thing you want to do is a sketch/construction drawing of the overall size of the ear to establish its height and width. Do this by making a few straight lines (as in the example) that will create a frame that you can then draw the ear inside of.
Step 2 – Sketch Out the Basic Shape
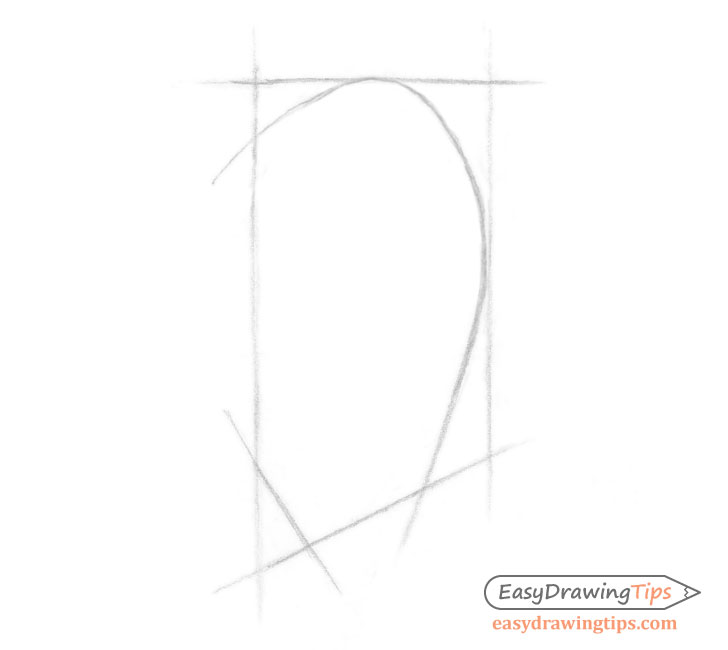
Add the upper curve of the ear and add a few more lines to frame it’s bottom shape.
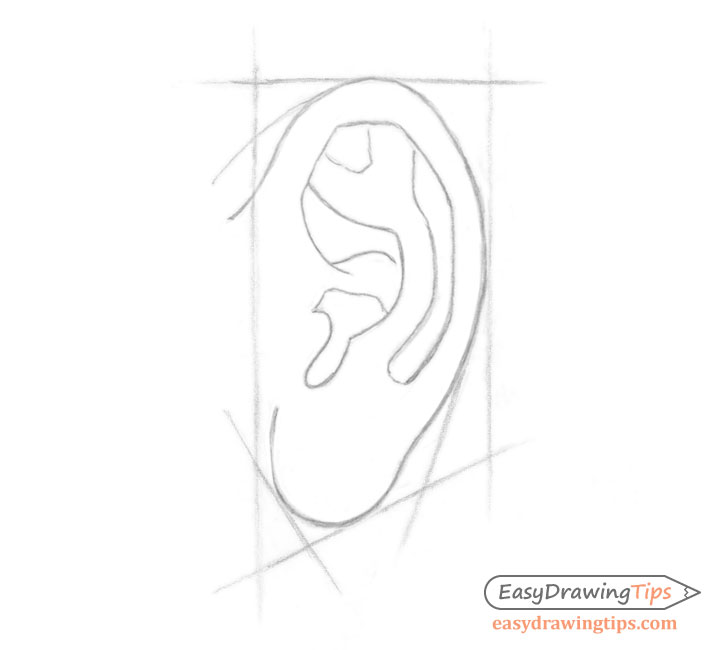
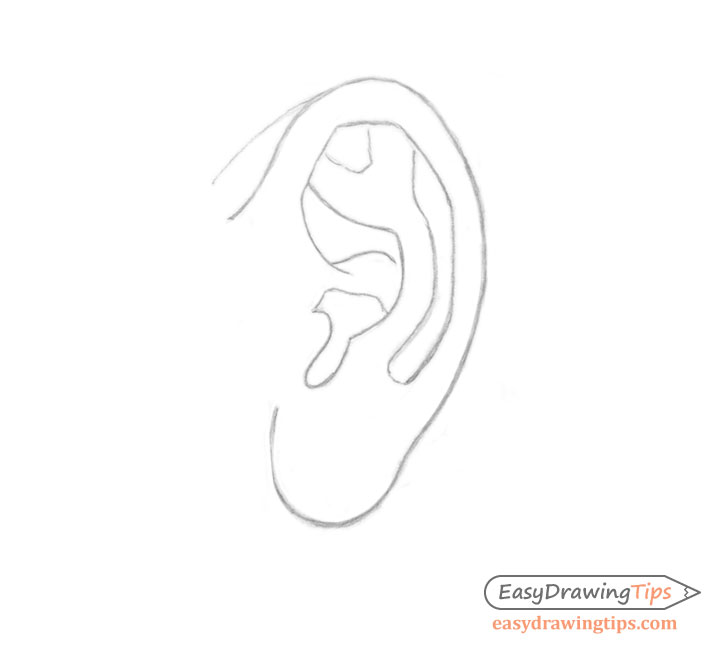
Step 3 – Place the Inner Details

After outlining/framing the general shape of the ear add a few lines to help position the inner details. You do not need to do this for all of them but just enough to give yourself a bit of a guide.
Step 4 – Create the Line Drawing
Inside of the frame/construction drawing create the organic drawing of the ear with all of it’s smaller bends cures and details.
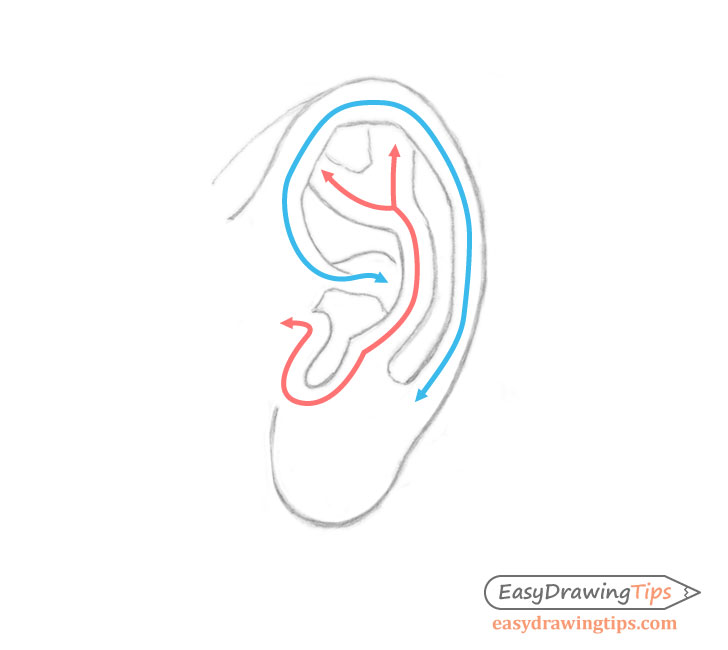
There is no particularly easy way to describe the inner shape of the ear but you can see the above illustration for a general idea.
Once done erase all of the construction lines so that you have a clean drawing similar to the example above.
Step 5 – Add Basic Shading
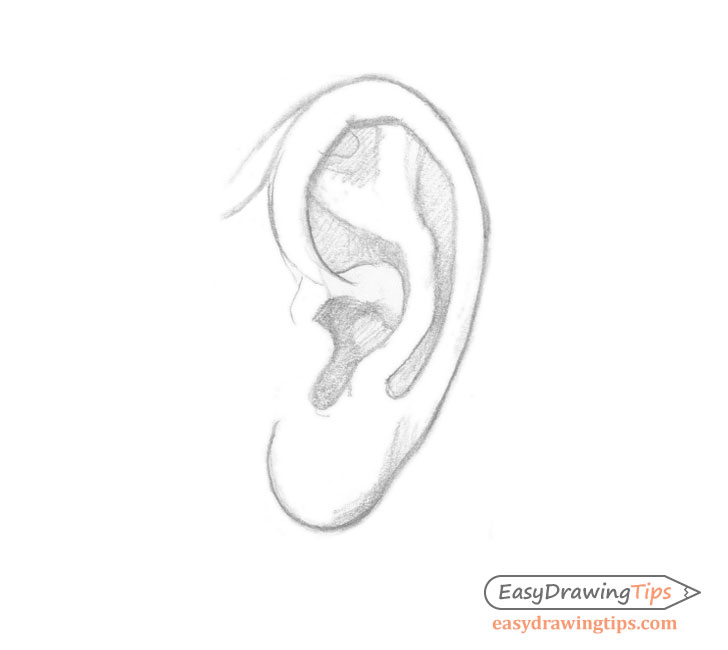
Once the line drawing is don you can begin applying some basic shading. Start by first filling in the darkest areas but do not darken them all the way. The goal is to first establish the overall distribution of the shadows.
In this case the ear will be in a fairly generic lighting setup such as daytime outdoors or a well lit indoor area with the main light source somewhere above it.
In this type of setup the lighter area will generally tend to be on top an the darker areas on bottom. The darkest parts will be the deeper parts of the ear where less light tends to reach.
Step 6 – Refine the Shading & Finish the Ear Drawing
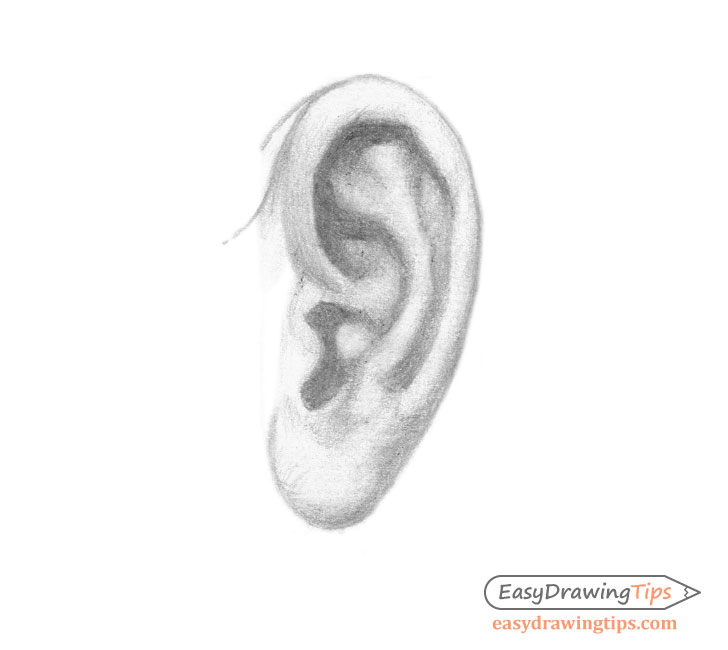
Once you have the basic shading figured out you can begin applying additional layers of strokes to creating smoother gradients. If you need to lighten an area you can simply erase some of the shadows.
In this case the shading will be “blended” so that the individual strokes are not visible.
For more on different shading techniques:
Shading Techniques and Stroke Types Drawing Tutorial
Conclusion
Drawing the ear can be a little bit confusing but if you find yourself struggling don’t be discouraged. Different people may have somewhat differently shaped ears. If you are looking at a photo or a person in font of you take some time to study the inner and outer shape of the ear and try and follow the steps shown in the tutorial. Start with simplified larger shapes and work your way down to the smaller details.
For more similar tutorials also see:
- How to Draw Male Hair Step by Step
- How to Draw a Different Types of Eyes
- How to Draw Different Eye Types Step by Step
- How to Draw Different Nose Types


