How to Draw an Ear From the Front Step by Step
This step by step tutorial shows how to draw an ear from the front view. It includes examples for each step going from basic construction lines to a pencil shaded drawing.
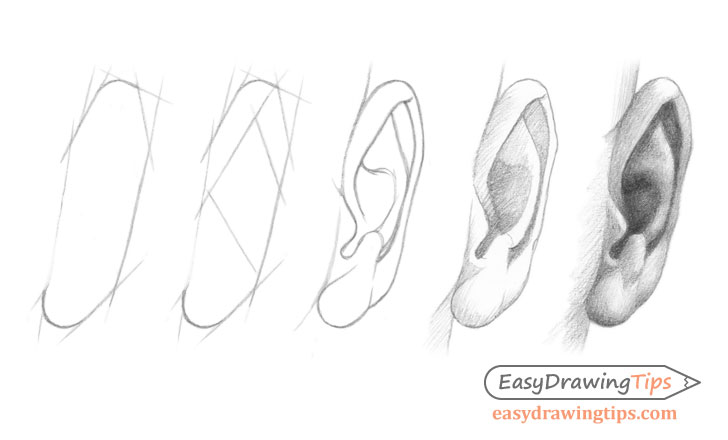
The ear consist of many irregular shapes, ears also tend to vary in shape and size from person to person. This makes it difficult to have one clear proportions guide for drawing them.
Instead this tutorial takes a more general approach of using construction lines to quickly estimate the major proportions and main shapes of the ear.
For an explanation of some good drawing practices also see:
Beginner Guide to Learning to Draw
For drawing an ear from the side view see:
How to Draw an Ear Step by Step – Side View
Step 1 – Make a Construction Line Drawing of the Outer Shape of the Ear
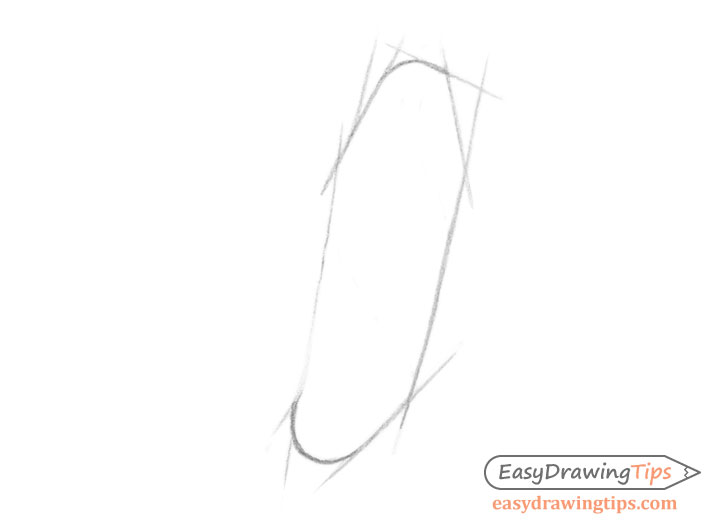
Start the ear drawing by making a simple construction line sketch that will basically outline the ear. The goal is to get the general flow of it’s shape as well as the major proportions such as the height and width.
Step 2 – Make a Construction Line Drawing of the Inner Shape
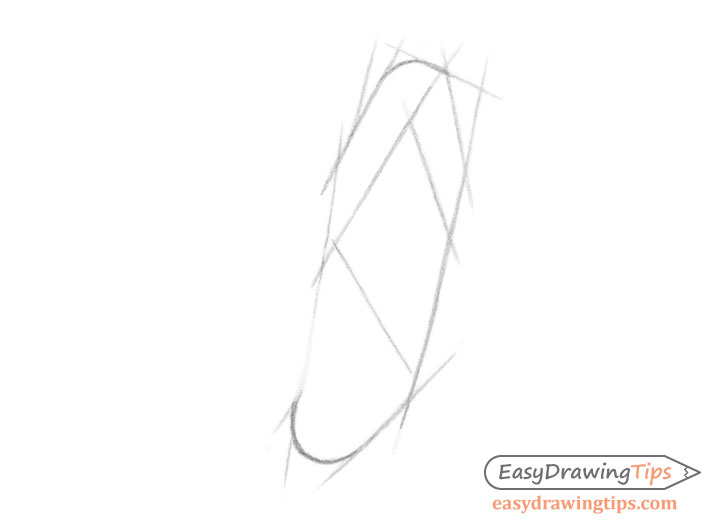
Similar to the previous step make a construction drawing of the inner part of the ear. In this case it will just be three lines. One will set the thickness of it’s outer part and the other two will act as guide lines for it’s inner folds.
Step 3 – Make a Line Drawing Inside the Construction Lines
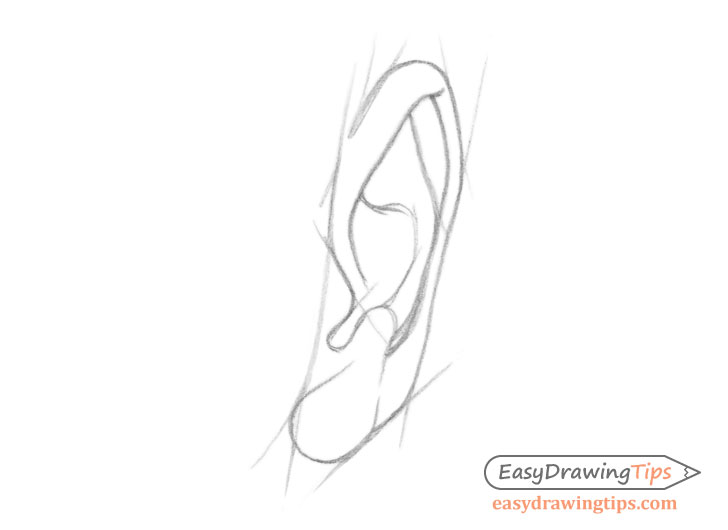
Above you can see how the ear now fits into the construction frame. Generally ears will tend to have a sort of “rim” around their top part followed by an indented area that and then a sort of large fol that sticks out to the side.
Make a line drawing similar to the example above and erase the construction lines after you are done.
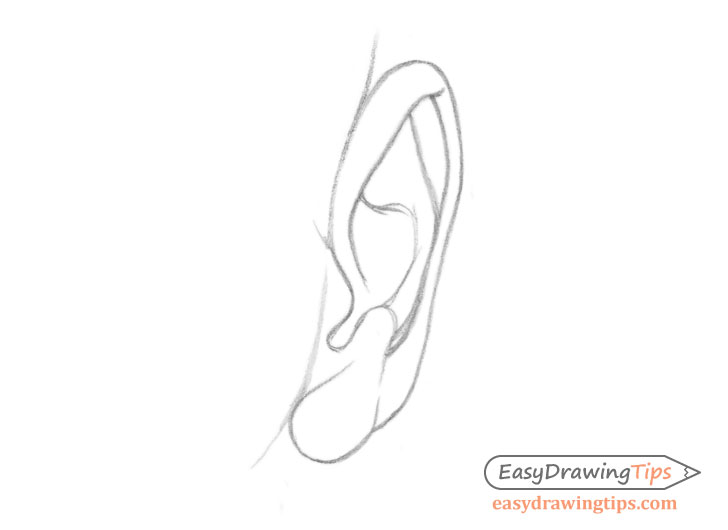
You should have a clean line drawing of the ear similar to the above example after you are finished.
Step 4 – Start Shading
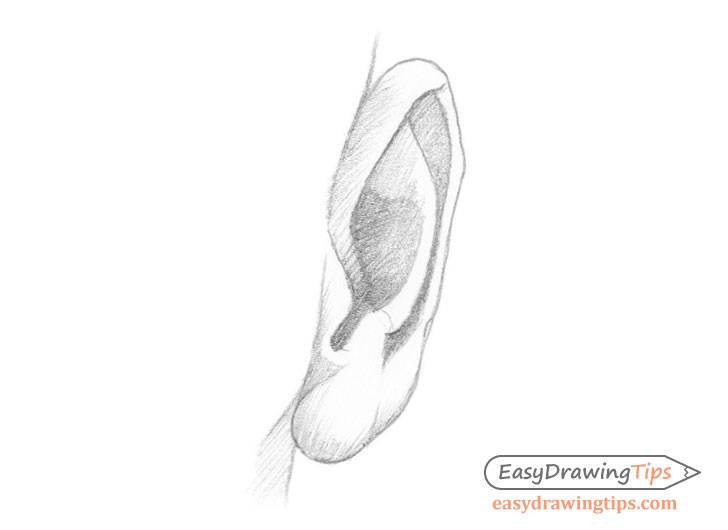
For this particular example we will shade the ear based on fairly common lighting conditions without a strong one directional light source. Generally the light will be coming from somewhere above. This means that the shadows will be on the bottom parts of the various cures of the ear and the light areas on top.
The overall darkest parts of the ear will be the deepest parts of the folds as that is where the least light tends to reach.
You can view each part/curve of the ear as somewhat of a separate shape with it’s own light and dark areas. At the same time you also want to view the ear as a whole so that you don’t shaded one part too light or to dark in relation to another.
Begin the actual shading process by first darkening the “in shadow” areas/parts described above.
For different types of shading methods see:
Shading Techniques and Stroke Types Drawing Tutorial
Step 5 – Finish the Ear Drawing/Shading
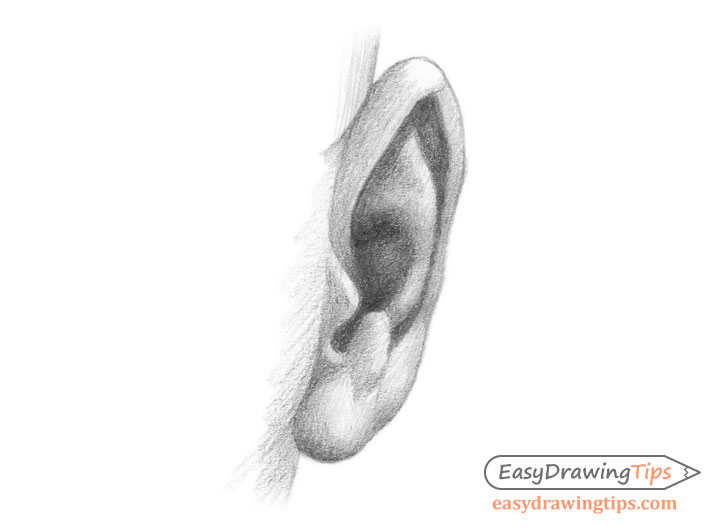
Once you establish the basic light and dark parts of the ear smooth out the shading by applying more sets of strokes as well as blending them where needed. As the ear consists of curves try and avoid having sharp light to dark transitions. You want to have smooth gradients.
Conclusion
Ears can be different in shape from person to person and generally consist of many irregular shapes. This makes them quite difficult to draw. A good approach is to start with a construction drawing that helps defines it’s overall most important parts and to then work your way down to the smaller details afterwards. When shading an ear drawing it can be helpful to view it’s different curves as individual shapes with their own shadows and highlights.
For examples of shading basic 3d shapes see:
How to Shade Basic 3D Shapes Tutorial
For drawing entire faces see:


