How to Draw Different Nose Types
This tutorial shows an easy approach to drawing different types of noses. It includes step by step pencil drawing examples and simple instructions.
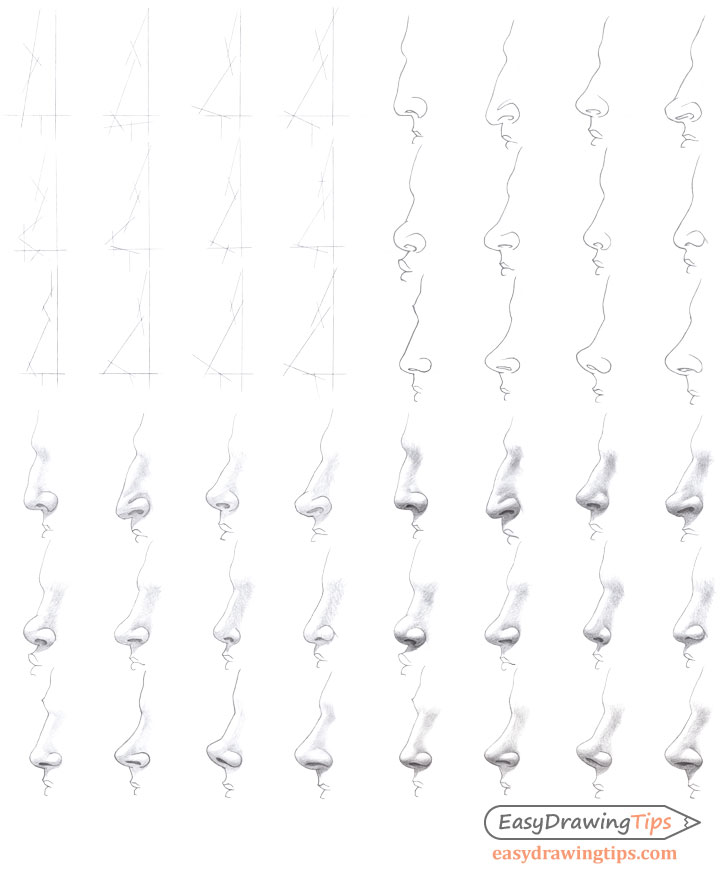
Drawing noses in the profile view is not particularly complicated and can be good practice for beginner artists interested in drawing people.
If you are going to follow along it’s recommended that you do so with pencil and paper.
Step 1 – Make a Construction Drawing of a Given Nose
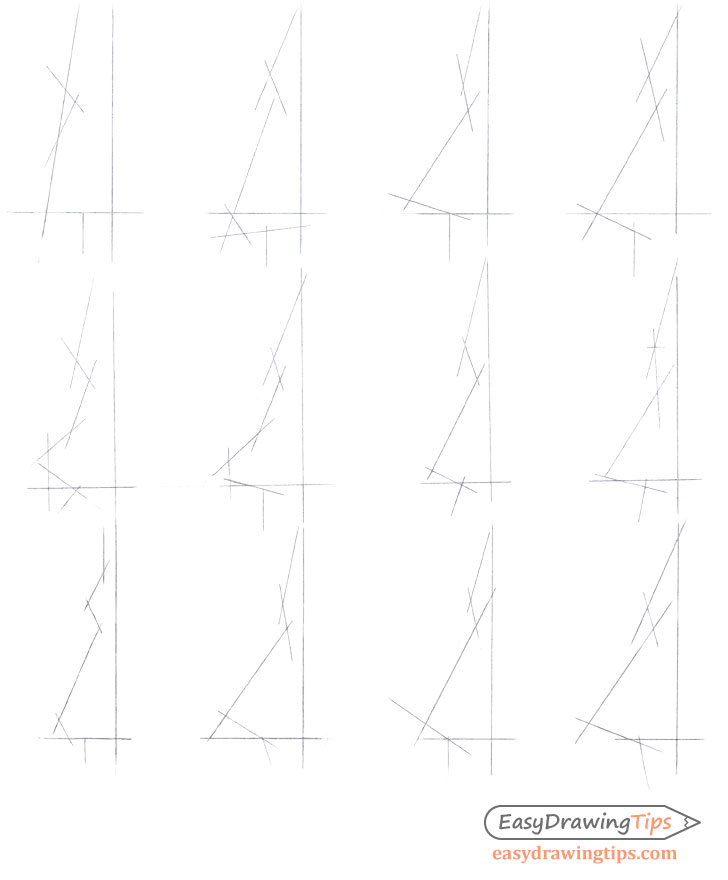
There are many variations in the shapes and sizes of noses. A good way to estimate their overall proportions is to make a quick construction drawing as shown in the example above.
A quick construction sketch can help you get the width, height and angles of the major parts of the nose you wish to draw.
Be sure to keep the construction lines very light so that you can easily erase them when they are no longer needed. The lines in the examples have been made darker to make them easier to see.
Step 2 – Make a Line Drawing
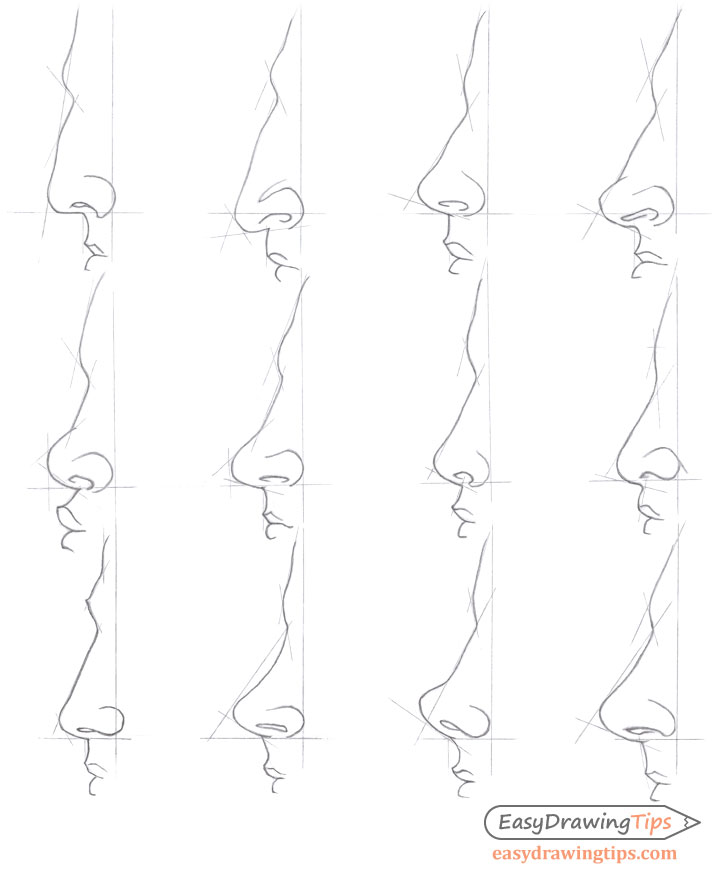
Inside the construction frame make the drawing of the actual shape of the nose with all of it’s bends and curves. Make the initial drawing light so that you can easily erase your lines in case you make a mistake. Once you determine that everything is in the right place, trace over your lines with a darker stroke.
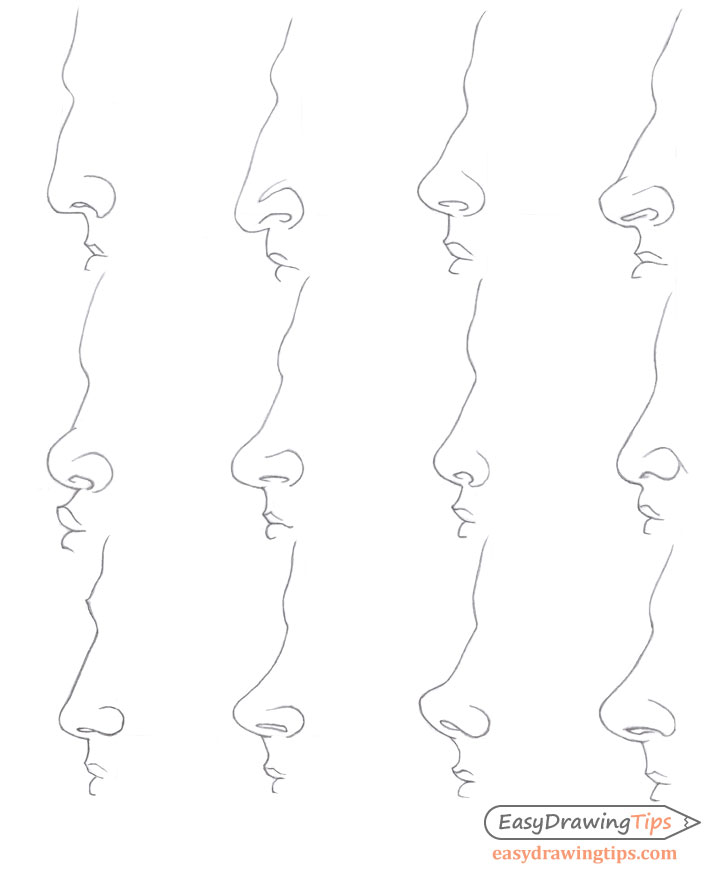
Finish by erasing the construction liens so that you have a clean drawing similar to the examples above.
Step 3 – Begin Shading

Generally shading will depend on the lighting setup. In this case the noses will be shaded as though they are in fairly generic lighting conditions such as a well lit room or daytime outside.
In such a setup most of the shadows will tend to be on the bottom or in areas that are indented, basically wherever there is less light reaching.
For applying the actual shading you can use a light crosshatch where you apply the strokes in one direction and then apply a second strokes on a slightly different angle to the first.
For different types of shading techniques see:
Shading Techniques and Stroke Types Drawing Tutorial
Begin by first filling in the areas with the darkest shadows but do not go full strength with the shading on the surface area of the nose yet. Keep it lighter than what you intend to have in the finished drawing. You can however darken the nostrils all the way. For the rest of the nose you want to first set up a sort of “shading guide” for yourself that establishes the light and dark parts of the drawing. You can apply another layer of shading over top of it after.
Step 4 – Finish the Nose Drawing
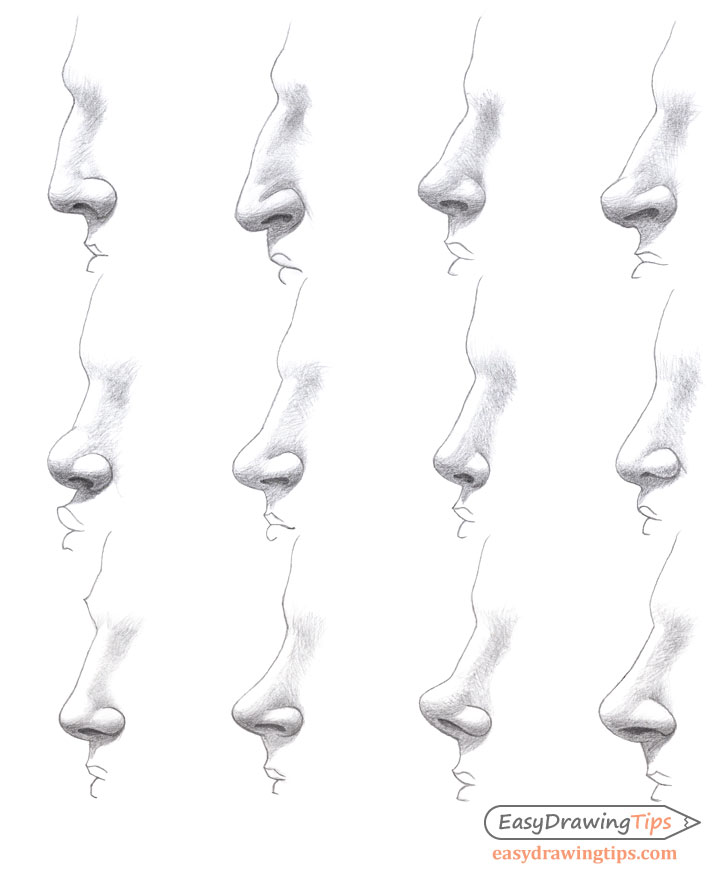
Now add another layer of shading as already mentioned to darker the drawing. This is a also a good stage to further smooth out your gradients and to touch up any parts of the drawing as needed.
The darkest areas of the drawing should generally be the nostrils followed by the bottom and then the sides of the bridge of the nose. The light areas should be the tip, the front of the bridge of the nose and the upper part of the area around the nostrils.
Once done with the shading you should hopefully have a nice finished drawing of whatever type of nose you chose similar to the examples above.
But even if your drawing does not come out you can simple start over and keep practicing until you are satisfied with the results.
Conclusion
The profile view of a nose is not very difficult to draw and can be good practice for beginners interesting in drawing people. As with drawing most things it’s a good idea to start with a construction drawing followed by a line drawing. It’s also a good idea (especially for beginners) to apply shading in several layers to avoid mistakes and make erasing easier in case you do.
For more similar tutorial also see:
- 3 Step Nose Side View Drawing Tutorial
- How to Draw & Shade a Nose in Three Quarter View
- How to Draw Different Types of Lips
- How to Draw Lips From 3 Different Views
- How to Draw Different Eye Types Step by Step

