How to Draw Lion Face & Head Step by Step
This step by step tutorial shows how to draw a lion’s face and head going from a basic shape sketch to a finished line drawing.
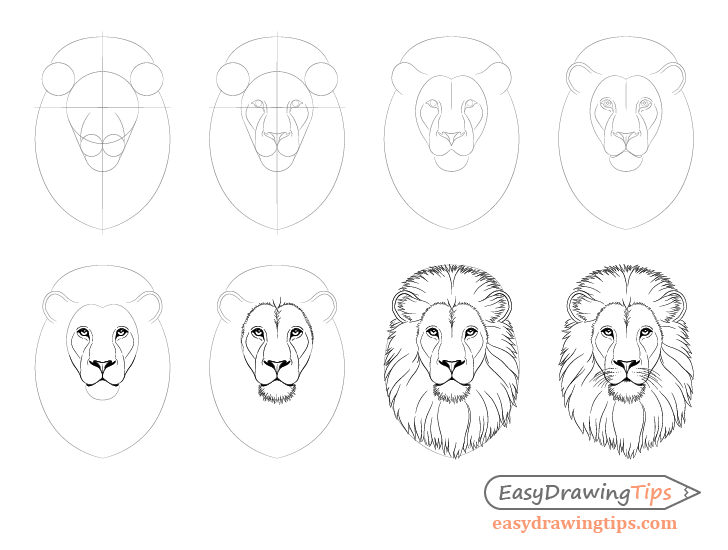
A lion’s face is fairly complex and drawing it can be a challenge. To help this guide show how you can construct the basis for one from simple shapes. It then illustrates how you can gradually build on these to create a detailed line drawing of the animal.
Approaching art in such a way makes the process easier to manage and can help you avoid time consuming mistakes.
Please note that some of the steps will require you to erase parts of the initial structure drawing. For this reason you should start the tutorial in pencil. You should also make light lines that won’t leave marks when erased.
Step 1 – Draw the Major Shapes of the Lion’s Face & Head
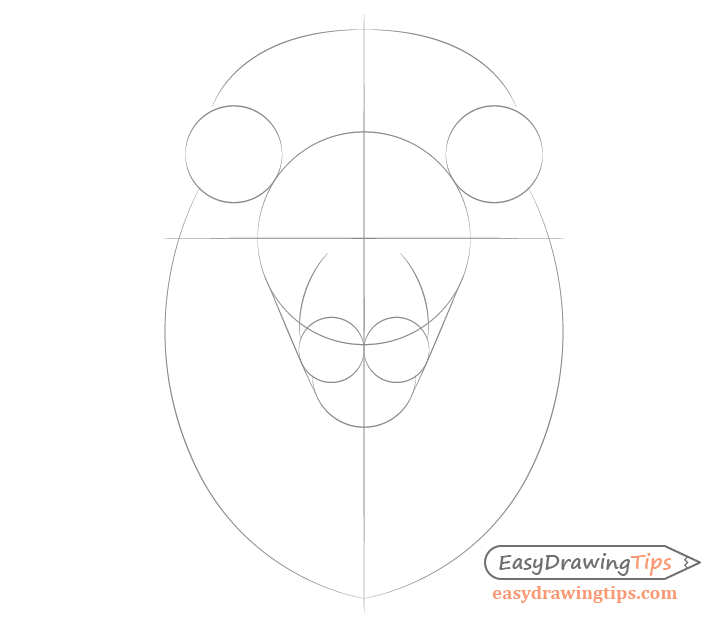
Start the drawing of the lion’s head by simplifying it’s main parts into more basic shapes.
For a more detailed explanation on why you should draw in this way you can also read:
Beginner Guide to Learning to Draw
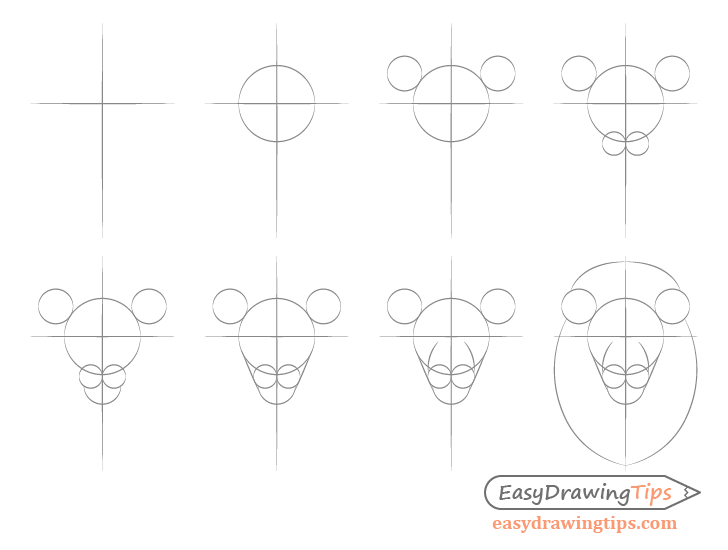
Construct the lion’s head as in the example above:
- Draw a straight vertical line through the middle of your drawing area followed by an intersecting horizontal line towards the upper end of the first line
- Make a circle around the intersection to get the rough width and shape o the upper part of the head
- Draw two circles to indicate the basic shape and size of the ears
- Towards the bottom end of the large face circle draw two more circles (slightly overlapping the big one) to define the end of the snout
- Draw a half circle below the two “snout” circles to set the shape of the bottom jaw
- Project a set of lines from the large face circle towards the bottom jaw half circle to define the sides of the face
- Draw two curves staring from slightly below the horizontal line towards the “snout end” to define the sides of the snout
- Draw the outer shape of the mane as two sets of curves for it’s upper section (above the ears) and another two sets of curves for it’s lower section
Step 2 – Draw the Facial Features
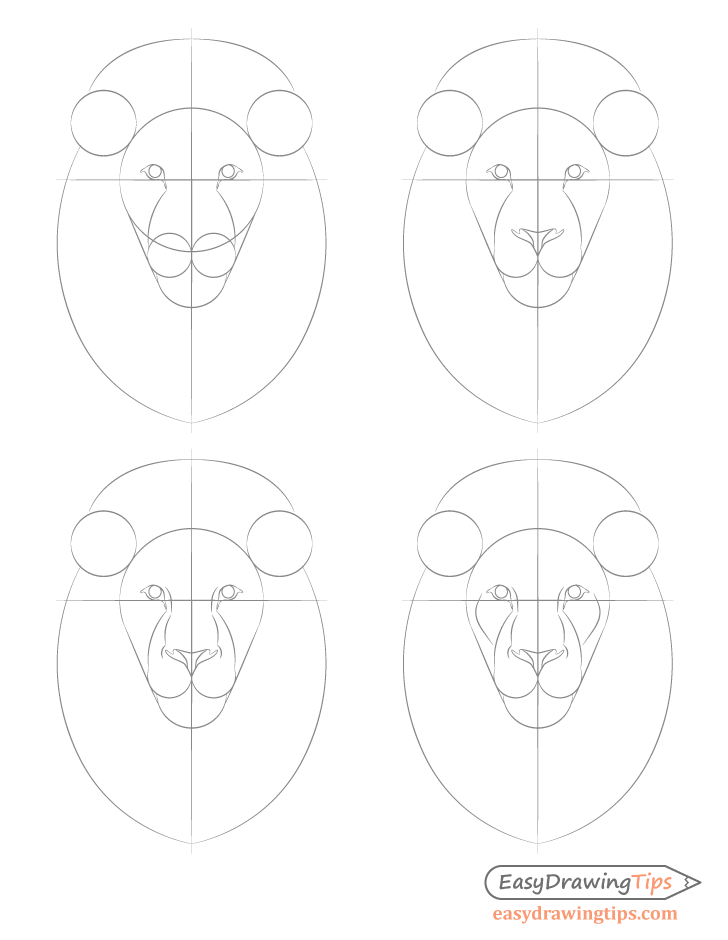
For this step draw the lion’s eyes, snot details, and cheek bones.
Draw the Eyes
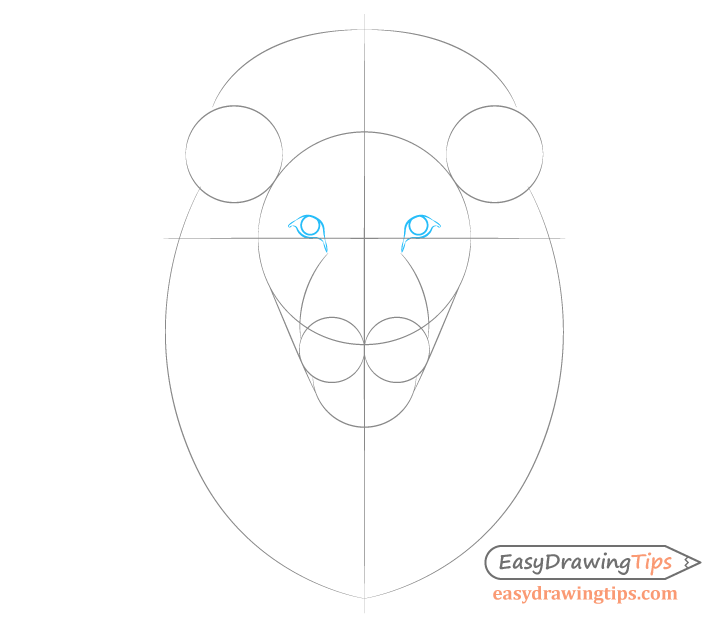
Draw the eyes directly above the horizontal line added in step one (with their inner corner going below it).
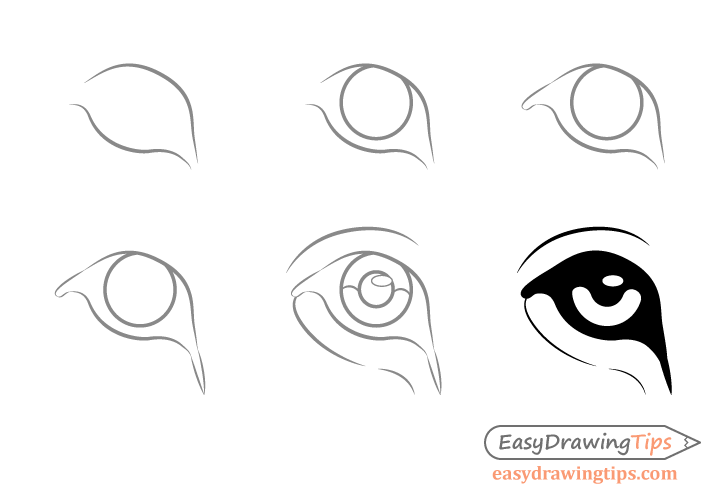
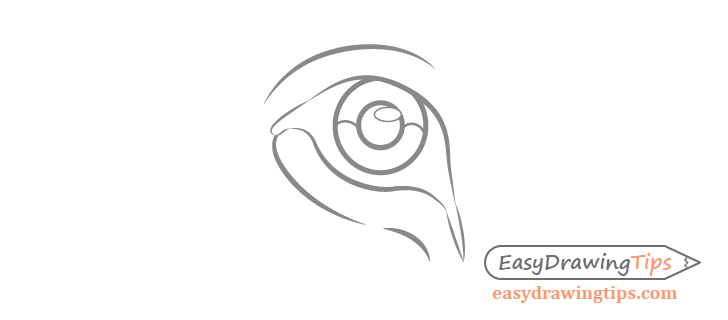
You can see a lion’s eye draw step by step in the example above so that you can better understand the end goal of the drawing. However, for this stage you only need to go until step four.
First, draw each eye’s main shape followed by a circular iris. Finish by adding the outer and inner corners.
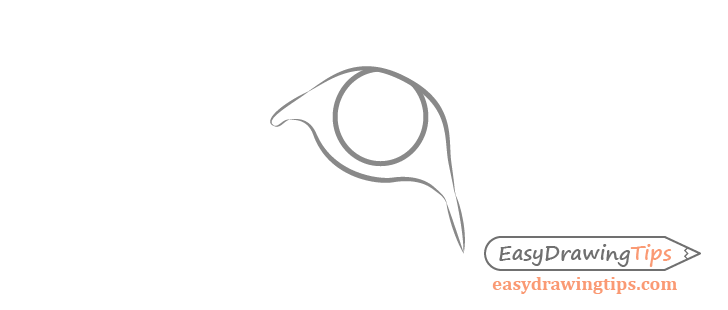
At the end of this step your drawing should be similar to the above example.
Draw the Nose
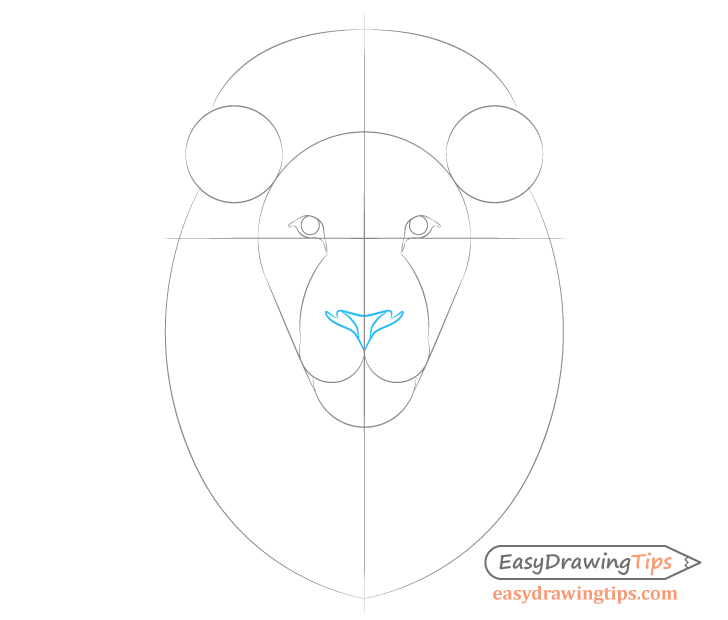
To add the nose first erase the lower half of the large circle of the head and the upper halves of the two circles of the snout (so they don’t get in the way).
Use the center line from step one to help place the nose in the middle of the head.
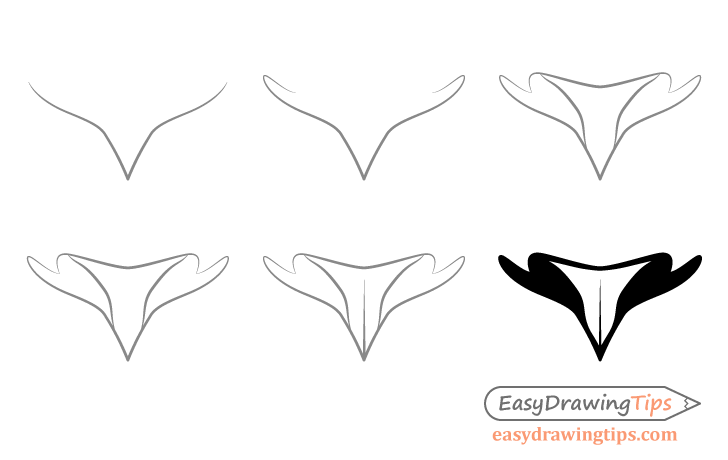
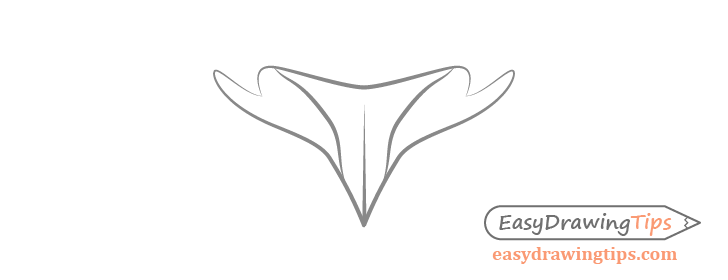
Similar to the eye, you can see the entire drawing of the nose in this next step by step example. Again, you only need to go until the fourth example for this stage of the tutorial.
First, draw the noses lower part with a “V” like shape at it’s very bottom that then branches out to the sides. Afterwards, add it’s upper part follow by the middle area.

Once done adding the nose it should look similar to the example above.
Draw the Upper Part of the Snout/Bridge of the Nose
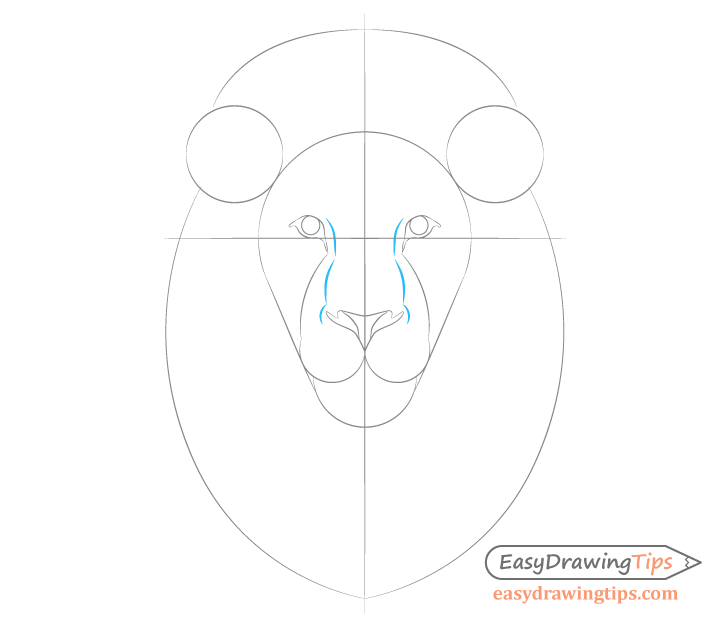
Draw the bridge and sides of the nose along the upper end of the snout.
Define the bridge starting with a pair of curves from just below the top of the eyes. These should then transition into another longer pair that curve in the opposite directions and run almost all the way down to the nose.
Finally, define the sides of the nose with yet another (small) pair of curves that go down from the previous set.
Draw the Cheek Bones
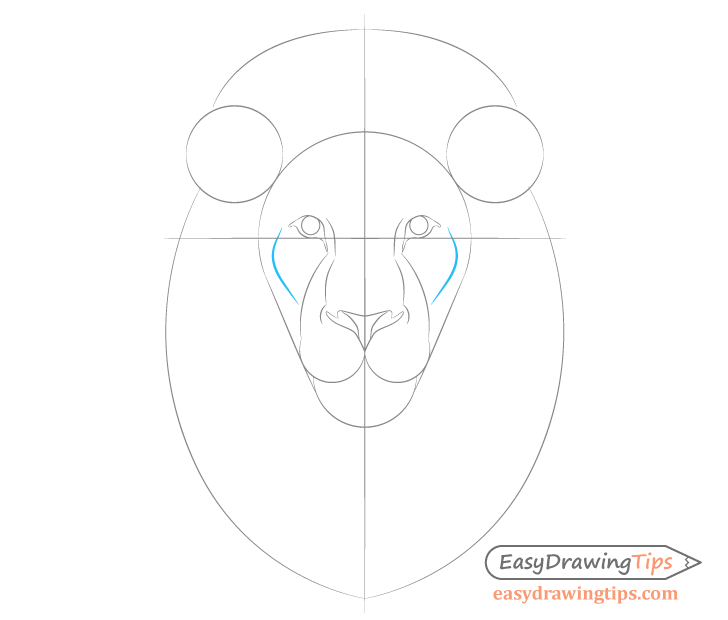
Next, add the cheek bones on the sides of the head. Draw their upper end starting close to the outer corners of the eyes. Their shapes should first go outwards (towards the sides of the head) and then back inwards towards the nose.
Once done with the above you should have a basic outline of the lion’s facial features.
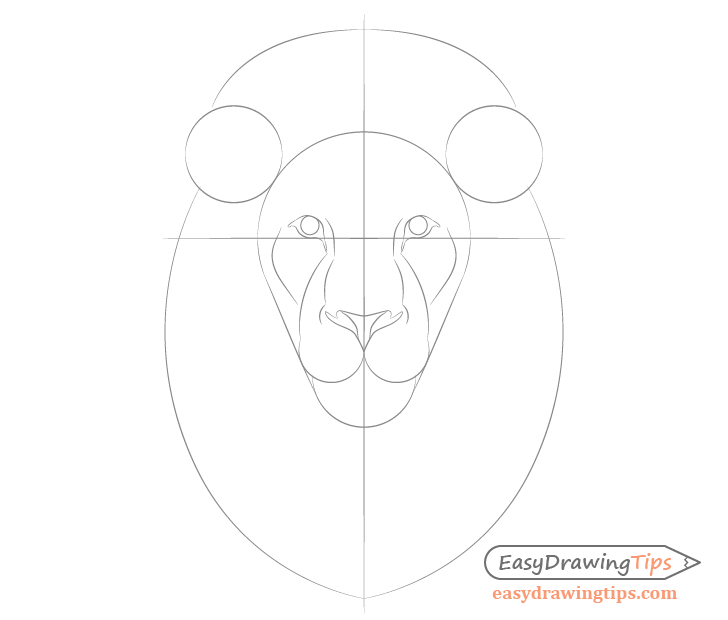
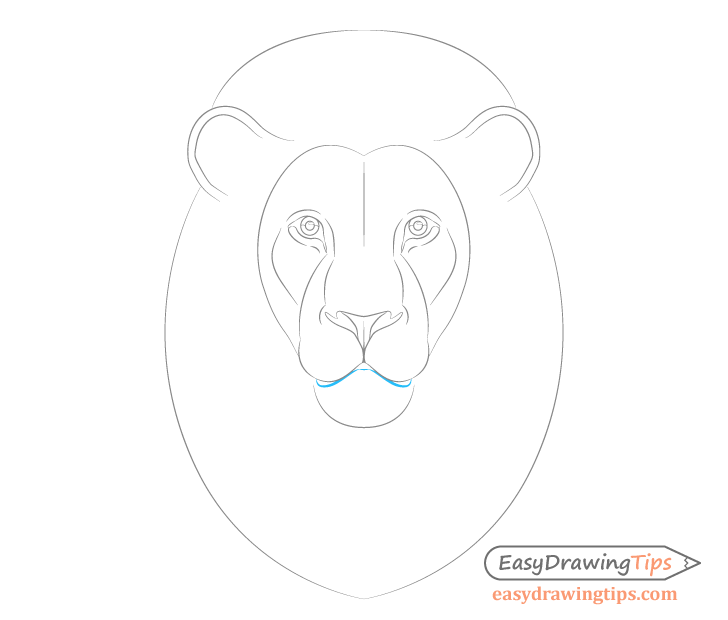
Step 3 – Refine Shape of the Face
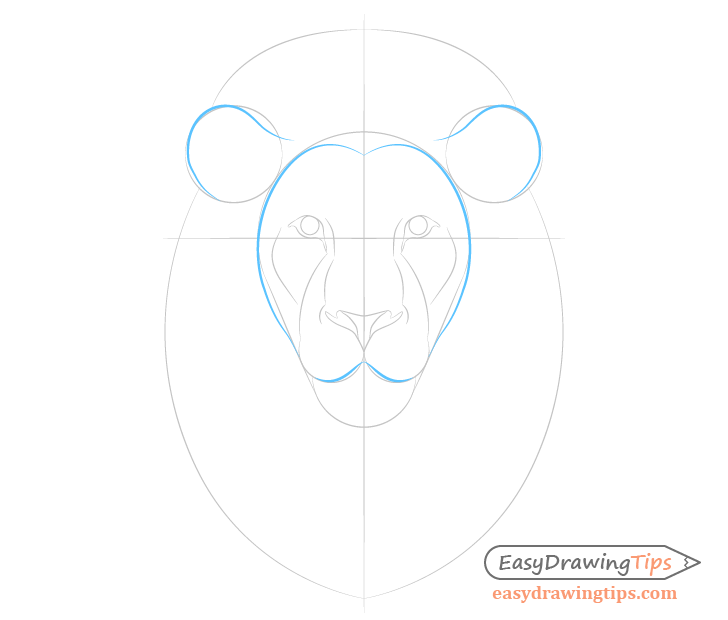
Refine the shape of the lion’s face as shown with the blue lines above to make it more “organic”.

Clean up the excess lines afterwards. You can also erase the horizontal and most of the vertical guide lines once you are done with this step. Just leave a little bit of the vertical line along the forehead (as in the example).
Step 4 – Draw the Smaller Details of the Face

Add the smaller details of the lion’s ears, mouth, eyes and nose.
Draw the Details of the Ears

Draw the Details of the Eyes
Draw the inner curves of the ears pretty much following the shape of their outer curves.
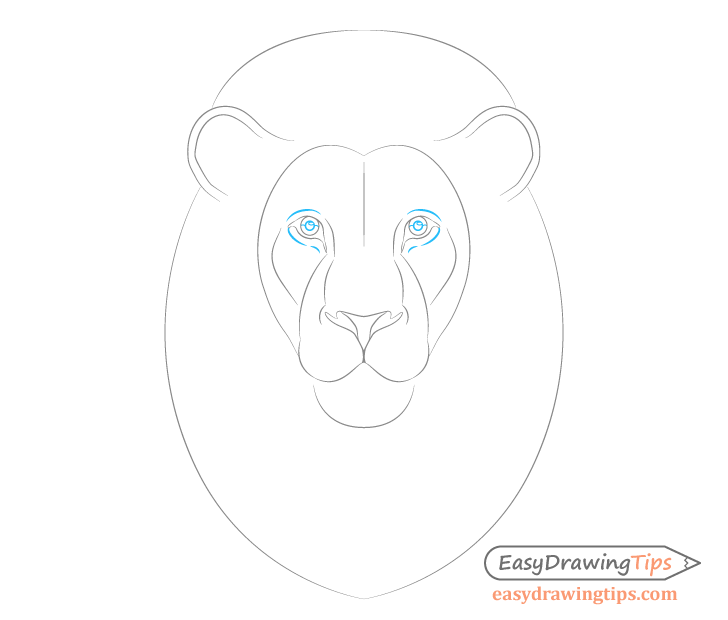
Draw the smaller details of the lion’s eyes.
Add the pupil, reflection area and indicate the upper area inside each iris that will be shaded. Also, draw the curves of the upper and lower eyelids as in the above example.
Draw the Details of the Nose

The only detail needed for the nose is the little split towards it’s upper middle.
You can see it more clearly in this next example above.
Draw the Details of the Mouth
Add the bottom part of the mouth’s opening with the lips sort of “hanging down” on the sides.
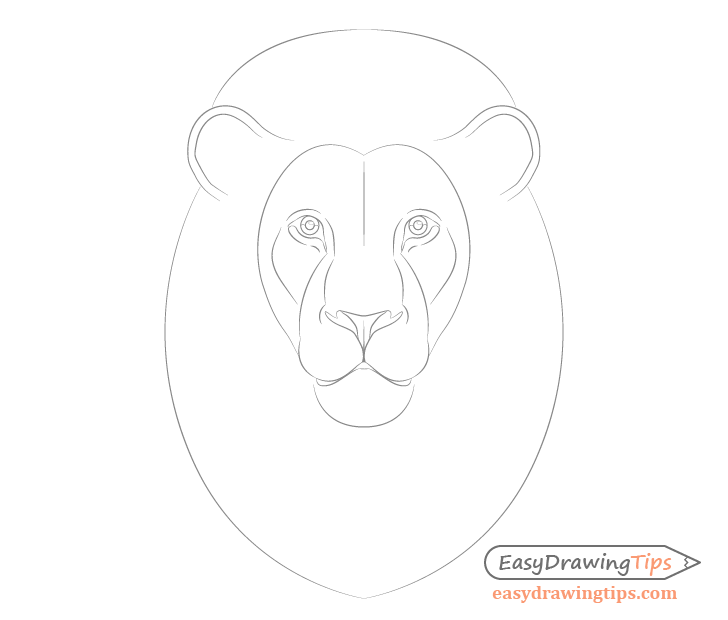
After you are finished with this step you should have almost all of the details of the lions face outlined. The only thing left is the fur.
Step 5 – Add Some Basic Fill/Shading
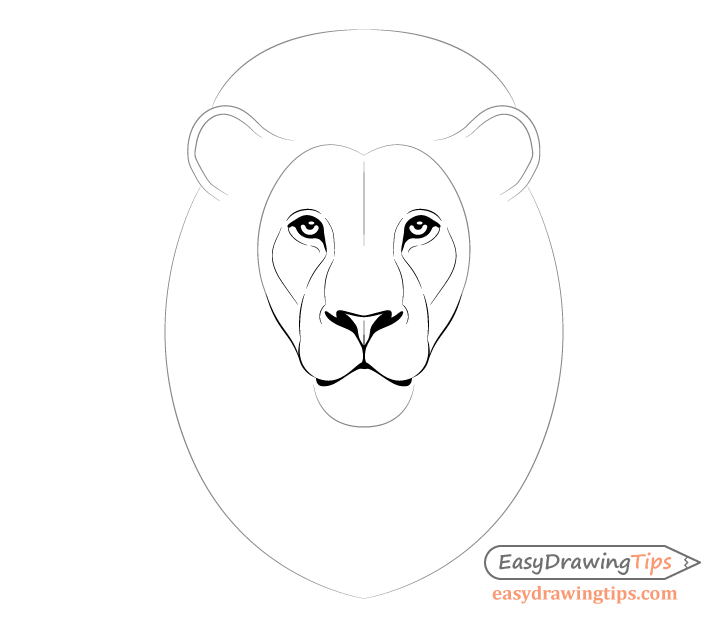
Fill in/shade the areas of the eyes nose and mouth as in the above example. You can also go over the lines that will be kept for the final drawing with a more solid stroke. These are are shown in black in the example above and include all of the details of the eyes, snout and cheeks.
Step 6 – Draw the Inner Mane & Chin Fur
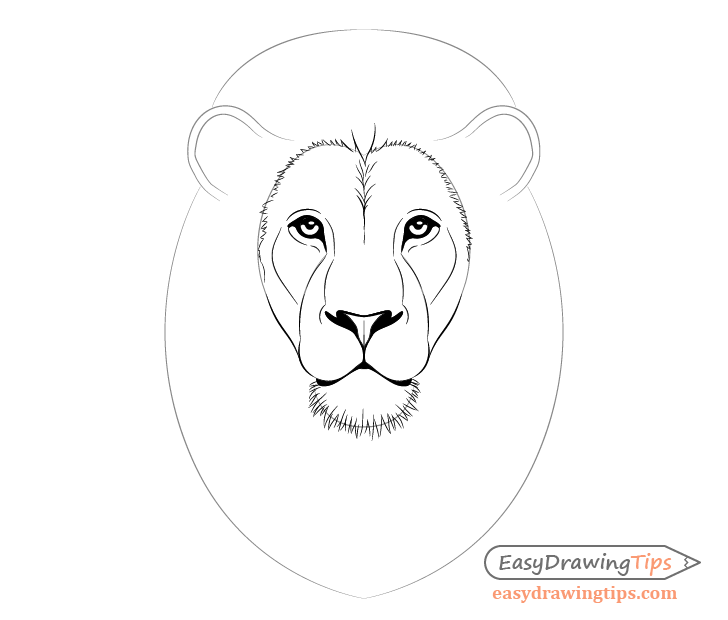
Draw the inner part of the mane’s fur as well the fur along the chin.
You can define the fur using little clumps that can generally consist of just two lines each. Try and make each clump slightly different in shape, size and length to make the fur look natural.
Step 7 – Draw the Mane
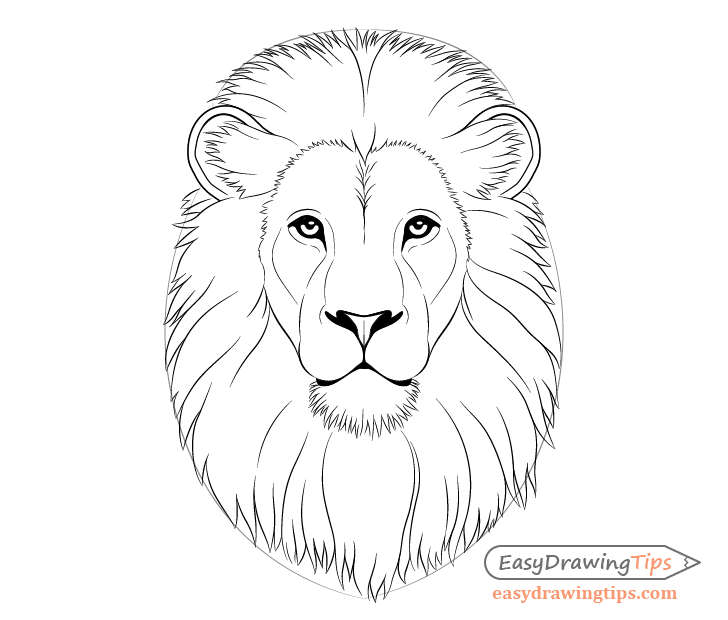
Draw the rest of the lion’s mane. Generally these fur clumps will be smaller around the top area and larger around the bottom where the fur is longer.
Step 8 – Draw the Whiskers
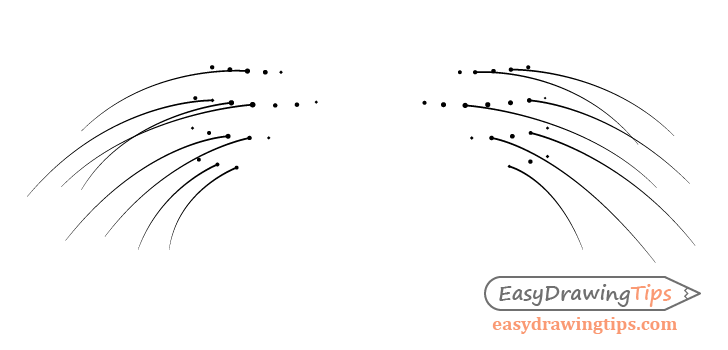
To finish the drawing of the lion’s face add it’s whiskers.
Lions generally have a set of tiny black dots around the upper area of their mouth that the whiskers grow out of. Draw a few rows of these before drawing the whiskers themselves.
Make the whiskers thicker towards the base and thinner towards their outer tips. Also, be sure to vary them in length and to draw them curving in slightly different directions (so that a few overlap).
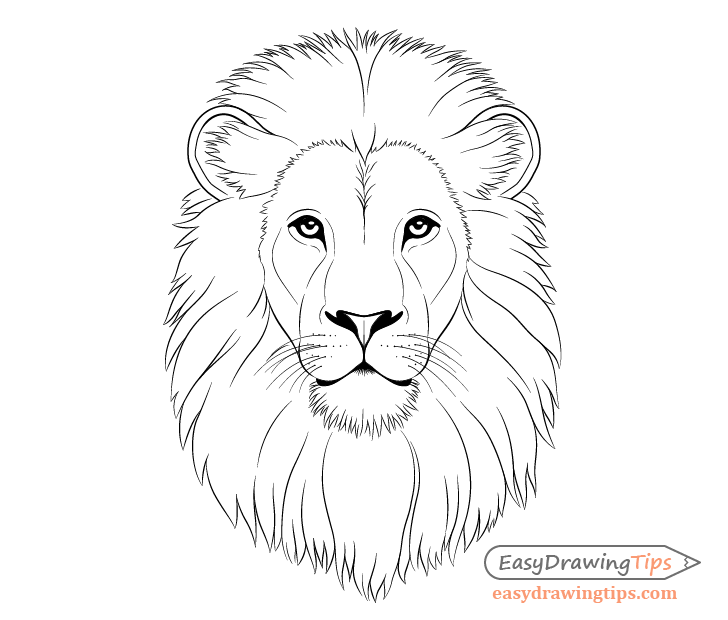
When the whiskers are done you should have a finished line drawing of the lion’s head.
Conclusion
A lion’s face and head can be very complex to draw but you can make the process easier by first breaking it down into more basic shapes. You can then build up the drawing in several steps by placing the facial features, refining the the various parts of the head into more organic shapes and finally adding the small details.
Drawing in such a way makes the process a lot easier to manage and can help you avoid time consuming mistakes. By outlining the lion’s entire head using simplified shapes you can quickly see if it has good overall proportions before moving on to the details. If however you were start from the smaller details right away and try to eventually piece these together into a finished drawing (as many amateur artist do) you could easily run into problems.
If for example you were to draw the entire mane one clump at a time without having a basic outline to act as a guide you could find that when you were done it’s overall shape was off. This would mean having to erase all or part of that work and start over. Whats worse is that even after redoing it you could again run into the same problem. For this reason it’s much better to first structure the overall shape of the different parts of the lion’s head from basic shapes that you can redraw quickly and easily. You can then use these as guides to avoid mistakes when drawing the small time consuming details.
For drawing the full body of a lion from the side view see:
How to Draw a Lion Full Body Step by Step
For other similar tutorials see:
- How to Draw a Wolf Face & Head Step by Step
- How to Draw a Tiger Face & Head Step by Step
- Dog’s Head Front View Drawing – Step by Step
- How to Draw a Fox Step by Step


