How to Draw & Shade a Nose in Three Quarter View
This four step tutorial explains the basics of drawing and shading a nose in three quarter view using examples done in pencil.
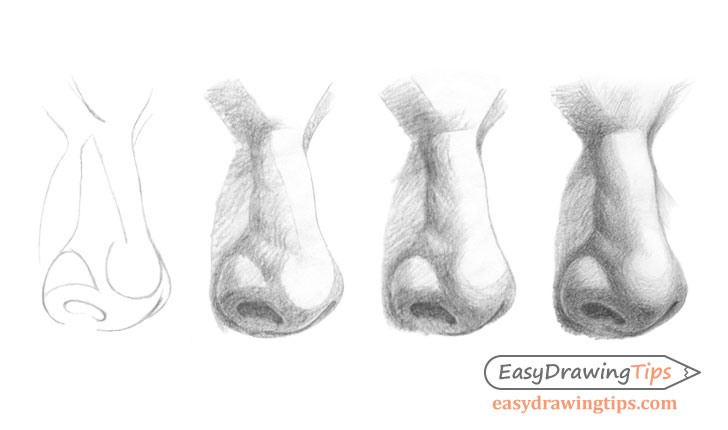
You can see the main drawing stages included in the tutorial in the preview picture above. Unless drawing digitally it’s recommended that just like the examples you do it in pencil.
Step 1 – Make a Line Drawing of the Nose
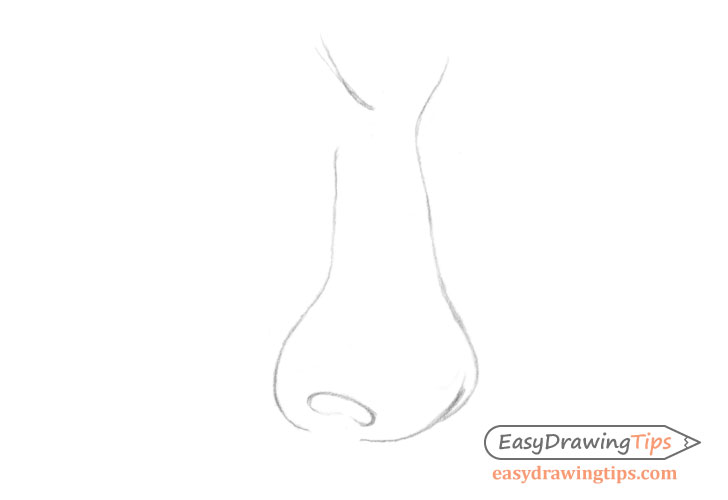
Begin the actual line drawing of the nose with the outline of it’s main shape as shown in the above example. This stage will basically outline the main proportions of the nose and it’s most important details such as the nostrils.
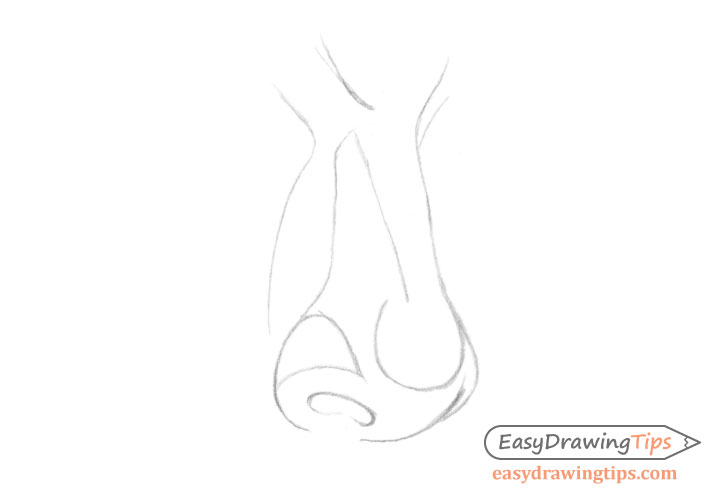
Next add the smaller details of it’s bends, shapes and surfaces. While at this stage these may make the line drawing look a little odd they will be very useful when shading.
Step 2 – Apply Basic Shading
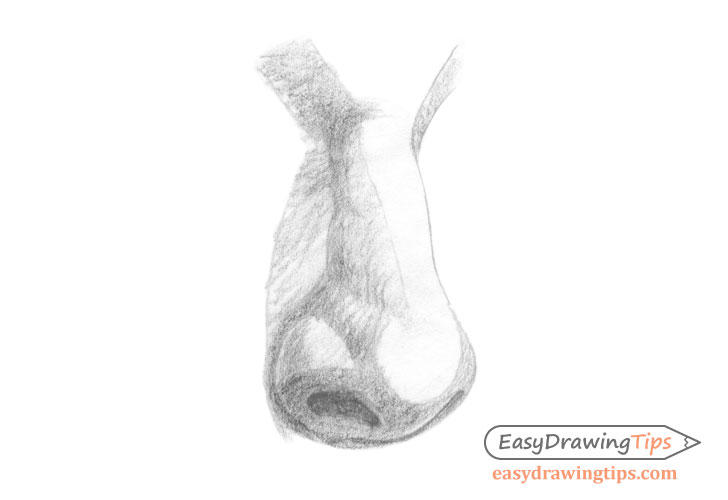
Analyze the distribution of the light and dark areas before shading.
In this case the light will be coming from the upper front area of the nose. This means that it’s front plane will be the largest light area.
The largest dark area will be the bottom of the nose as it will be facing almost directly away form the light. Most of the mid tones will be on the sides.
For the actual shading technique its a good idea to make the strokes in a way which helps reinforce the shape of a given area. For example if you are shading a small curve it can be useful to make curved strokes.
Make the initial layer of shading lighter than what you want to have in the final drawing. You can then slowly work towards building up the shading to the desired intensity through adding more layers of strokes over top.
For more on different shading techniques you can see:
Shading Techniques and Stroke Types Drawing Tutorial
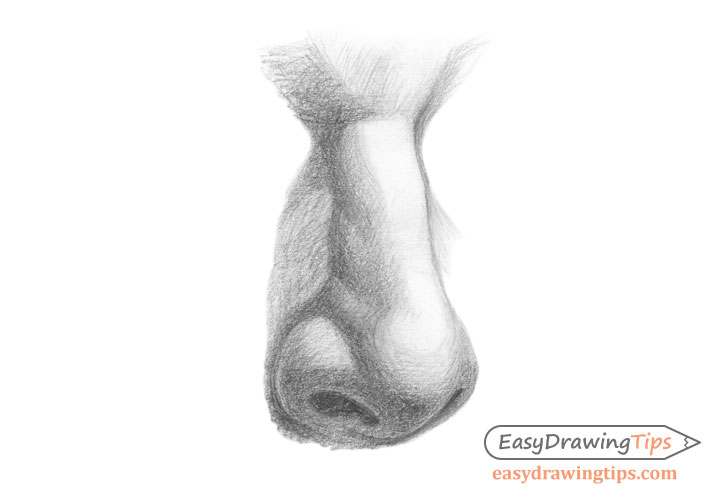
Step 3 – Refined the Shading
Continue shading the nose by applying more layers of strokes to both darken and smooth out the shading.
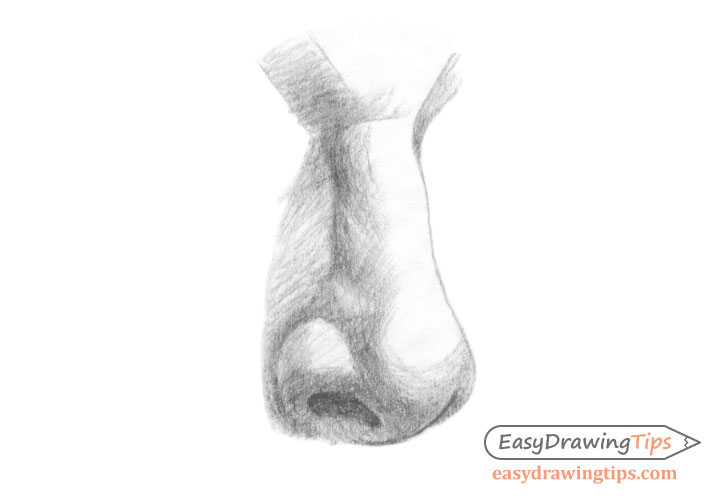
Step 4 – Finish Nose Drawing
Further smooth out the shading and bring it to the level that you want to have in the final drawing. At the same time try not to completely blend your strokes. As was mentioned earlier you want them to be somewhat visible as they can help reinforce the shape of the nose.
Conclusion
Due to their varying and somewhat irregular shapes noses can be quite difficult to draw and even more difficult to shade (especially in 3/4 view). If you are having trouble drawing one don’t be discouraged. Remember to start with a basic line drawing and to try and establish the correct shape of the given nose before going further. Add the smaller details afterwards.
When you begin shading don’t go full strength right away. Instead create a sort of “shading map” for yourself with a much lighter layer of strokes then what you want to have in the final drawing and then build it up in several layers.
Working in several steps and insuring that the previous one was done right can help you catch mistakes early on and to minimize the amount of backtracking you have to do in order to fix them. This approach can be especially helpful when drawing things are are fairly complex such as a nose.
For more tutorial on drawing noses see:
For some very basic shading tutorials that can be helpful for beginners see:


