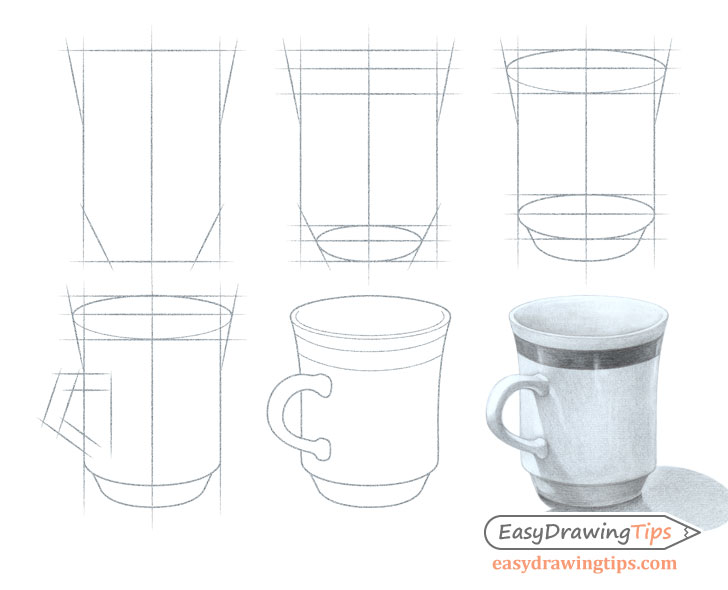
How to Draw a Cup Step by Step
This tutorial explains how to draw and structure a cup. It also has some basic shading tips.
While there is a specific cup used for this tutorial you can still use it if you want to draw a different type of cup.
If you are going to be following along using pencil and paper be sure to make very light lines as there will be a lot of erasing in this tutorial.
Step 1 – Sketch the Basic Shape of the Cup
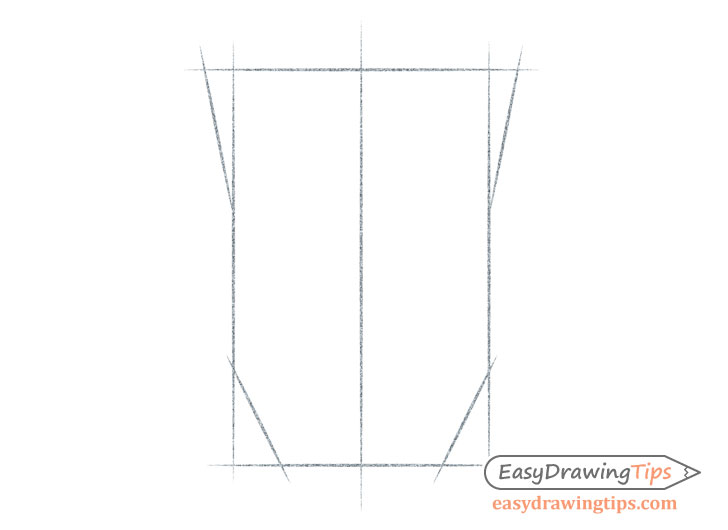
Sketch out the overall shape of the cup (without any curves) to determine it’s overall shape. Pay attention of the relation between the height and the width to make sure they are in correct proportions to one another.
Step 2 – Draw the Base of the Cup
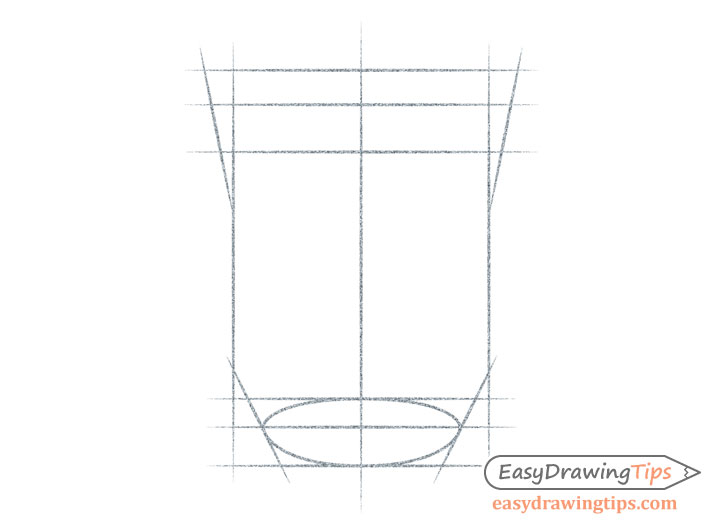
To get the correct shape of the base of the cup you will want to draw an oval shape (an in perspective circle) sort of like the cup is “see through”. Drawing the whole oval instead of just a half-oval will help you insure that you draw it correctly.
Draw the bottom part of the oval vertically wider than the top.
For an explanation of perspective and drawing cylinders in perspective you can see:
Step 3 – Draw the Top & Bottom Shapes of the Cup
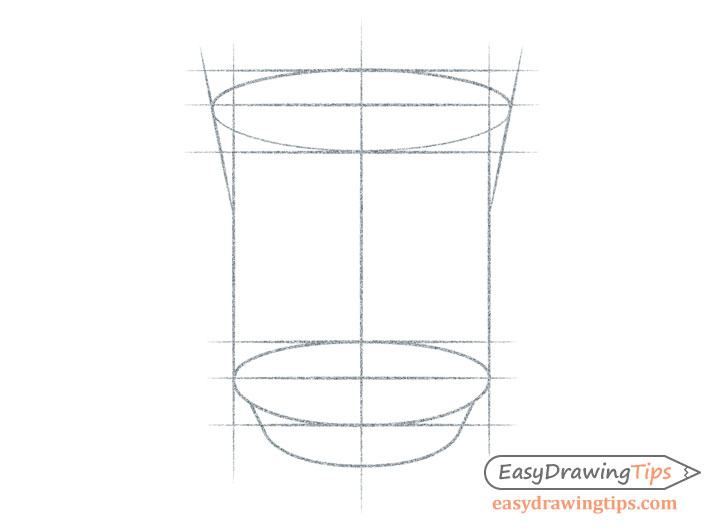
In this step you basically want to repeat what you did in the previous step two more times but with a slight difference.
One very important thing to know in order to be able to draw a realistic looking cup is that the ovals will get progressively vertically narrower as they go up.
The reason for this is that the lower the cup is in relation to your eyes the more the oval will look like a circle and the higher you bring it up to your eye level the flatter it will get. You can experiment with this for yourself by moving a cup up and down in front of your eyes and looking at the top shape.
Because the bottom of the cup is always lower down than the top it will appear rounder (unless you flip the cup upside down in which case they reverse will be true).
Step 4 – Sketch the Proportions of the Handle
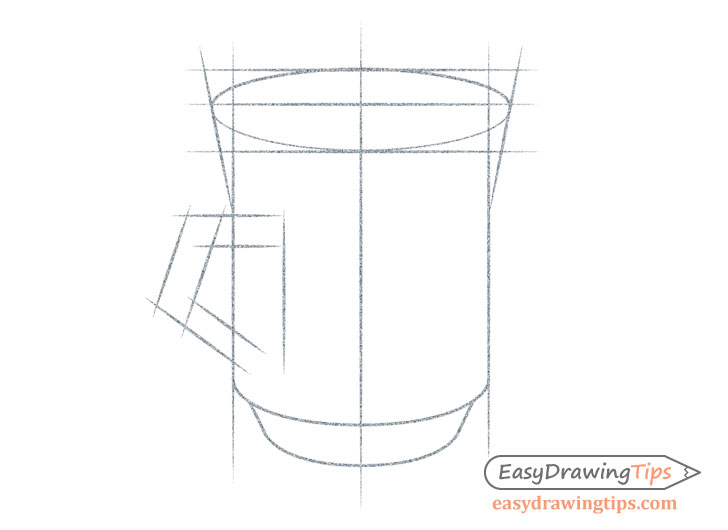
Sketch out the proportions of the handle similar to the initial sketch of the cup.
Step 5 – Clean up the Line Drawing
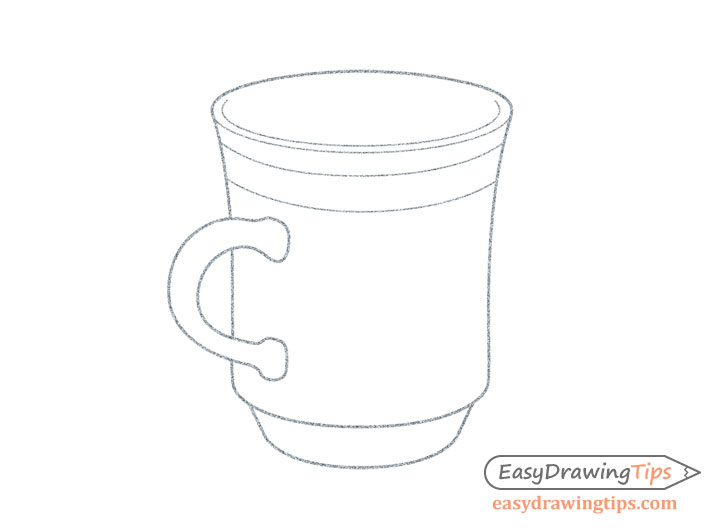
Draw in the handle and other smaller details of the cup. Afterwards clean up your drawing by erasing any guide lines.
Step 6 – Shade the Cup
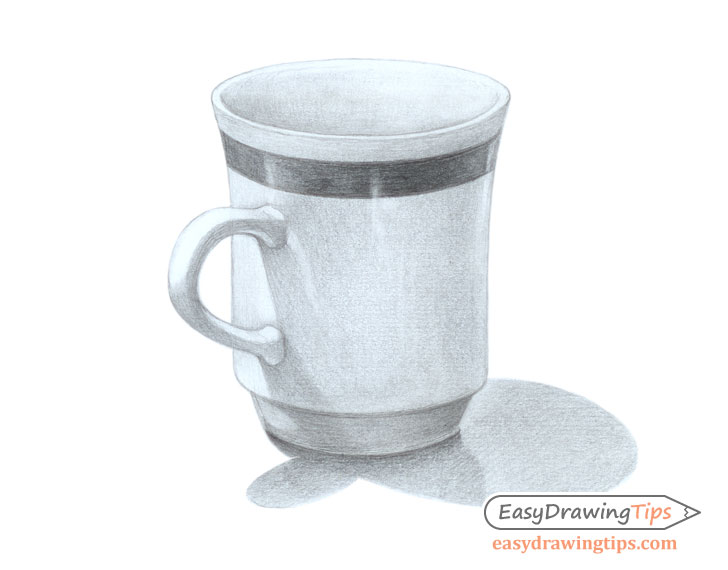
We will not go too much into the shading details in this tutorial but the first thing you will want to do is figure out the light source.
In this case the light is coming from the back left side of the cup.
For this reason the majority of the visible portion of the cup will be in the shadows. The highlighted areas will be on the far left of the cup. There will also be a few small reflections.
As a cup is a very smooth surface you may want to emphasize this in your drawing by either leaving a barely visible stroke or blending your shading to the point where there is no stroke visible at all.
For more help on shading you can check:
Conclusion
A cup is not an overly complex object to draw and at the same time is a very good way to practice drawing.


