How to Draw an Onion Step by Step Tutorial
This step by step tutorial shows how to draw an onion with fairly easy examples that also teach a good overall approach to drawing.
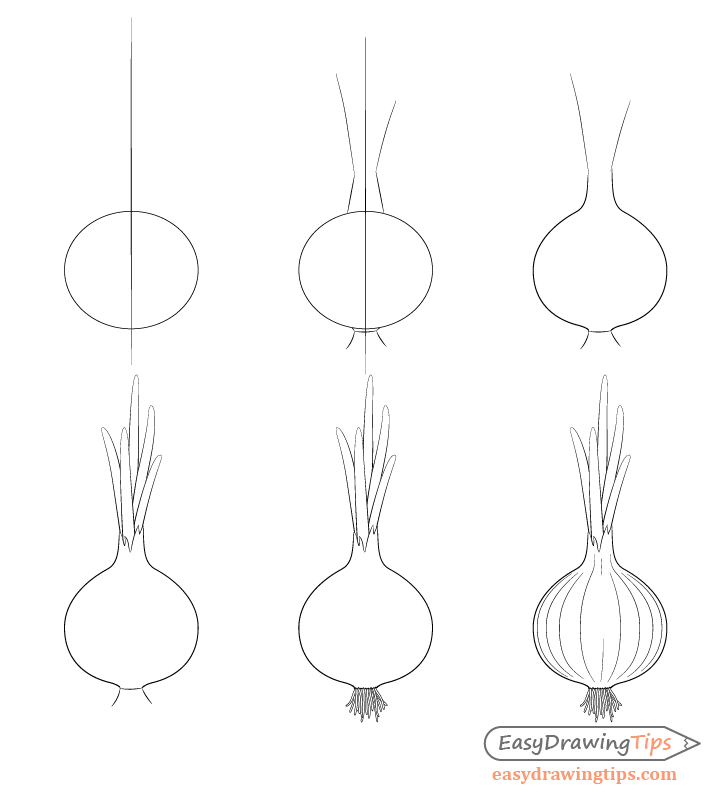
An onion is a fairly interesting looking vegetable so even a basic line drawing as the one in this example can still look fairly nice once finished.
Step 1 – Draw a the Construction Lines for the Onion
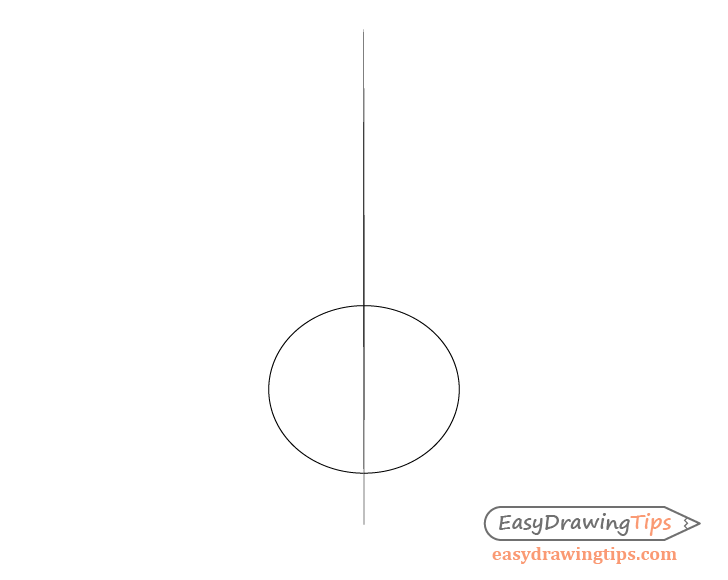
Start the onion drawing by making a straight line through the center of your drawing area (what will later be the middle of the onion). Next draw an oval towards it’s bottom that will act as the basis for the onion bulb.
Step 2- Add Construction Lines for the Leaves & Roots
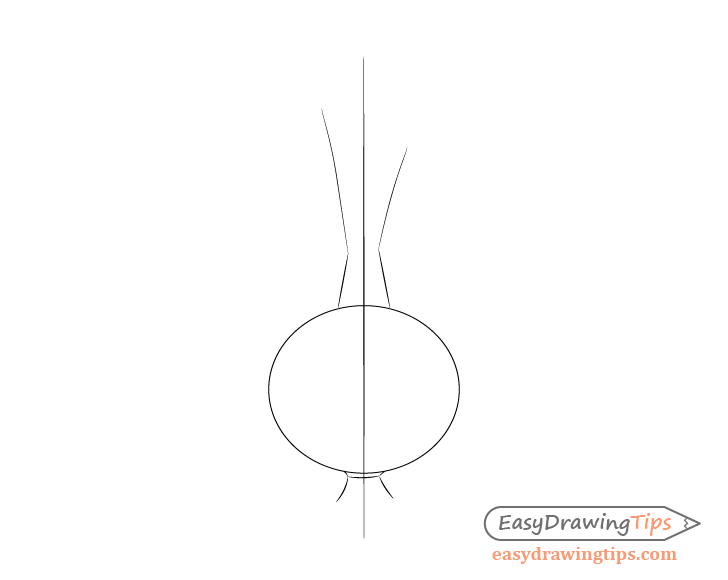
Add some lines to indicate the top and bottom tips of the bulb (from where it will transition into the roots and leaves). Also add just a few lines to indicate the general growth direction of the leaves and roots from those tips.
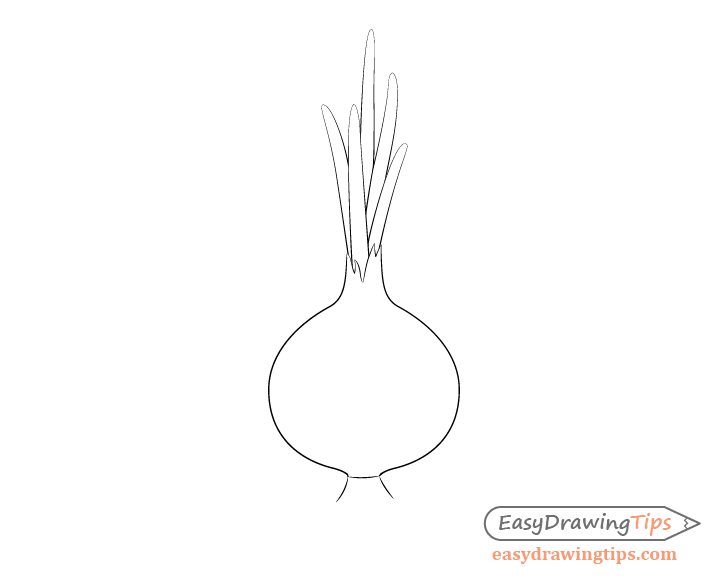
Step 3 – Draw the Outer Shape of the Onion Bulb
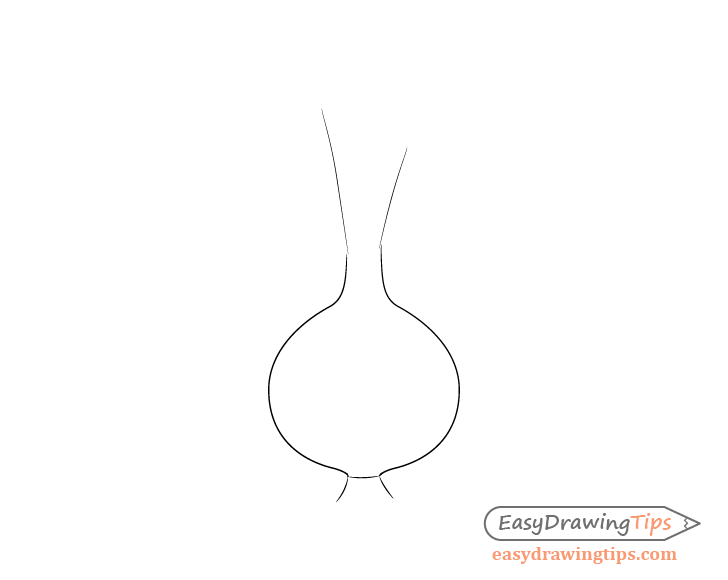
Based on the construction lines from the previous steps draw the organic shape of the onion bulb by adding the smaller curves and tweaking the shape where needed.
Step 4 – Draw the Leaves
Draw the leaves fanning out from the bulb. Try and draw each one pointing in a slightly different direction with varying curves to make them look natural.
The onion leaves will generally be wider towards the base and narrower towards the top. Also keep in mind that the background leaves tend to be partially hidden behind the foreground leaves.
Draw the onion skin around the bottom of the leaves with sort of pointy irregular shapes so that it kind of looks like its been torn off.
Step 5 – Draw the Roots
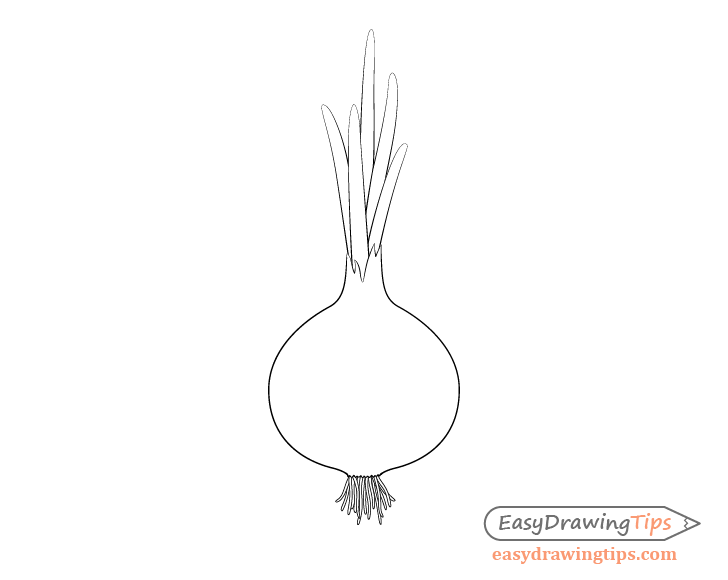
Add some tiny zigzags/waves to the bottom tip of the onion where the roots go from. Draw the onion roots in smooth curves with pretty much the same thickness through their entire length. You will want to add quite a few of them for the onion to look natural.
Step 6 – Add the Details & Finish the Drawing
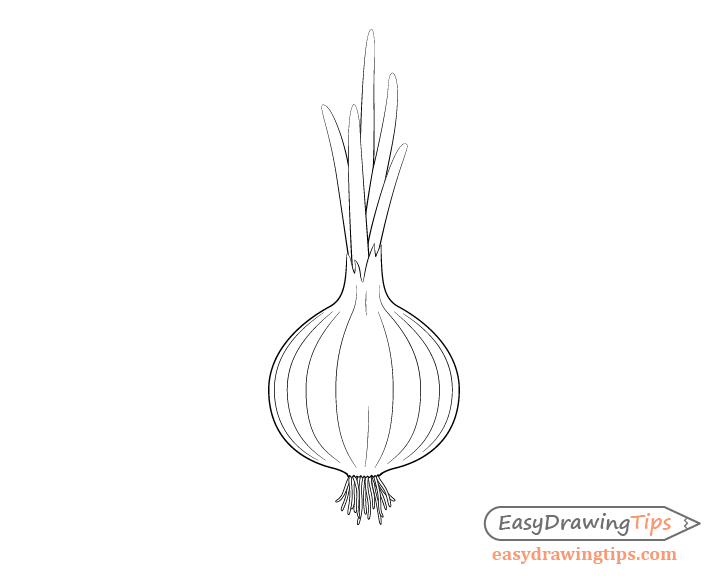
To finish the drawing add a series of lines that onions tend to have along the bulb. These lines should sort of “hug” the shape of the onion. If you look at an actual onion they will appear to be farther apart towards the middle and closer together towards the sides due to the curve of it’s shape. The lines will also appear to have wider curves as they progress towards the sides. Try and draw each line in a smooth transition from the previous line so that there is no big jumps from a small curve to a large one. The most outer curves should pretty much trace the shape of the sides of the bulb.
The lines on each side don’t need to be perfectly symmetrical and can vary in length. You can also adds a few breaks in the lines (as was done in the middle line in the example) to make them look more natural.
Once done you should be finished with the tutorial.
Conclusion
Making a line drawing of an onion is not very difficult but even for simple objects starting with a construction drawing can help you insure that you get a better final result. Especially so if you are fairly new to drawing and/or want to improve.
For an explanation of good drawing practices see:
Beginner Guide to Learning to Draw
For more similar tutorial see:
- How to Draw a Peach Step by Step Tutorial
- How to Draw Grapes Step by Step Tutorial
- How to Draw Broccoli Step by Step


