How to Draw a Cucumber Step by Step Tutorial
This tutorial shows how to draw a cucumber step by step starting with a basic line sketch and going to a fully shaded realistic looking drawing.
This is a fairly short and simple tutorial with only four steps and can be good practice for beginners.
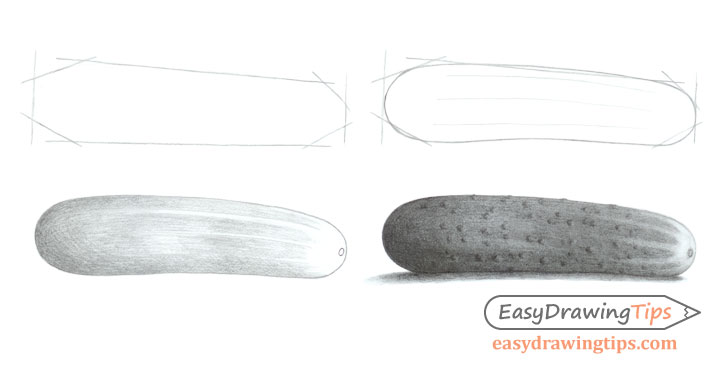
Step 1 – Draw the Constructions Lines
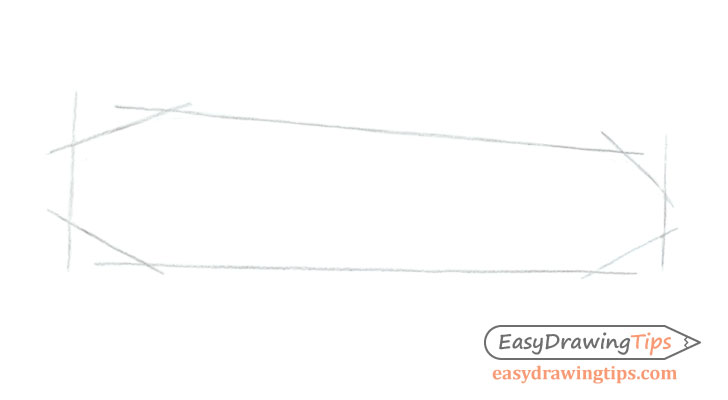
To star the cucumber drawing you can make some very basic construction lines to help you estimate it’s width, height, and general shape.
The construction lines in the example have been made slightly darker so that they are easier to see but you can draw very light lines that are barely visible as you will want to erase them later.
Step 2- Make a Line Drawing
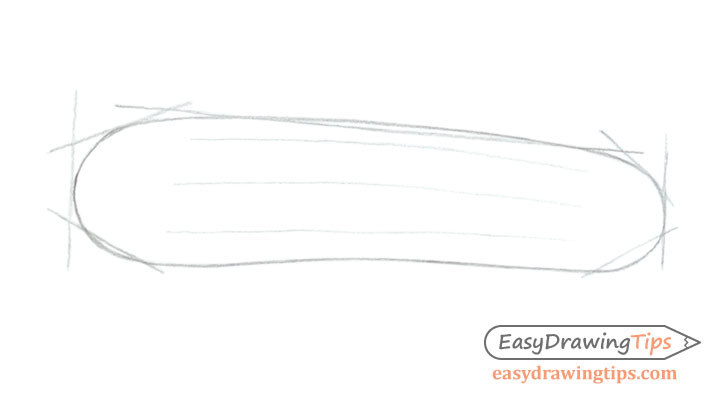
Inside the construction lines frame draw the organic outer shape of the cucumber. You can also draw some lines to indicate the inner shape.
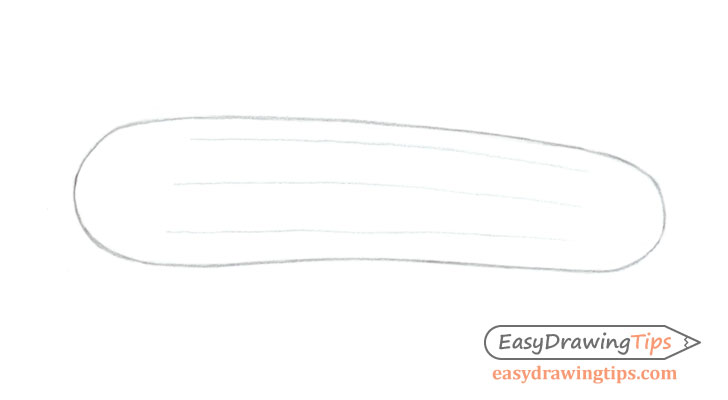
Erase the construction lines once your done for a clean line drawing.
Step 3 – Begin Shading
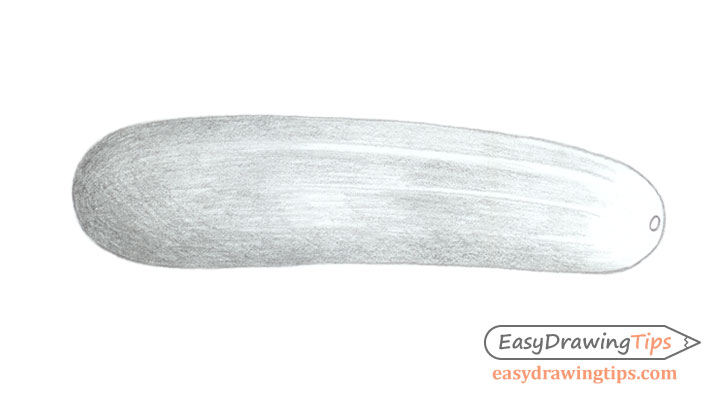
Before shading any object you should first analyze the lighting conditions. In this case the light is coming from the right side of the drawing. This means that the left side of the cucumber will be in the “in shadow” side. At the same time this particular cucumber will also naturally be lighter towards it left side (particularly the tip).
Begin the shading by first making strokes that go along the shape of the cucumber, darker on the right and lighter on the left. You can leave the tip pretty much white.
For different types of shading strokes see:
Shading Techniques and Stroke Types Drawing Tutorial
Step 4 – Finish the Shading
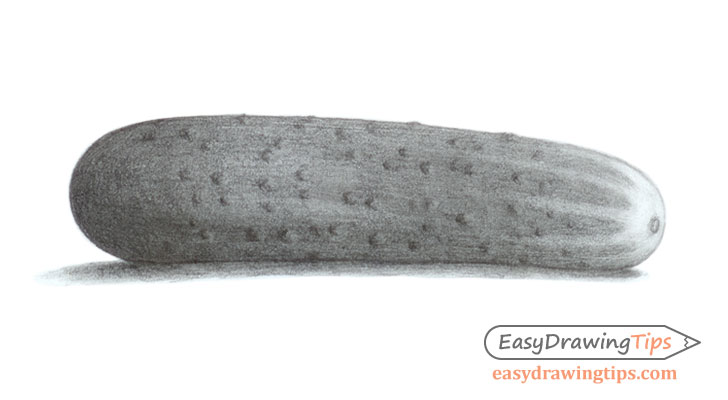
Keep on adding overlapping strokes to the cucumber until you have a fairly smooth looking texture and a dark and detailed enough drawing.
You will also want to add a shadow. Shade it darker towards the bottom of the cucumber and lighter as it gets farther away. As already mentioned the light is coming from the right side so the shadow will be cast more towards the left.
For the final step add the little bumps that cucumbers tend to have by applying darker shading on the left side of the bump areas (as the light is coming form the right). For the right side of the bumps you can lighten the texture strokes of the cucumber with an erase. This combination of light and dark will create the 3d looking effect of the bumps.
Once you are done with the shading you should have a finished of a cucumber.
Conclusion
Overall this is a fairly simple tutorial that provides just a little bit of an extra challenge from the very basics. If you would like to try something even simpler see:
How to Shade Basic 3D Shapes Tutorial
For more similar tutorial see: