How to Draw a Chair in Perspective Step by Step
This step by step tutorial shows how to draw a chair in two point perspective. It can be particularly helpful for beginners looking to learn and to better understand perspective drawing.
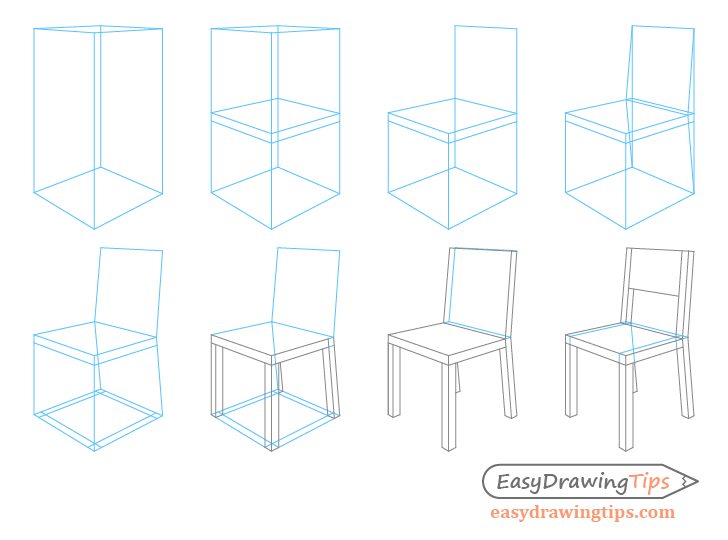
This is a great exercise for understanding how objects are drawn in perspective as throughout the tutorial pretty much every part of the will be chair will be constructed using perspective.
If you don’t know anything at all about perspective drawing then you should first check:
Perspective Drawing Tutorial for Beginners
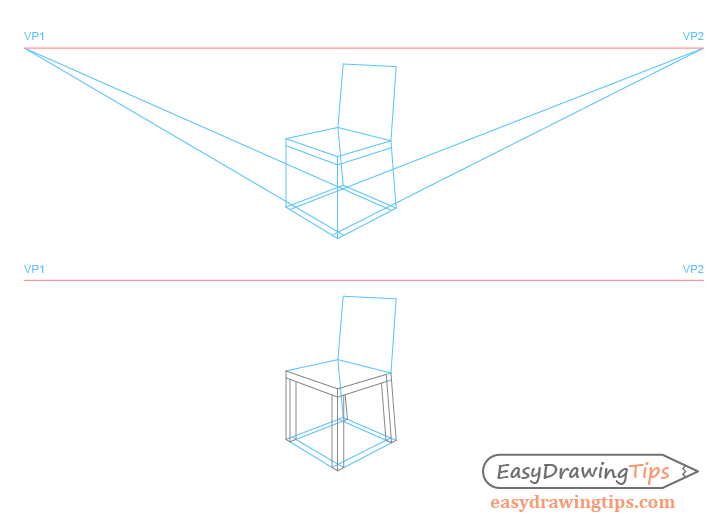
Step 1 – Draw the Perspective Construction “Box” for the Chair
As mentioned this chair drawing will be in two point perspective.
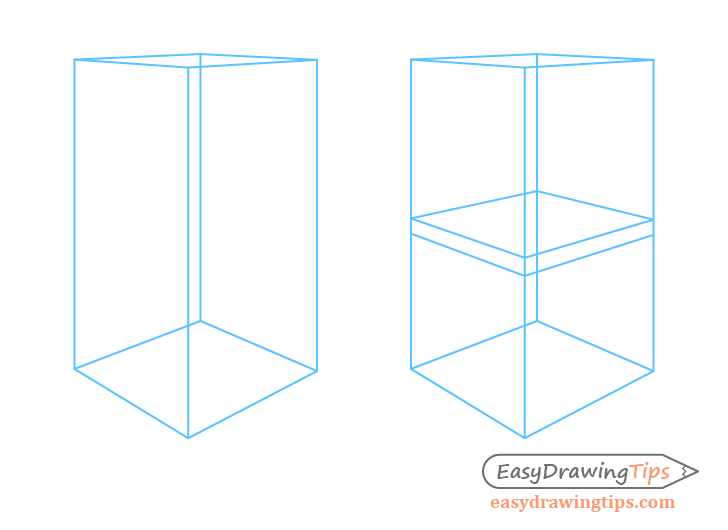
Start by first making a transparent 3d in perspective rectangle. You can think of this as a box that the chair will be constructed inside of. The box should have a base area equal in size to the actual chair and roughly the same (or slightly taller) height.
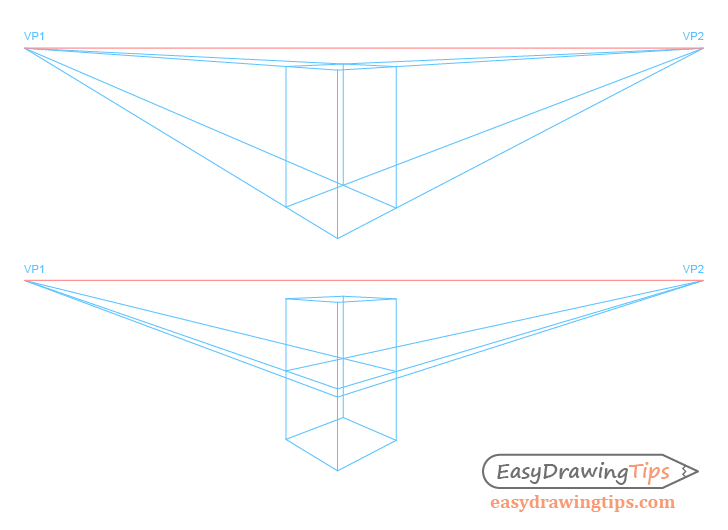
To start the actual drawing make a straight horizontal line to establish the horizon line or the “eye level”. Determine your vanishing points on the horizon line and from those project two sets of lines to establish the base area of the box/chair. Be sure that these are not too close or too far apart or the chair will begin to look odd. Next draw four vertical lines for each corner of the base and use these to project two more sets of perpective lines to establish the top of the box.
You can then create the seat area in pretty much the same way by drawing a vertically narrower 3d rectangle (sort of like a pizza box).
It’s important note that the vanishing points in some drawings may be so far off to the sides that they will not fit on the drawing area. In those cases you can make a small thumbnail sketch to figure out how the objects you are drawing should look like in perspective. Afterwards you can make a larger drawing based on the thumbnail.
You can see the larger version of the drawing above.
Step 2 – Get the Backrest & Back Leg Angles

The back rest and back legs of chairs tend to be on an angle so we will add that in this step.
You can erase all of the perspective lines from the previous steps as well as part of the box as shown in the first example above.
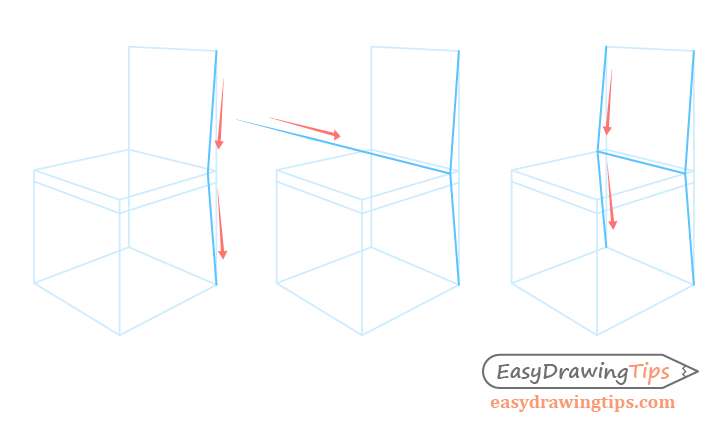
Next draw the angled lines for the backrest and the back legs on the side of the chair that is closer to the viewer. These should start from the top and bottom right side corners of the box and meet at the line that defines the top of the seat. Next from the first vanishing points project a line to where the two angled backrest/back legs lines meet. This line will help give you the correct positioning of the “far side” backrest/back legs lines. Draw these from the far back top and bottom corners of the box meeting at the point where the perspective line intersects the upper left side of the seat.
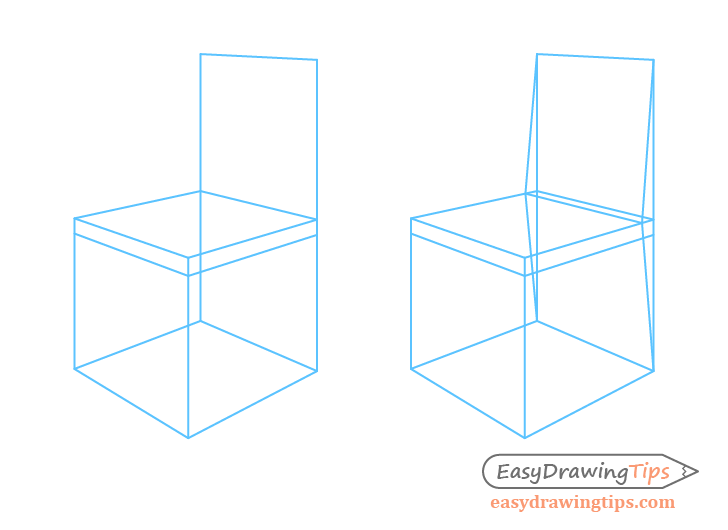
Again you can see the larger version of the drawing above.
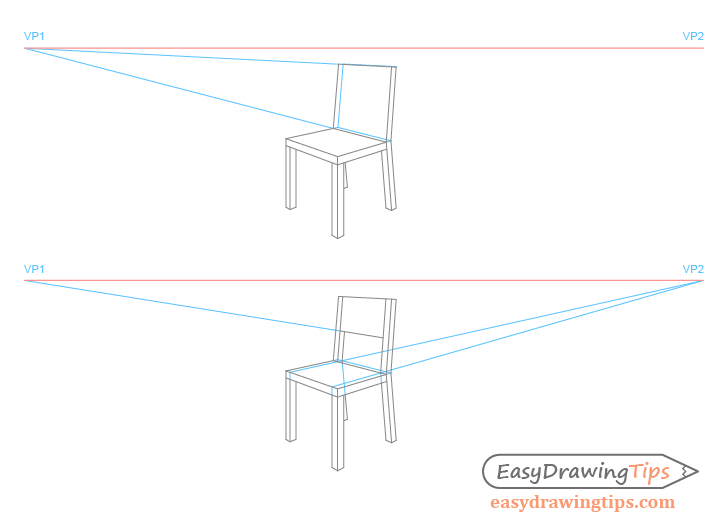
Step 3 – Draw the Legs
To draw the chair’s legs project a set of lines from each vanishing point to form a smaller shape inside the base area.
The small sort of “in perspective squares” created on the sides of the base will be the bottoms of the legs. Project a set of lines from the bottom of the seat to these squares to draw the legs. You can project the front leg lines vertically and base the back leg and backrest lines on the angled lines created earlier.

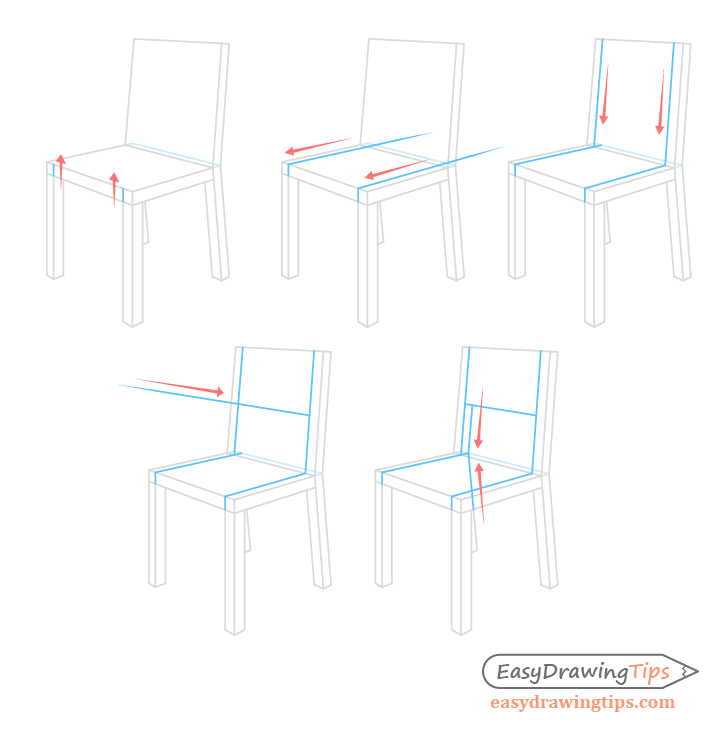
Step 4 – Draw the Backrest
The backrest of the chair is a bit complicated so below is a line by line breakdown of the drawing.

- Projecting a perspective line from the first vanishing point to the area above the front of the forward facing back leg
- Draw a line that will define the front side of the backrest down to the end of the perspective line
- Project a second perspective line to the top of the backrest line
- Draw another line from the second perspective line to the first one to finish the front part of the backrest
- Finally make a small line from the top right side angle of the section we just drew going slightly downwards towards the back side of the backrest
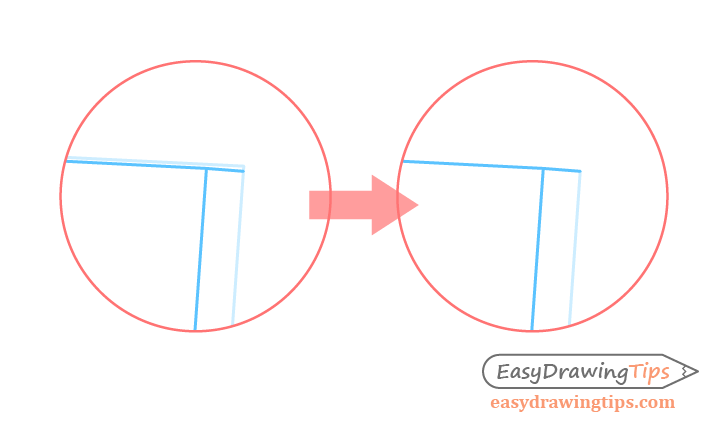
Above is a close up view of the top right side corner for the chair in the last step.
You can see how the last line touches the back section of the backrest on a slight angle. The reason for drawing it this way is because the tilt of the backrest.
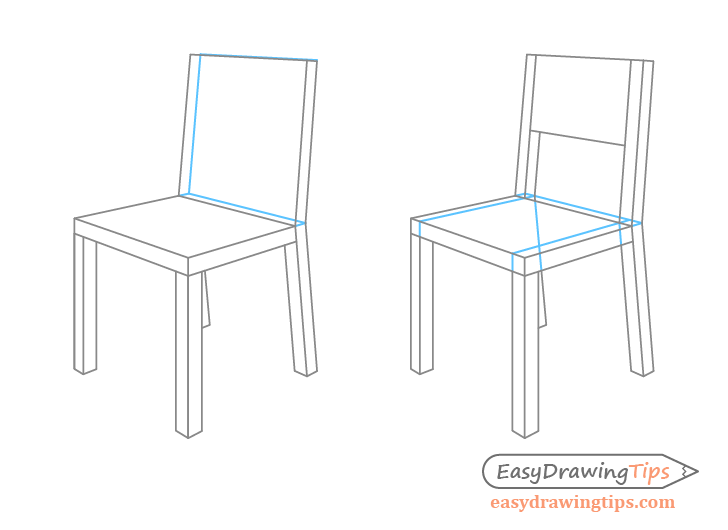
Once you finish all of the steps above can erase the upper back portion as shown in the example above as well as some of the other construction lines.
For the final part of drawing the backrest we will add a gap between it and the seat that chairs tend to have as show in the illustration above.
You draw this as follows:
- Project two small lines directly upwards fro the inner part of the front legs of the chair
- To those lines project two perspective lines from the second vanishing point
- Draw another set of lines that will run along the front section of the back of the chair and meet the perspective lines
- Make another perspective line from the first vanishing point to set the height of the gap/bottom of backrest
- Finally draw the lines for the far back leg and backrest support section that should meet at the end of the “pizza box section” drawn in step one
You can see the larger version of the drawing with all of the construction lines above.
Step 5 – Finish the Chair Drawing

Clean up all of the construction lines to finish the drawing.
Conclusion
This is a very detailed tutorial with almost all parts of the chair being drawn out in perspective. While it’s a great exercise you do not always need to draw perspective lines for every detail of every object. Once you have a solid grasp of perspective drawing you can estimate how certain objects should look like.
For more similar tutorials see:
- How to Draw a Book Step by Step
- How to Draw a Cone in Perspective
- How to Draw a Pyramid in One Point Perspective
- How to Draw a Pyramid in Two Point Perspective
- How to Draw Cylinders in Perspective Tutorial
For some general beginner drawing tips see:
Beginner Guide to Learning to Draw


