How to Draw a Rhinoceros Step by Step
This quick tutorial shows how to draw a rhinoceros step by step from the side view going from a basic construction sketch to a finished line drawing.
Please note that this is a short but somewhat advanced tutorial. While it’s not overly difficult it does not offer as detailed a breakdown as some other tutorials here on EasyDrawingTips.
It’s recommended that you do this tutorial in pencil.
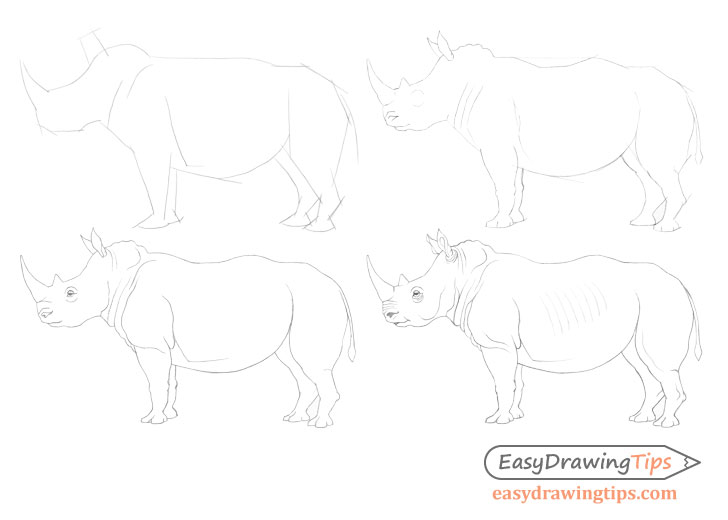
Step 1 – Make a Construction Drawing

Start by making a rough construction drawing of the rhinoceros. You can outline most parts of it’s body with either straight lines or simple curves without drawing any of the smaller bends.
Be sure to draw very light lines that you can easily erase. The lines in the example have been darkened to make them easier to see. These lines should define the most characteristic features of this particular subject in a simplified manner. They should set the correct proportions of the different body parts in relation to one another and establish their general shapes.
For example The horn can be outlined with just two simple curves. The top of the head has a characteristic wave line shape going from the horn to the back of the head/neck area. The body is very large in relation to the fairly small legs with a somewhat straight back and a curved bottom. The Front legs are pretty much straight with barely noticeable bends while the back legs have a clear backwards bend in them. The overall shape of the legs gets thinner towards the ground while the feet get wider as they go down from the legs.
A construction drawing such as this one is important (especially to a fairly complex subject such as an animal) as it allows for easy corrections/revisions. If you fully draw out each body part before moving on to the next one you may end up having to do far more backtracking if you make a mistake. You will also probably be more likely to make mistakes if you start the drawing with the small details without viewing the rhino as a whole.
For more good drawing practices see:
Beginner Guide to Learning to Draw
Step 2 – Create an Outline Drawing With Basic Details
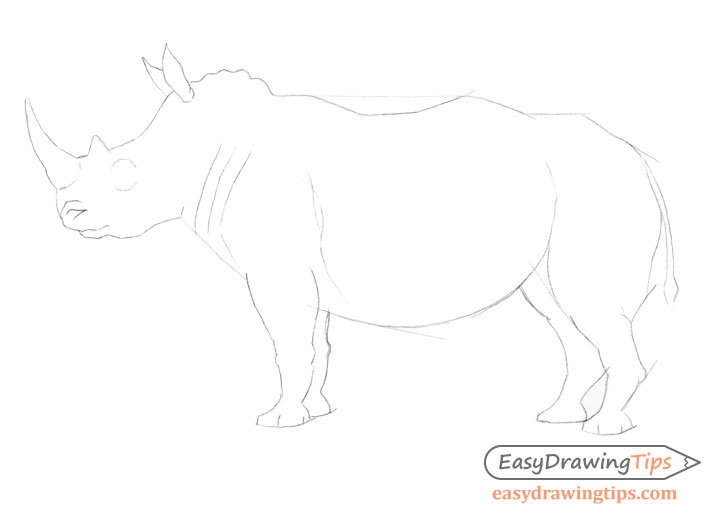
Inside the construction drawing’s “frame” you can now outline the organic outer shape of the rhino and start adding some of the smaller details of it’s body.
Draw the smaller bends and curves that define it’s silhouette and add details such as the ears/facial features, tail, toes and wrinkles on it’s skin.
Step 3 – Add the Smaller Details of the Body
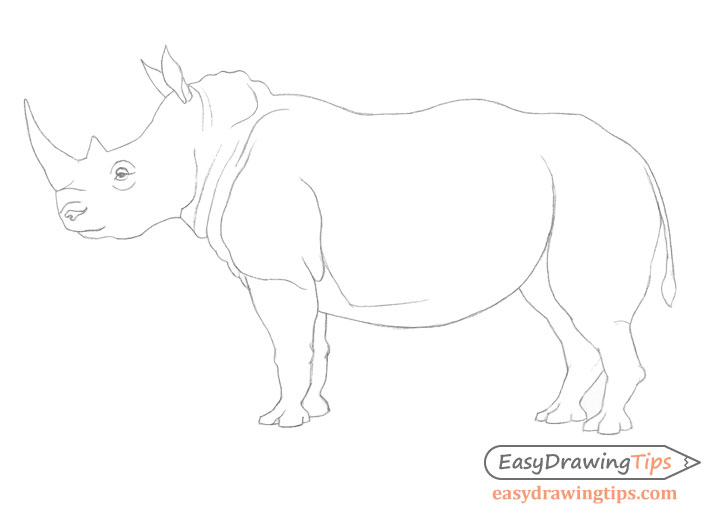
Keep working your way down the to the smaller details and refining any of the construction lines into a more organic drawing. Add all of the facial features, some more wrinkles and finish the overall organic outline of each body part.
Step 4 – Finish the Rhinoceros Drawing
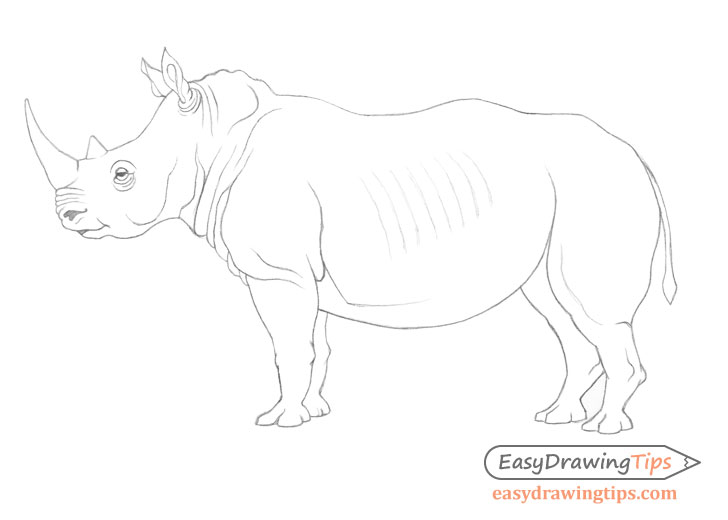
To wrap up the drawing better define the folds/wrinkles of the rhino’s skin and can also draw some hints of the ribs and the bones around the joins of the back legs.
Many of the very tiny folds will be below the horn going down to the nose, underneath the eyes and at the bottom of the ears. Rhinos will also usually tend to have quite a few folds along the neck transitioning into the upper part of the front legs.
Once you finish adding all of the details you should be done with the tutorial.
Conclusion
Rhinoceros are fairly difficult animals to draw due to the irregular shapes of their bodies. When drawing something so complex it’s a very good idea to start with a basic construction sketch. This way you can quickly estimate the sizes and shapes of the various body parts.
For other similar tutorials see:
- How to Draw a Lion Full Body Step by Step
- How to Draw a Dog Step by Step
- How to Draw a Horse From the Side View Tutorial


