How to Draw a Tiger Face & Head Step by Step
This tutorial explains how to draw a tiger’s face and head step by step going from a line drawing to some basic beginner friendly shading.
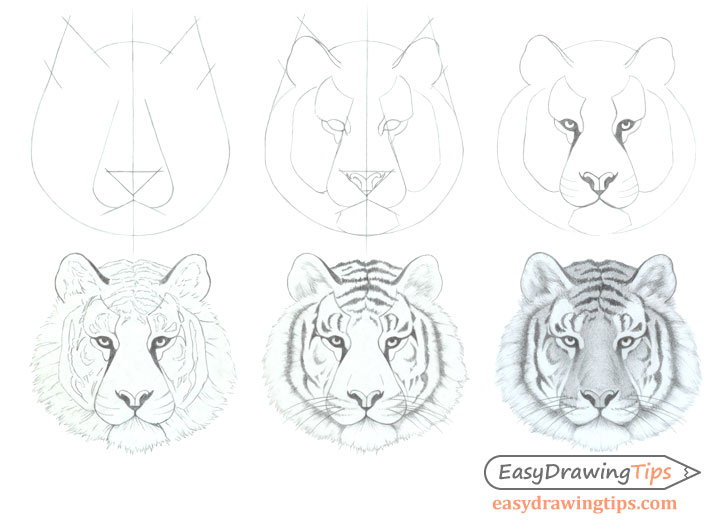
While a tiger can be a fairly complex animal to draw this tutorial has been made with beginners in mind and features simplified shading. If you want to make it even easier you can only go up to step five (a line drawing with some dark fill for the stripes, eyes, and nose).
Step 1 – Make a Construction Line Drawing of the Overall Shape of the Tiger’s Head
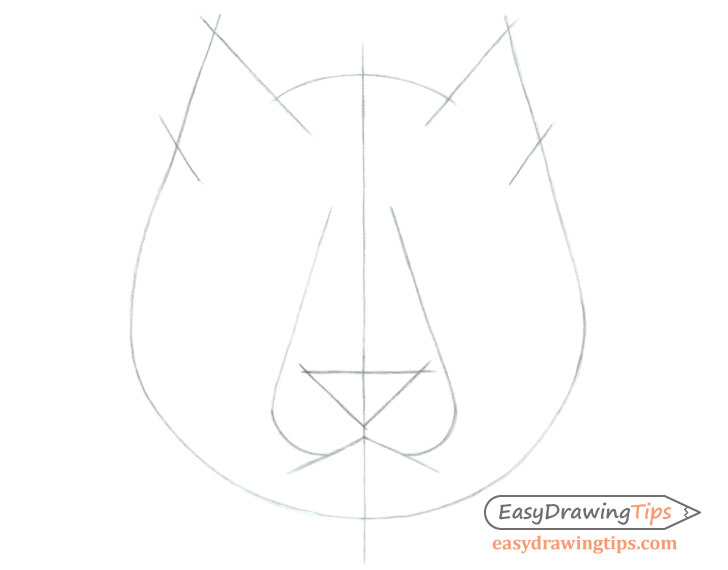
Draw a highly simplified version of the major shapes of the the tiger’s head without any of the small details. The goal is to establish the general shape of a tiger’s head and face and to insure that the various proportions are of the correct size in relation to one another.
Be sure to keep the lines for this stage of the drawing very light as you will have to erase most of them in later steps. The lines in the examples have been made slightly darker so it’s easier for you to see them.
Step 2 – Facial Features Outline Drawing
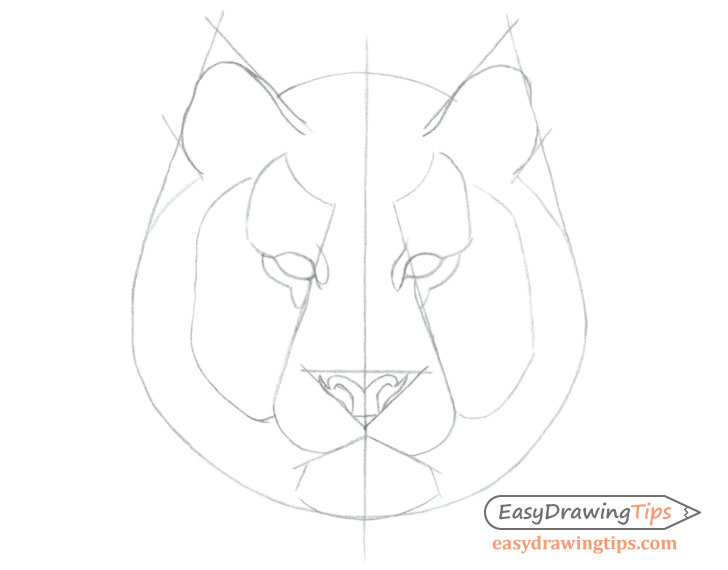
Inside the guide lines from the previous step begin making a line drawing of the outline shapes of the tiger’s facial features.
Again be sure to make very light lines as you will need to remove some of them as well.
Step 3 – Basic Line Drawing
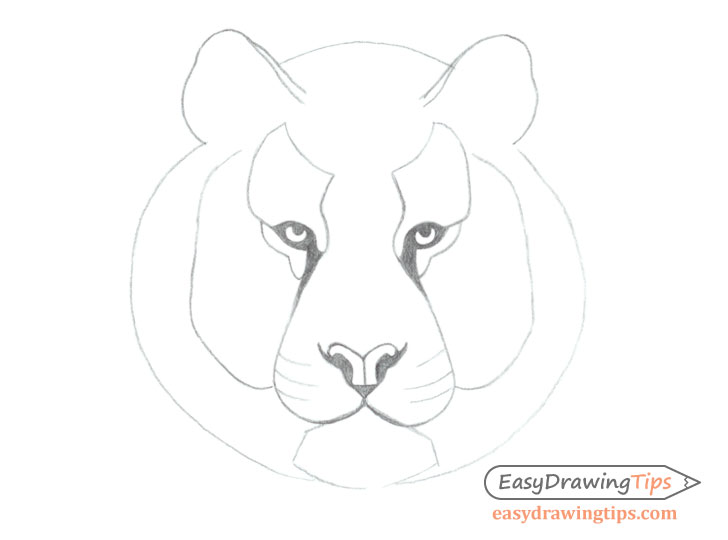
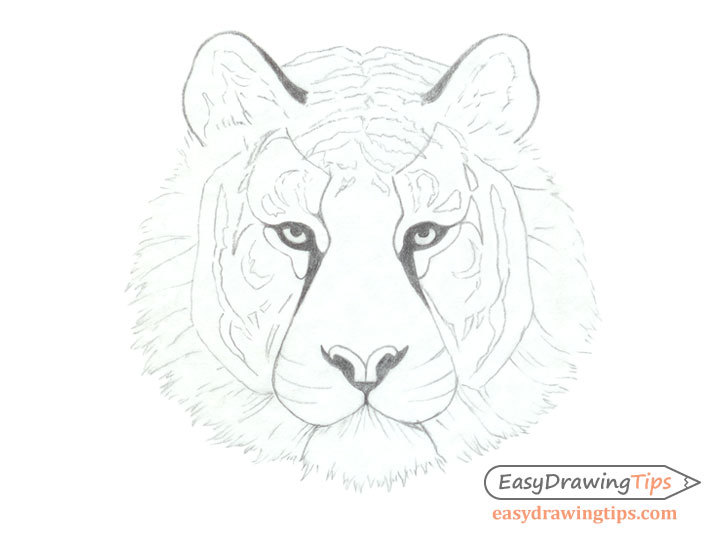
Erase the overlapping guidelines from the first step and draw in some of the smaller details of the tiger’s face such as the pupils of the eyes and some lines for the “whisker” area.
You can also shade in the darker areas of the eyes and the nose with a solid dark fill.
Step 4 – Detailed Line Drawing
For this step you can add some hints of the tiger’s fur along the outer edges of it’s head and inside the ears. Draw the fur in sort of “small clump” of varying shapes and sizes.
Next draw in the outer shapes of the stripes.
Step 5 – Basic Shading
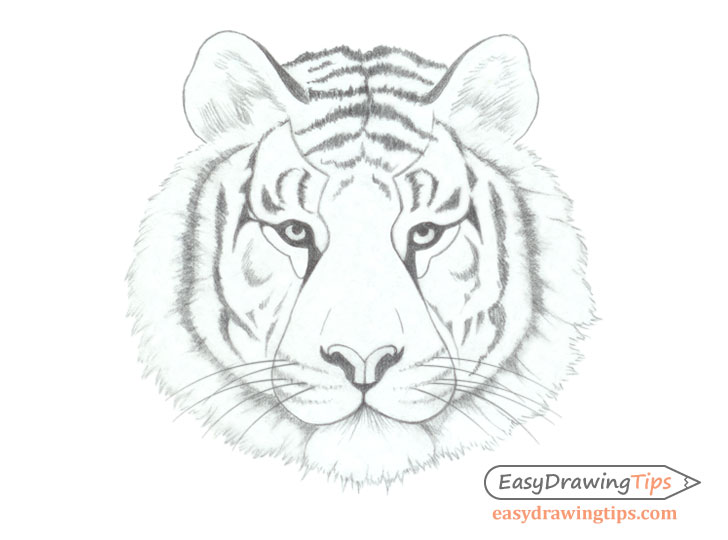
Shade in the fur stripes stripes with some basic one directional strokes (no crosshatch needed) of varying length to make the stripes look more natural. You can also add a few more strokes to the outline area of the head and inside the ears to give the fur a little more detail.
Once you are done the above draw in some whiskers from the “whisker lines” around the mouth area. Try and make these of slightly different length and with slightly different curves.
When you finish this step you can leave the drawing as is or go a little further and move on to the next step.
Step 6 – Fully Shaded Drawing
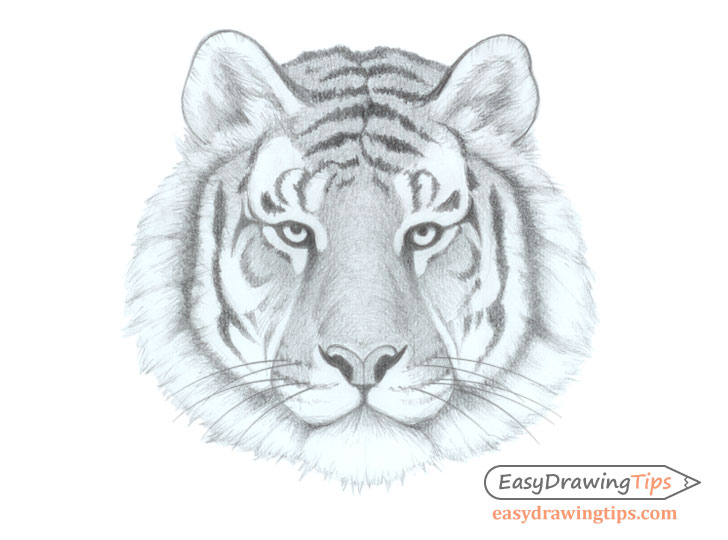
To really make the drawing stand out you can apply some fairly light shading to the darker fur areas of the head and show some basic light and shadow.
In this case the darker fur will be mostly along the nose and forehead/top of head area so you will want to shade in that area. The main light source will be above and in front of the tiger which will make the bridge o the nose area slightly lighter then the rest o the darker fur. You can also darken the inside of the ears by adding more strokes to that area as those areas will generally be more hidden from the light. You can also smooth out the whole drawing in general by adding some extra strokes where needed (see the drawing example above).
As you shade you can erase some of the lines from the previous step (around the eyes and snout area) as you can now show the shape of those areas with the shading.
Construction
Drawing a tiger’s face is generally pretty hard but this tutorial has been somewhat simplified to make it a little easier and more beginner friendly. At the same time it still allows you to draw a fairly realistic looking tiger.
For another similar tutorial you can also see:
- How to Draw Lion Face & Head Step by Step
- How to Draw a Lynx Face Step by Step
- How to Draw a Fox Step by Step


