How to Draw a Lynx Face & Head Step by Step
This tutorial shows how to draw the face of a lynx in twenty steps going from a simple construction drawing to a detailed illustration.
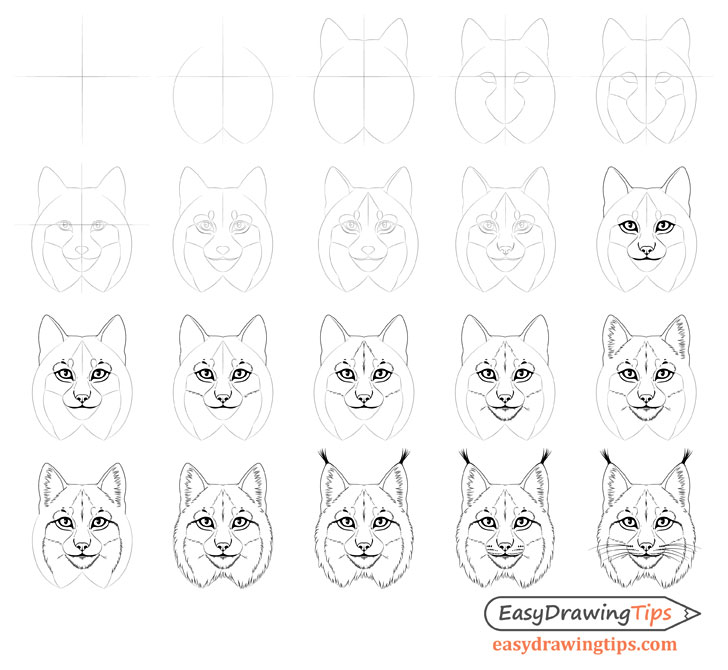
This guide can also be used for drawing the face of a bobcat as the two animals are very similar.
While fairly long this tutorial is somewhat beginner friendly as it shows a simple approach to drawing and does not involve shading. It also provides a very detailed breakdown of the drawing process making it relatively easy to follow.
Unless you are drawing digitally it’s recommended that you start this tutorial in pencil and draw very light lines that are easy to erase.
Step 1 – Draw the Guide Lines For the Lynx’s Face

Though the middle of your drawing area draw two intersecting lines, one vertical and one horizontal. The horizontal line will be used to help see if both halves of the face are equal in width. It can also help determine if the facial features are evenly spaced.
The vertical line will help insure that the eyes and other parts of the face are on the same level.
Step 2 – Begin Structuring the Head
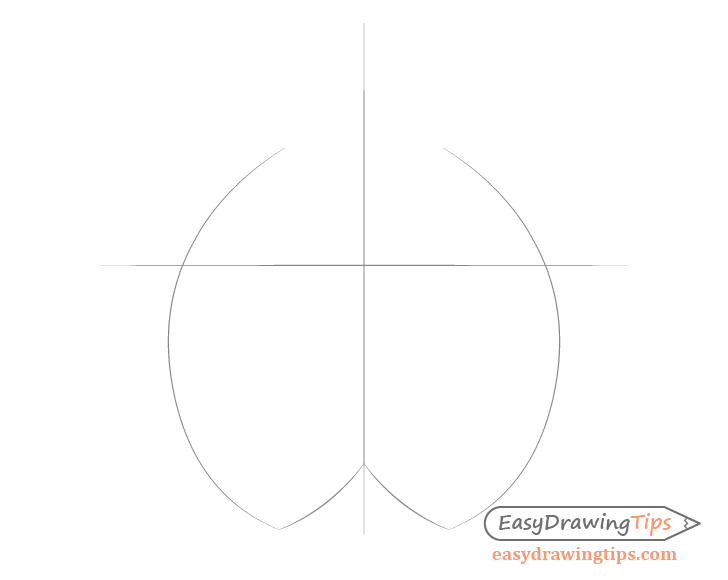
Before drawing any of the small details you will want to create a simple construction drawing of the lynx’s head.
Star by making a rough outline of the shape of the mane. Generally a lynx’s mane has a split in the middle sort of like a “W”. You can draw this with just a few curves. Make two large outer curves that are then joined at the bottom by two smaller curves as show in the illustration above.
The outline of the mane should be positioned so that roughly at least 2/3 of it’s shape are below the horizontal line drawn the previous step.
Step 3 – Add the Outline of the Ears

On top of the outline of the mane add the ears. These are not overly complex in shape so you can pretty much outline them as they will appear in the final drawing.
Before drawing the ears be sure that you will have enough room at the top of your drawing for the ear fluff that will be added towards the end of the tutorial (see any of the last 3 steps).
Make the ears slightly tilted to the outer sides of the head. Draw them fairly pointy but with rounded tips. The ears should have a wider area at their bottoms, sort of like bumps (as shown in example).
After you finish drawing the ears you can join them with a pair of wavy lines that will define the top of the head. These should curve slightly downwards at the vertical center line (drawn in first step).
Step 4 – Draw the Outlines of the Eyes & Snout
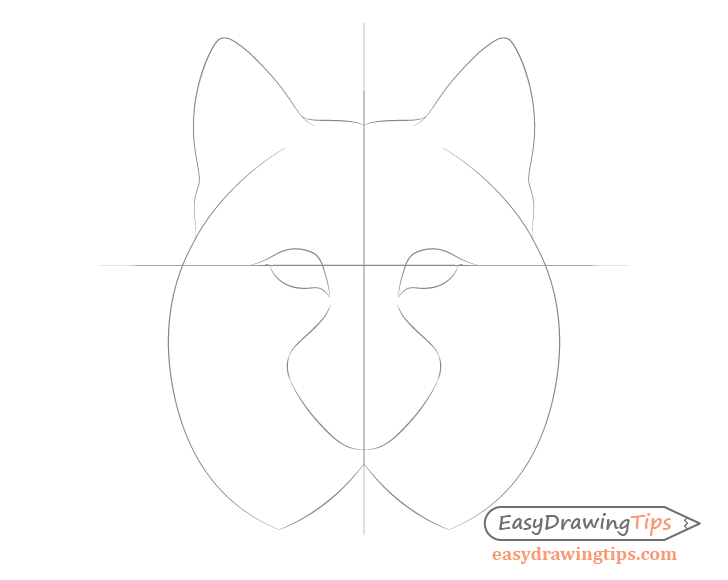
Use the horizontal guide line to help place the outlines of the eyes. Space them about far enough apart that you can fit another eye outline in between them. Please keep in mind that these are not the actual eyes but the patter that surrounds them.
The eye outlines should be angled slightly inwards towards the snout with pointy inner and outer tips. The inner tips should pretty much transition into the snout with just tiny breaks between them. The snout itself should be slightly similar to a “diamond” in shape with rounded corners.
Step 5 – Draw the Shape of the Cheeks
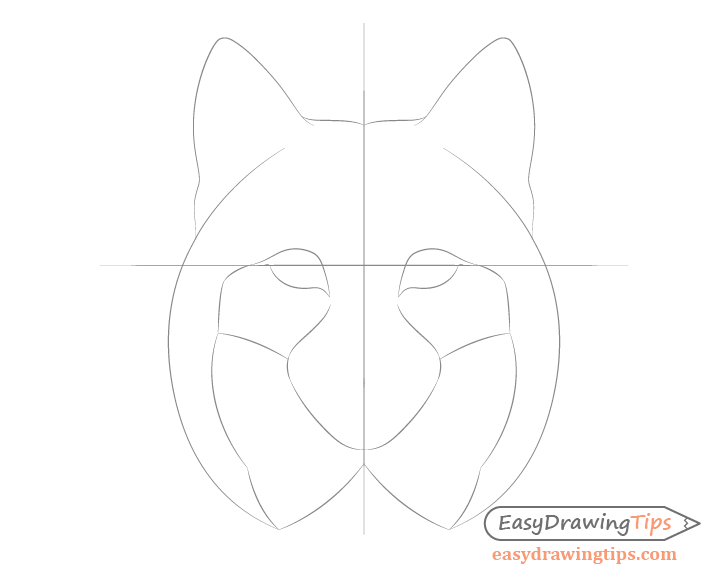
In this step add the shapes of the cheek areas as well as some lines to define the fur pattern below them.
To do this project a pair of curved lines from the outer tip of each eye slightly downwards. Next project a pair of curved lines form the outer tips of the snout (upwards). Finally join these with another pair of curves to form the cheek area. You can see the above example for what this look like.
From the bottom corners of the cheeks on each side of the face add two more curves. A large curve that goes slightly below the snout and a second curve from the end of that one that goes to the bottom tip of the mane on it’s side of the head. These curves will later be used to help draw some of the fur.
Step 6 – Add the Facial Features
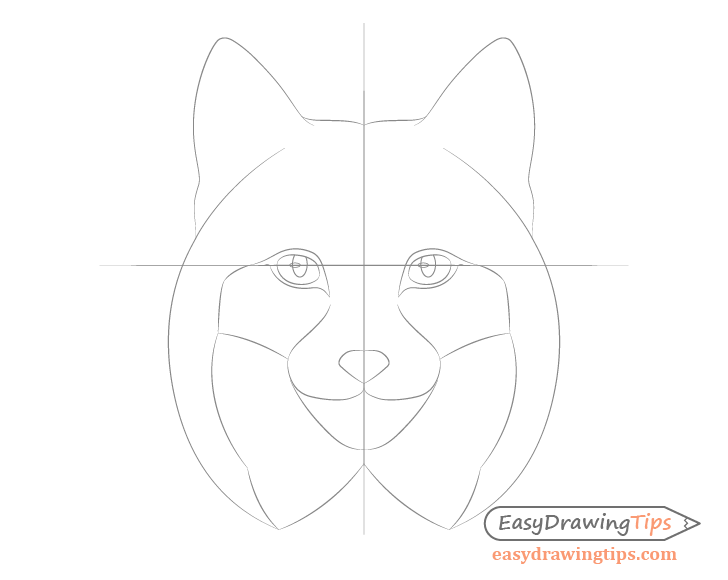
Now add the actual eyes as well as their inner details. First drawing two oval like shapes inside the outline shapes drawing earlier. Again these should be angled slightly towards the snout. Next inside each eye draw two oval pupils with their tops slightly covered by the eyelids.
finally add a pair of small horizontal ovals right on the horizontal guide line overlapping the left side of each pupil. These will be the highlights.
After you finish the eyes draw the nose. Position it slightly to the upper part of the snout. For this stage of the drawing make the nose shaped similar to the kind of diamond you might find in a wedding ring (when it’s viewed from the side).
After the nose draw the mouth as two curves. Each of these should start from the outer edges of the snout and join at the bottom tip of the nose.
Step 7 – Add the Details Around the Eyes
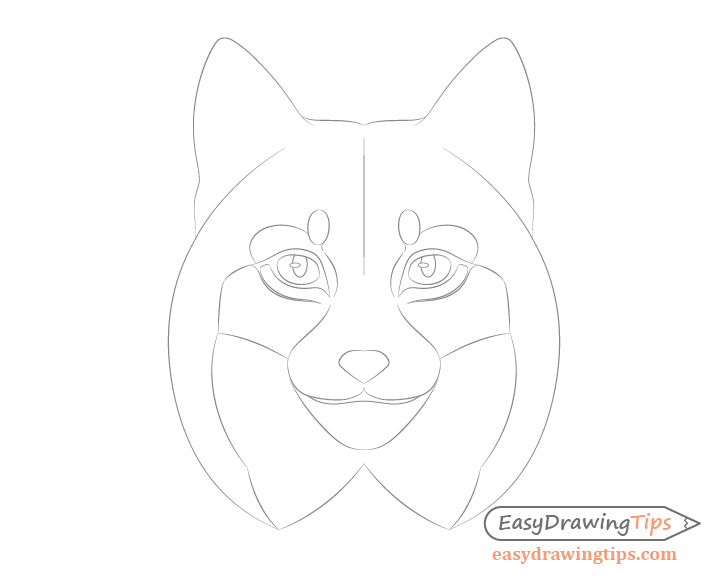
Add the lynxes eyebrows and the shapes under the eyes as shown in the example above.
You can draw a pair of large curves around the outer ends of the eyes with a smaller pair of curves between their inner ends. Between these sets of curves draw two ovals (as shown in example above). These lines will later be used to create the fur pattern in that area of the face.
Next add a pair of curves underneath the eyes to define (something lynx’s also tend to have). These should start from their outer tips and go towards the upper part of the snout.
Once done with this step you can erase the horizontal and most of the vertical guide lines from the first step. Leave just a small bit of the vertical line around the forehead area as shown in the illustration above. You can also erase the parts of the pupils overlapped by the highlights.
Step 8 – Add More Details of the Face
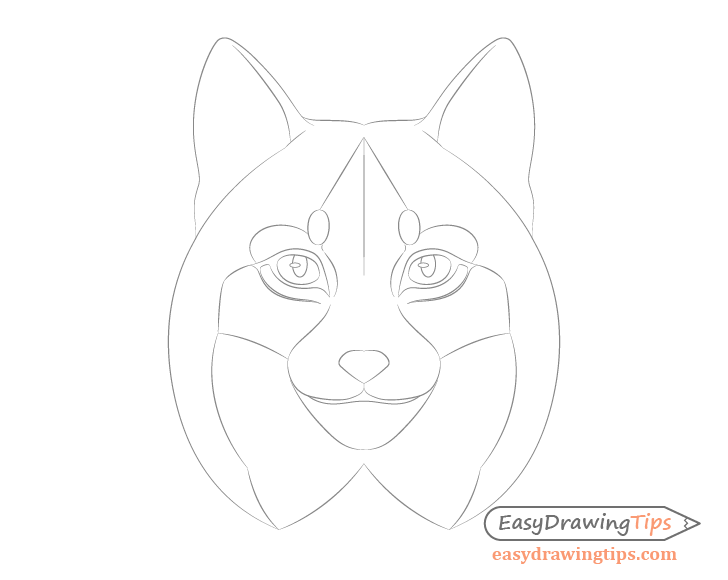
Draw a pair of curved lines inside the shape of each ear to show the ear’s thickness. You can also slightly extend the two large curved lines with a pair of smaller curves.
Next create the construction lines for the fur pattern on the forehead. Do this by projecting a pair of straight lines from the upper tips of the eyebrow ovals to the top of the remaining vertical guide line.
Finally add the bottom lip/mouth area with a wave like line that somewhat follows the mouth’s upper shape.
Step 9 – Draw the Smaller Details of the Nose
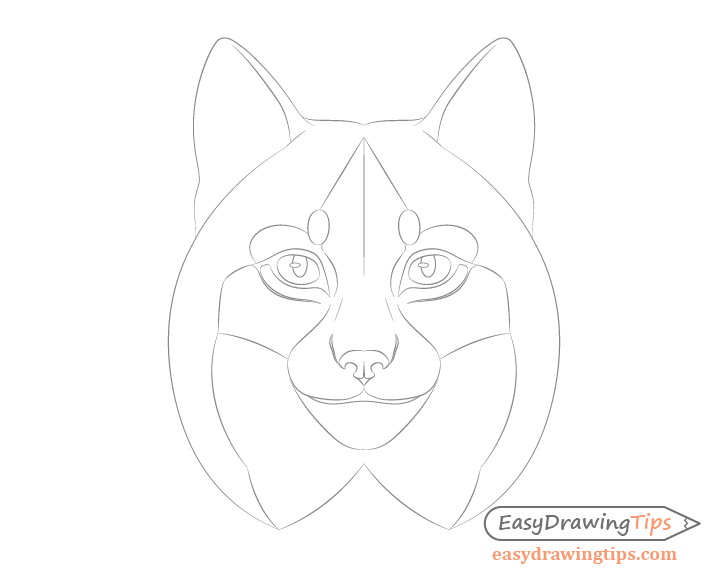
To finish the basic line drawing of the face add the smaller details of the nose.
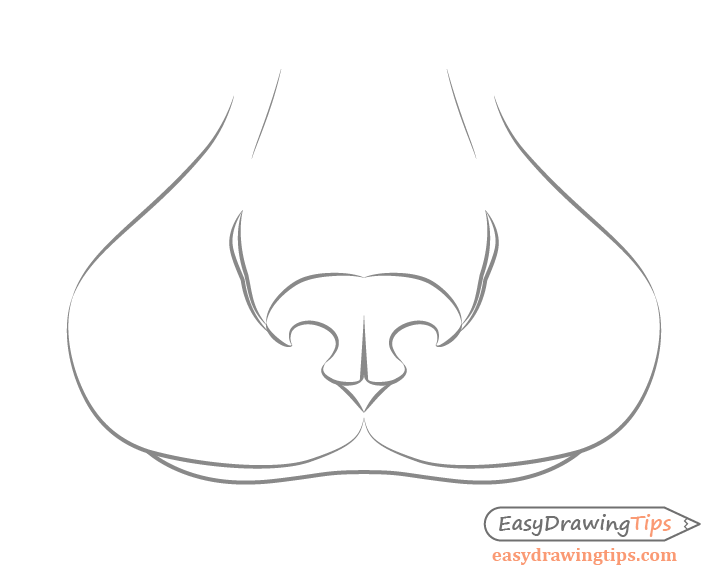
You can see a large close up drawing of it above.
First add two lines along the snout to define the bridge of the nose. Next from the outer tips of the actual nose draw two shapes that pointy these “bridge lines”.
Inside the shape of the nose drawn earlier add a pair of nostrils and a small split line down the middle. You can also add a pair of curves going form the bottom of this split towards the nostrils.
Step 10 – Fill in the Dark Areas of the Face
Once you finish the basic line drawing oft he face you can darken/fill in some areas of the facial features. You can also darken the lines that will remain the same for the final drawing.
Shade in the follow areas:
- Eyes -the surrounding patter as well as the pupils (leave highlights white)
- Nose – Nostrils, bottom tip and upper areas (upper curve of nose as well as the two shapes that go up along the bridge)
- Mouth – Entire area between the lines that define it’s top and bottom.
You can also darken the lines that define the ears, top of head, snout, bridge of the nose and the lines around the inner parts of the eyes.
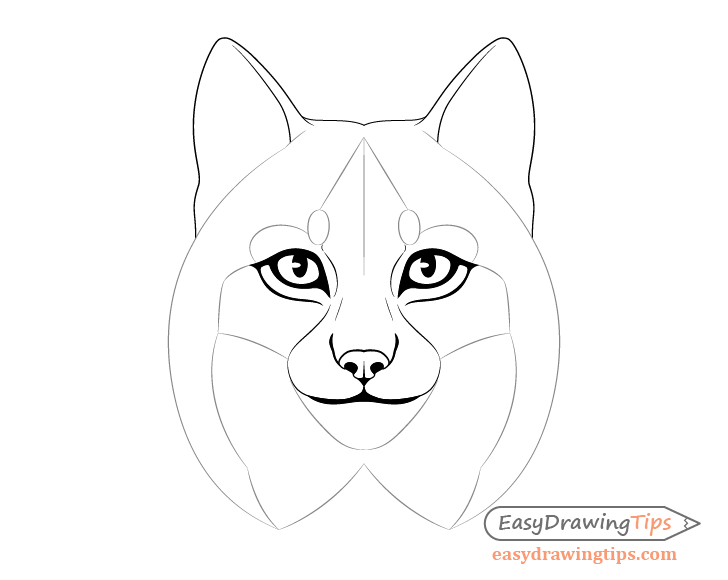
Step 11 – Add Hints of Fur to the Eyebrow Areas
To add the fur begin by doing so around the eyebrow areas.
First add small strokes that sort of “swirl” around the larger eyebrow outer area lines. Next add a pair of fairly dense stroke areas above each to make tiny dark clumps.
Finally draw some “swirling” strokes around oval eyebrow shapes as well. Mainly around their inner ends (facing towards the middle of the head).
After you are done with the area above the eyes you can also add some tiny strokes at their bottom tips and at the bridge of the nose.
You can carefully erase the guide/construction lines in those areas after you finish drawing the fur.
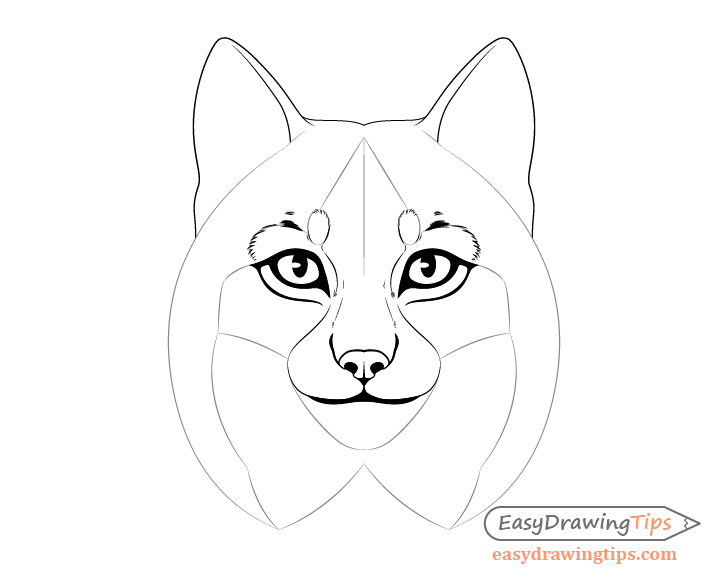
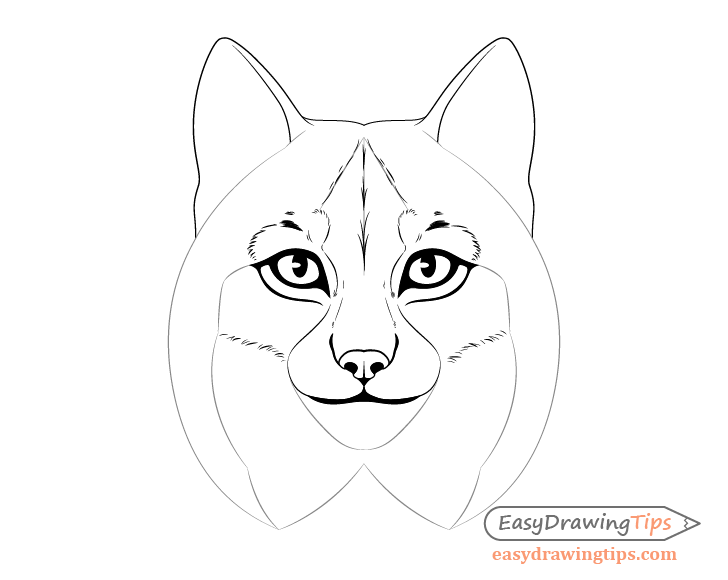
Step 12 – Draw Fur Along the Cheeks
Add some fur along the bottom of the cheek areas by making short strokes of slightly random length.
Also try to somewhat randomize the angle of these strokes while still keeping them pointing in generally the same direction.
Erase the cheek lines along which you drew the fur after you are done.
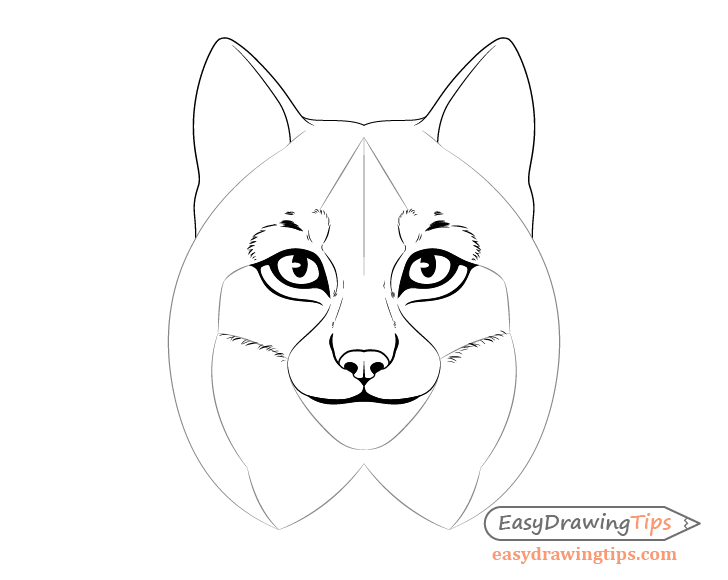
Step 13 – Add the Forehead Fur
Draw some strokes along the pattern of the forehead to create the fur in that area as shown in the example above.
You can make the strokes down the middle as somewhat of a “fountain” shape where they start from the same point and branch out in different directions. For the strokes along the lines on the sides you can simply make them in the same general direction as each of those lines.
Erase the remaining part of the vertical guide line as well as the lines to it’s side after you are done placing the fur.
Step 14 – Add the Fur on The Chin & Surrounding Areas
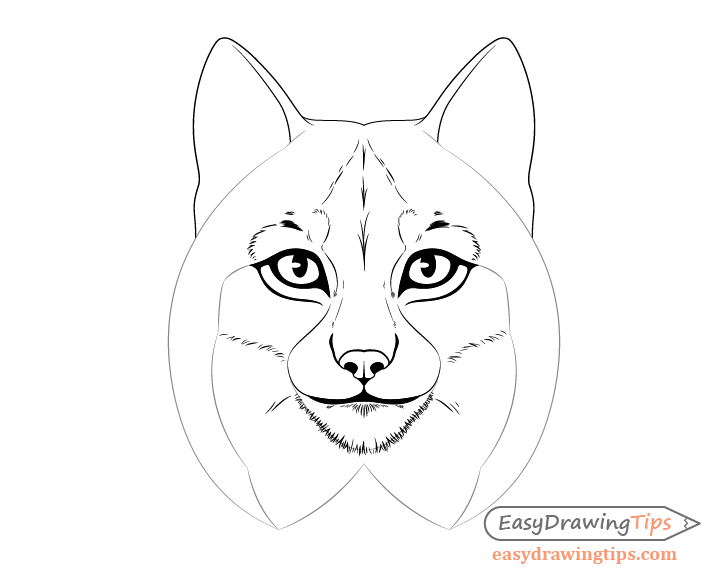
Now add the fur along the chin and bottom mouth areas.
First draw the fur along the the chin (in tiny clumps). Keep the length of the strokes fairly random but try and make them longer towards the bottom of the chin and shorter towards the sides.
Next add the fur pattern just below the bottom lip with some small fairly closed spaced strokes (as shown in the example).
Finally add some hints of fur (with just a few lines) going from the areas around each side of the mouth.
Step 15 – Draw the Fur Inside the Ears
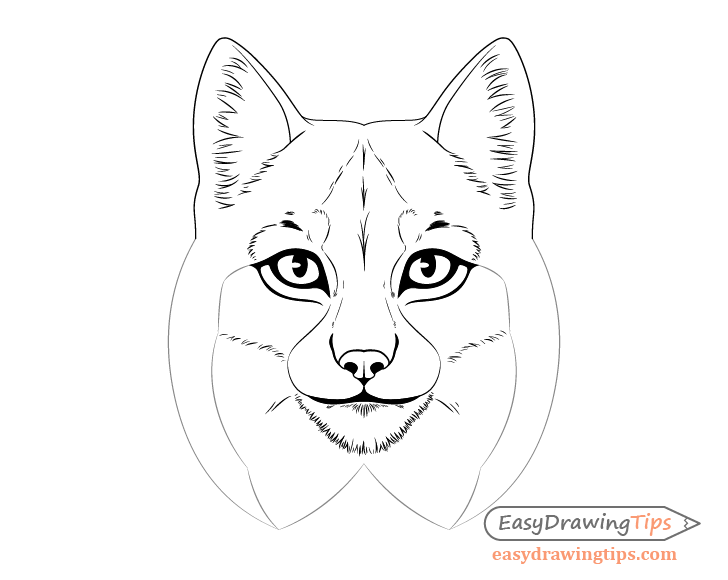
Draw the fur inside the ears with fairly long (in comparison to other fur) strokes that again form sort of “clumps”. Next add some fur along the bottom of the ears in a similar manner but with much shorter strokes.
Step 16 – Draw the Fur Pattern From the Eyes
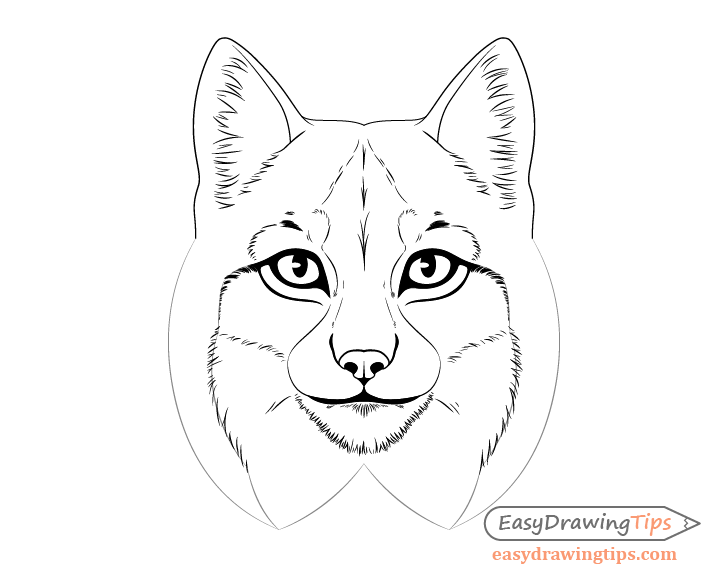
Draw the fur pattern that goes from the outer tips of the eyes down to the cheeks. You can do this by making a lot of fairly thick strokes in small groups with some breaks in between them.
Afterwards also draw some fur running down from those patterns along the curved lines running down the mane (defined in earlier steps). Yet again draw this fur in random sized clumps similar by making small curved strokes with some distance between them.
Step 17 – Draw the Outer Fur of the Mane
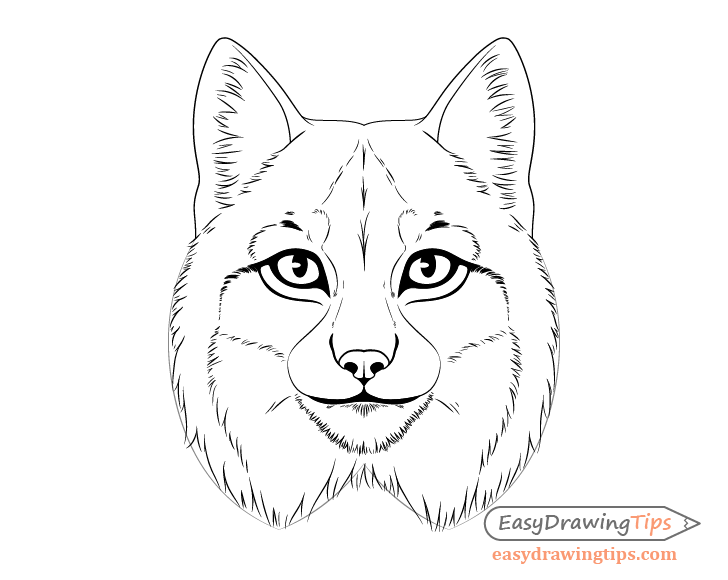
Finally draw the fur of the outer mane. This should generally be drawn with shorter strokes and smaller clumps towards the top and with longer strokes and larger clumps towards the bottom.
To make these clumps look more natural you can draw some of them with slight waves instead of just one directional curves.
Step 18 – Draw the Ear Fluff
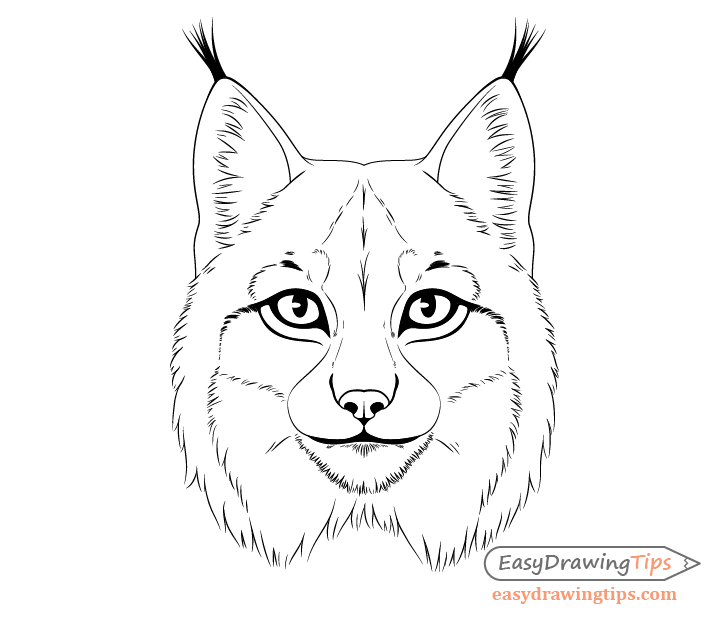
For this simple but important step add the fluff that is so characteristic of lynx’s on top of the ears. You can do this with just a few very thick strokes.
Step 19 – Draw the Pattern Along the Mouth
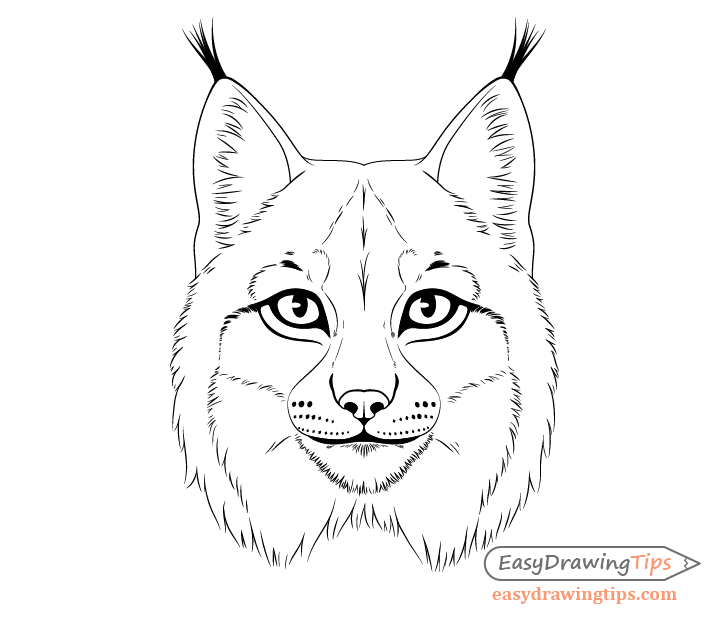
Along the bottom of the snout/mouth area add several lines of dots that the whiskers that most cat’s tend to have grow out from.
Different animals can have slightly different patterns of these but in this case we will add three rows per side with smaller dots on the bottom and larger ones on top.
Also be sure to draw the dot lines with some waves in their pattern (not just straight lines) to make them look more natural.
Step 20 – Draw the Whiskers & Finish the Lynx Drawing
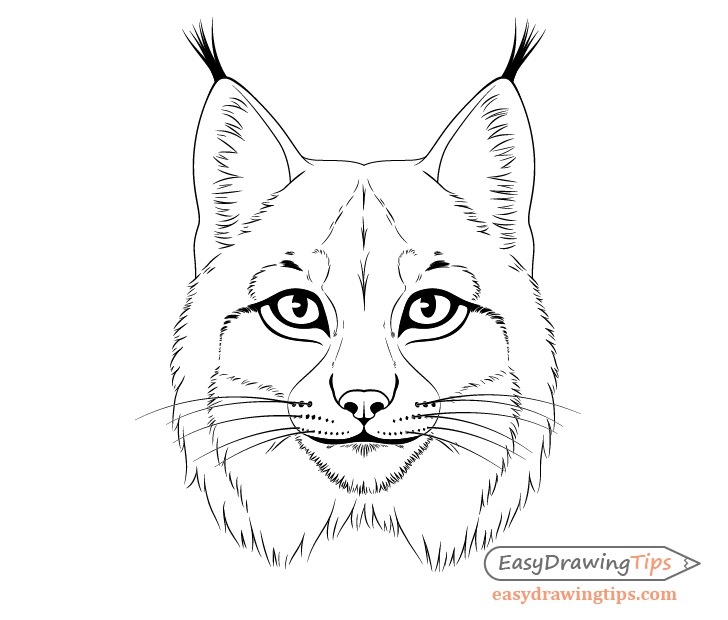
Finally to finish the drawing of the lynx’s face add the actual whiskers. Make these fairly thick at the base with narrower tips. Also be sure to draw them pointing in slightly different directions.
Conclusion
This is a very long tutorial that may take (or may have already taken you) some time to complete. At the same time it offers a very detailed breakdown of the drawing process which makes it fairly easy to follow. If you enjoyed it and want to try more similar tutorial see:
- How to Draw a Lion Full Body Step by Step
- How to Draw a Wolf Face & Head Step by Step
- How to Draw a Fox Step by Step
- How to Draw a Feather Step by Step


