How to Draw a Realistic Watermelon Step by Step
This step by step tutorial shows how to draw and shade realistic looking watermelon. The examples for this tutorial are done in pencil but the drawing tips can still apply to other mediums.
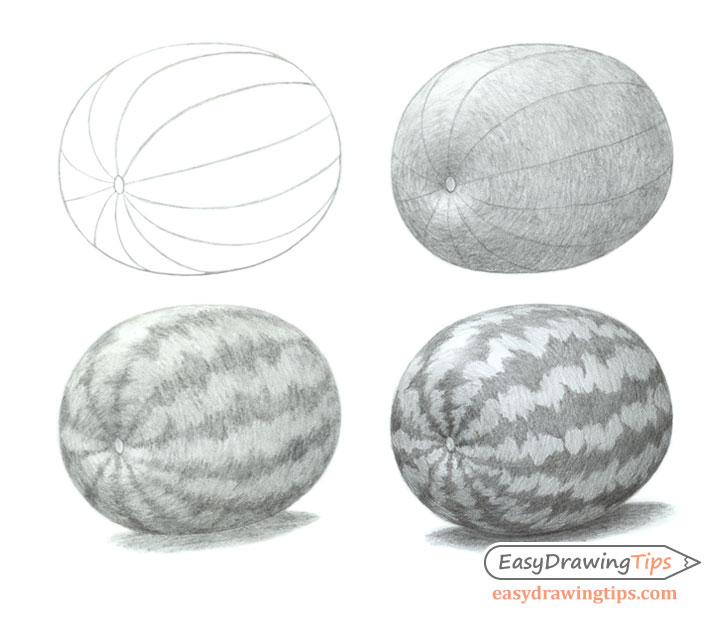
Step 1 – Draw the Shape of the Watermelon
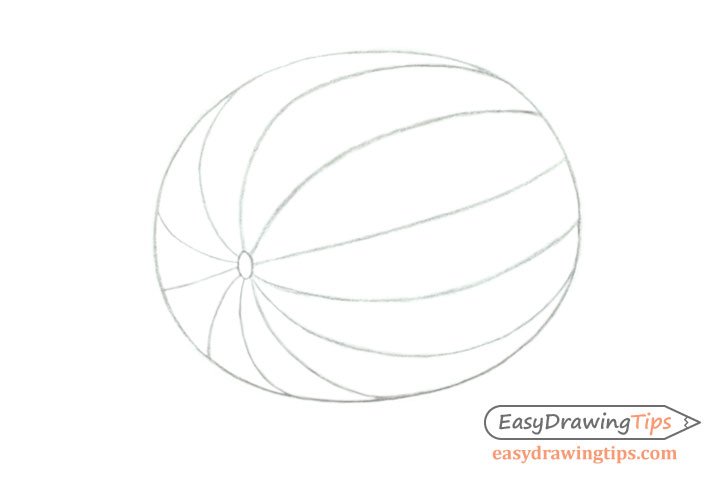
Start with a simple line drawing of the shape of the watermelon. Inside this shape draw some lines that will represent the position of the stripes.
The lines should curve around the shape of the watermelon.
Step 2 – Apply Basic Shading
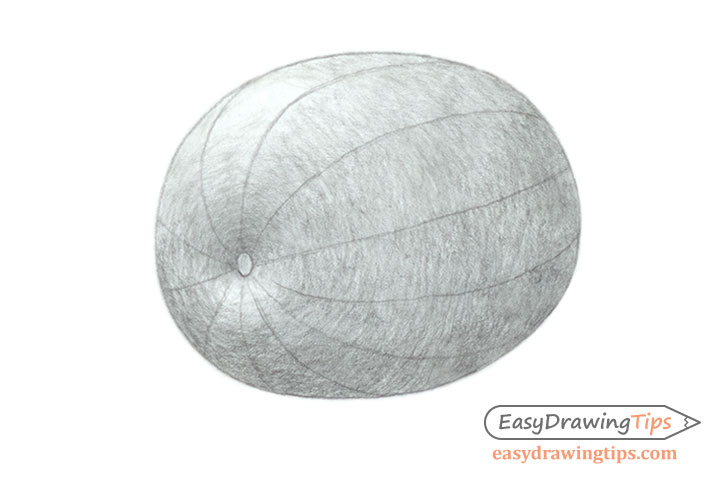
Start shading the drawing of the watermelon without adding the stripes. The goal is to create a 3d looking shape of the watermelon first.
For this example the light is coming from the top left of the drawing with the light source also being in front of the watermelon.
This means the watermelon will be “darker” as it curves towards the bottom right and back area.
Also be aware that often there is a reflection coming from the surface that will illuminate the bottom of the object. But we will ignore that for the sake of this tutorial.
You will also notice there is a lighter/darker area near the bottom tip (where the vine was attached to the watermelon) as in this particular example that area curves inwards. As the bottom of this area is facing more towards the light it will be lighter and the top that is facing away from the light will be darker. As this is a smooth curve be sure shade with a smooth gradient if you are following the example of the tutorial.
When applying the shading the the watermelon you can also make the strokes in the direction that will reinforce the shape of the object. As you can see in the above example the pencil strokes sort of curve around the watermelon.
For more on this see:
Shading Techniques and Stroke Types Drawing Tutorial
Step 3 – Draw the Stripes
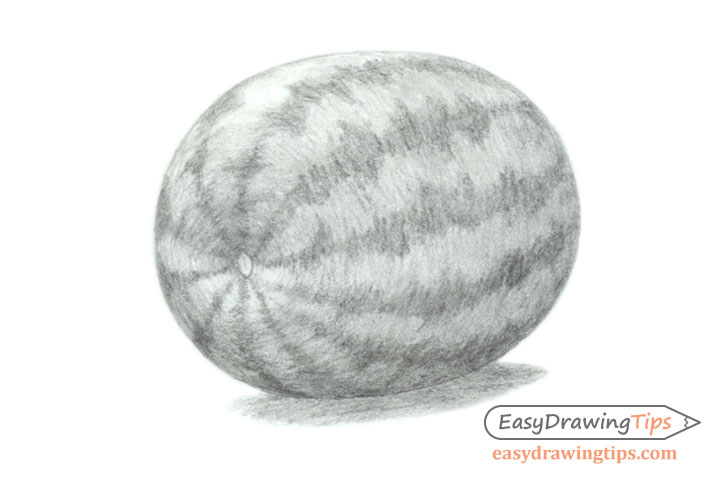
Once you’ve shaded the entire watermelon you can then apply some darker shading to create the stripes.
Step 4 – Intensify the Shading

Finally you can refine and intensify the shading as needed to create a finished drawing of the watermelon.
Keep in mind that the stripes will also be effected by the lighting conditions so just like the rest of the watermelon they will get darker as they curve away from the light so shade accordingly.
Conclusion
Drawing a watermelon can be a great way to practice some more advanced shading as the shape of the watermelon is fairly simple but the stripes can provide a bit of a challenge.
If you would like to try drawing and shading something that’s a little easier see:
- Egg Step by Step Basic Shading Tutorial
- How to Draw a Realistic Pear Tutorial
- How to Draw an Eggplant Step by Step
- How to Draw a Realistic Pumpkin Step by Step Tutorial
- How to Draw a Realistic Pineapple Step by Step


