How to Draw a Realistic Pear Tutorial
This tutorial explains how to draw and shade a realistic looking pear by viewing it as more basic 3d shapes.
Learning to see objects you are drawing as more primitive shapes can be very helpful in structuring more complex drawings and in shading.
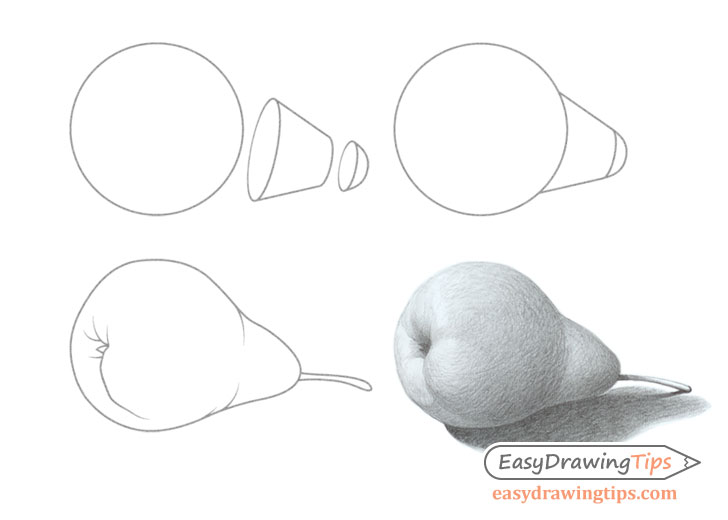
Step 1 – Analyzing the Shapes of the Pear
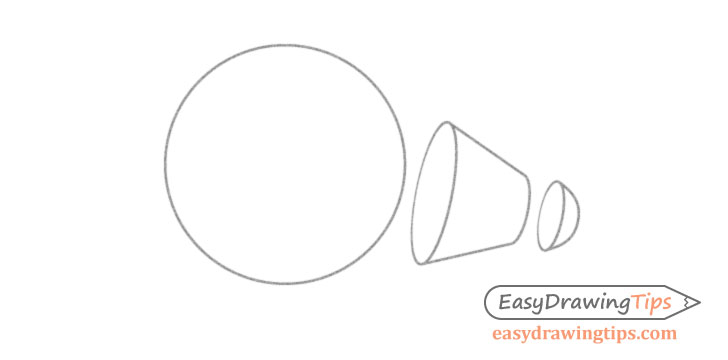
The shape of the pear in this particular example can be broken down into three basic shapes, a sphere, a cone with the top cut off and a part of a sphere.
Please note that you do not need to actually draw out this step as it is more for understanding the 3d shape of the object.
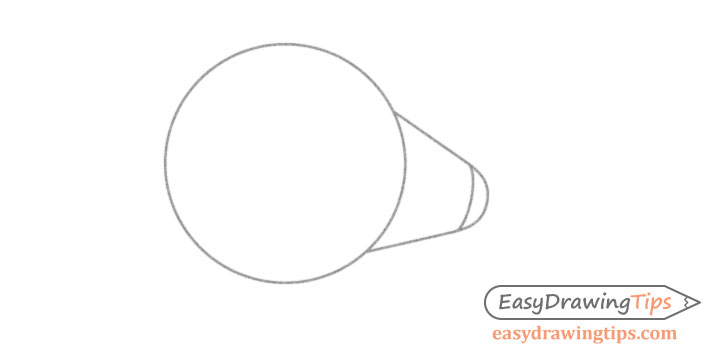
When we combine the above shapes we pretty much get a “light bulb” like shape of the pear.
Step 2 – Pear Line Drawing
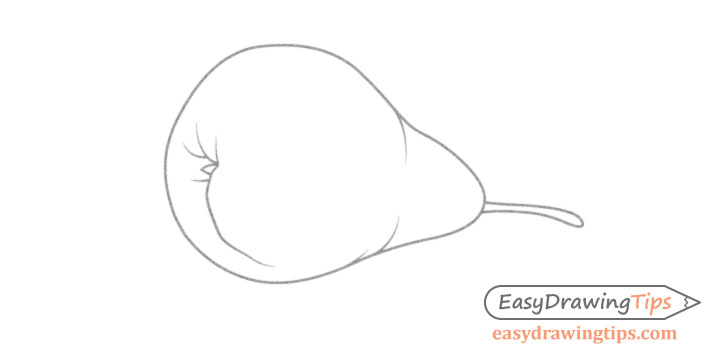
The line drawing of each pear is fairly straight forward.
Draw the overall shape of the pear based on the analysis above and add the inner details afterwards.
Step 3 – Shading the Pears
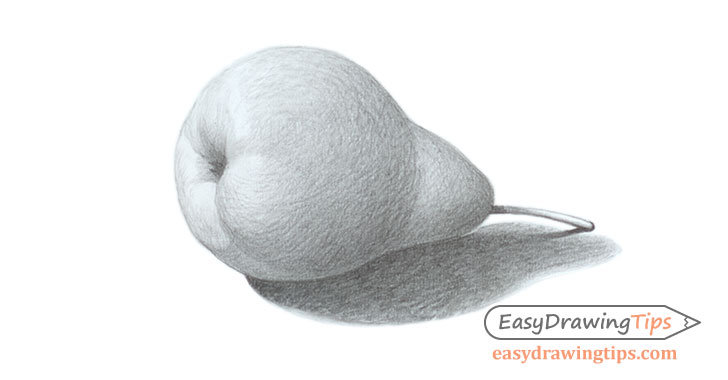
Before you start shading you should first determine the light source/sources. In this case the light is coming from the left area of the drawing and is slightly above and in front of the pear. There will also be some light reflected from the surface the pear is sitting on coming from the bottom right.
The shading of the pear will basically be a combination of the sphere and cone from the How to Shade Basic 3D Shapes tutorial.
For different types of shading strokes you cans see the Shading Techniques and Stroke Types Drawing Tutorial.
Try and apply the strokes in a way that reinforces the shape of the pear. You can see how in the above example the strokes sort of curve around the shape of the pear.
Based on the lighting conditions described above the lightest area of the sphere part of the pear will be the upper left area. This area will transition into darker shading as it curves towards the right and bottom sides of the pear.
The cone section will have its lightest area towards the upper middle and the “part sphere” section will pretty much be completely dark as most of it faces away from the light.
You may also notice that to show the light reflecting form the surface the very bottom of the pear is shaded slightly lighter then the darker area above.
Conclusion
A realistic looking shaded drawing of just about any object is fairly difficult to make. That’s why if you are a beginner artist it’s usually good to first practice with simpler objects like this pear that can easily be broken down into more basic shapes.
For a similar, slightly more complex tutorial see:
- How to Draw a Mango Step by Step
- How to Draw an Apple Tutorial – Step by Step
- How to Draw a Realistic Watermelon Step by Step
- How to Draw Cherries Step by Step
- How to Draw a Cake Slice in 10 Steps


