How to Draw a Cookie in 8 Steps (Line Drawing & Shading)
This tutorial shows how to draw a chocolate chip cookie in eight steps with easy to follow pencil drawing and shading examples.
As mentioned in the title the tutorial consists of the line drawing and shading portions. You can see a preview of the different drawing stages for each of them in the example above.
It’s recommended that you start in pencil and make light lines that can eventually blend into the shading and that are easy to erase in case you need to make a correction.
Step 1 – Draw the Outline of the Cookie

Begin with a simple outline of the cookie’s shape. It this case it will be somewhat round (as these types of cookies usually are) but no where near a perfect circle. You will wan to deliberately make the outline somewhat wavy and uneven.
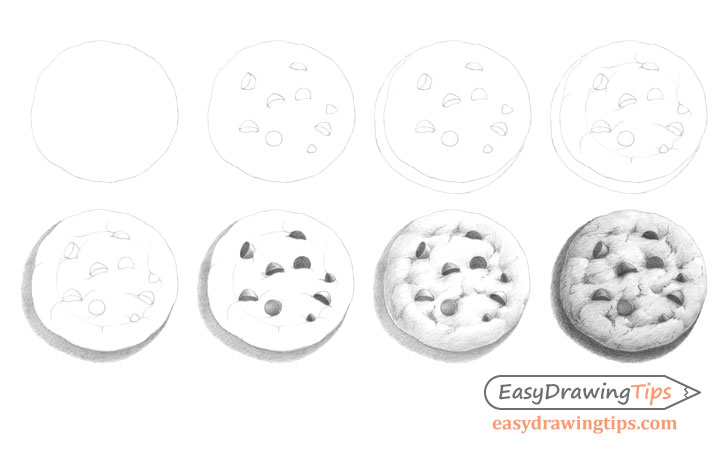
Step 2 – Draw the Chocolate Chips
Inside the cookie’s main shape draw the chocolate chips. One common mistake beginners tend to make when adding these is drawing all of them to look the same (for example as bunch of circle).
For a more realistic drawing you will want the chips to all be different (pointing in different at different angles) with some only showing a little bit while others nearly fully visible.
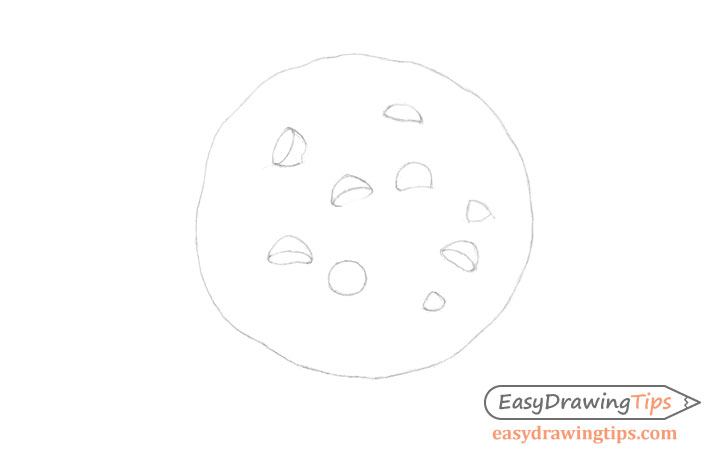
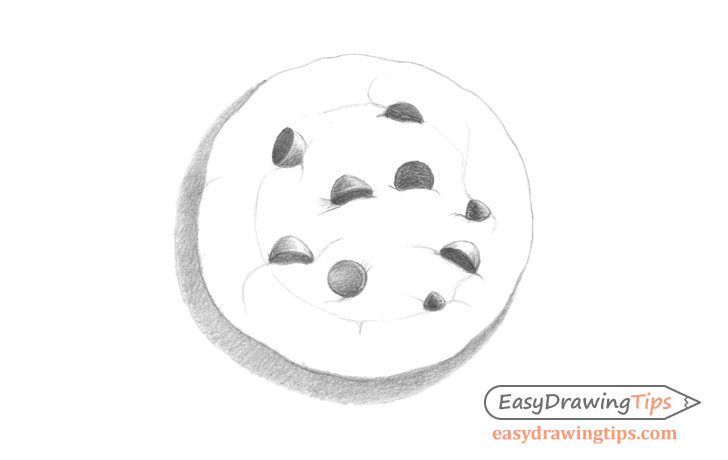
Step 3 – Outline the Shadow

In this setup the light will be coming from the upper right of the cookie which means that the shadow will be to the lower left. Outline it as shown above so that it’s roughly close in shape to that side of the cookie.
Step 4 – Finish the Line Drawing
For the last part of the line drawing add the cracks and folds that tend to form in the cookie dough as it bakes.
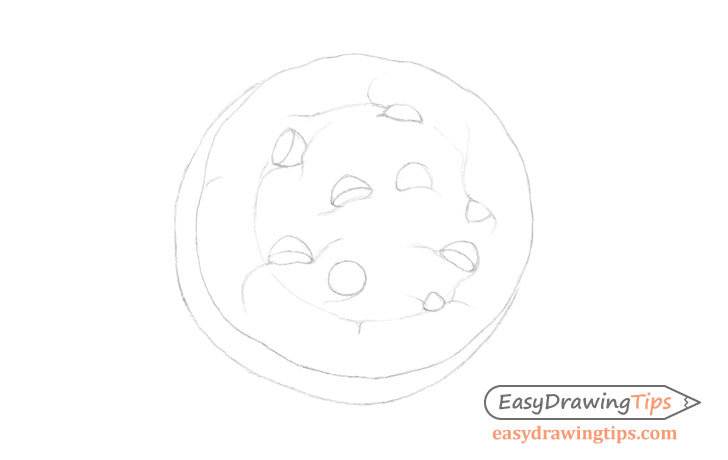
Step 5 – Shade the Shadow
When you first start shading be sure to not go full strength. You will want the initial layer to be slightly lighter than what you wish to have in the final drawing in order to give yourself some room for corrections.
You can begin by darkening the cookie’s shadow as shown in the example. An easy way to do this is by using crosshatch strokes.
For an explanation of different types of pencil strokes and shading techniques see the follow:
Shading Techniques and Stroke Types Drawing Tutorial
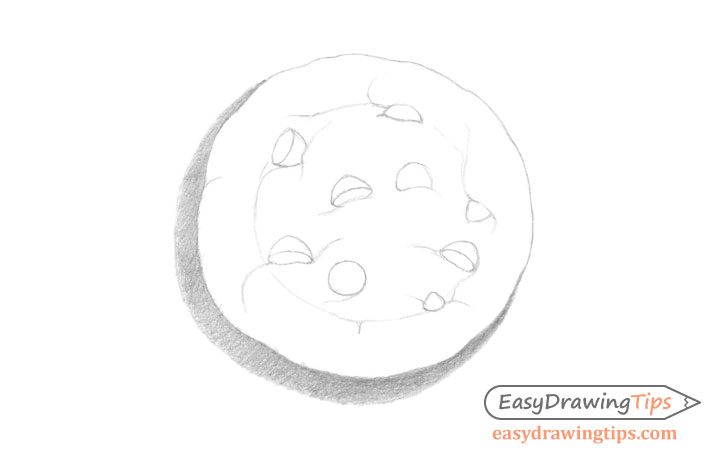
Step 6 – Shade the Chocolate Chips
As was already mentioned the light is coming from the upper right of the cookie. This means that when shading the chocolate chips their darker parts will generally tend to be on their bottom and left areas. The ones that are facing away form the light. Chips that are more embedded in the dough will also tend to be darker as less light will reach them. Because chocolate (especially when melted) can be somewhat shiny the contrast between the light and dark on the chips will be fairly sharp.
Step 7 – Shade the Cookie
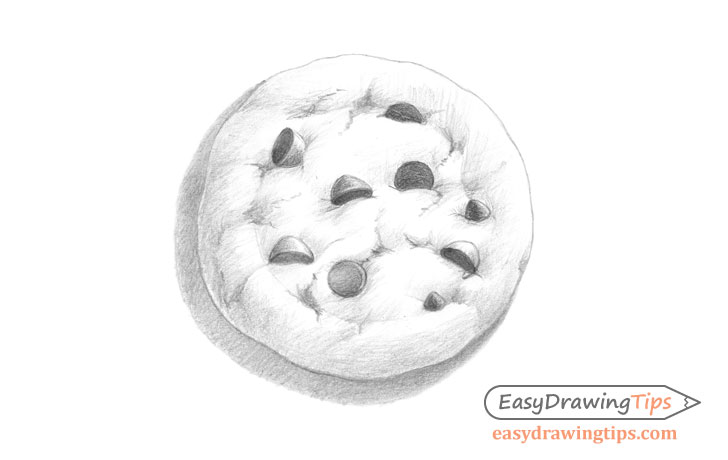
Finally shade the cookie itself. Again, remember to keep the shading lighter than what you wish to have in the finished drawing. Just like the chips the cookie will be darker on it’s bottom/left and lighter on it’s top/right. Any indented areas (generally around the cracks) will be darker as well. As the cookie is not very reflective it will generally have smoother transitions between light and dark than the chips.
One more thing to be aware of is a thin light strip that runs along the cookies bottom and left areas right between it’s darkest part and the shadow (better visible in the last example). This is created by the light reflecting from the surface the cookie is sitting on and will be opposite the main light source. This strip is just barely visible, especially because in this case its also broken up in a few spots due to the cookie’s uneven shape.
Step 8 – Finish the Drawing
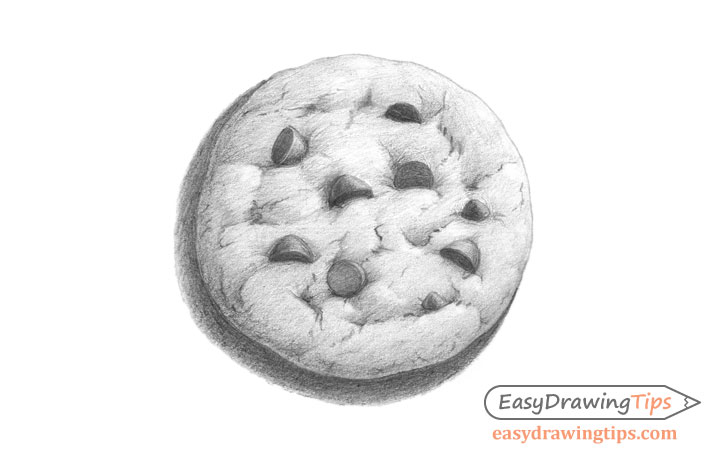
For the last part of the drawing process you can refine the shading by darkening it and creating smoother gradients in the process (where appropriate). Keep in mind that the cookie should be the lightest part of the drawing and the chips and shadow the darkest.
Darken the shadow near it’s base and gradually make it lighter as it goes away from the cookie. You can also add a bunch of smaller cracks throughout the cookies surface (looking a bit like a series of dashes).
If you feel that you’ve gone too dark one any part of the drawing you can simply lighten it with an eraser.
Conclusion
Drawing a cookie like the one in this example is not too difficult, however it’s also not overly simplistic. If you are a beginner artist looking for a bit of a challenge this tutorial can be some good practice.
If you like these types of step by step drawing guides you may also wish to try the following:
- How to Draw a Croissant Step by Step
- How to Draw a Kiwi Step by Step
- How to Draw an Eggplant Step by Step


