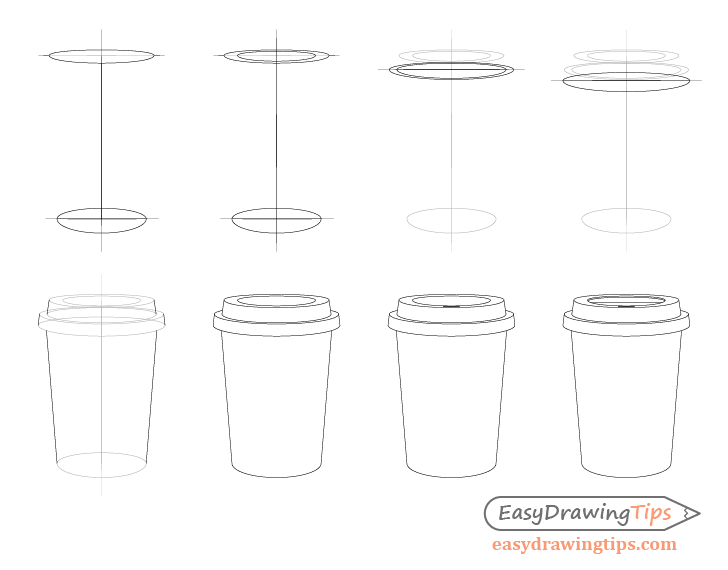
How to Draw a Coffee Cup Step by Step
This tutorial shows how to draw a paper coffee cup step by step by applying the basic of perspective drawing. It includes a total of eight steps with detailed illustrations for each.
The drawing tips in this tutorial can apply to any similarly shaped coffee cup. As recommended with most other tutorials here on EasyDrawingTips be sure to make light lines that you can easily erase until you pretty much finish the drawing. You can go over it with darker lines after you confirm that everything is in the right place. The reason the examples show dark lines even for the early stages is simply to make it easier for you to see them.
If you are not familiar with perspective drawing you may first want to see:
Perspective Drawing Tutorial for Beginners
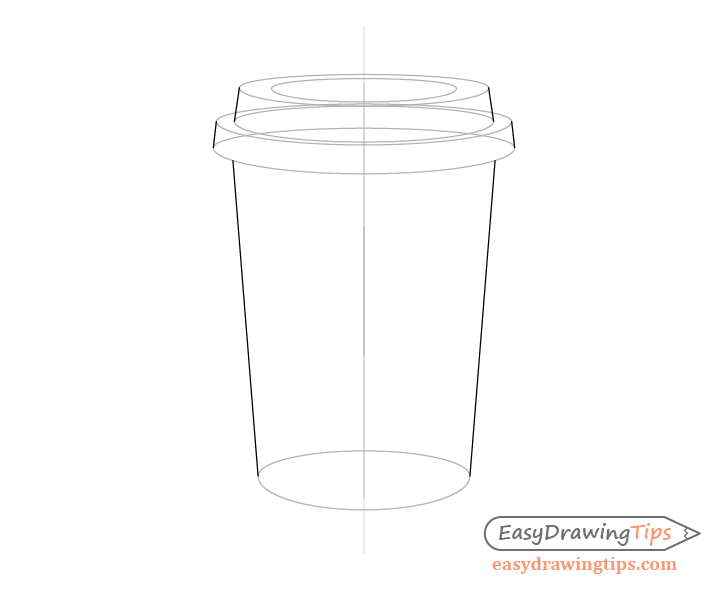
Step 1 – Draw the Top & Bottom of the Cup
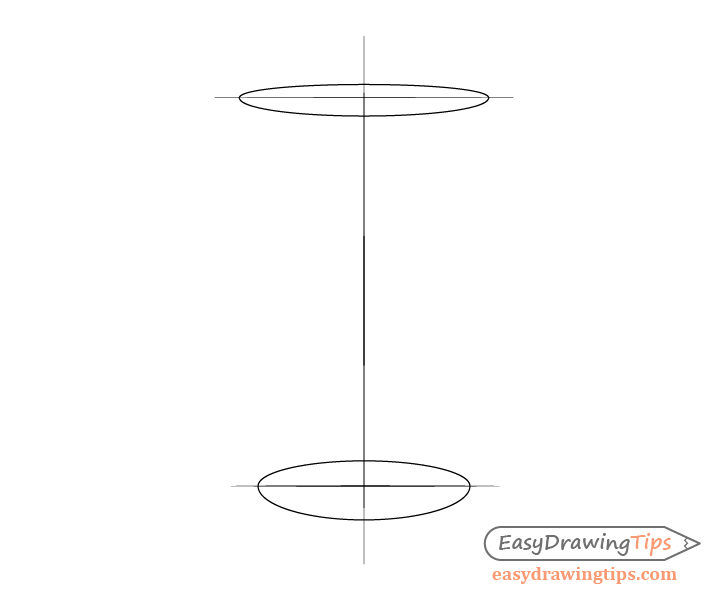
Start by making a vertical line through the middle of your drawing area. This line will be the center of the cup and will help you see if both it’s halves are relatively equal in width.
Next draw a pair of horizontal lines, one for the top of the cup and one for the bottom. Around these lines draw the top of the lid and based of the cup. Though both are circular in shape when viewed at this angle they will appear as ovals. There are a few important things to note about drawing these. When divided by the horizontal lines the top side of each oval should be narrower than the bottom. The bottom oval should also be taller in relation to it’s width than the bottom.
The reasons for drawing them that way are perspective and eye level. As the top section of each oval is really just the side of the cup that is farther away from the viewer it will appear smaller/narrower. The bottom area of the cup should be drawn wider as it’s lower down in relation to the viewers eyes. For example if you take the lid off of a coffee cup and hold it directly in front of your eyes it’s top (and bottom) will appear as pretty much a straight line. If you start bringing the lid down it’s top will start to look more like an oval and if you place it all the way down on the floor and look at it standing up it should appear as pretty much a circle.
Step 2 – Draw the Inner Shape of the Lid
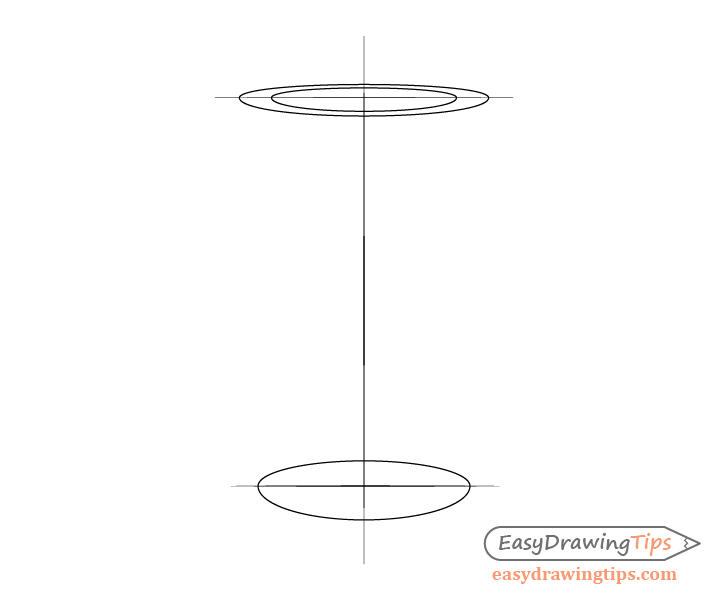
Draw another smaller oval inside the one that represents the top of the lid. All the same rules apply to drawing it as to the larger one.
Step 3 – Draw the Upper Part of the Lid Rim
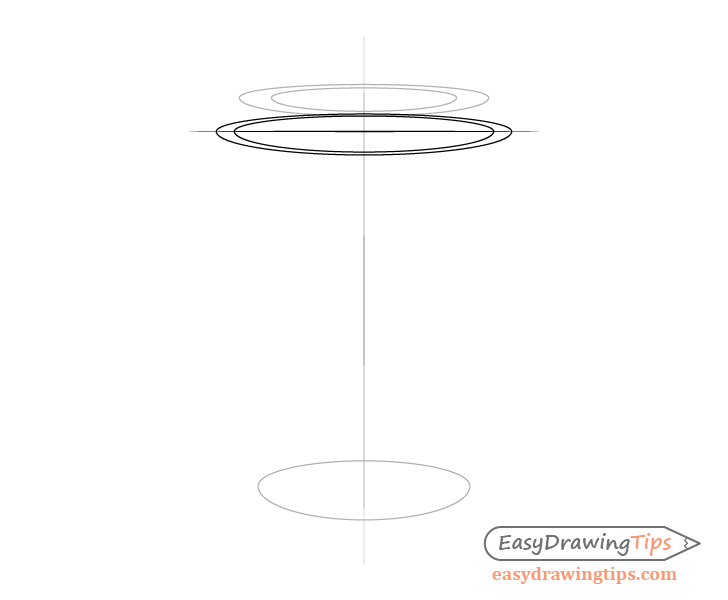
Draw another horizontal line below the one for the top of the lid . You can erase the line from the first step once done. Around the new top line draw two ovals, one smaller and one larger. These will be the top part of the rim that fits around the edges of the cup. Again keep in mind that the top side of each oval should be narrower in relation to the bottom. These ovals should also be slightly “taller” in relation to their width than the oval for the top of the lid (but not by much as they are only slightly lower).
Step 4 – Draw the Bottom of the Lid

Finally draw one more horizontal line below the one from the previous step and again erase the previous line once done. Around this line draw an oval that is slightly larger than the one directly above it. Yet again this oval should be slightly taller in relation to it’s own width then the previous lid ovals (as it’s further down). It should also again have a narrower top when divided by it’s horizontal line.
Step 5 – Draw the Sides
Now simply connect all of the ovals for the lid as in the example. Next project a pair of lines to each side of the bottom of the cup from the bottom of the lid.
Step 6 – Clean up the Drawing
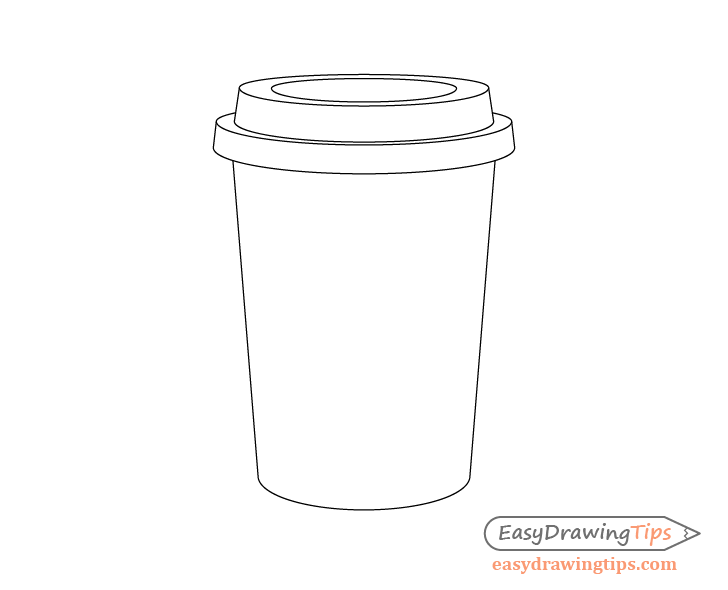
Erase the parts of the cup that should not be visible as well as the center line and you should have a finished drawing of its main shape.
Step 7 – Draw the Hole in the Lid
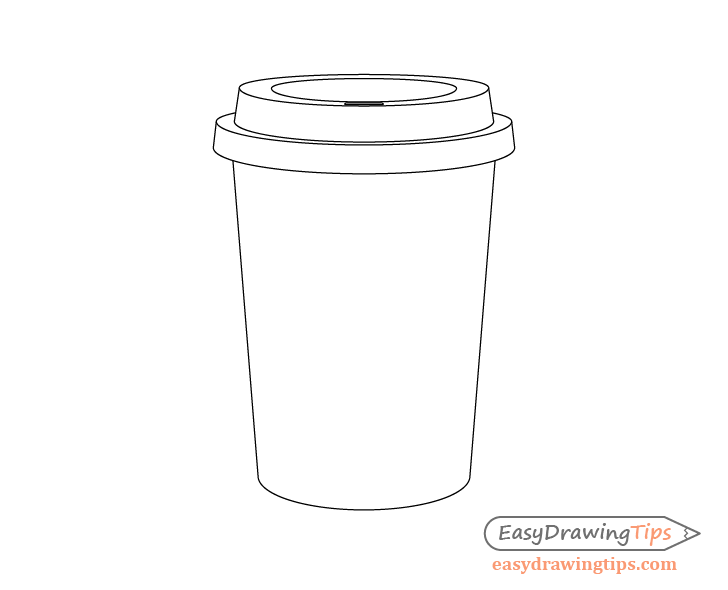
Between the inner and outer ovals of the top of the lid draw the drinking hole. Viewed at this angle it should be almost as thin as a single line.
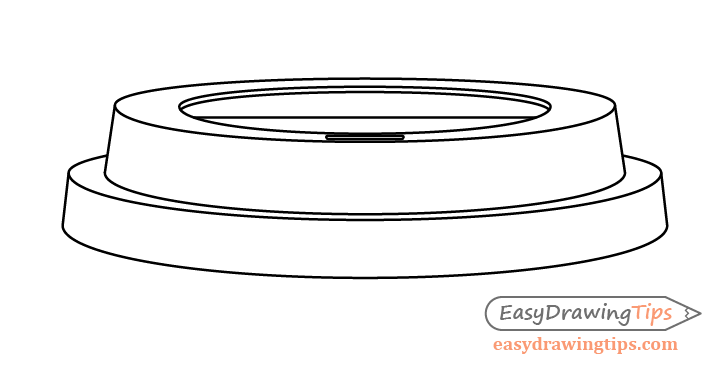
Step 8 – Add the Details & Finish the Drawing
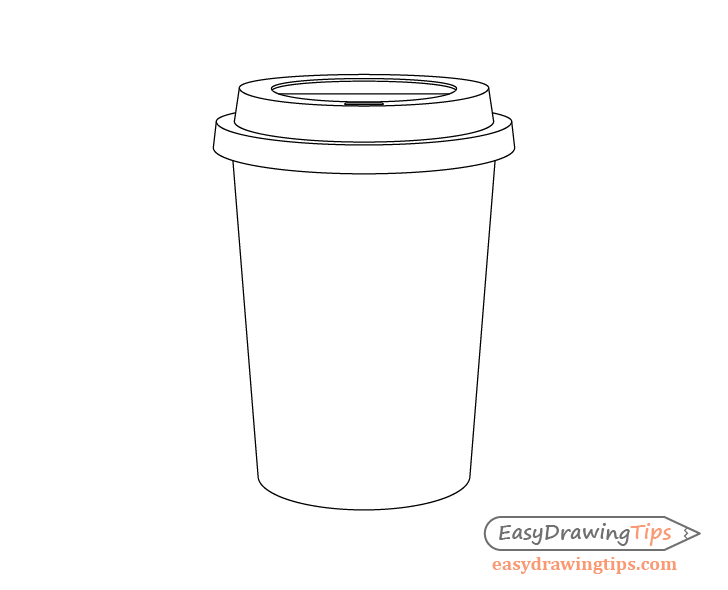
Show that the center area of the lid is slightly indented by drawing a curve along it’s inner oval but slightly that sort of cuts into it’s sides.
Coffee cup lids tend to have an even deeper indent on the side with the drinking hole. Show this by simply drawing a horizontal line through the inner part of the lid slightly closer to the front/bottom.
You can see the close up drawing of the lid below.
Once you finish with it’s details go over the entire drawing with darker lines to finish the tutorial.
Conclusion
This tutorial shows how to draw a coffee cup based on an understanding of eye level and perspective drawing. For a more detailed explanation of this works see:
How to Draw Cylinders in Perspective Tutorial
For more similar tutorial check out:
- How to Draw a Book Step by Step
- How to Draw a Phone Step by Step
- How to Draw a Milk Carton Step by Step
- How to Draw a Sunflower Step by Step
- How to Draw a Shoe in Nine Steps


