Draw a Cactus in a Plant Pot Step by Step
This guide shows how to draw a cactus in a clay flowerpot. The example is of a fairly small cactus plant similar to what you might have inside your home.
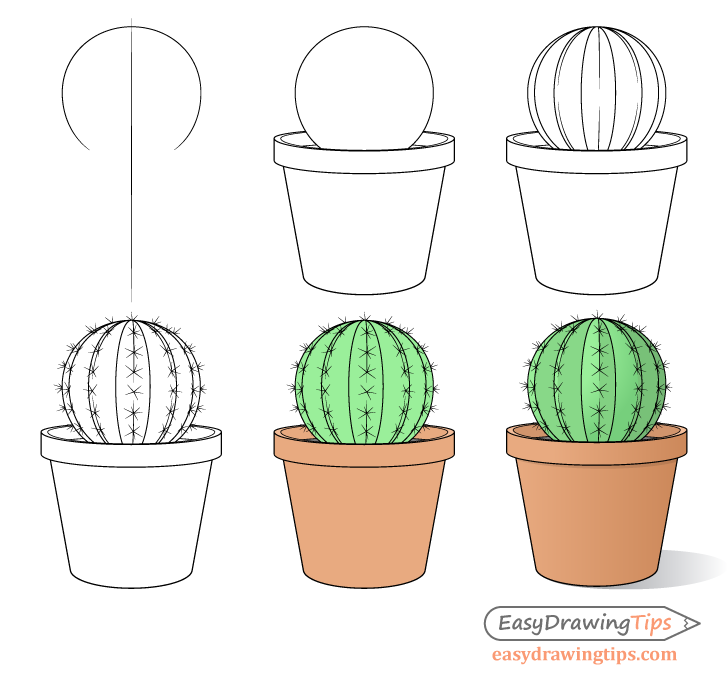
The guide focuses on line drawing, color and shading. The goal is to create a slightly stylized and simplified drawing of a cactus that is well structure, colorful, and easily recognizable. Don’t worry if it seems like there are a lot of stages to the tutorial. Such a detailed breakdown is provided to make it easy to follow along.
If drawing on paper be sure to start the tutorial in pencil. Make light lines as some of the steps will require you to do some erasing. You can trace over your drawing with darker lines after adding the last part of the cactus (the spikes).
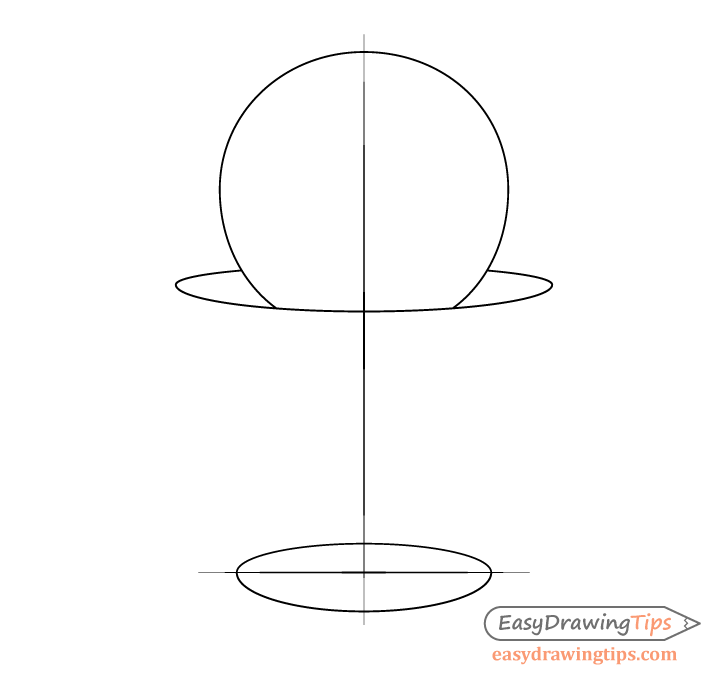
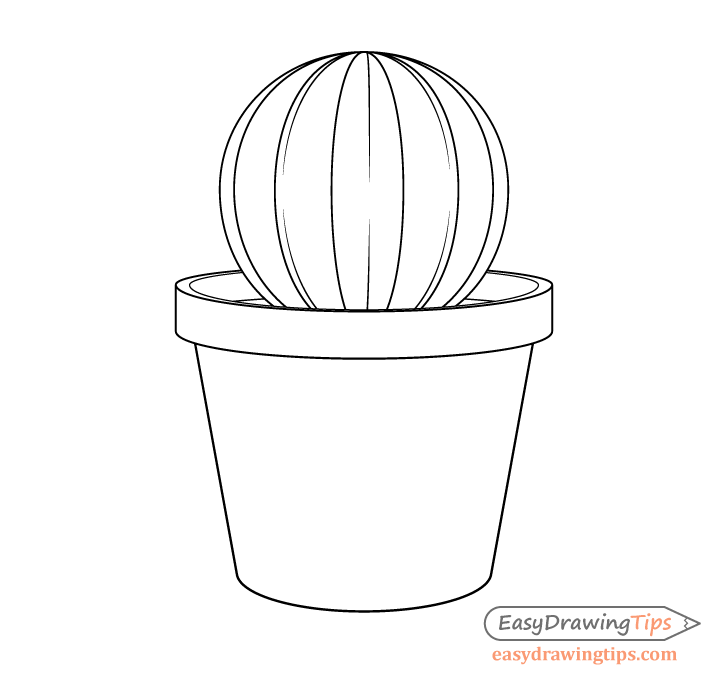
Step 1 – Outline the Shape of the Cactus
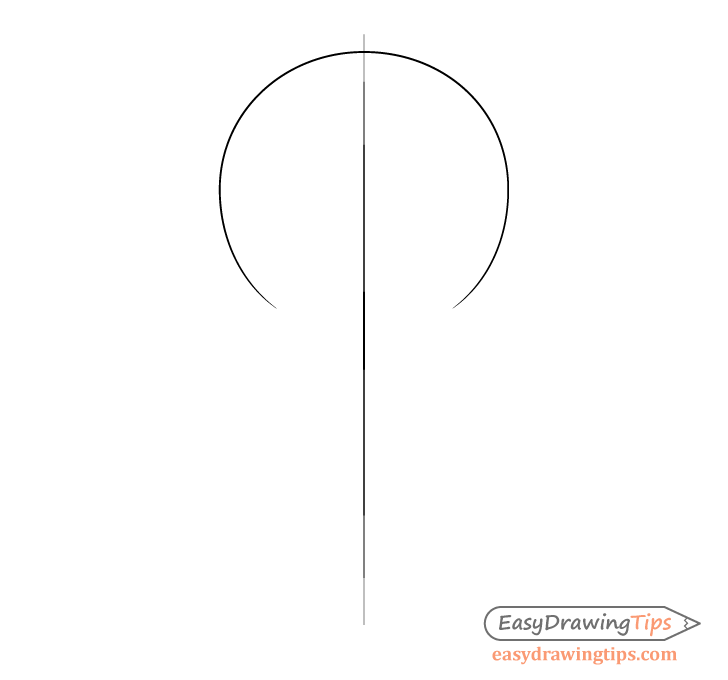
For this very easy step outline the main shape of the cactus (it’s silhouette). Make it fairly round and leave the bottom of it’s outline open.
Step 2 – Draw the Plant Pot
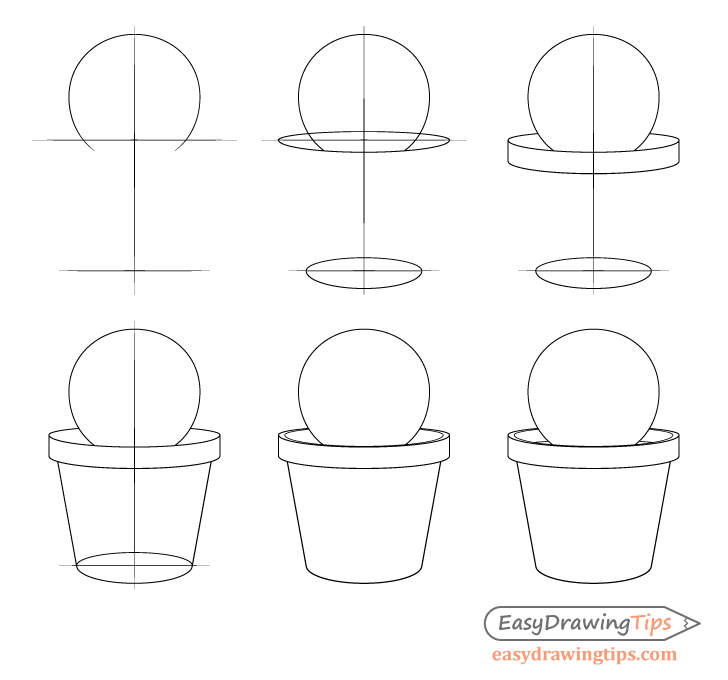
Unlike the cactus, drawing the pot’s shape is a little bit more complicated. However, if you follow the instructions below it should not be too difficult.
Set the Pot’s Height

First, draw a pair of straight horizontal lines to set the pot’s width and height.
Draw the Top & Bottom
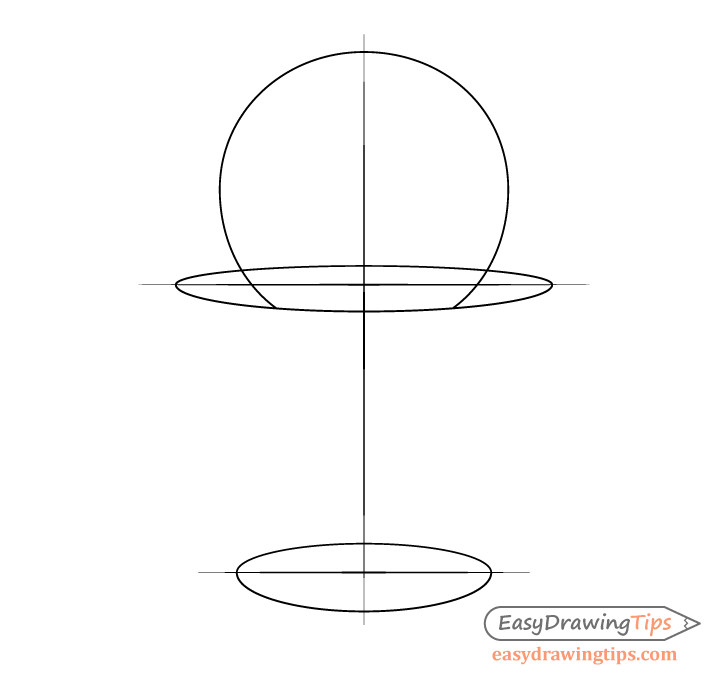
Once the height is set outline the pot’s top and base. This part is slightly tricky due to perspective and eye level.
As the pot is being viewed on an angle draw it’s otherwise round top and base as ovals. Outline the bottom as though it’s is transparent (so that it’s fully visible).
To accommodate for “eye level” make the bottom oval rounder than the top. In addition to this show perspective by drawing the upper parts of both ovals flatter than the lower parts.
The explanation for this is as follows:
Due to the bottom being lower down in relation the viewers eyes (if a person was looking at this pot) the bottom appears rounder.
Because of perspective, the upper parts of the ovals that are further out in the distance appear “smaller” and therefore flatter.
For more on eye level and perspective see:
Perspective Drawing Tutorial for Beginners
After you have the top and bottom of the pot outlined, erase the horizontal line used to help draw the top oval and the part of the pot hidden behind the plant.
Draw the Rim

Draw the rim at the top of the pot. Outline it’s bottom using the outline the upper oval as a guide. Make the rim’s bottom just a little rounder than the top (as it’s lower down). Afterwards, define it’s sides with a pair of straight lines.
Draw the Walls
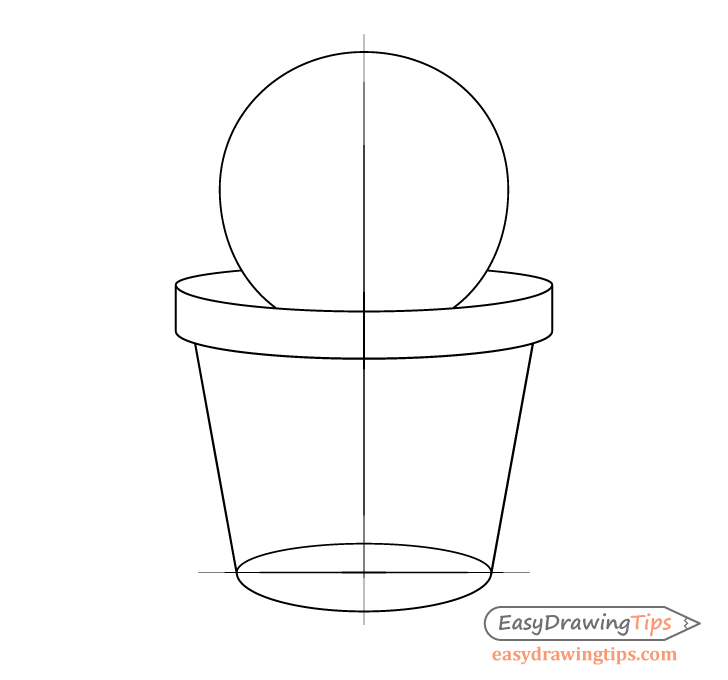
Draw the pot’s walls by projecting straight lines from the bottom of the rim down to the oval.
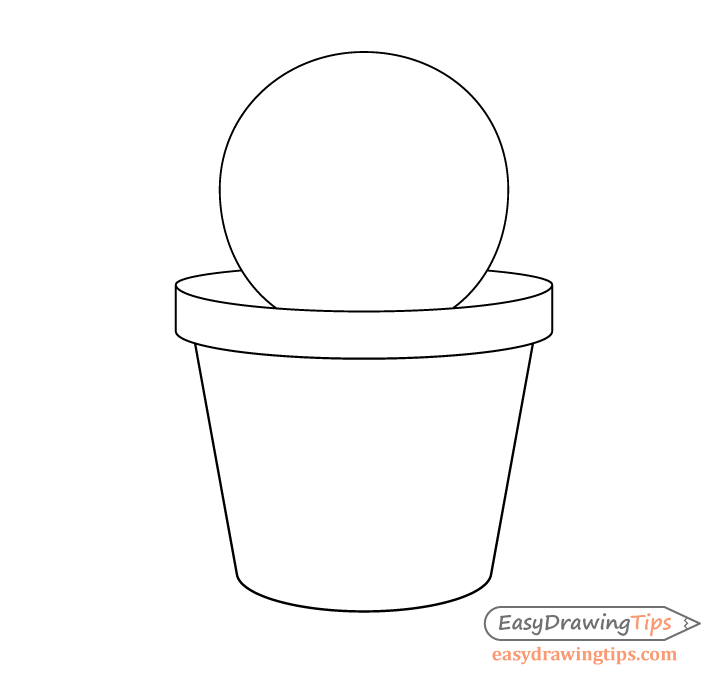
After adding the walls, erase the upper part of the bottom oval as well as the remaining guide lines.
Draw the Inner Edge of the Pot
To finish the pot’s outlined draw the inner edge of the rim (around the opening). This will show the thickness of the pot’s walls. Without it the pot would appear paper thin.
The inner edge should have the same shape as the oval used to define the pot’s top (but smaller). You may need to erase a little bit of the plant;s outline when adding it.
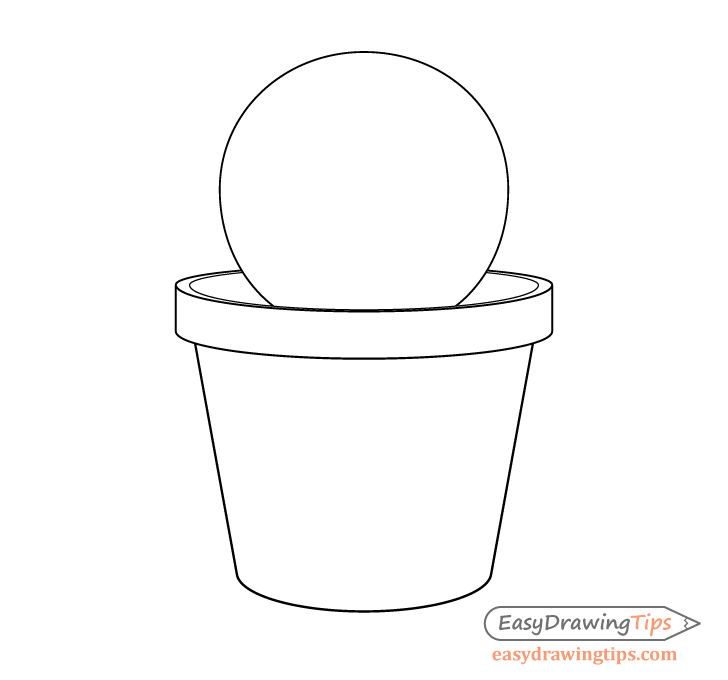
Draw the Soil

Finally, draw the soil. In this example it’s just barely visible (around each side of the bottom of the plant). The soil’s shape should somewhat follow that of the pot’s opening.
Step – 3 Draw the Ribs Along the Cactus

After you have the pot outlined, return to drawing the cactus. Start by adding a series of ribs running up and down along it’s surface. To keep things simpler draw the center most rib as though it’s facing directly at the viewer. Draw the ribs on it’s sides with each consecutive rib facing more sideways. Show this by making the lines that define them more rounded the closer they are to the main outline.
Add the edges of the ribs starting with the one in the middle. Draw it running roughly through the rib’sca center. Add the edges of the two ribs next to it much close to their outer sides. Because the remaining ribs are facing more sideways than the three in the front their edges are already defined by their main outlines and there is no need to add anything else for this stage of the drawing.
The edges will help give the cactus a more three dimensional appearance. You can also leave some breaks in their lines that define them to make the edges appear a little softer.
Step – 4 Draw Clusters of Cactus Spikes
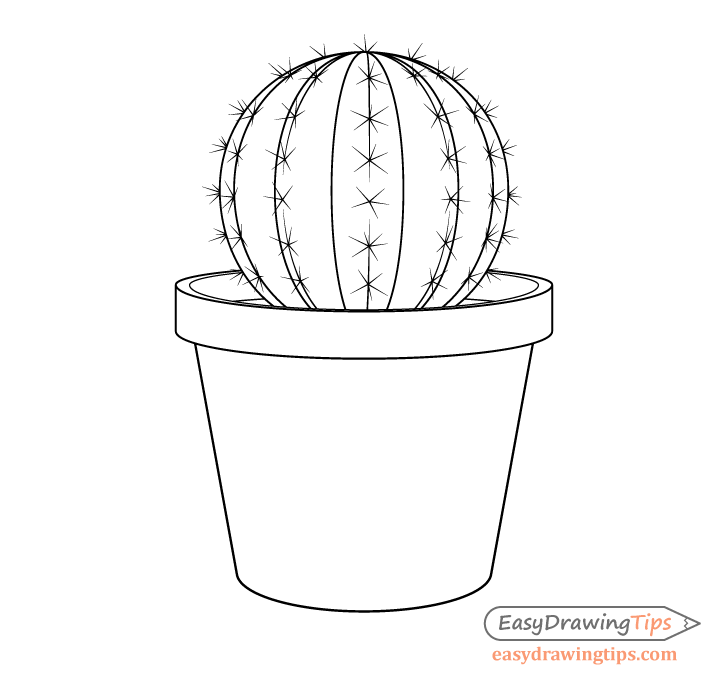
For the last (but very definitive) set of details add the cactus spikes. Draw these in batches along the edges of the ribs. Cactus spikes are usually fairly evenly spaced so you can make the distance between each batch similar in length.
Once you’ve added all the spikes you can trace over your drawing with darker pencil lines or a thin black marker (if you feel confident in your tracing ability).
Interesting face about cactus spikes: they are actually leaves!
For drawing more traditional looking leaves see:
Step – 5 Color the Cactus Green & The Pot an Orange Brown
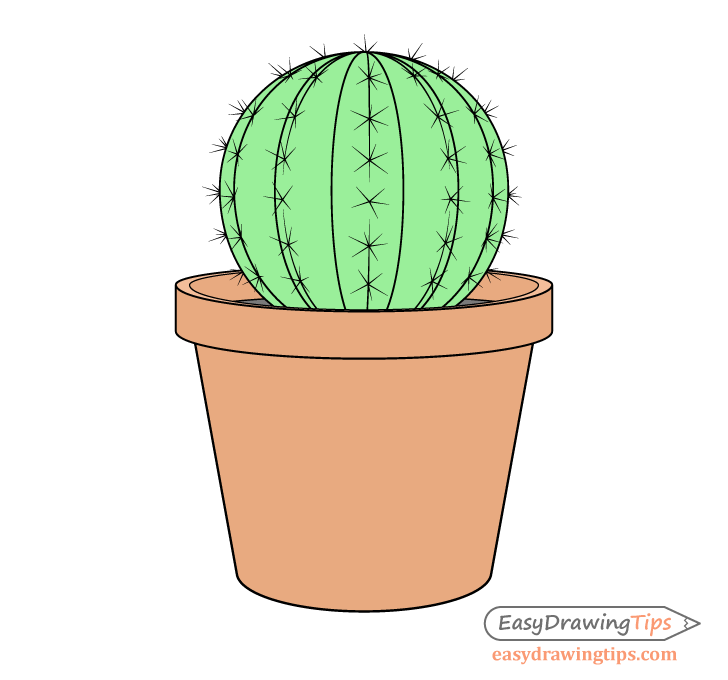
Green and orange are colors that go well together. Cactuses are naturally green and clay pots tend to be an orange brown. This makes for an easy choice of colors. To start, fill in the cactus with a solid green. Next, bake the pot an orange brown but use a lighter variant of this color for the upper surface of the rim. Finally, make the soil inside the pot a dark grey.
Step – 6 Shade the Drawing
In this example the shading is simplified, however, it’s enough to give the drawing a more three dimensional appearance.
The shadow are placed as though the light is coming from the upper left of the cactus.
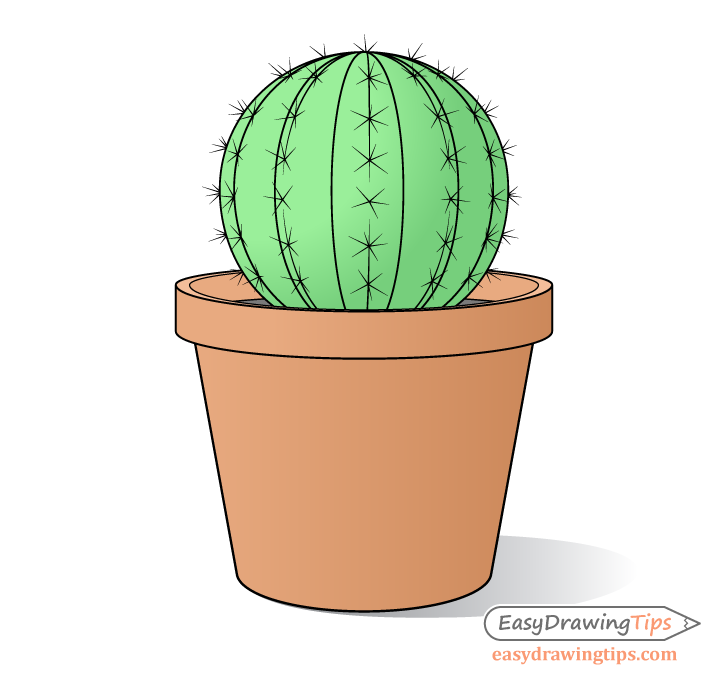
Shade the drawing starting with light to dark gradients. Make the cactus darker gradually darker on the side facing away from the light as well as along the bottom.
Add another gradient running from one side of the pot to another so that similar to the cactus it is lighter on the side facing the light and gradually gets darker towards the side facing away from it.
Finally, add a shadow cast opposite the light source that gradually gets lighter as it moves away from the pot.
After adding the gradients, add the “hard” shadows. Fully darken the cactus ribs facing away from the light and add a thin shadow below the pot’s rim. Finally, also darken the pot’s inner walls.
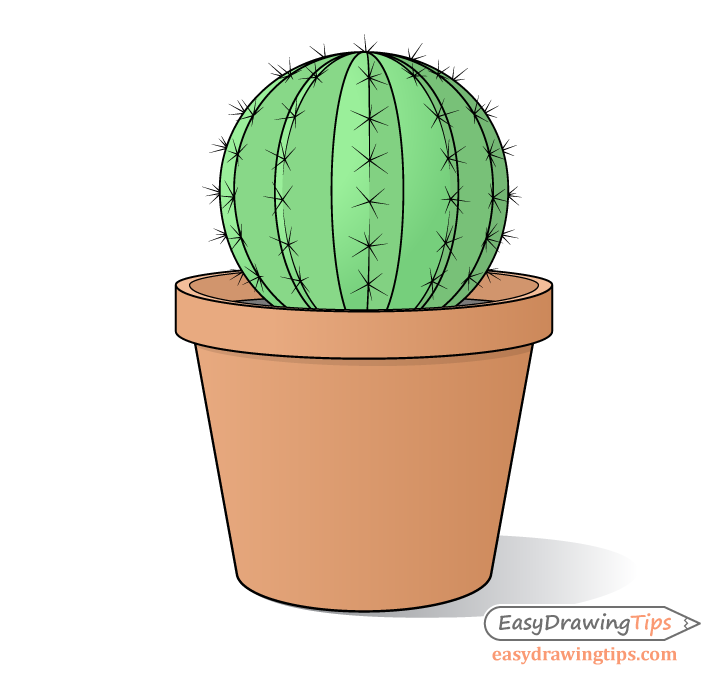
Once done with the above you should have a finished drawing of a cactus plant in a pot.
Conclusion – a Simplified Art Style Can Look Great
This guide shows how to draw a cactus plant in a pot in a slightly stylized but still a fairly realistic manner. Although simplified, example looks nice because it follows the rules of perspective and makes effective use of color and shading.
By showing the most important characteristics of your subject and by properly structuring your artwork you help insure that it both looks good and is easily recognizable.
For more drawing tutorials done in a similar style see:
- How to Draw a Pizza Slice in 6 Steps
- How to Draw a Milk Carton Step by Step
- How to Draw a Carrot Step by Step
- How to Draw a Monarch Butterfly Step by Step


