How to Draw a Tree Branch With Leaves
This step by step tutorial explains how to draw a tree branch with leaves and includes illustrated examples for each step.
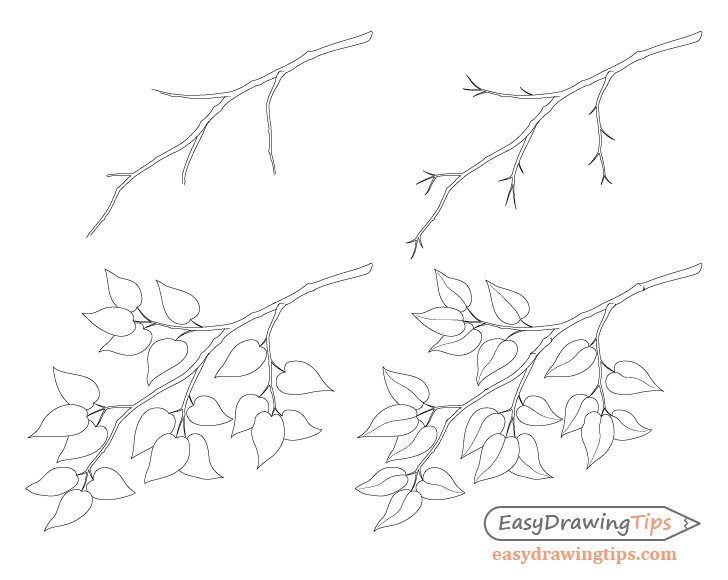
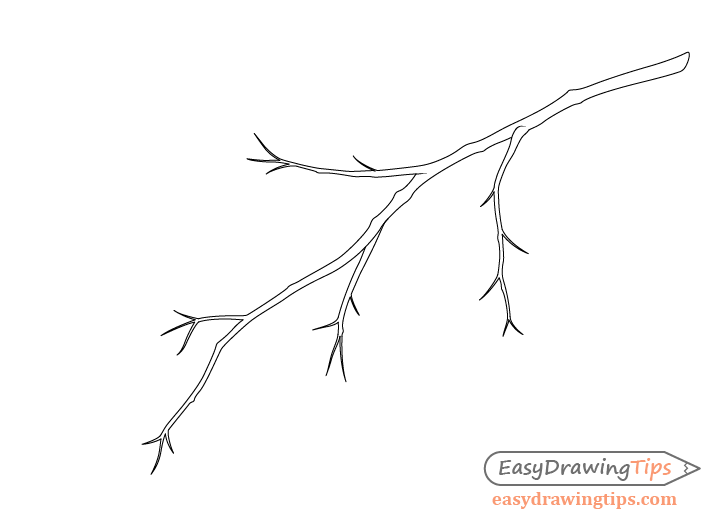
Step 1 – Draw the Branch

Start by first drawing out the shape of the branch.
Generally branches are thicker towards the base and thinner towards the ends. They also tend to have fairly irregular shapes with many bumps and small bends.
You can first do a light sketch that omits some of these bends and bumps and add them in once you determine the main shape of the branch (erase where needed).
Step 2 – Draw the Petioles
Next you can add the petioles (parts that attach the leafs to the branch). Alternatively you can first draw the leafs and then project the petioles from those to the branch.
The shapes of the petioles are fairly basic. They tend to be thicker towards the branch and thinner towards the leafs. Draw accordingly.
Step 3 – Draw the Leaves
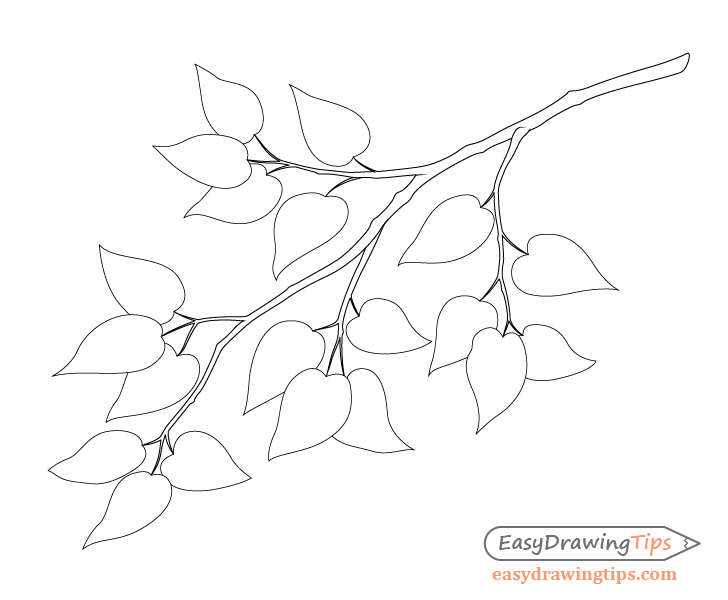
For this step draw the outline shape of the leaves. In this particular example the leaves have a sort of “heart like” shape.
Try and draw the leaves to be slightly different from one another varying in size, shape and direction to make them look more natural. Generally leaves will tend to sort of “fan out” from the branch.
Step 4 – Finished Branch With Leafs Drawing
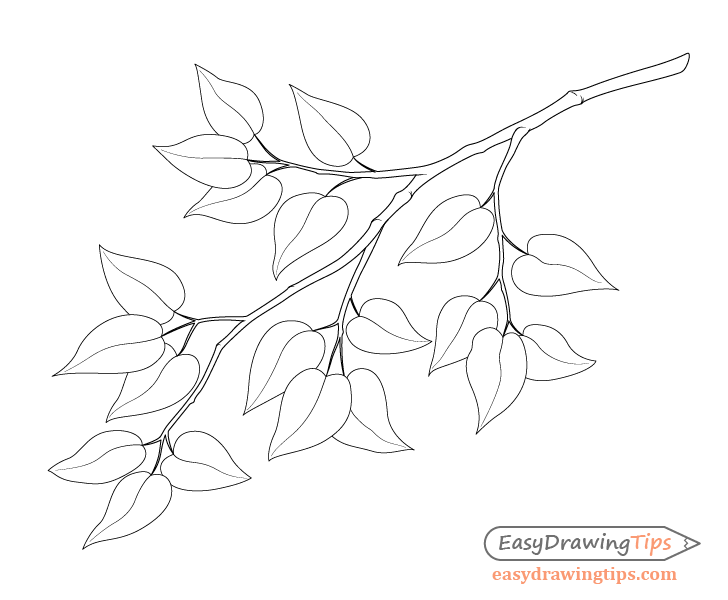
Finally once you have the finished outline drawing of the branch and leaves you can add the midribs of the leaves and some smaller details of the bumps on the branch.
Conclusion
A basic line drawing of a branch with leaves is not too complicated and can be a good drawing exercise for beginners.
For some similar beginner friendly tutorials see:
- How to Draw a Sunflower Step by Step
- How to Draw Grass in 3 Different Ways Tutorial
- How to Draw a Maple Leaf in 3 Steps
- How to Draw a Dolphin Step by Step