Easy Tulip Drawing Step by Step
This step by step tutorial show how to draw a tulip. It’s a fairly easy and great for beginner that want to practice drawing something simple.
Though tulips are not the most complex flowers to draw the example in this tutorial has been simplified even further to make it more symmetrical and easier to draw.
Generally tulips have six petals but since we will be drawing it with one of the petals facing directly towards us the petal in the back that is directly behind it will no be visible.
If drawing on paper be sure to make light lines for the initial construction lines of the drawing so that you can easily erase them in later steps.
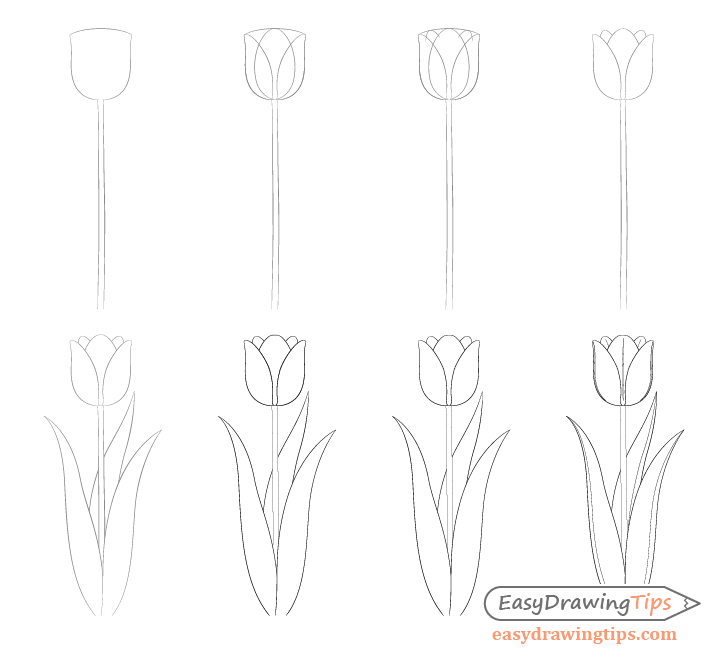
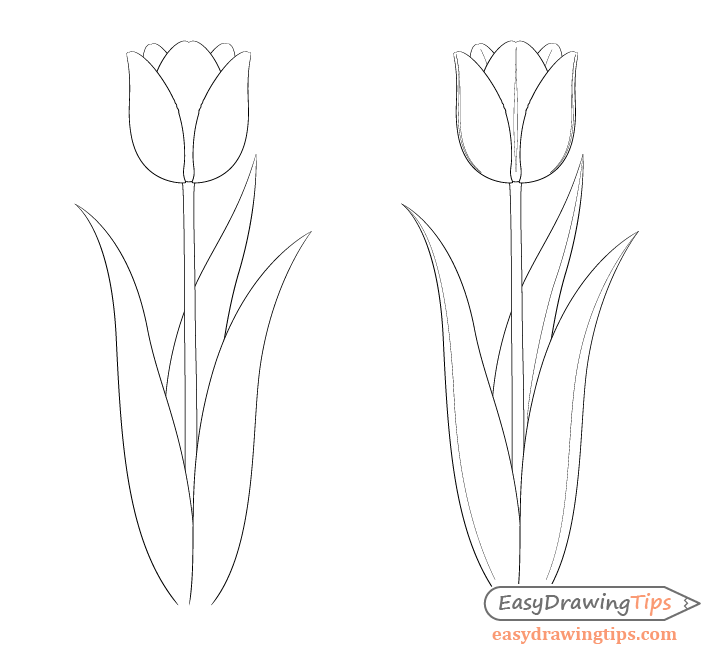
Step 1 – Draw the Basic Shape of the Tulip
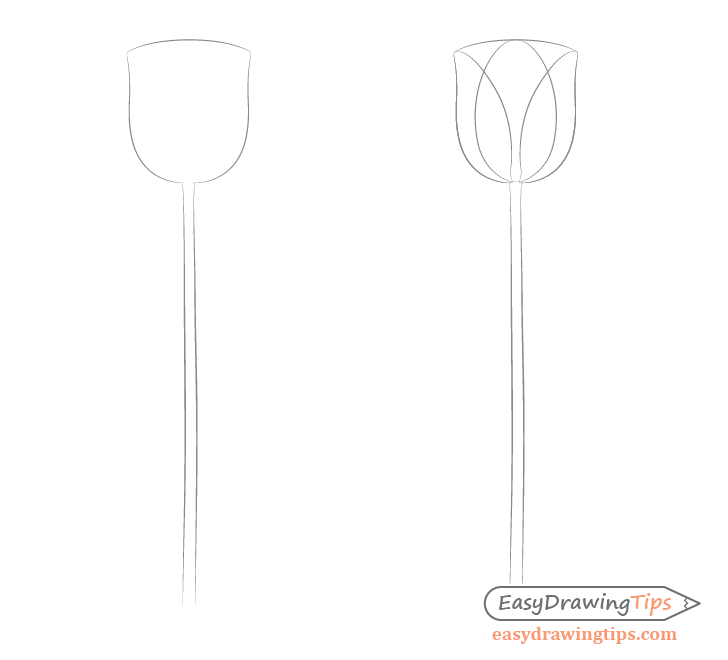
Start the drawing with the basic shape of the tulip. First draw the flower and the stem (no leaves yet).
The goal is to establish the overall shape and proportions of the tulip and to make sure it fits well into your drawing area so draw the full height of the stem.
When you are done the shape should somewhat resemble a champagne glass.
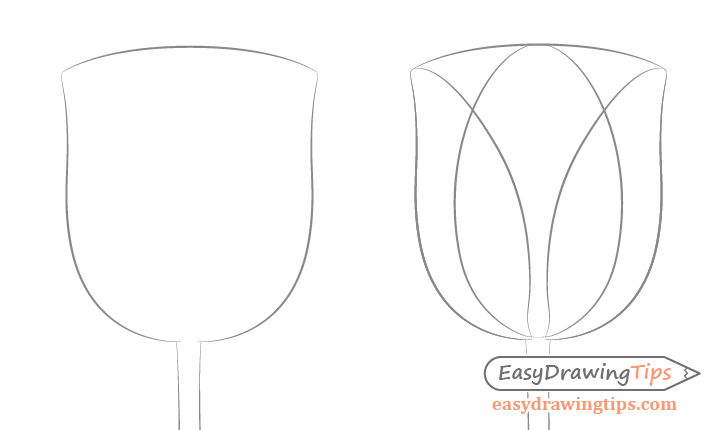
Finish this step by drawing the shapes of the three petals in the front. Parts of the forward most facing petal will be hidden by the other two petals but you may want to draw it as see through to help you get the correct shape.
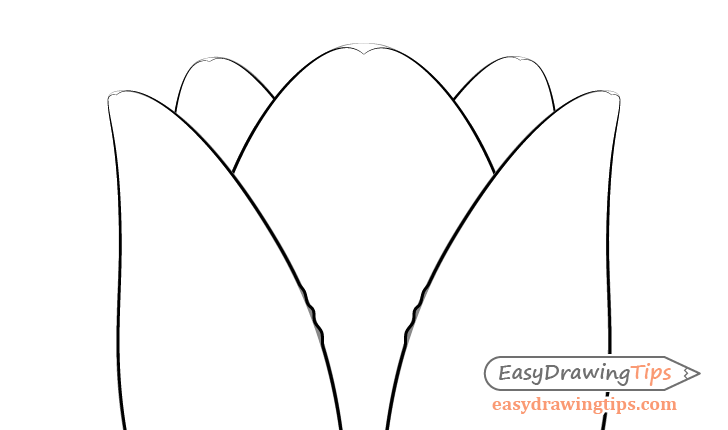
Step 2 – Fully Draw Out the Flower Shape
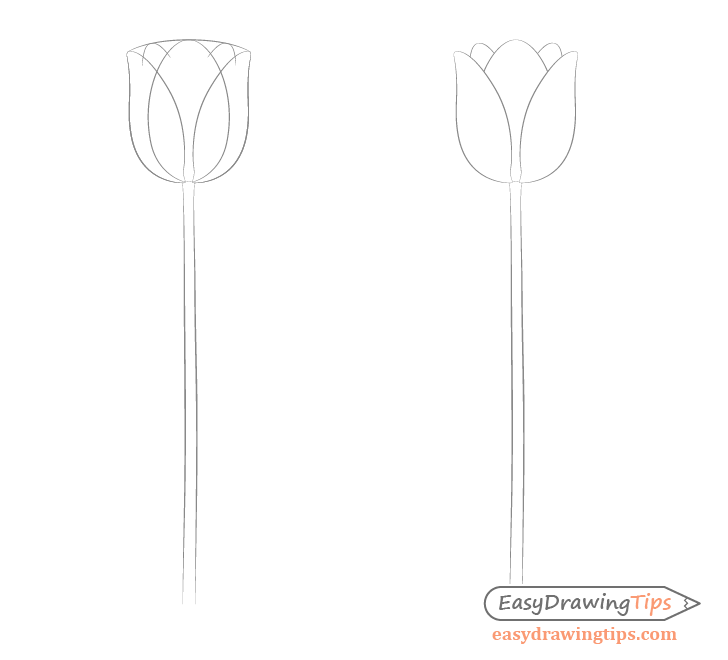
Now draw the petals in the back and erase any see through lines as well as the upper most construction line from the first step.
Step 3 – Draw the Leaves & Curves
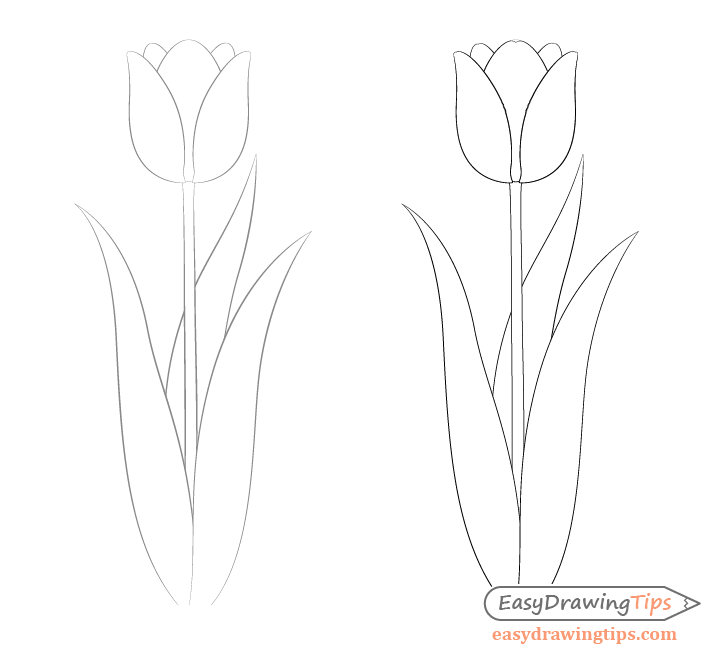
For this particular example we will draw two leaves in the front and one in the back. Draw the leaves thicker towards the bottom and thinner towards the top with smooth curves.
For the flower you can add some small curves that sort of split the petals towards the tips as well as some tiny curves on the sides (tulips tend to have these).
Go over your light drawing with a more solid stroke when you are done.
Step 4 – Finished Drawing
Clean up any extra lines and add the smaller details of the tulip
Add some lines in the middle of the petals that tulips tend to have as well as in the middle of the front leaves where they kind of “fold”.
You can also add a line to the back leave to make it appear slightly curved.
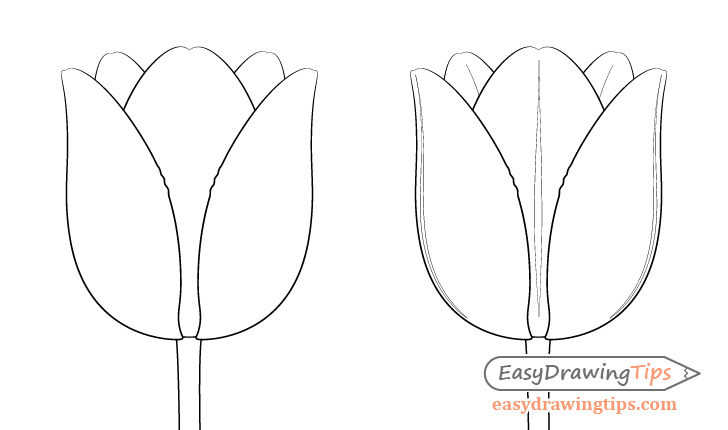
With that done you should have a finished line drawing of the tulip.
Conclusion
This is a very basic tutorial intended for beginners. If you are looking for something more complicated you can try:
How to Draw a Rose Step by Step
For more simple tutorial on drawing plants check out:
- How to Draw a Sunflower Step by Step
- How to Draw a Tree Branch With Leaves
- How to Draw Grass in 3 Different Ways Tutorial


