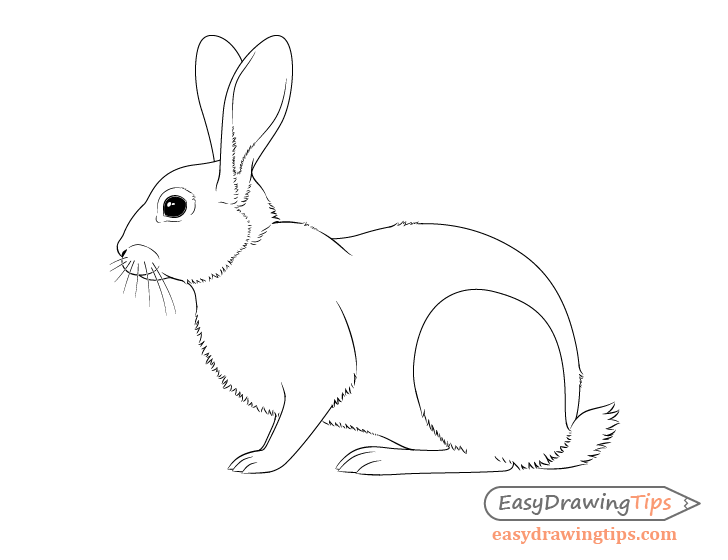
How to Draw a Rabbit Step by Step Tutorial
This step by step tutorial shows how to draw a rabbit from the side view and provides detailed illustrated examples for each step.
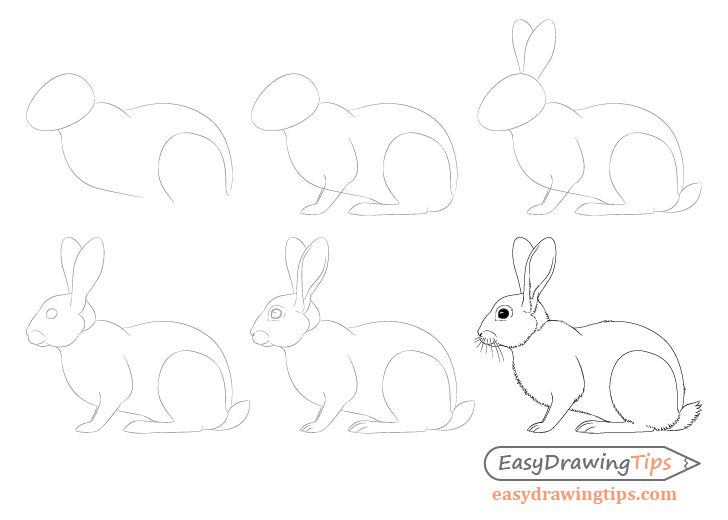
Compared to other animals a rabbit is not the most difficult one to draw but it can still be quite a challenge (especially if you are a beginner artist).
To help this tutorial provides a drawing approach that goes from the basic shape of the body down to the smaller details.
If you are going to be drawing the rabbit using pencil and paper be sure to make light lines that you can easily erase until you get to the final step of the drawing process.
Step 1 – Draw the Major Shapes of the Rabbit Body
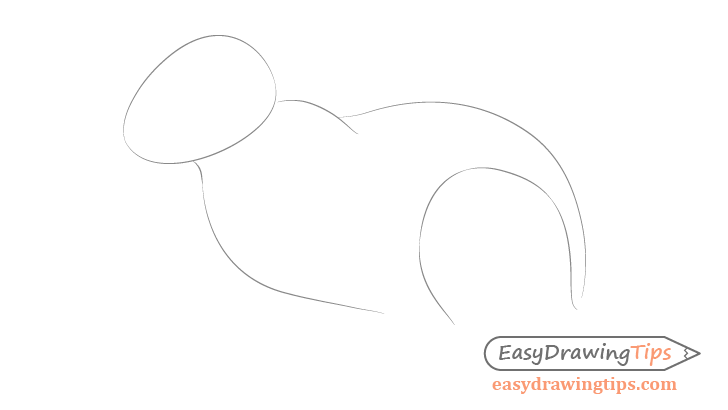
Start the drawing of the rabbit by first getting the overall shapes of the major parts of it’s body as in the above example.
Draw the head as a sort of “egg” shape.
Next draw the body itself which for a rabbit in this position can sort of be broken down into two parts, the smaller front and the larger back. You can pretty much draw the back shape with just one single curve (leave the bottom open for the legs).
Next draw the upper part of the rabbits back leg (a fairly large shape).
Step 2 – Draw the Legs
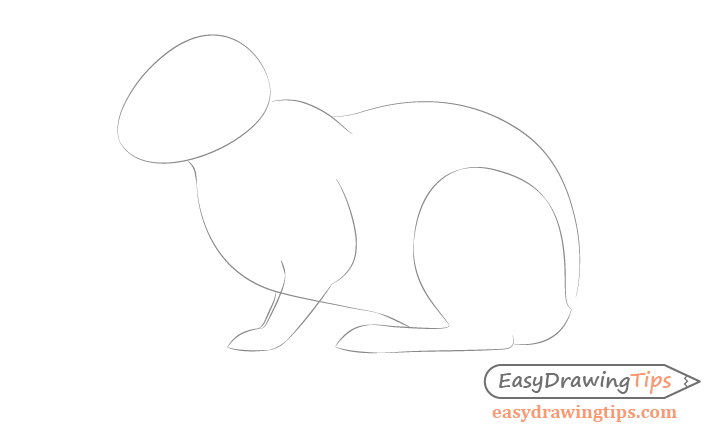
Draw the overall shape of the rabbits legs. The bottom part of the front leg gets slightly narrower from the elbow area towards the toes. The bottom portion of the back leg actually gets slightly wider towards the toes area.
You can also draw just a tiny hint of the other front leg in the back (really just one line).
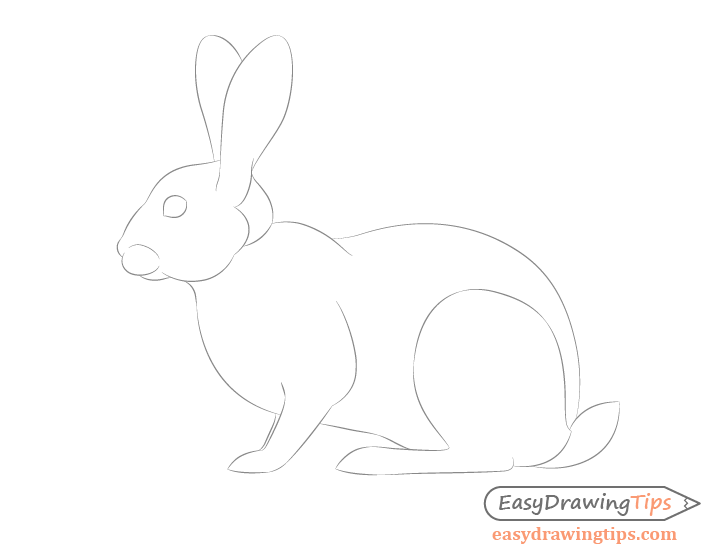
Step 3 – Draw the Ears & Tail
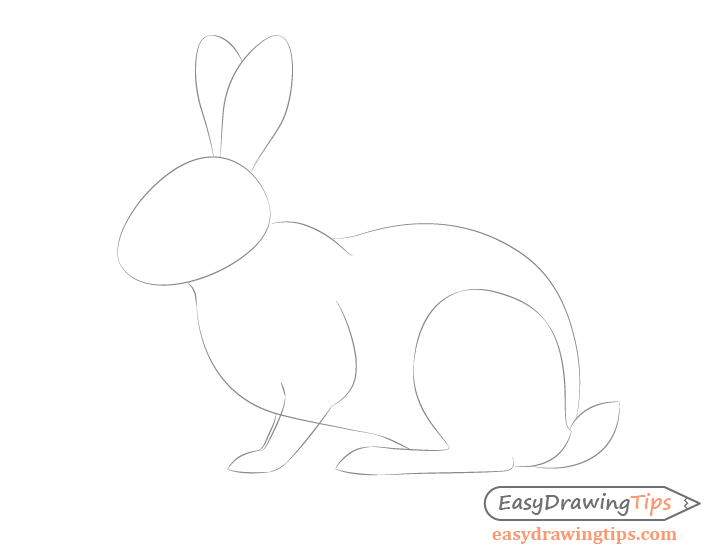
Draw the outer shape of the rabbits ears with the ear that is closer to the viewer pointing more towards the right of the picture and the farther ear pointing slightly to the left.
The reason for this is that if you were to look at the rabbit from the front view each ear is actually tilted to each side of the rabbit. Drawing the ears as described above in the side view helps create this effect of the “tilted” ears.
As rabbits have tiny tails you can draw it with just two curves for this stage of the drawing.
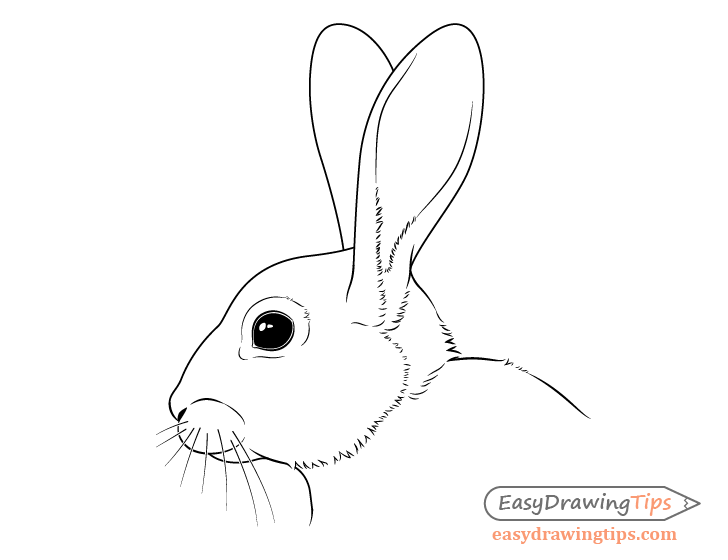
Step 4 – Draw the Details of the Head
Now add the details such as the the smaller bends and curves of the rabbits head. You can also draw the mouth area, cheek area, nose, eye, and bottom portion of the front ear.
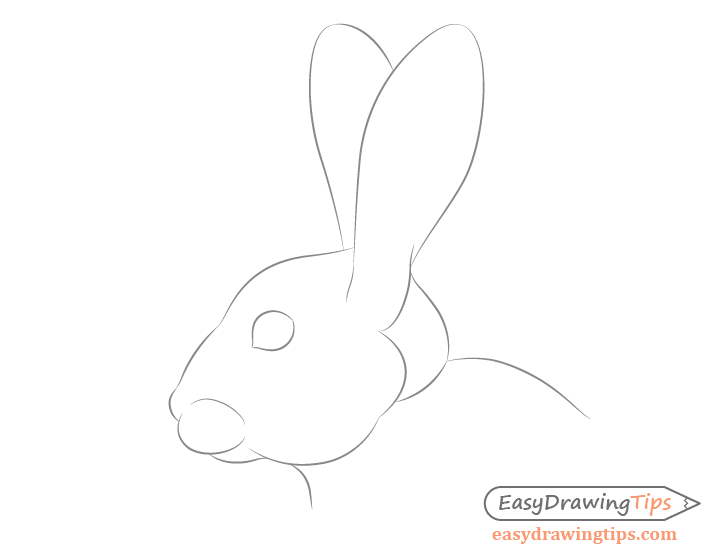
- Mouth – with an egg like shape between the bottom jaw and the nose
- Cheek – a set of two curves one for the bottom portion and one for the area between that and the bottom of the ears
- Nose – just a tiny bump at this stage
- Eye – a sort of “lemon like” shape
- Bottom of Ear Front Ear – a small curve for the front part and a larger curve for the back part that sort of cuts into the upper shape of the ear
Step 5 – Draw the Very Small Details
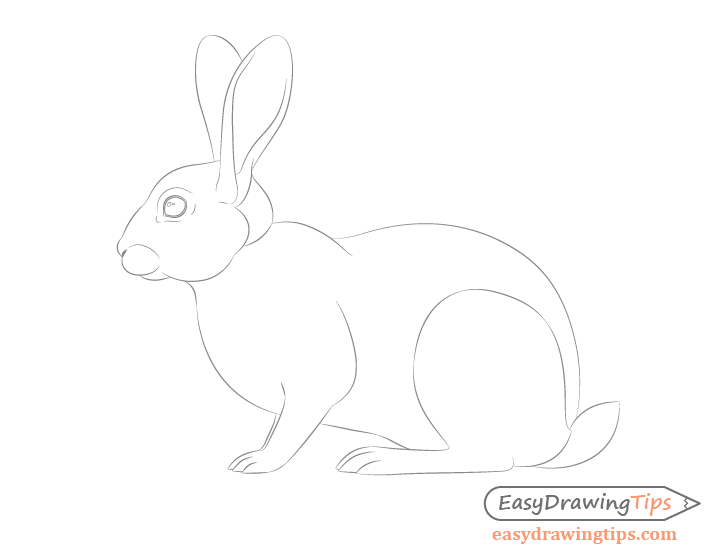
Now add the even smaller details of the rabbit in the following places:
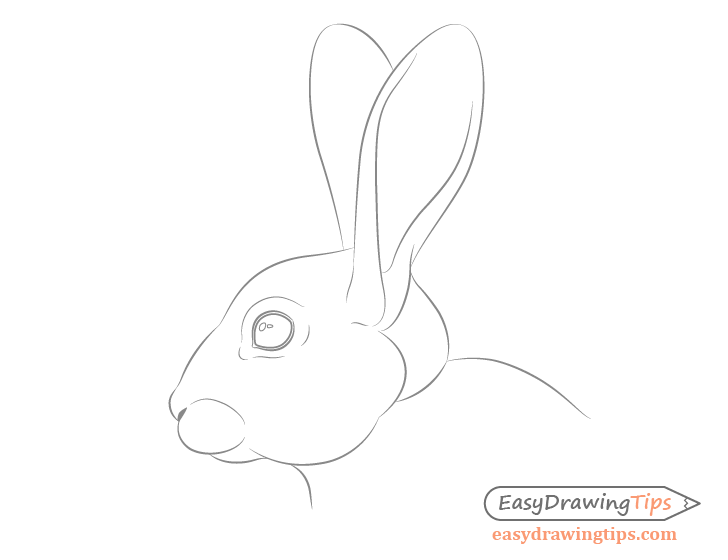
- Ears – the inner shape of the front ear
- Eye – the inner shape of the eye as well as the reflection areas (basically white dots where the light is reflected in the eye)
- Around Eye Area – Rabbits tend to have eyelids and a lighter fur in this spot
- Nose – a tiny nostril area between the bump of the nose and the upper mouth area
- Legs – individual toes
Step 6 – Add the Fur & Whiskers to Finalize the Drawing
Finally you can add some whiskers to the upper part of the rabbits mouth area as well as some fur clumps.
Add the fur clumps in the following areas:
- Around the inner bottom part of the ears as well as a tiny bit towards the outer bottom back area
- Tiny clumps in back of the the “eyelid/around eye area”
- Fanning out around the cheek area
- The chest area
- Elbow area (front leg)
- Bottom portion of the upper part of the back leg
- Back of the tail
- Back of the head
- Tiny clumps in some random areas around the large curve of the back
Draw the fur clumps of varying lengths and sizes and with slightly different curves to make the fur look more natural.
You can also completely shade the eye (excluding the reflections).
Conclusion
Though a rabbits are not the most complex animal they can still be quite a challenge (depending on your artistic skill) to draw. Hopefully the tips and drawing approach provided in this tutorial have helped you gain a better understanding of how to draw one.
For more similar tutorials see:
- How to Draw a Squirrel From the Side View Tutorial
- How to Draw a Horse From the Side View Tutorial
- How to Draw a Lion Full Body Step by Step


