How to Draw a Horse From the Side View Tutorial
This step by step tutorial explains how to draw a horse from the side view and includes detailed illustrations for each step.
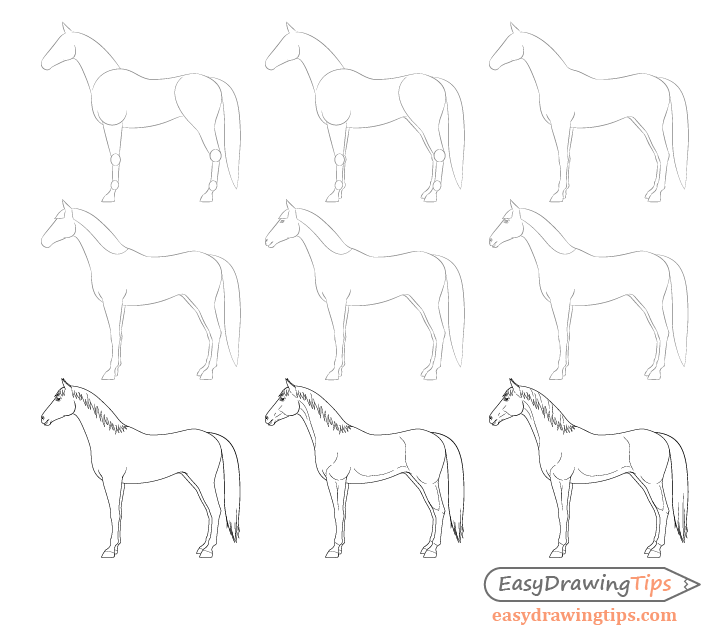
A horse is a fairly challenging animal to draw. If you are going to be following along using pencil and paper be sure to make light lines for the first six steps of the tutorial as you will need to do some erasing later on.
Step 1 – Establish the Proportions of the Horse’s Body
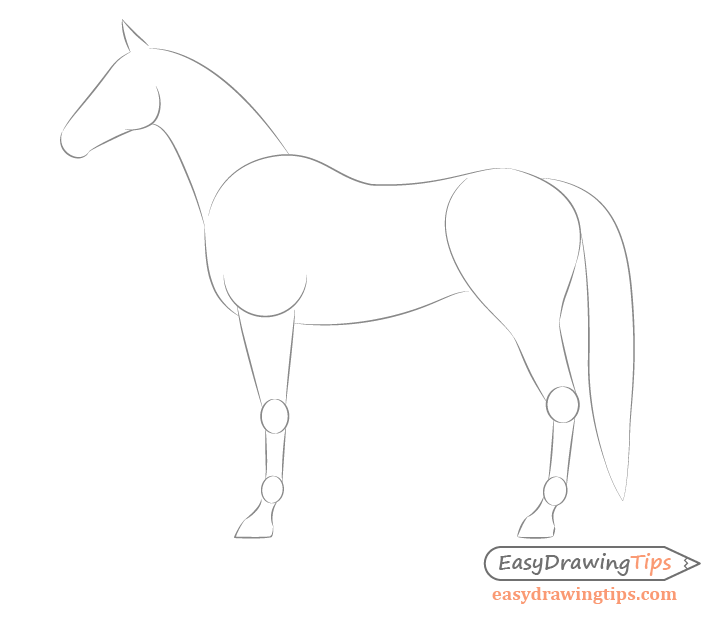
Start with a simplified line drawing to establishing the basic proportions and shapes of the horse’s body.
In the above illustration you can see the basic curves and shapes of a horse.
Generally it’s a good idea to start the drawing from the head.
You can draw as follows:
- Head – thinner towards the nose and wider towards the neck with a large curve for the cheek
- Ears – a horses ears are fairly pointy and in their natural position lean slightly towards the nose
- Neck – thinner towards the head and thicker towards the body
- Body Top – has a small sort of “hump” (right after the neck) that then curves downwards and back up again
- Body Bottom – a smooth curve from the end of the neck to the front legs and an upwards curve from the chest to the stomach
- Shoulder/Elbow – located at the very top of the front leg (you can indicate the area with a simple half circle for this stage of the drawing)
- Front legs – wider at the top and thinner towards the bottom with oval like shapes for the joins
- Hips – above the back legs of the horse (significantly wider than the legs)
- Back Legs – thicker at the top and thinner toward the bottom with oval like joins
- Hooves – Wider at the bottom with a pointy front end
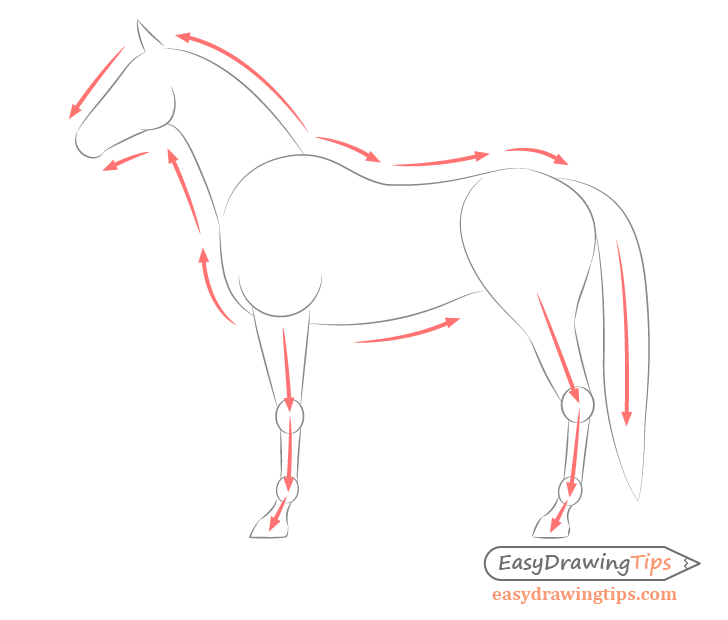
Step 2 – Drawing the Basic Shape of the “Far Side” Of the horse.

The side of the horse that is away from the viewer or in this case the second front leg and the second back leg will also be visible but will appear smaller due to perspective. Draw them accordingly with the same basic shape as the “forward” set of legs but slightly smaller.
For a detailed explanation of perspective drawing see:
Perspective Drawing Tutorial for Beginners
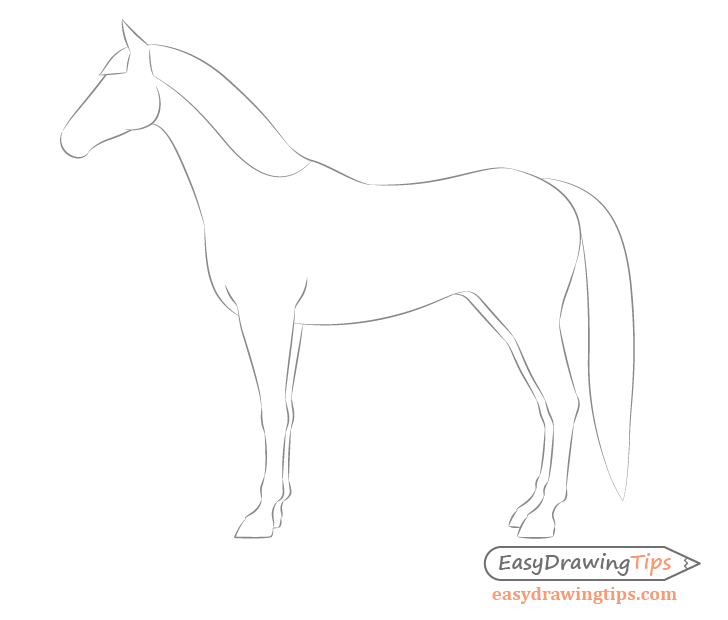
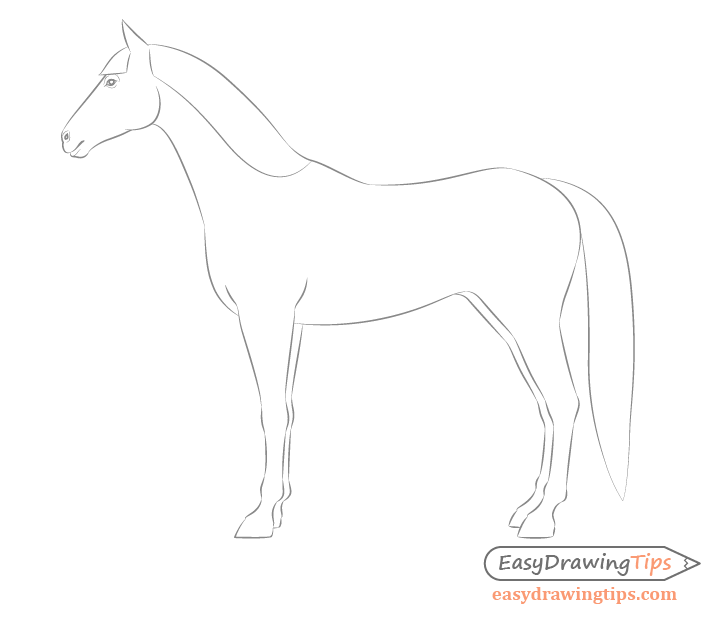
Step 3 – Horse Side View Basic Body Shape Drawing

Smooth out the proportions drawing and remove some of the extra lines to have a basic side view drawing of the the horse.
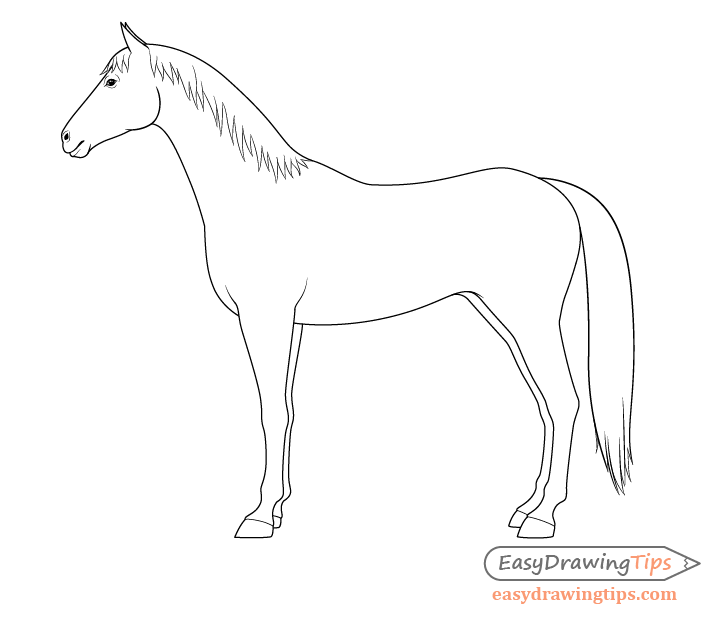
Step 4 – Horse’s Mane Shape Drawing
Draw out of the basic shape of the horse’s mane without any of the smaller details. The mane will usually be split into two main shapes, one in front of the ears and one behinds the ears along the neck.
Step 5 – Horse’s Facial Features Basic Drawing

Draw the basic facial feature of the horse as follows:
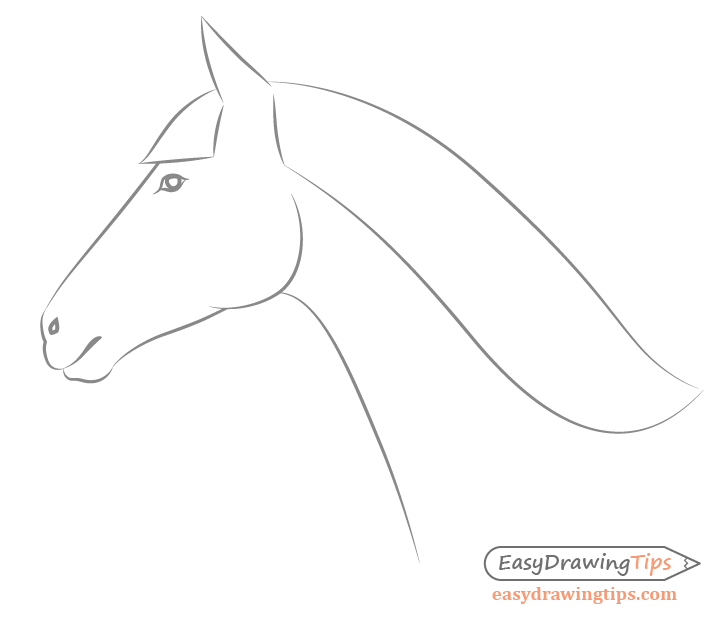
- Eye – somewhat similar to a human eye but with a larger iris that covers most of the eye
- Nose – as a sort of “water drop” shape at the very tip of the upper bottom of the head
- Mouth – as a sort of “wave” shape
Step 6 – Facial Features Details
Add some smaller details to the facial features as follows:

- Eyes – lines to indicate that the sort of “puffy” eyebrow shape around the top of the eye and a hint of the bottom eyelid
- Nose – a hint of the thickness of the nostrils
- Mouth – a hint of the bottom lip
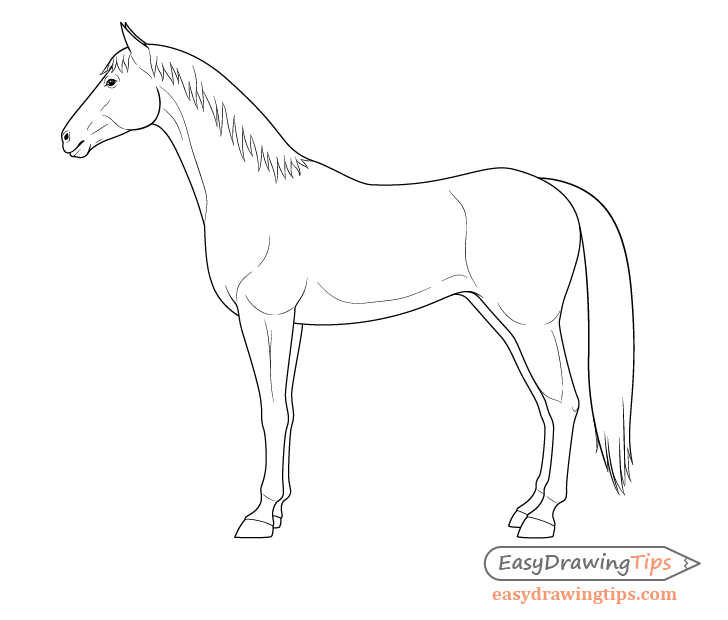
Step 7 – Mane, Tail, & Basic Horse Outline Drawing
Finally you can draw the details of the individual hair clumps of the horses mane and tail. Afterwards you can go over the drawing with darker more solid lines.
You can also add some lines to indicate the top of the hooves as well as darken the inside of the nostril and the iris/pupil area of the eye (leave some white for the reflections in the eyes).
When you are done you should have a finished basic line drawing of the horse.
Step 8 – Drawing the Horse’s Muscles
To make the horse look a little more finished add some hint’s of the various muscles and smaller shapes of the body.
- Head – extend the cheek area a little more towards the top of the head add some small hints of the muscles between it and the mouth
- Neck – add a hint of muscles in the bottom area
- Elbow – add a smaller curve towards the top right side of the leg
- Front Leg – add a sort of “split” to show the muscles in the upper area
- Body – add a line near the bottom of the stomach to give a hint of the curve in that area
- Hips – draw a sort of wave like shape near the front and add a hint of the curve at the bottom
- Back Legs – give a hint of the back leg muscle located in the upper front part of the leg
Step 9 – Finished Horse Drawing
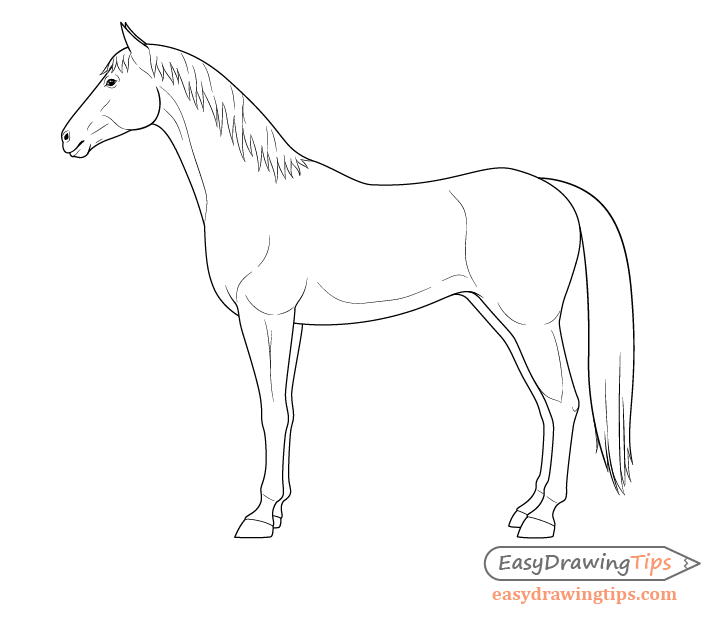
At this point you can simply add some more hints of the hair to the mane and tail to finally have a finished drawing of the horse.
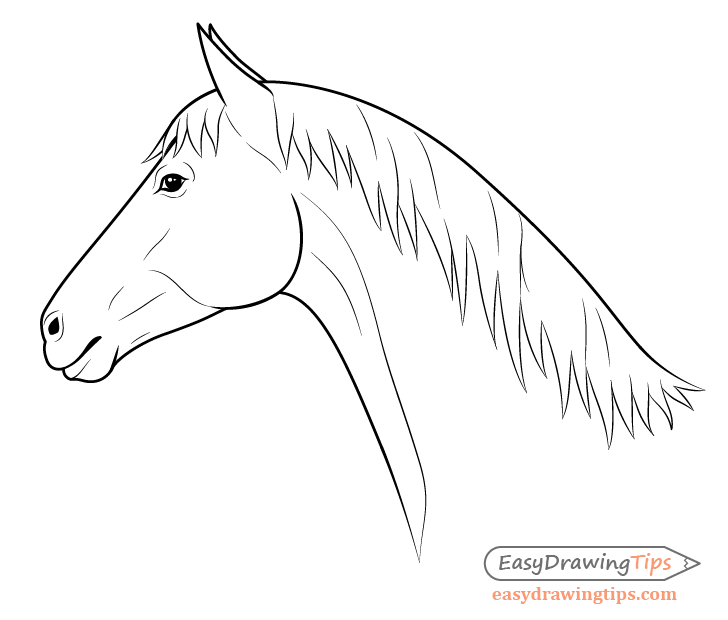
You can also see the close up drawing of the head above.
Conclusion
This is a fairly extensive tutorial that provides some general basic guidelines and tips for drawing a horse. If you find the tutorial to be too difficult you can practice drawing individual parts of the horse to make it a little easier (only the head for example). Alternatively you can add more details to the horse than shown in the tutorial by using photos of horses for reference and studying the various shapes of their bodies.
For some similar tutorials see:
- How to Draw a Sitting Cat Front View – Step by Step
- How to Draw Bird Step by Step – Side View
- Dog’s Head Front View Drawing – Step by Step
- How to Draw a Lion Full Body Step by Step
- How to Draw a Dolphin Step by Step


