How to Draw a Cat Step by Step
This step by step tutorial explains how to draw a cat from the front view. It provides detailed illustrated examples and simple instructions.
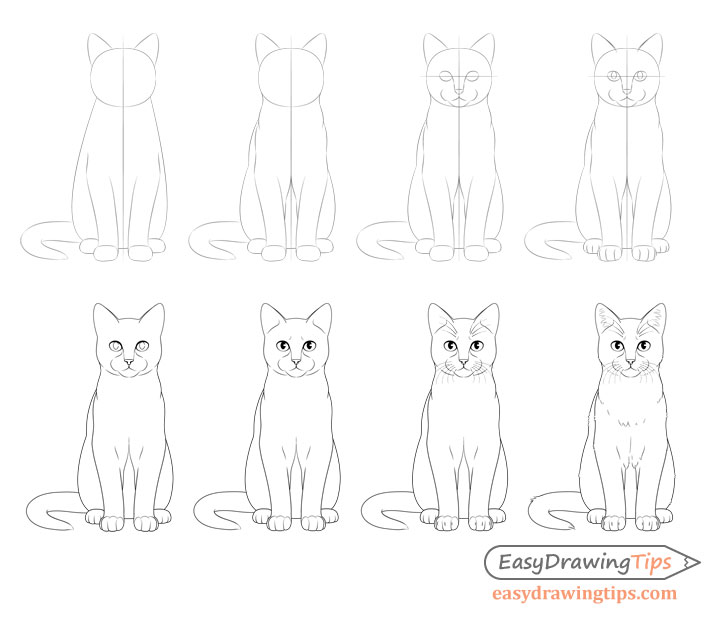
When a complex drawings such as that of animals it can be particularly helpful to use the right approach. This tutorials explains how to draw a sitting cat with a detailed eight step guide. You can see they key stages of the drawing in the preview image above but there are additional examples shown in some of the steps to make it even easier to follow along.
It’s recommended that you use a pencil as you will need to do a bit of erasing as you progress through the tutorial.
Step 1 – Outline the Main Parts of the Cat
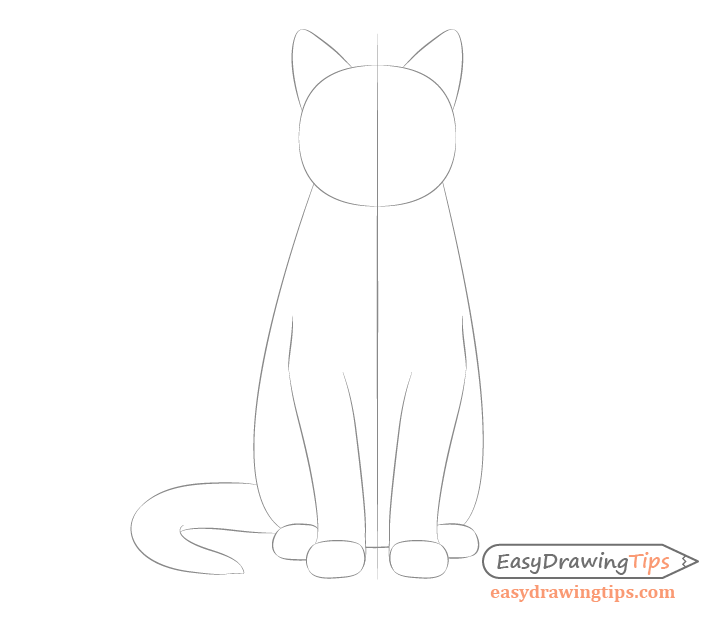
Begin by outlining the major shapes of the cat’s body without any of the smaller details.
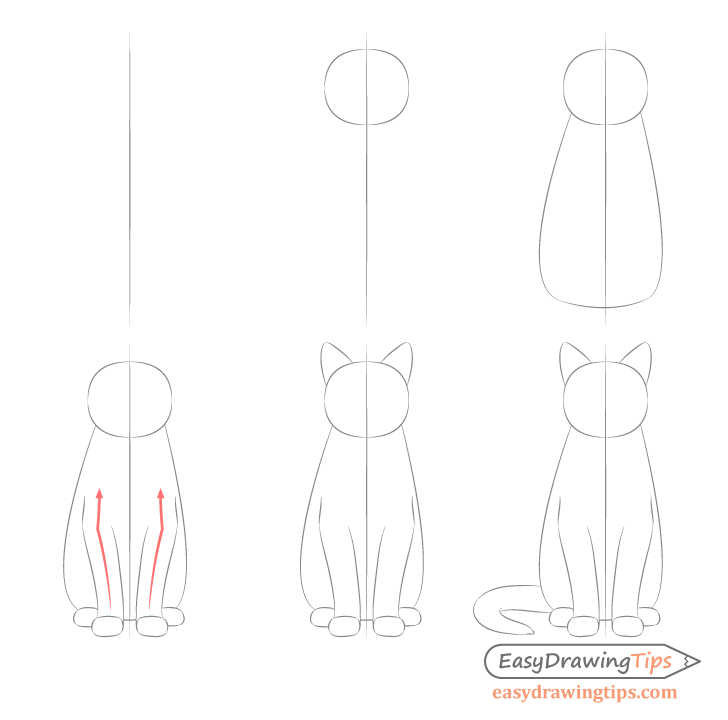
Draw these in the following order:
- Draw a vertical line to help you see if both side are of even width.
- Outline the head with a shape close to an oval.
- Draw the body shaped like a drop of water.
- Outline the paws without any of the small details like the toes.
- Add the front legs in a way where they curve slightly outwards (about halfway up the body) and then angle a little bit inwards.
- Outline the ears and tail.
Step – 2 Add the Curves of the Body
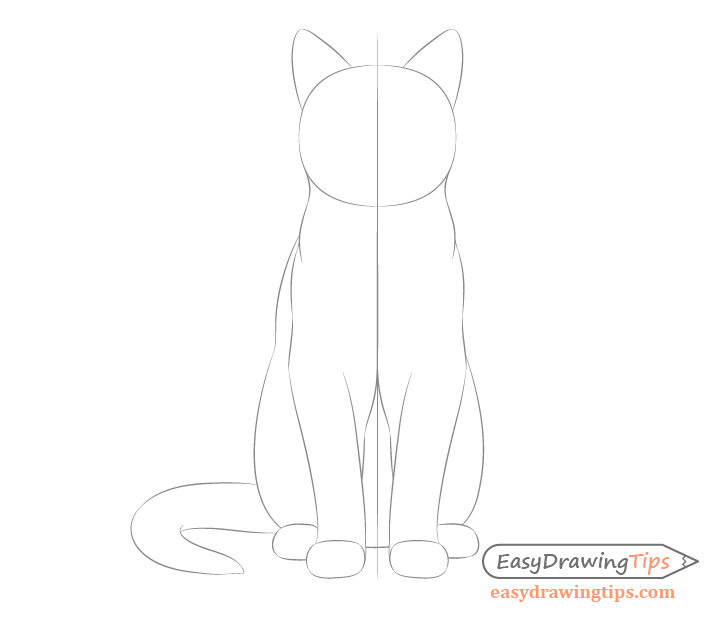
After you’ve constructed the cat as described in the previous step add the smaller shapes and curves along the upper part of it’s body.
Step 3 – Position the Facial Features
At this stage of the drawing position the cat’s facial features but leave out their smaller details for a later step.
- Draw a horizontal line through the head to help you place the cat’s eyes on the same level.
- Draw the eyes angled slightly downwards with their inner ends.
- Draw the nose rounded corners on the sides and a flat bottom (shaped somewhat like a triangle).
- Define the bridge of the nose with a pair of curved lines that go from the inner ends of the eyes towards it’s tip.
- Draw the mouth with two sets of curves that start slightly below the nose. Add another pair of curves to their sides to define the snout and one curve below to define the chin.
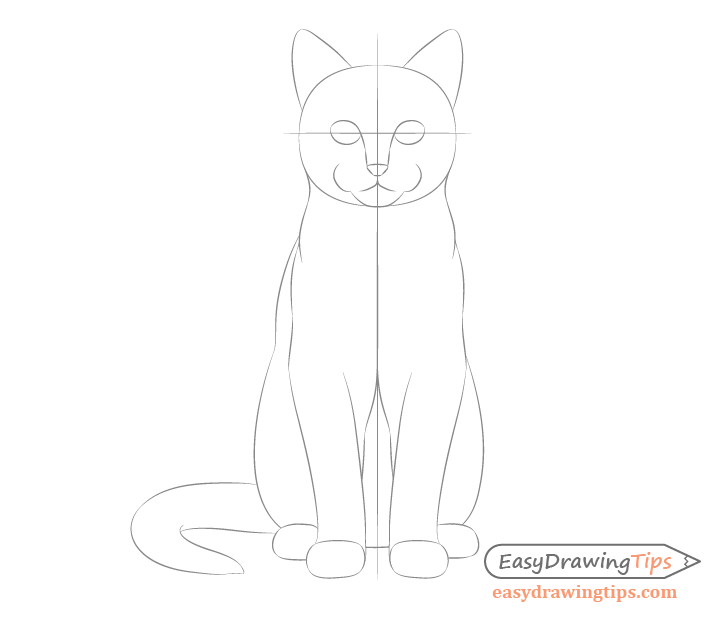
Step 4 – Add the Pupils, Ear Curves & Toes
A cats pupils are are close in shape close to ovals. Add one to each of it’s eyes. Next, show the curves of the ears by drawing a pair of lines towards their inner ends that cut into the outline of the head.
Draw some division lines on the paws to show the individual toes. Keep in mind that the front paws in this example are slightly angled so as the toes turn away from the viewer they will become less visible. Draw the dividers accordingly with smaller division for the far toes.
The pack paws are viewed on an angle as well but the paw on the left is facing more directly towards the viewer while the paw on the right is facing more sideways. For this reason one toe on the right-side leg will not be visible.
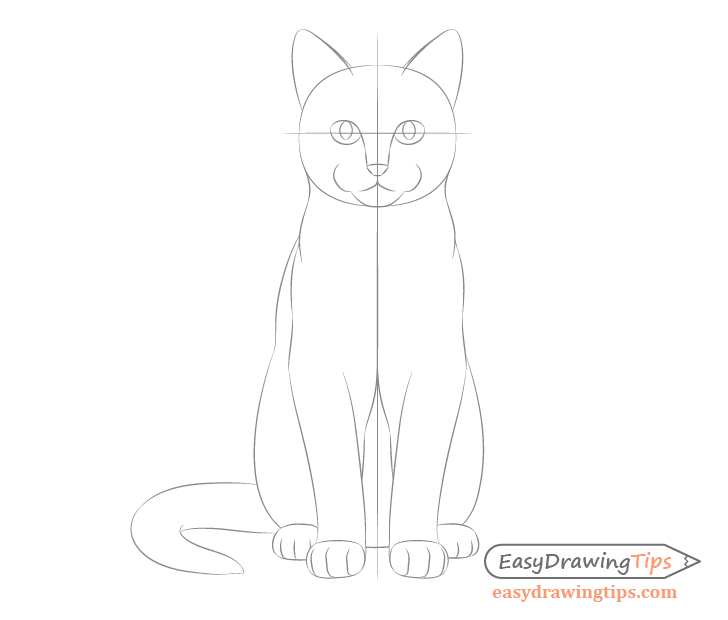
Step 5 – Clean up the Drawing
Clean up the drawing by erasing the guide lines. Afterwards, better define the shape of the head, snout and nose, as well as the legs and toes as follows:
- Head – add the curves of it’s lower part
- Snout – define it’s upper part
- Nose – add the nostrils
- Legs – better define the curves of their upper/inner parts
- Toes – add the upper (front paws only) and lower curves of their shapes
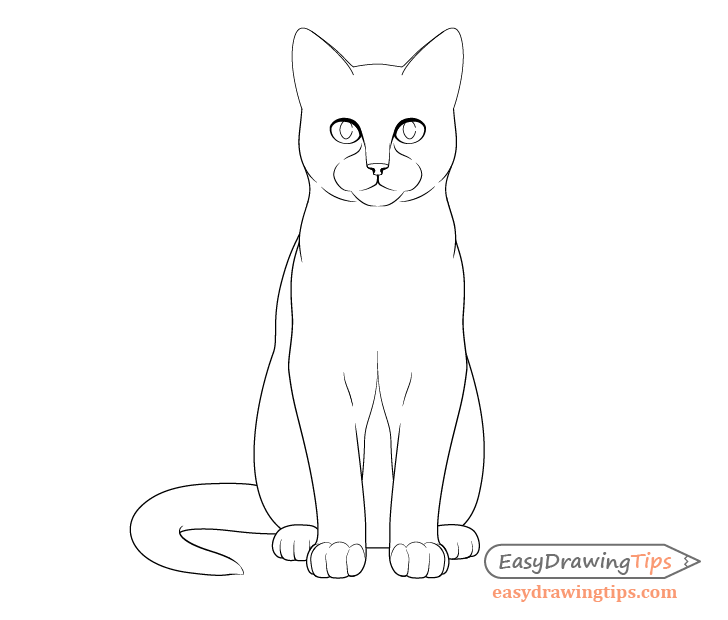
Step 6 – Add the Details of the Upper Part of the Head
Define the lower part of the ear openings add a hint of the eyebrows and fill in the pupil’s with black or dark pencil shading.
When adding the eyebrow areas you can just give a hint of them by adding as a small curve near the inner end of each eye. When shading the pupils leave a small white spot that “cuts” into each of them. These white areas will show light reflecting from the smooth surface of the eyes.
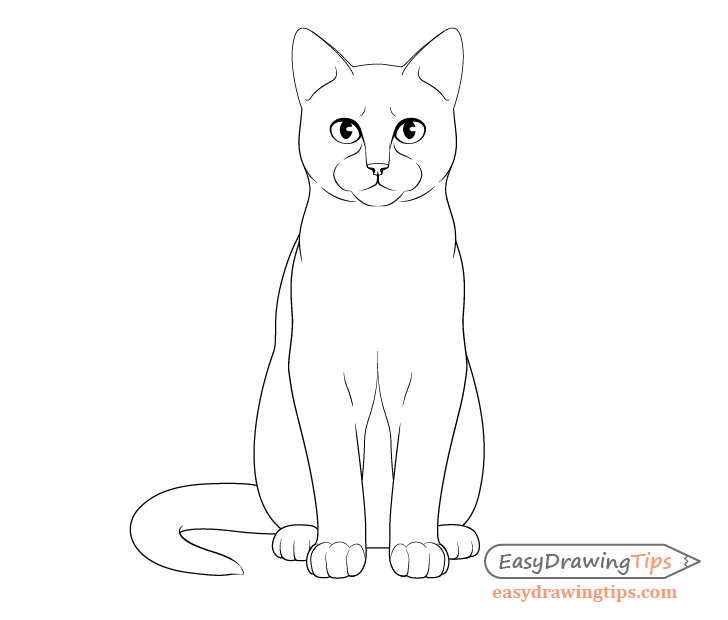
Step 7 – Draw the Whiskers & Claws
Add the whiskers and the eyebrow hairs. Try and make these of slightly varying length and placement to make them look more natural. At the same time try and keep these fairly balanced on each side of the face.
As cats have retractable claws you wont really see them when their front paws are in a relaxed state. You can however define the areas where the claws come out of by adding a few small curves to the front toes.
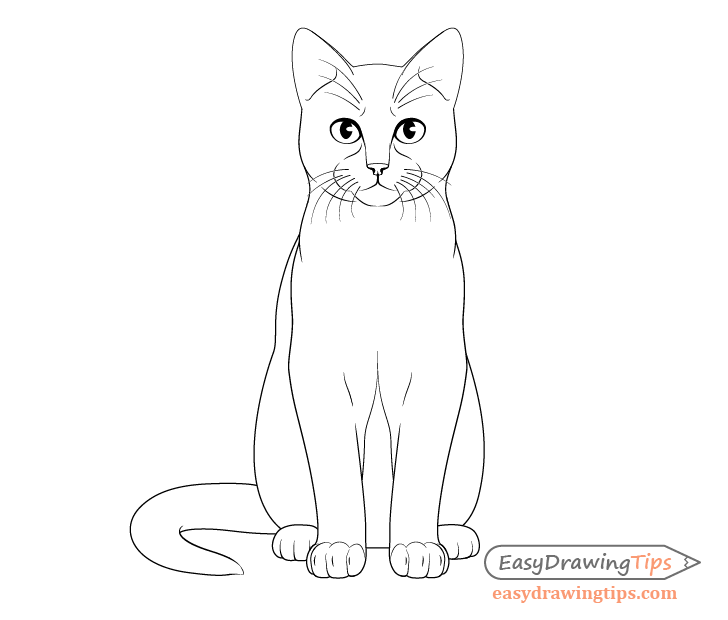
Step 8 – Draw the Fur & Finish the Cat Drawing
To finish the cat drawing add the fur. Fur will tend to stick out in the areas where there are some curves along the body as well as the neck area where some cats have a mane. There will also be some fur inside the ears though not as solid as that over the rest of the cats body.
Add the fur clumps as shown in the example. Try and draw them of slightly different sizes and pointing in slightly different directions to make the fur look more natural.
Conclusion
When making a more complex drawing like that of the cat in this tutorial it’s important to use the right approach. By working from the larger parts of the body to the smaller details you can make the process much easier to manage and reduce mistakes.
For more on good drawing practices see:
Beginner Guide to Learning to Draw
For more similar tutorials see:
- How to Draw a Lynx Face & Head Step by Step
- How to Draw a Lion Full Body Step by Step
- How to Draw an Eagle Head Step by Step
- How to Draw the Female Body Step by Step


