How to Draw a Fish in 10 Steps (Perch)
This guide shows how to draw a fish (freshwater perch). It’s presented in a step by step format with line drawing and shading examples done in pencil.
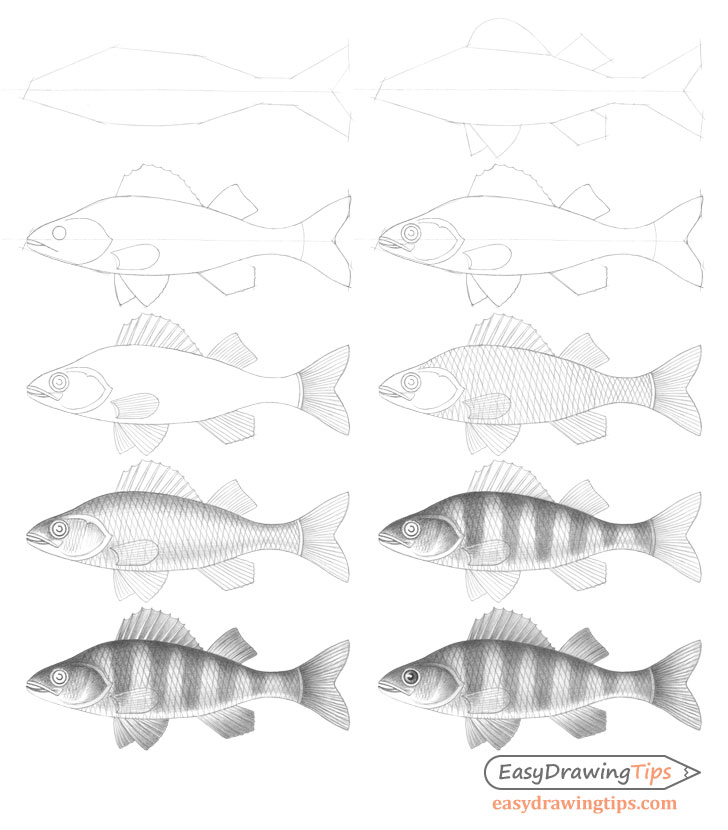
As mentioned, the example is of a perch. The focus of the guide is on illustrating how you can create a realistic looking fish drawing. It shows how to first make a line sketch with a shape characteristic of such an animal and then how to apply shading to give it a lifelike appearance. The tutorial can be helpful if you are looking to improve your line drawing and pencil shading skills.
If you plan on following along start with light easy to erase lines as you will need to clean up those from earlier steps as you progress through the guide.
Step 1 – Sketch Out the Shape of the Fish’s Body

Begin by sketching out the main shape of the fish’s body and the tail.
First, draw a straight horizontal line through the middle of your drawing area to act as a guide. This guide can make it easier to see the the width of the upper and lower part of the fishes body in relation to one another. It can also help insure that the drawing does not get crooked or become skewed to one side.
After you have the guide line roughly sketch the shape of the body and the tail that it transitions into. The goal at this stage is to establish their overall proportions. To do this you can create a sort of “frame” (as shown in the example). Use this “frame” to set the overall width and length of the body and tail as well as define their main shapes without any of the smaller details, bends or curves.
In this example the fish’s body is narrower towards the nose wider in the middle and then narrower again towards the tail. The tail is taller than the body with a split on it’s end.
The reason for starting with simplified shapes like those in the example is that it can help you catch mistakes early on and fix them more easily. If for example you find that the body is too short or not properly positioned on the page you can redraw the above sketch fairly quickly. However, if you go into the smaller details (like the scales for example) and then find out you need to make adjustments it can be far more time consuming.
Step 2 – Sketch Out the Shapes of the Fins
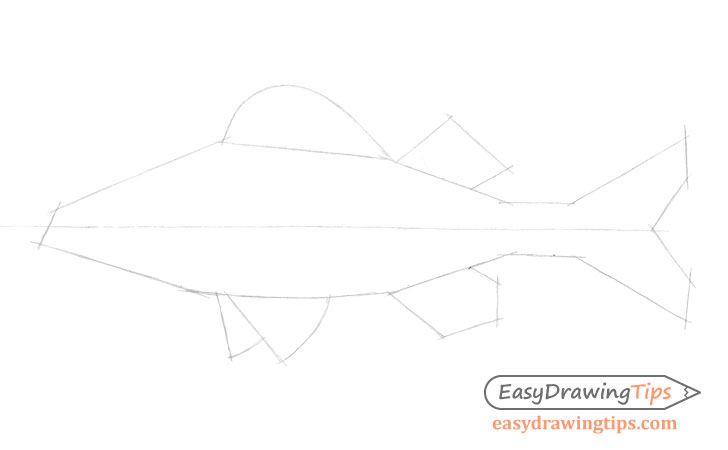
Onto the outline of the body add the fins. A perch generally has two fins on top and three on the bottom with one more along the side of the body (added in the next step). Because in this example the fish is viewed from the side one of the fins on the bottom is partially hidden behind the other.
Again, just like the body at this stage of the drawing you can make the outlines of the fins highlight simplified. The goal is to get their overall shapes and proportions.
Step 3 – Outline the Fish’s Head & Main Body Parts
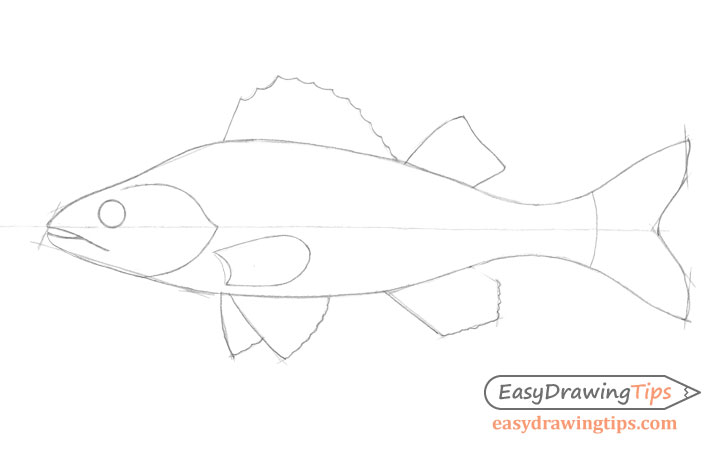
Inside the “framework” from the previous steps outline the organic shape of the fish’s body with all of the bends and curves. At the front of the body also add the mouth (slightly open in this case). Also, outline the organic shapes of the fins and tail. Next, draw the gill followed by the outline of the eye (as a fairly small circle). Position the eye near the top of the head (slightly closer to the front than the back).
Also, add the outer details of all of the fins and add the last visible fin on the lower side of the body.
Step 4 – Draw the Details of the Head
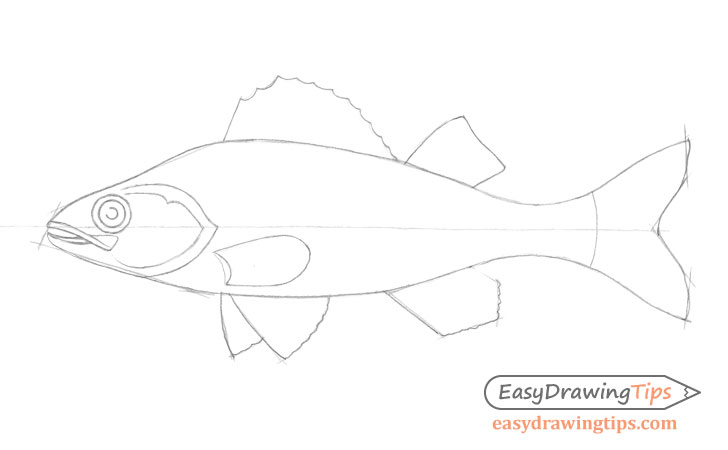
Draw the smaller parts of the head which include the following:
- The lips around the mouth
- The pupil of the eye (in it’s center)
- The area around the eye (larger circle around the one from the previous step)
- The inner area of the gill covers
Please note that in this example the fish’s head is slightly simplified to make the guide a little easier and less time consuming.
Once you are done with the above you can clean up the drawing and erase the “frame” lines and guide line from steps one and two.
Step 5 – Draw the Rays & Spines of the Fins
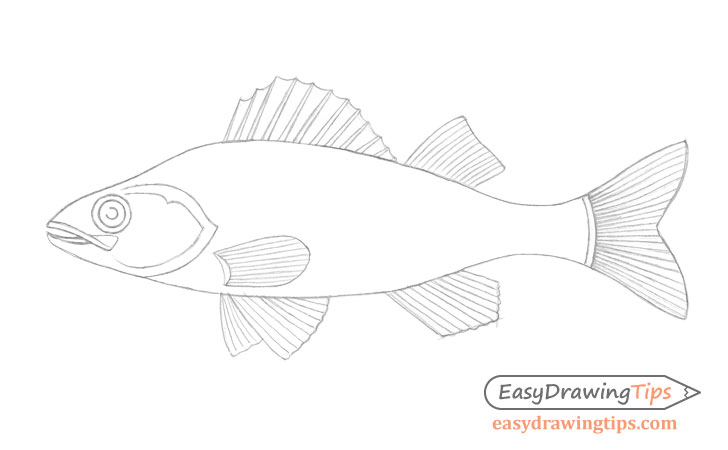
Draw the lines that fishes generally have running along their fins called rays and spines (small bones). Draw the spines along the large fin on top thicker than the rest. You can define the rays (softer smaller bones) along the other fins with just a single line for each of them. You can define the bones of the tail with single lines as well.
Step 6 – Draw the Scales
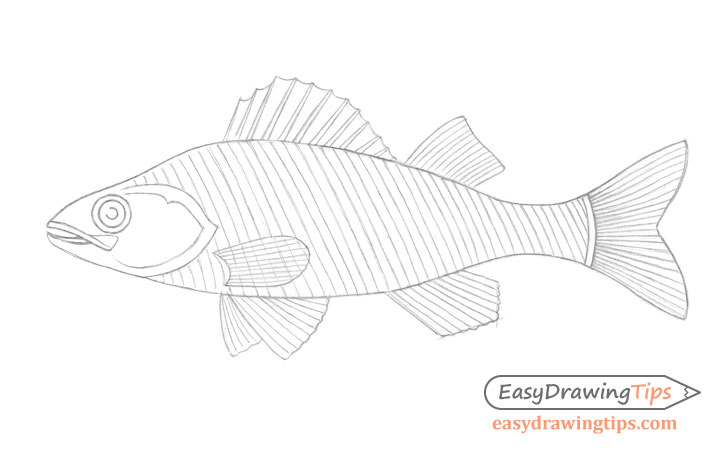
For the last part of the line drawing add the fish’s scales. To show the scales first make a series of slightly curved angled lines running along the fish’s body. You can draw these lines running over the fin that overlaps the body as a perch’s fins are slightly transparent. However, make the line sections that run through it slightly lighter.
Next, draw another series of lines that overlaps the first set. This will create an appearance of fish scales without the need to individually outline each of them.
Once you’ve drawn the scales check your drawing to make sure everything looks good before moving on to shading.
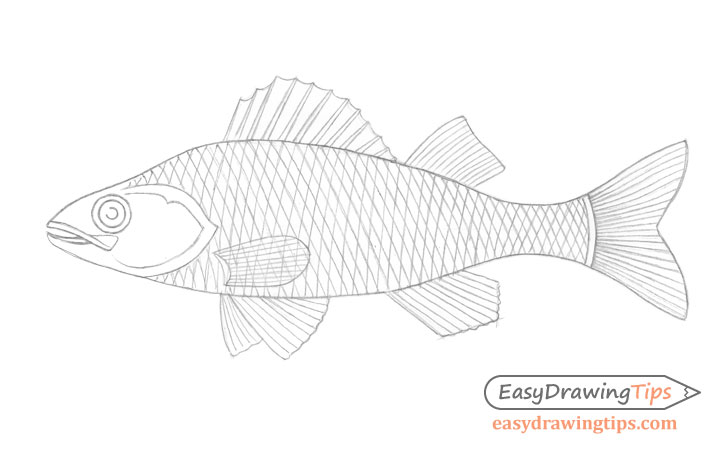
Step 7 – Shade the Body
Shading the fish in this example is fairly easy. Start by adding a darker area along it’s back that gradually gets lighter as it goes down (be careful not to make it too dark). Also, add a slightly darker streak running along the lower part of the fish’s body that gets lighter as it goes up and down.
The explanation for applying shading in such a way is quite simple. Perches of the kind shown in the example (and a lot of fish in general) have a darker back and a lighter belly. Because of their smooth scales and the curvature of their bodies they tend to get a reflection running along it’s middle. Thus the reason for the lighter part between the two darker areas.
When shading also try and make the pencil strokes in a way where they flow along the shape of the body.
For more on different shading techniques and stroke type see:
Shading Techniques and Stroke Types Drawing Tutorial
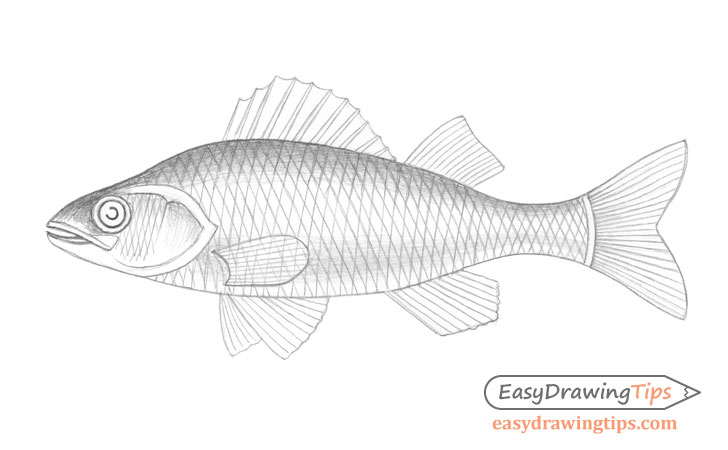
Step 8 – Shade in the Stripes & Gill Flap
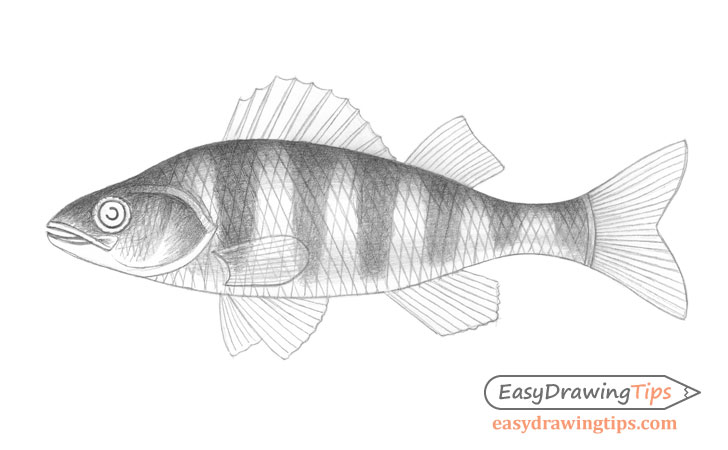
Once you’ve added the first layer of shading add some tiger-like (perches are carnivores too).
Draw the stripes running all the way from the top of the body and ending just a little bit before they touch it’s bottom. Make the darker on top and lighter as they go down.
Also, darken the gill flap (head area) with pretty much the same level of shading used for the stripes.
The reason you want to do the shading in layers instead of just adding the stripes right away is because it would be more difficult to keep the lighter parts in between them consistent otherwise.
Step 9 – Shade the Fins & Tail
Generally different perches tend to have slightly different color/shading variations along their fins. For this example you can make the shading of the large top fin lighter as it goes and make the splines very light throughout their entire length. Make the tail lighter as it goes out (away from the body) as well.
Leave the fin overlapping the body pretty much as is (semi transparent).
Make each of the other fins darker as they go out away from the body and lighter at the base.
Step 10 – Shade the Eye

Finally, shade the eye. Leave the area surrounding it pretty much white. Make the pupil dark with a light spot towards it’s front to show a reflection. Make the rest of the eye darker around the edge and gradually lighter toward the center.
Once you’ve shaded the eye you can better blend and darken the shading where/if needed to finish.
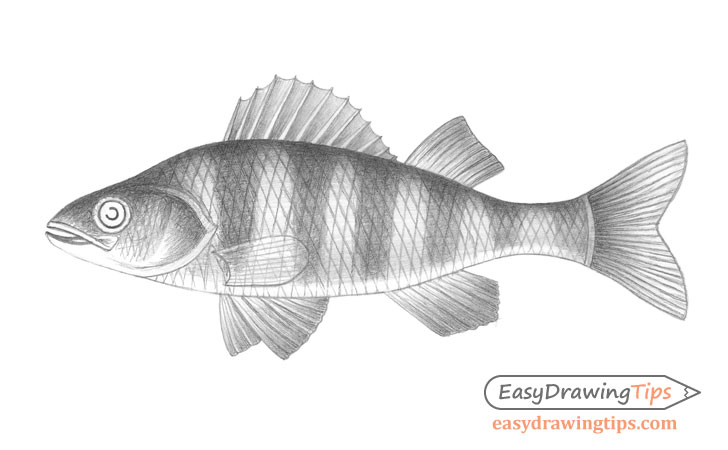
Conclusion – Drawing a Realistic Fish Can be Much Easier With the Right Approach
This guide shows how to create a fairly realistic looking drawing of a fish. It does so by first explaining how to structure it’s overall shape with a line drawing and then how to apply shading to give it a lifelike appearance.
Using a step by step approach like the one shown in this guide can help you minimize drawing mistakes and create better overall looking artwork. By first establishing the fish’s basic shape you can then more easily place the smaller parts of it’s body and their various details. When applying shading it can be good to do so in several layers for the more complex parts of the drawing (like the main body of the fish in this example). This can help you keep it more consistent.
Hopefully you’ve found the provided tips and examples helpful. For more similar drawing guides also be sure to try the following:
- How to Draw a Cake Slice in 10 Steps
- How to Draw an Owl’s Face & Head Step by Step
- How to Draw a Rose Step by Step
- How to Draw a Hammer in 10 Steps


