How to Draw Different Types of Lips
This tutorial shows how to draw different types of lips with step-by-step, pencil-drawing examples and a total of 8 variations.
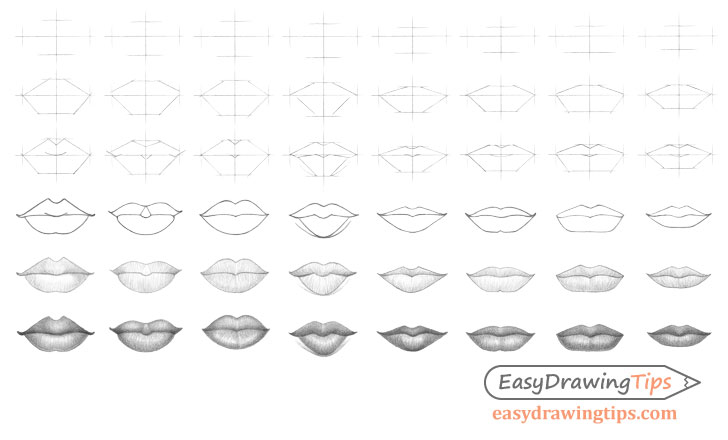
Lips come in many different shapes, and while this guide shows several variations, it does not focus on any specific set. Instead, the tutorial demonstrates an overall approach to drawing them. This includes:
- Establishing the Proportions
- Creating a Construction Drawing
- Creating an Outline Drawing
- Applying Shading
If you are going to follow along, be sure to make light lines for the construction stages of the drawing process, as you will want to erase these later on.
Supplies Needed for Drawing Lips
- Regular Pencils: An HB pencil for the initial line drawing and 2B to 6B (softer) pencils for the shading.
- White Paper: Standard drawing paper or printer paper.
- Eraser: A kneaded eraser is highly recommended, as it allows you to more easily and precisely lighten the shading if required.
Step 1 – Establish the Proportions of the Lips
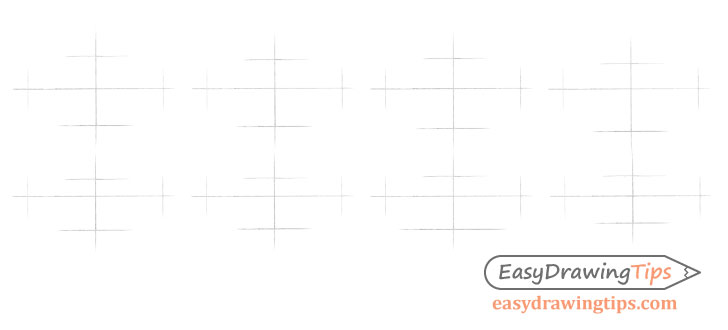
Begin by drawing a pair of intersecting lines, one horizontal and one vertical.
The vertical line makes it easier to see if both sides of the lips are even in width, while the horizontal line helps ensure that the drawing does not get skewed to one side.
After making the initial set of lines, add several more to frame the height and width of the lips as shown in the examples. Draw lines to set their top, bottom, and each of the sides.
Step 2 – Create a Construction Drawing
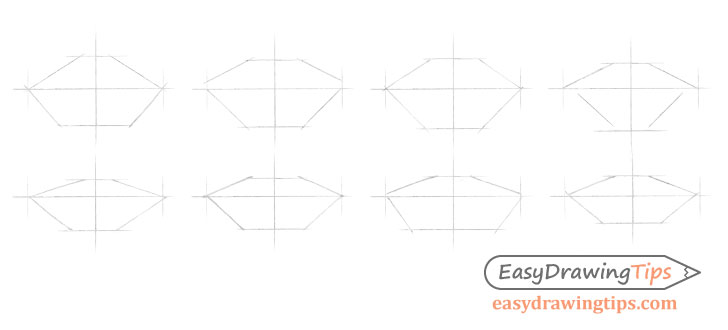
Based on the proportions defined in the previous step, start creating a construction drawing of the outer shape of the lips using straight lines. Drawing in such a way has several benefits:
- Easy to Make: A drawing with just straight lines can be done very quickly to establish the basic shape of the lips.
- Helps Catch Mistakes: A simple drawing makes it easier to notice mistakes.
- Acts as a Guide: The straight lines act as guides for the organic outlines added later.
First, frame in the shape of the sides of the lips.
Step 3 – Finish the Construction Drawing
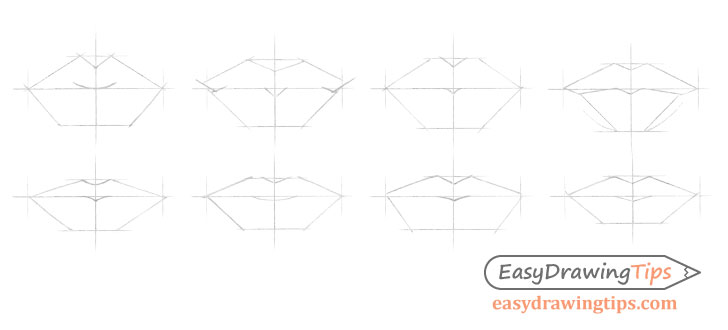
Add more lines to finish the construction drawing.
Define the M-like shape of the upper lip by adding a little dip in its top middle and a little bump on its bottom. Again, define both of these with straight lines to form V-like shapes.
Step 4 – Make a Line Drawing

Using the construction drawing as a guide, outline the organic shape of the lips and erase the construction lines.
Step 5 – Begin The Shading Process
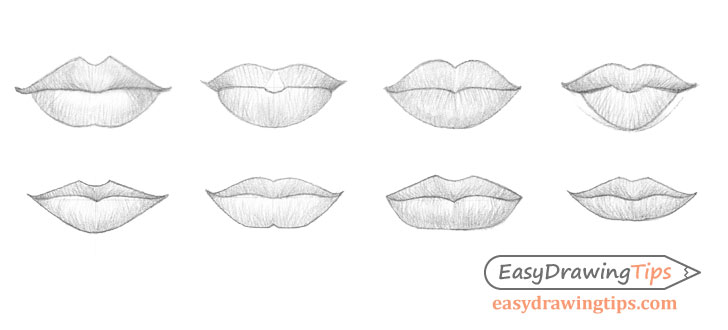
In this case, the lips are drawn as though they are in fairly standard lighting conditions, such as a well-lit room or outdoors during the day. In such a setting, there will tend to be a large highlight along the bottom lip and a smaller one along the top lip. The shadows will tend to be along the bottom of each lip and around the opening of the mouth.
Keeping the above in mind, begin the shading process by making strokes that loosely flow along the shape of each lip.
Keep the initial layer of shading lighter compared to the values you want to have in the finished drawing. You want to first establish the overall distribution of the light and dark areas.
For explanations of different stroke types, see:
Shading Techniques and Stroke Types Drawing Tutorial
Step 6 – Finalize the Lips Drawing
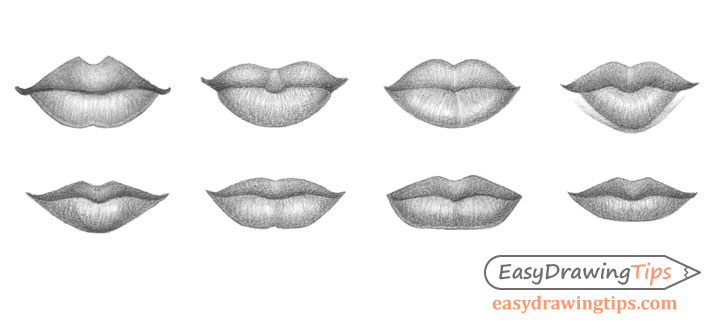
Darken the shading to bring it up to the final desired values and create smooth transitions between the light and dark areas of the lips.
Conclusion
By using the step-by-step approach demonstrated in this tutorial, you can help ensure that you get a drawing that matches the pair of lips you are referencing. This approach can also help you avoid mistakes and minimize backtracking.
For more similar tutorials, also see:
- How to Draw a Smile Step by Step
- How to Draw Eye Expressions Step by Step
- How to Draw Lips From 3 Different Views
- How to Draw Different Eye Types Step by Step
- How to Draw Different Nose Types