How to Draw a Hammer in 8 Steps
This guide shows how to draw a hammer with step by step by step examples (done in pencil) and easy to follow instructions.

The hammer in this tutorial has a fairly common design with a metal head, a metal handle and a rubber grip. The examples first shows how to structure a line drawing with shapes characteristic of such a tool and then demonstrates how to apply shading to give the hammer a realistic appearance.
In addition to simply showing how to draw a hammer this guide can be great for those looking to learn to draw in general.
It’s recommended that just like in the examples, you do the tutorial in pencil. Start by making light lines for it’s initial stages. This will allow you to more easily erase the construction lines and to correct any potential mistakes without them leaving marks. You can darken them (if needed) before shading.
Step 1 – Draw a Pair of Guide Lines
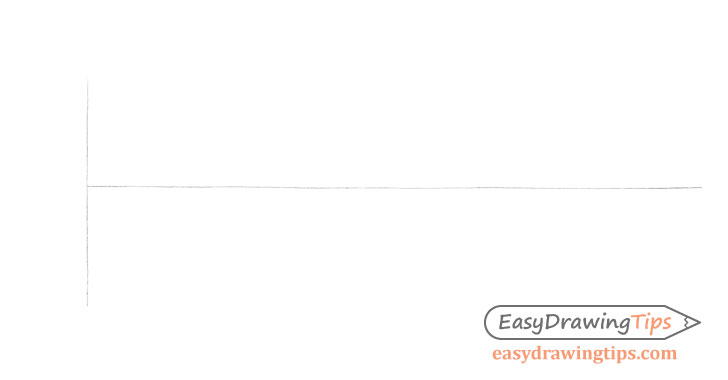
First, make two simple guide lines to help you insure that the hammer drawing does not become crooked or skewed. Make a shorter vertical line for it’s head and a longer line for the handle. Combined these should make a letter “T” shape (flipped on it’s side).
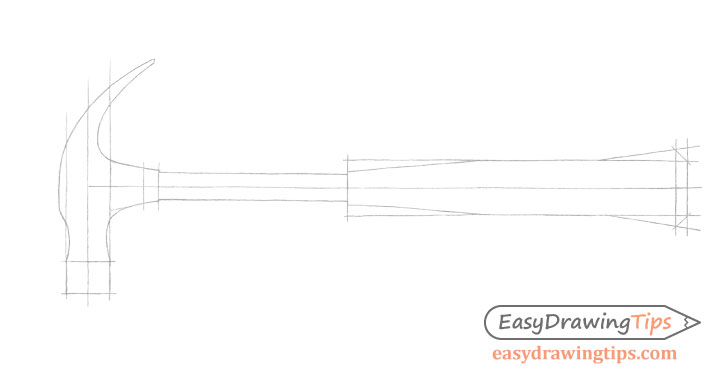
Step 2 – Make a Construction Drawing of the Hammer’s Shape

Create a simplified outline of the hammer’s major parts to establish their width and length. You can do this by mostly using straight lines as shown in the example. At this stage of the drawing leave out all of the smaller bends and curves.
One reason for making a simplified drawing like this is that it can be erased and redrawn fairly quickly in case you need to make adjustments as you try and get the correct proportions. Another, is that this creates a “framework” that you can then rely on when making the more detailed outline of the hammer.
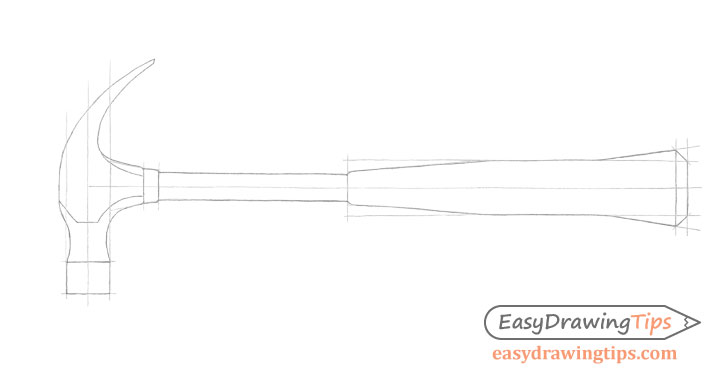
Step 3 – Make a More Detailed Outline of the Hammer’s Shape

Based on the “framework” from the previous step make a more detailed outline of the hammer’s head by outlining the larger curves of it’s shape. Also, define the thicker and thinner parts of the handle as shown. However, save the smallest details for the next step.
Step 4 – Finish the Line Drawing of the Hammer
Proportion the smaller details of the hammer. These are the area at the back of the head and at the back of the grip.
Next, draw the bends of the hammer’s head inside it’s main outline. Afterwards, round off the various corners (where appropriate) to create the final outline.
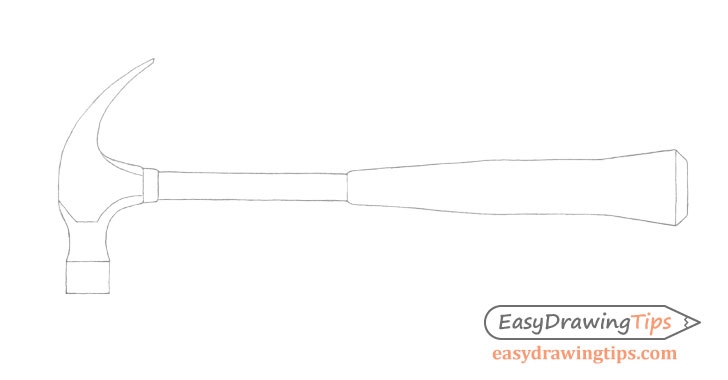
Once done with the above, erase all of the guide/construction lines so that you have a clean line drawing of the hammer as shown above.
As was mentioned at the start of the tutorial, you can darken your lines if needed before you begin shading.
Step 5 – Begin Shading With the Darker Areas of the Hammer
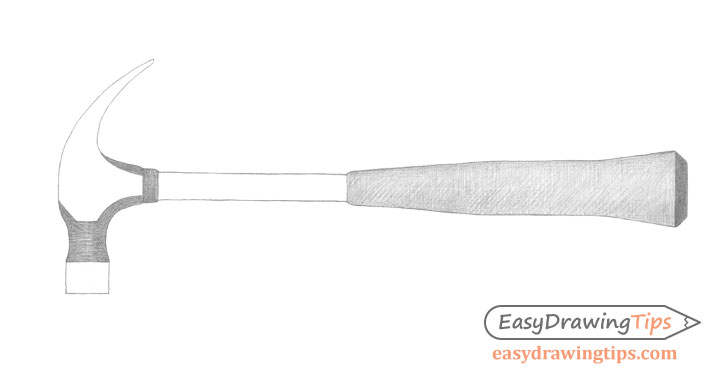
Generally, it’s a good idea to begin shading the largest darkest parts of an object. In this case you can start with the “in shadow” areas along the hammer’s head and the grip (as it’s black and therefor naturally dark).
The shadows will shift depending on the light source. In this case the light source is positioned to the front and upper left of the hammer. This means that the darkest shadows will be on the right and on the bottom and background areas of the hammer.
When you start shading don’t go “full strength” with the pencil. Build up the shading gradually in several layers.
In this example the shading is pretty much fully blended in the final drawing so the method in which you apply the strokes is not that important. However, crosshatch and one directional strokes can both be good options.
For more on different stroke types and pencil shading techniques see:
Shading Techniques and Stroke Types Drawing Tutorial
Step 6 – Shade the Lighter Areas
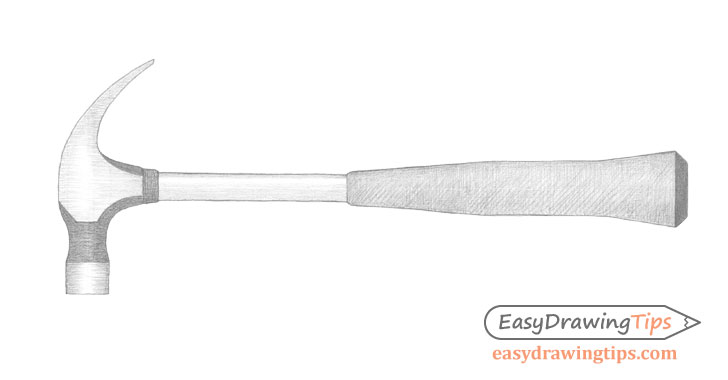
After you’ve applied shading to the darker areas of the hammer apply shading to it’s lighter areas.
Lightly darken the side and bottom areas of the hammer’s head leaving a vertical white strip along each of them (slightly to left side) to show light reflecting from those areas. Also, shade the metallic part of the handle leaving a white strip along it’s upper area to again, show a reflection.
Step 7 – Darken the Shading
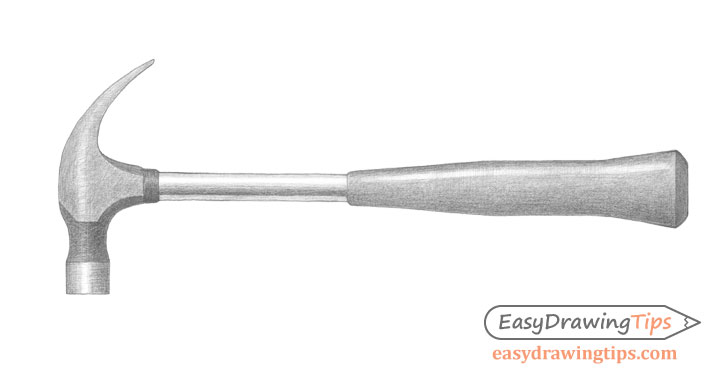
Once you have a basic distribution of the light and dark areas of the hammer you can gradually darken and blend the shading. While doing so also add a dark strip running along the bottom of the metallic part of the hammer’s handle. This is created by both a shadow and the reflection of it’s surroundings.
When darkening the handle grip leave a light strip along it’s upper area to show light reflecting from it’s surface as well. This reflection should be darker than those along the handle’s metallic part. Also, make the grip’s surface gradually darker towards the bottom to show a shadow in that area. The smooth transition from light to dark will show the grip’s curvature.
Step 8 – Finish the Hammer Drawing
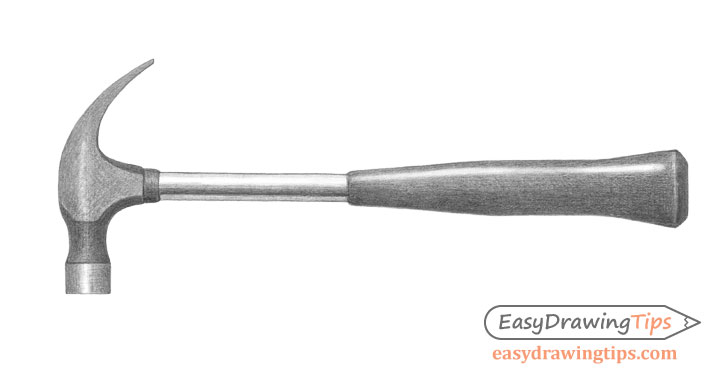
To finish the drawing, further darken and smooth out the shading. If you feel some areas are too dark you can lighten them with an eraser.
Conclusion
This tutorial shows how to create a drawing of a hammer with a fairly common design. It first illustrates how to structure it’s shape and then how to apply shading to give the tool a fairly realistic appearance.
Gradually building up and proportioning your line drawing (starting with simple shapes) and applying shading in several layers can help you avoid time consuming mistakes. In this case the process was applied to drawing one particular tool but you can use the approach for drawing in general.
If you like this guide and would like to try more similar tutorials also see:
- How to Draw a Fish in 10 Steps (Perch)
- Draw a Cactus in a Plant Pot Step by Step
- How to Draw a Bottle Step by Step (Line & Shading)


