How to Draw Eyebrows Step by Step
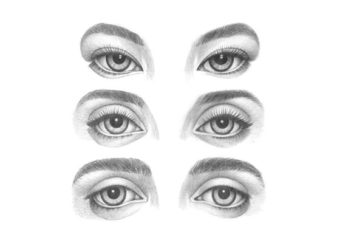
This simple tutorial shows how to draw eyebrows with a total of twelve different examples and four drawing steps for each of them.

Eyebrows come in many different shapes, but you can use very similar steps for drawing most of them. Instead of analyzing individual sets, the focus of this tutorial is on providing a general guide that can fit almost any eyebrow type.
The line drawing steps explain how to structure the different eyebrow shapes. The shading steps show how to apply strokes in several layers to eventually create the appearance of realistic hairs.
Supplies Needed for Drawing Eyebrows
- Regular Pencils: An HB pencil for the initial line drawing and 2B to 4B (softer) pencils for the shading.
- White Paper: Standard drawing paper or printer paper.
- Eraser: A kneaded eraser is highly recommended, as it allows you to lighten the shading more easily and precisely if required.
Step 1 – Make a Construction Drawing of the Eyebrows

Begin with a very simple construction drawing of the main shape of the eyebrows. Keep these lines very light (barely visible).
A construction drawing can be highly simplified, omitting small bends or curves. It only needs to capture the rough, overall shape and proportions of the eyebrows. You can make it with straight lines and/or basic curves, depending on what best suits the particular set.
Step 2 – Make a Detailed Outline

Based on the construction lines, make a more detailed outline drawing of the eyebrows. Keep this outline light enough so that it can eventually blend into the shading. You can erase any leftover construction lines before moving on to the next step.
Step 3 – Apply the Initial Layer of Shading

Begin shading by applying a layer of strokes that go in the general direction of the growth of the eyebrow hairs.
These strokes will act as a background layer for the effect of individual hairs applied in the next step. For this reason, try to make them a mid-tone (medium grey), so that the darker strokes applied over top of them are visible.
Step 4 – Finalize the Shading and Details

To finish the drawing, add the secondary layer of shading as a series of quick strokes that act as the individual hairs that comprise the eyebrows. To make these, first put more pressure on the pencil and then quickly pull it away from the paper so that you end up with a darker base and a lighter tip.
You can change the direction of the strokes based on the types of eyebrows you want to create. For example, for neater eyebrows, you can gradually transition most of the strokes from one direction to another. For bushy eyebrows, you can add the strokes in a way where a lot of them fan out in fairly random directions.
When drawing darker, bushier eyebrows, you may wish to use softer pencils, as these will allow you to create darker lines without having to apply a lot more pressure.
Whatever type of eyebrows you wish to draw, be sure not to fully blend the strokes, or you will lose the effect of the little hairs.
Troubleshooting Tip: If you do happen to blend the strokes too much in a particular spot, you can use a kneaded eraser to lighten the area. Simply mold it to the desired size and tap the part of your drawing where you wish to lift some of the graphite. You can then re-apply the strokes.
Construction
This guide shows how to draw various types of eyebrows. However, instead of focusing on each set individually, it provides broader instructions that can apply to drawing just about any pair of eyebrows you might like to create.
For more similar tutorials, also see:
- How to Draw Different Eye Types Step by Step
- How to Draw Eye Expressions Step by Step
- How to Draw Hair Step by Step Tutorial
- How to Draw Different Nose Types