How to Draw a Monarch Butterfly Step by Step
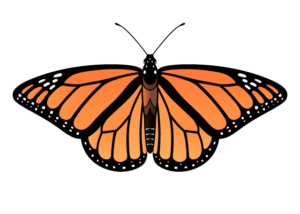
This tutorial shows how to draw a monarch butterfly with step-by-step illustrated examples and simple instructions.
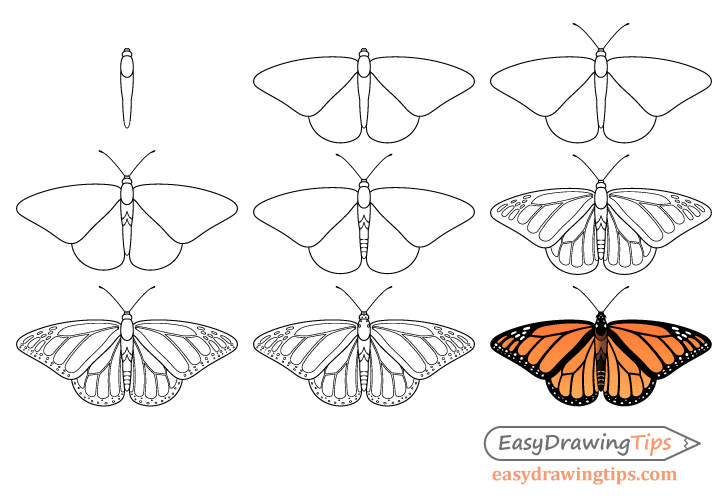
The focus of the guide is on creating a simplified but still fairly realistic drawing of a monarch butterfly. Most of the steps are dedicated to explaining how to build up the line drawing, with the final step showing how to apply color.
You can see a preview of the drawing stages in the image above, but additional examples are provided throughout the tutorial.
It’s recommended that you start the butterfly drawing in pencil. Although the examples are put together in a way where they don’t necessarily require erasing, due to the overall complexity of the tutorial, you will likely need to make some adjustment as you draw. For this reason, try and keep your lines fairly light. The lines in the examples have been made dark just so that they are easier to see.
Supplies Needed for This Butterfly Drawing
- Regular HB graphite pencil: For the initial line drawing.
- White paper: Almost any drawing or even standard printer paper will do.
- Eraser: A kneaded eraser in particular can be a good option as the drawing has a lot of small details.
- Black marker (recommended): For getting a deep, solid black that is difficult to achieve with a regular pencil.
- Colored pencils (recommended): A good coloring option for easily blending smooth gradients.
Step 1 – Draw the Butterfly’s Body
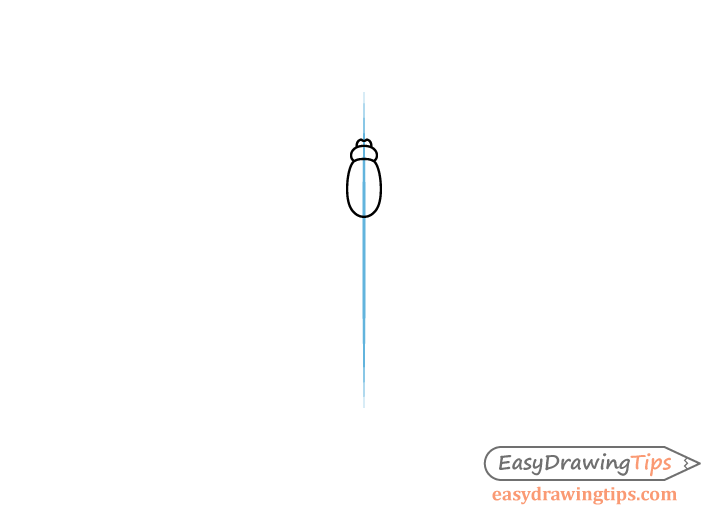
First, make a straight vertical line to act as a guide for drawing the butterfly’s body. Towards the upper part of this line define its upper part and add head on top. Make the body shaped like an oval with a slightly flattened upper end (where the head is attached). On top of this add the head with a larger lower part and the smaller upper section. Be sure to leave plenty of room on your drawing area for the antennae above (added in a later step).
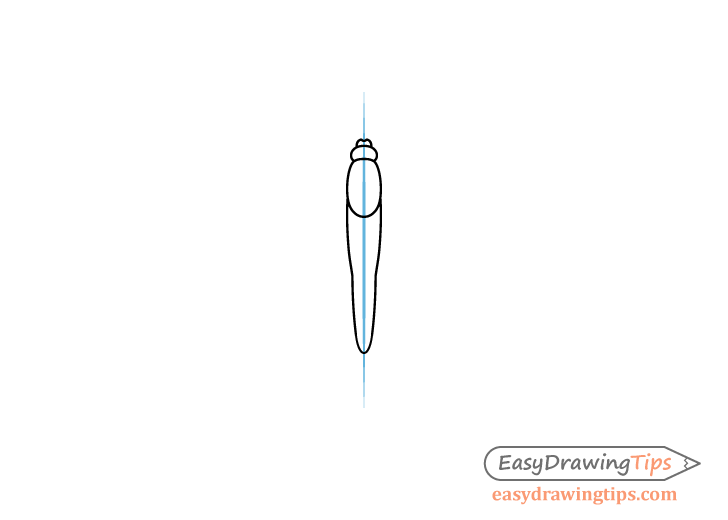
Draw the lower part of the body in two sections as shown above. Make the top section thicker and the lower section thinner.
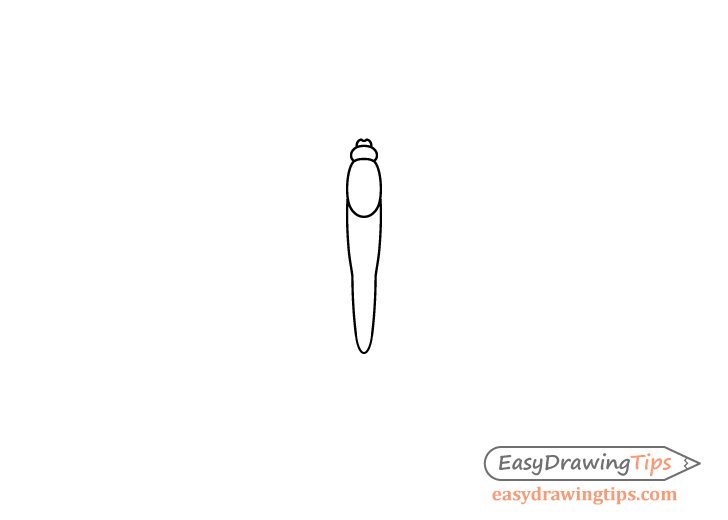
You can erase the guide line after you have the butterfly’s body outlined.
Step 2 – Draw the Wings
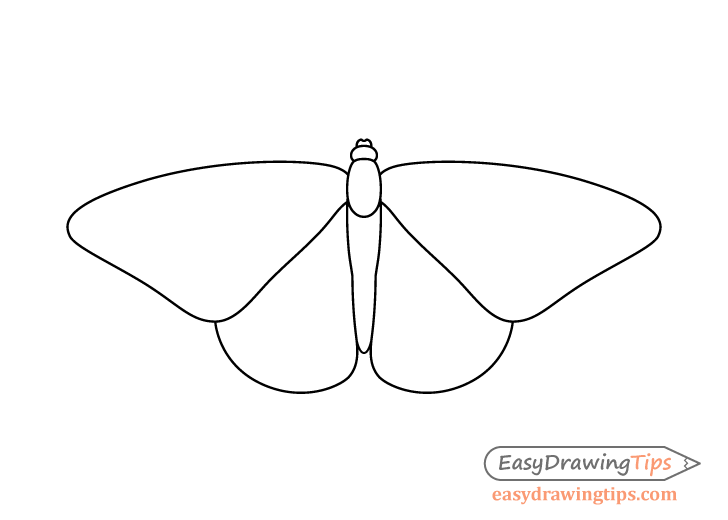
Draw the butterfly’s wings starting with the top pair. Afterwards, add the bottom pair.
Make the top pair of wings somewhat similar in shape to a triangles with curved sides and rounded corners. Draw the visible parts of the bottom wings to have rounded shapes. Try make the wings on both sides mirror one another so that the drawing is symmetrical.
Step 3 – Draw the Antennae
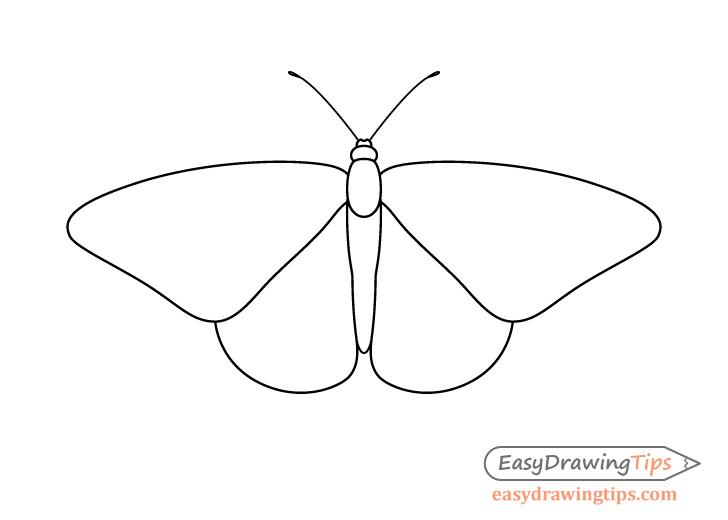
Going up from the top of the head draw the antennae (angled in different directions). Define them with curved lines and give them thicker water drop shaped ends.
Step 4 – Draw the Body Hairs
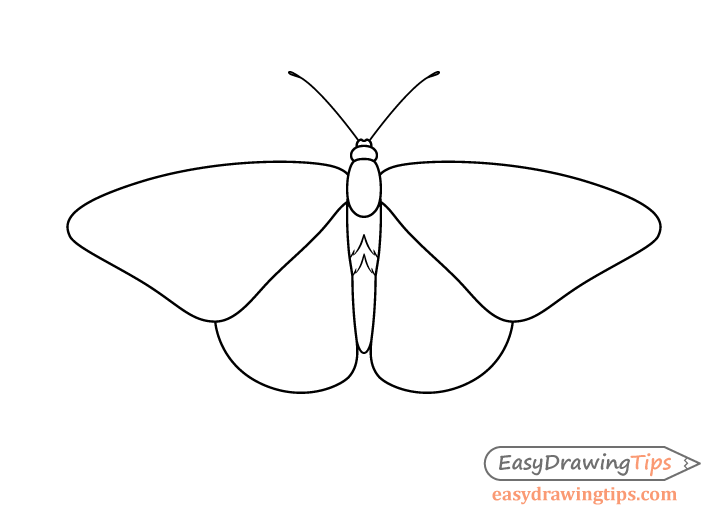
Monarch butterflies generally have hairs around the mid sections of their body. You can simply create a hint of these as shown in the example above. Draw the hairs as two sets of clumps with a large splits down their middle and smaller splits on their ends.
Step 5 – Draw the Stripes at the Bottom of the Body
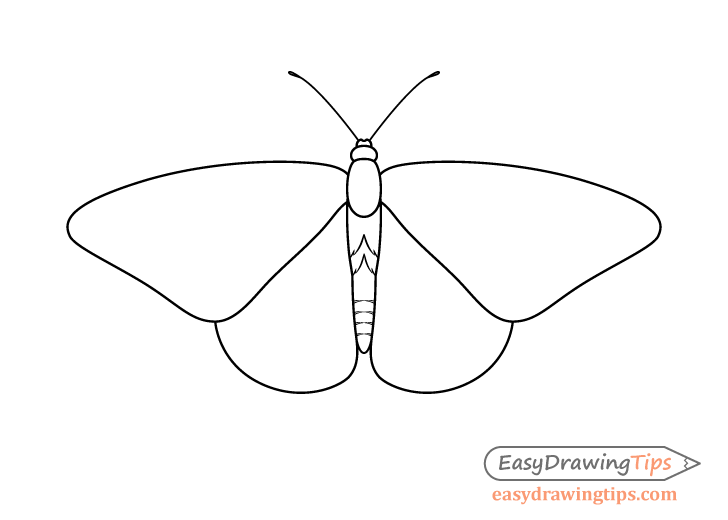
Draw some stripes that monarch butterflies have along the bottom end of the bodies. Add four of these in total as shown in the example. Make the outlines of the stripes thicker on the side and thinner towards the middle of the body.
Step 6 – Draw the Wing Patterns
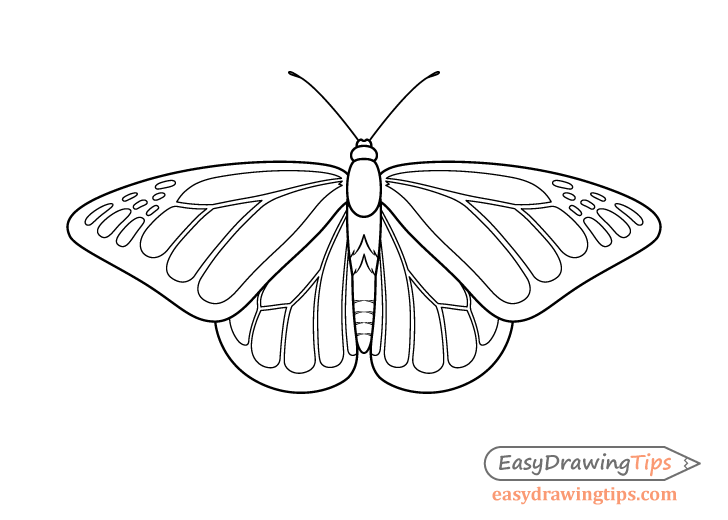
For this important step, draw the various markings on the butterfly’s wings. Add these one wing at a time.
First, do the pattern along one of the top wings. Start by drawing a large swatch near its upper end that gets wider as it goes out (away from the wing’s base). It should then get narrower near the end, transitioning into a pointy tip. Next, draw three more swatches below the first one, with each one getting progressively shorter as they go out away from the body.
After getting the larger parts of the pattern, draw the smaller swatches along the outer end of the wing. Add three slightly larger ones on the bottom followed by three more that are much smaller. Finally, add two more swatches on top of those (one slightly larger than the other).
When you are done adding the pattern along one of the top wings, do the corresponding bottom wing. Also note that in this example, the bottom wings are partially covered by the top wings, so the entire pattern will not be visible.
Add the visible parts of the bottom wing’s pattern, starting with the large swatch closest to the upper wing. Next, draw a really narrow swatch near the wing’s inner end. Follow this up with a wider swatch right next to it that runs all the way up to the body’s upper middle area. Finish up by adding three more swatches below the first one.
Once you have the patterns along the first pair of wings, adding them along the second pair becomes much simpler (as you now have an easy reference). Draw their various parts in the same order, mirroring the first two sets.
Step 7 – Draw the Wing Spots
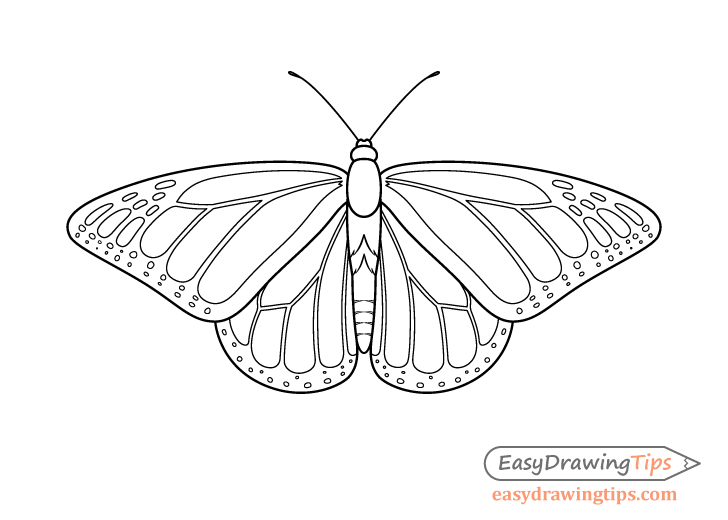
After you have the main patterns along the wings outlined, add some of the smaller spots that monarch butterflies tend to have along the outer lower edges of their wings (both top and bottom pairs). Generally, these will consist of two rows. The spots don’t need to be perfectly symmetrical, but try to keep them fairly even on both sides.
Step 8 – Draw the Head & Body Spots
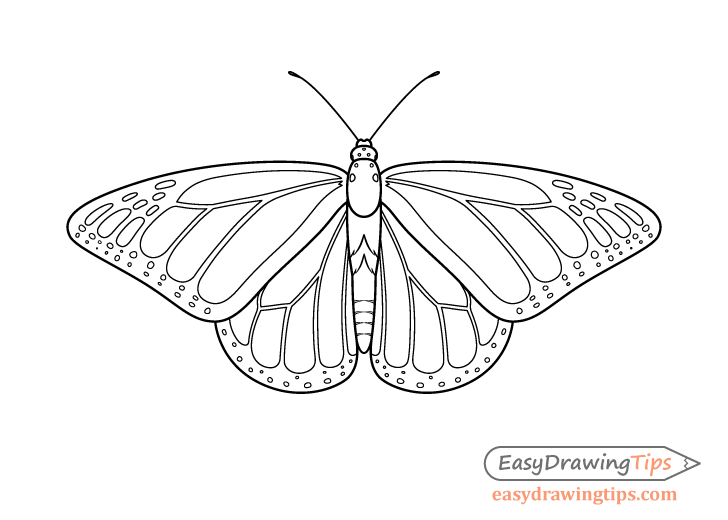
Finally, draw the spots along the head and the upper part of the body. For the body, draw a pair of spots per side with a larger one lower down and a smaller one higher up near the head. On the head itself, first draw three spots that form a triangular shape. Position one higher up and two lower down. Next, add the last pair of spots along the lower edges of its outline.
With this last set of details added, you should have an outline drawing of a monarch butterfly.
Step 9 – Color the Butterfly
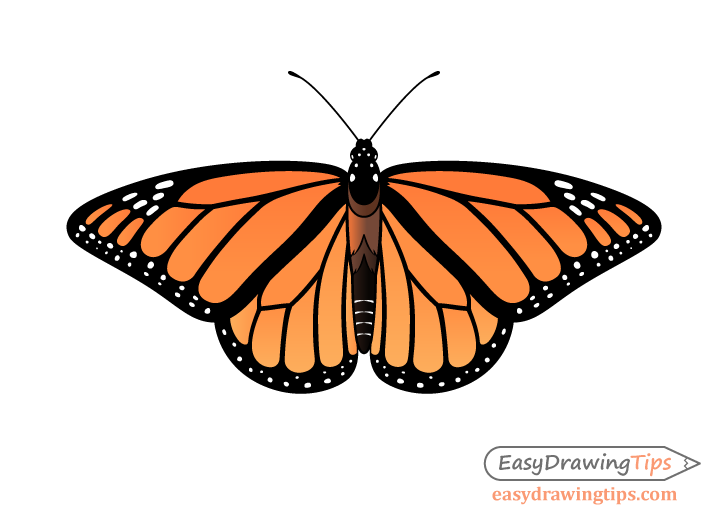
To finish the drawing, apply some color. All you need to color a monarch butterfly is black, orange and yellow, along with the regular pencil used for the linework.
First, apply the black to the head, upper and lower parts of the body, the outer areas and veins of the wings and the antennae. Don’t darken the bottom of the body’s upper oval-like section. As was already mentioned, a good way to apply the black is with a marker. However, if you don’t happen to have one around, you can simply fill these areas in using regular pencil shading.
After filling in the above-mentioned areas, apply an orange-to-yellow gradient (top to bottom) to the wing pattern. Leave the smaller swatches near the outer ends of the wings white. Keep the little spots along their lower edges white as well. Again, as mentioned, an easy way to create the gradient is by using colored pencils (orange and yellow). Alternatively, you can use other media such as paints or pastels.
Color the mid-section of the body a lighter-to-darker orange gradient to show that light is coming from one side of the butterfly (giving it a more three-dimensional appearance). Also, add a darker strip of this gradient along the upper oval section of the body to show a reflection in that area. You can create these gradients by blending some regular pencil shading overtop of the color.
Conclusion
This guide show how to draw a monarch butterfly. The tutorial goes from gradually building up the line drawing to coloring. The end goal is to create artwork that is somewhat simplified but still looks quite realistic.
For more guides done in a similar art style, be sure to also try the following:
- How to Draw a Mushroom in 8 Steps
- How to Draw a Pizza Slice in 6 Steps
- How to Draw a Carrot Step by Step
- How to Draw a Shark in 8 Steps