How to Draw an Apple Tutorial – Step by Step
This tutorial explains how to draw and shade an apple in four steps. Though an apple is generally not that complicated to draw there is still a bit to it if you want to have a properly done drawing.
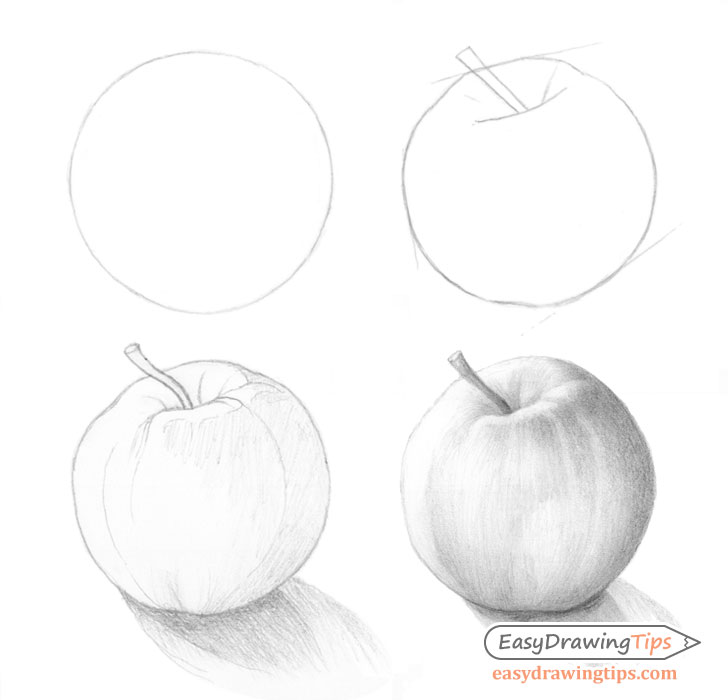
You can see a preview of the drawing stages included in the tutorial in the preview picture above.
For another similar tutorial you may also want to see:
How to Draw a Realistic Pear Tutorial
Step 1 – Apple Basic Shape
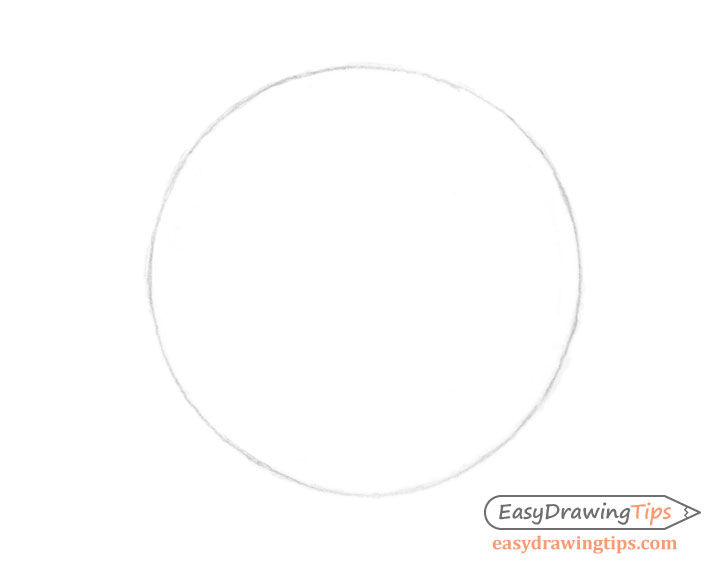
Start drawing the apple with an outline of its overall shape. In this case it will basically just be a circle.
Step 2 – Apple Sketch
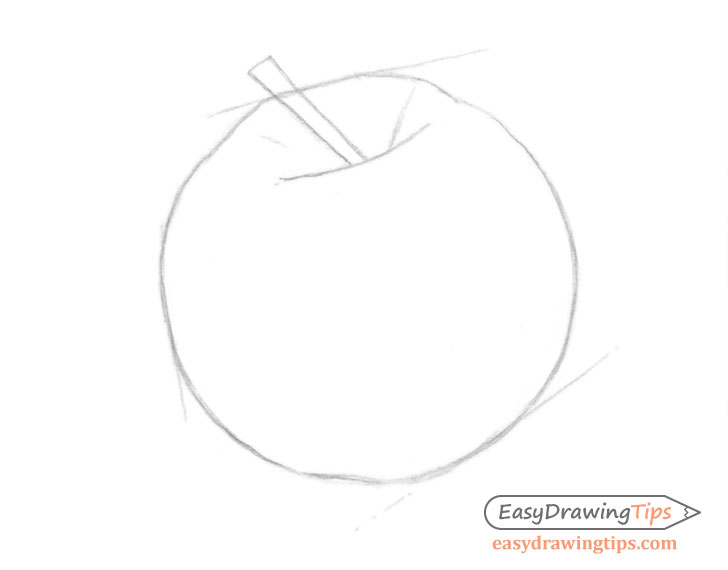
Based on the circle add some of the smaller details of the apple such as it’s stem and the smaller curves of it’s shape.
Step 3 – Apple Shape Details
Further refine the line drawing by adding more smaller details. Once done you can begin shading.
In this case the light source is located towards the top left of the picture and slightly behind the apple. This means that the darker area will be on it’s right side.
You can also add a drop shadow to make it appear that the apple is actually sitting on a surface.
Shadows are cast directly opposite the light source so in this case the shadow will be the bottom right of the picture facing towards the viewer.
The drop shadow for this particular example will be darker towards the object and will sort of dissolve as it goes farther out.
For more on shading see:
Shading Techniques and Stroke Types Drawing Tutorial
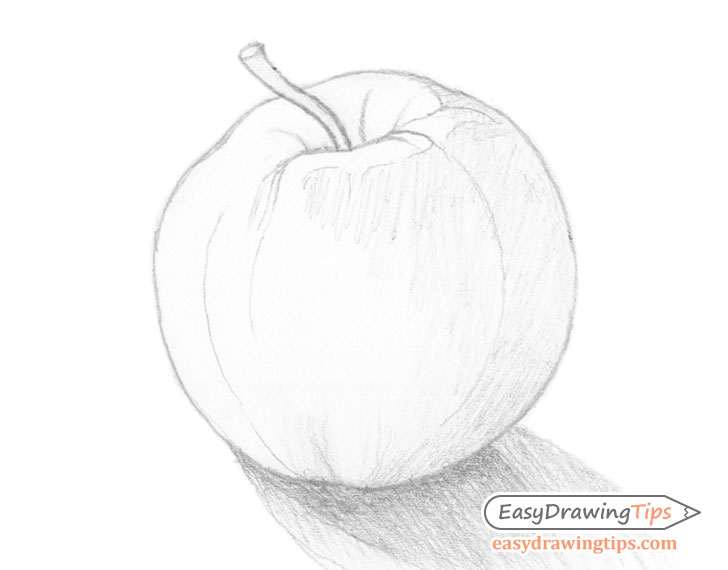
Step 4 – Apple Shading

Refine your shading by creating gradients from the darker areas that are away from the light towards the lit ones. Also try and apply your strokes in a way where they flow along the shape of the apple as is done in the example.
Keep in mind that if the apple has color variations in it (as this one does) then there may be lighter areas within the shaded ones that are simple cause by the color of the apple and not the lighting.
This can add an extra layer of complexity to shading as you now have to balance between the darker/lighter parts of the apple vs the illuminated and shaded areas. For example if you have an apple that is red and green the green in the shadows may still be lighter then the red in the light. Try and pay attention to these tings and shade accordingly.
Conclusion
The shape of an apple is fairly easy to draw but shading one with color variations can get tricky. If you are a fairly new to drawing and find the shading part too difficult you may want to consider drawing an apple that is of one solid color and that has a fairly smooth shape.
For a simpler shading tutorials you can see:
For more similar tutorials also try: